You’ve probably never considered how quickly a burst pipe can destroy your home until you’re standing ankle-deep in water at 2 AM. While most homeowners rely on luck and periodic checks, there’s a smarter approach that’ll give you complete control over your water supply. Building your own automated shutoff system isn’t just possible—it’s surprisingly straightforward with the right components and knowledge that most plumbers won’t share.
Understanding Water Damage Risks and Prevention
While many homeowners focus on protecting their property from fire or theft, water damage poses an equally devastating threat that strikes one in fifty-five homes each year.
You’re facing potential repair costs averaging $8,000, with severe cases exceeding $100,000. Water damage represents 30% of all insurance claims nationwide, generating $10 billion in annual claims.
Water damage strikes with devastating financial impact, averaging $8,000 in repairs while contributing to billions in nationwide insurance claims annually.
Common culprits include burst toilet lines, frozen pipes, and cracked refrigerator tubing. You can’t predict when these failures will occur, making prevention essential.
Installing an automatic water shut-off system dramatically reduces your risk by detecting leaks and immediately stopping water flow.
Modern leak detection systems offer real-time monitoring through smartphone apps, alerting you when water flow exceeds normal thresholds, especially valuable during vacations or extended absences.
Components of a DIY Water Shutoff System
Building your own water shutoff system requires four essential components that work together to protect your home from catastrophic flooding.
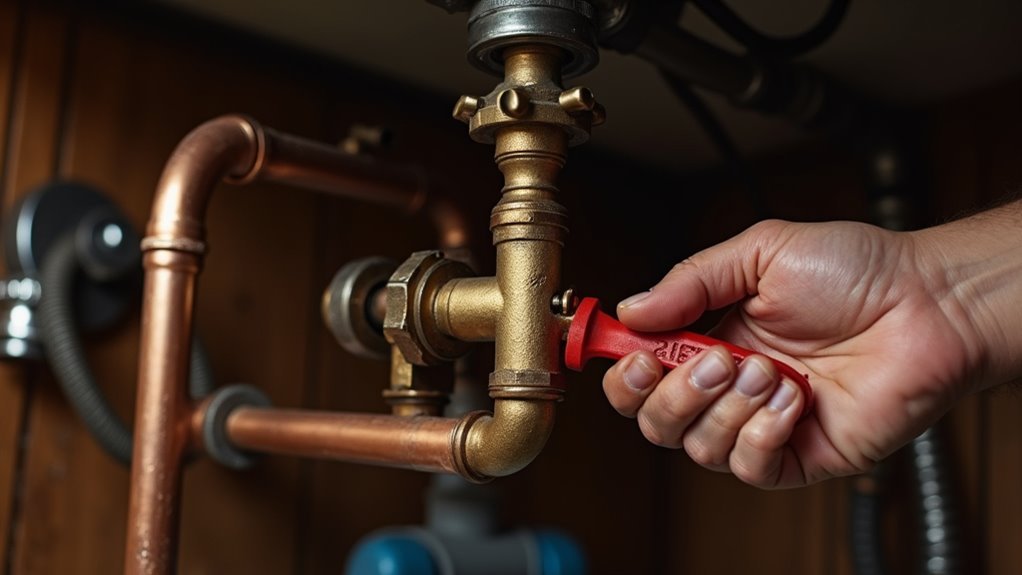
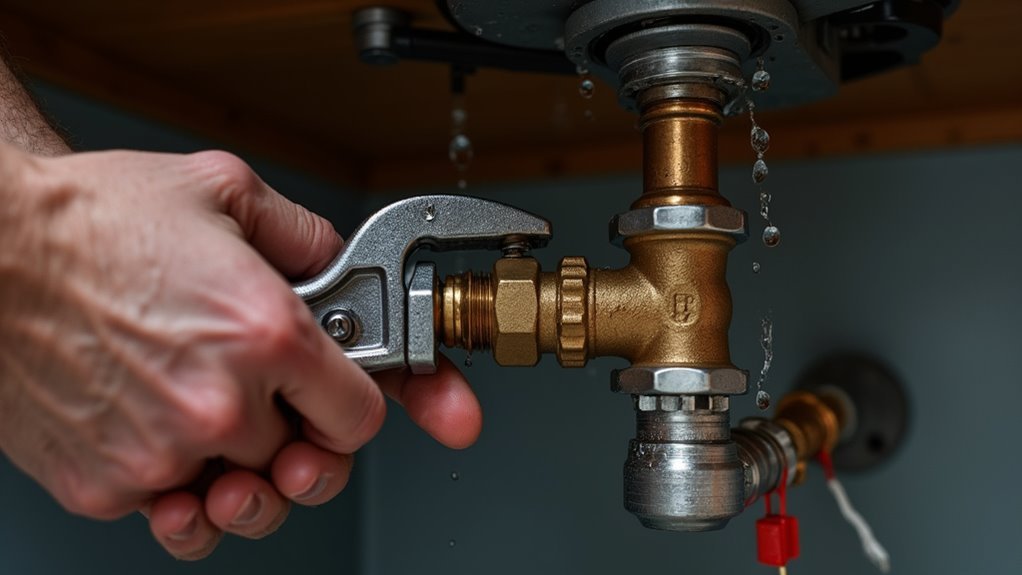
The motorized ball valve serves as your primary defense, physically stopping water flow when activated. You’ll need a control unit like a modified Sonoff basic to manage valve operations intelligently.
Water leak sensors, such as the Xiaomi Aquara, provide real-time detection capabilities that trigger automatic shutoff when moisture appears. Finally, a low-voltage power supply enhances safety while reducing installation risks.
These components connect through proper wiring configurations, with pulse control recommended for valve operation to prevent locking and guarantee longevity.
Visual documentation typically guides installation, making the process manageable for most homeowners seeking reliable water damage prevention.
Selecting the Right Motorized Ball Valve
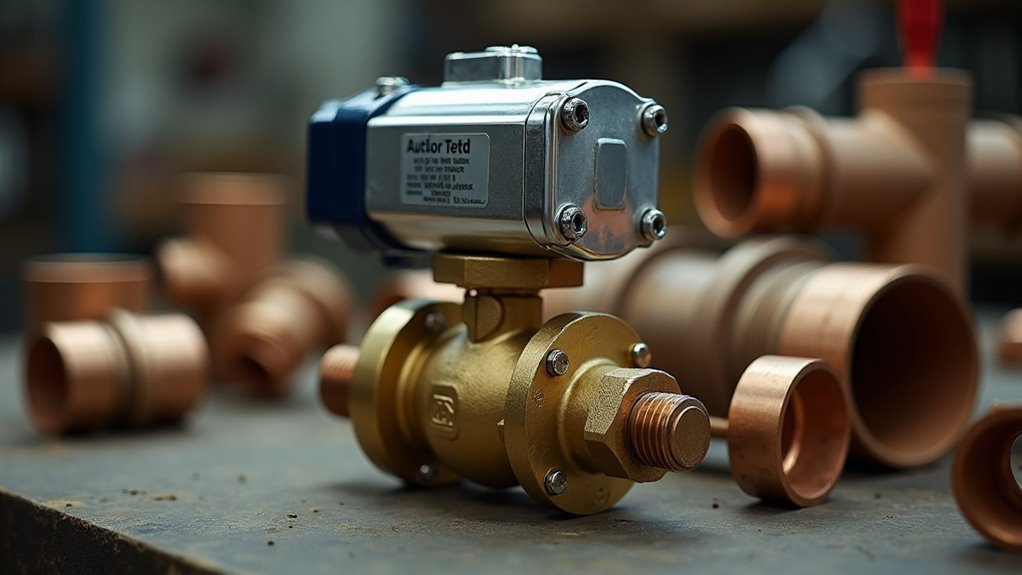
When choosing a motorized ball valve for your home shutoff system, you’ll need to focus on three critical specifications that determine whether the valve will work effectively in your setup.
First, consider the power requirements—most residential applications work best with low-voltage 24VAC valves that reduce electrical hazards and integrate easily with home automation systems.
You’ll also need to match the valve’s flow rate capacity to your household’s water demand and guarantee it’s compatible with your existing plumbing configuration.
Valve Power Requirements
Power requirements form the backbone of any successful motorized ball valve installation, and you’ll need to match your valve’s electrical needs with your home’s capabilities.
Most motorized ball valve options operate on low-voltage systems, typically 12V or 24V AC/DC, which offer enhanced safety and simpler installation compared to higher voltage alternatives.
When evaluating power requirements, verify the valve’s voltage and current ratings match your home automation system’s specifications. The Taco 12M810, for instance, runs on 24VAC power and features normally open operation that closes when energized.
Always confirm your chosen valve carries proper safety certifications like UL listing and meets local electrical codes. Additionally, review the manufacturer’s flow rate specifications to guarantee the valve’s performance aligns with your specific plumbing system demands.
Flow Rate Specifications
Flow rate specifications determine how much water can pass through your motorized ball valve, making this a critical selection factor.
You’ll need to evaluate the Cv (flow coefficient) rating, which indicates the valve’s capacity. For residential applications, common options include 4.9Cv, 8.9Cv, and 10.3Cv ratings. Higher Cv values allow greater flow rates, ensuring your home’s water pressure remains adequate even with the valve installed.
Match the flow rate to your household’s peak demand to avoid restrictions during high-usage periods.
If you’re installing the valve for leak detection systems, you’ll want sufficient capacity to maintain normal operation while providing reliable shutoff capability.
Assess future needs when selecting your motorized ball valve, as upgrading later requires additional plumbing work and expense.
Installation Compatibility Factors
Before committing to a specific motorized ball valve, you’ll need to verify several compatibility factors that determine successful installation in your home’s plumbing system. These installation compatibility factors guarantee your water shut off valve operates reliably and safely.
First, measure your existing pipe diameter to select the correct valve size. Most residential systems use ¾-inch to 3-inch connections. Next, confirm electrical requirements—24VAC power supply offers the safest integration with home control systems.
| Compatibility Factor | Requirement | Benefit |
|---|---|---|
| Pipe Diameter | ¾” to 3″ sizing | Proper fit |
| Power Supply | 24VAC low voltage | Enhanced safety |
| Certifications | NSF 61-G, UL listed | Code compliance |
| Valve Position | Normally open design | Fail-safe operation |
Verify your chosen motorized ball valve includes proper certifications for lead-free compliance and electrical safety standards.
ESP32 Microcontroller Setup and Configuration
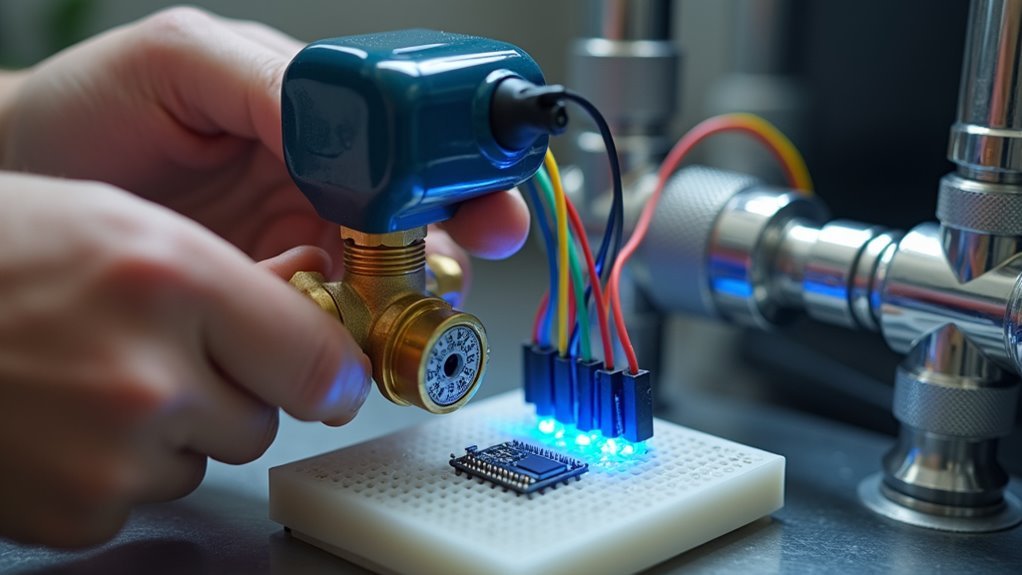
The ESP32 microcontroller serves as the brain of your automated water shutoff valve system, combining built-in Wi-Fi and Bluetooth capabilities with versatile GPIO pins to create a thorough smart home solution.
You’ll need to start by installing the Arduino IDE and adding the ESP32 board manager URL to enable programming and code uploads.
Connect relay modules to the ESP32’s GPIO pins to control your motorized valve’s open and close functions.
You can implement capacitive touch functionality for water leak detection using just two wires for sensor input.
To establish wireless communication, program the ESP32 with your Wi-Fi network’s SSID and password, enabling it to connect to your home network and execute HTTP requests for remote water shutoff valve control.
Wiring the Relay Control System
Once your ESP32 is properly configured, you’ll need to establish the critical relay connections that enable your microcontroller to physically control the motorized ball valve.
Your control system requires precise wiring to guarantee reliable water valve operation and prevent safety hazards.
Accurate wiring configurations are essential for dependable valve control and protecting against potential electrical hazards during installation.
Follow these essential relay wiring steps:
- Connect the relay’s SET pin to GPIO #16 on your ESP32 for valve activation commands.
- Wire the UNSET pin to GPIO #17 to control valve deactivation signals.
- Implement pulse control functionality to prevent the motorized valve from locking in position.
- Confirm proper Sonoff device connections, remembering that ON closes the water valve while OFF opens it.
Monitor your sensor thresholds carefully to trigger appropriate relay responses.
Always consult visual documentation and follow electrical codes for safe installation.
Installing Water Detection Sensors
After completing your relay wiring configuration, you’ll need to strategically position water detection sensors throughout your home to create an effective early warning system.
Each water sensor requires only two wires: one connected to ground and another to a capacitive touch pin like GPIO #4 (TOUCH0) on your ESP32 microcontroller.
Place sensors near appliances, water heaters, washing machines, and under sinks where leaks commonly occur.
The ESP32’s wireless capabilities enable real-time communication with your central control unit for instant leak detection alerts.
Configure remote sensors to trigger HTTP requests directly to your main module, eliminating the need for local relay activation.
This streamlined approach guarantees your automatic shut-off system responds immediately when water’s detected, providing thorough protection against potential water damage throughout your home.
Programming the Control Logic
Programming your ESP32 microcontroller’s control logic requires implementing key functions that’ll manage your water shutoff system’s automated responses.
Your control logic coordinates leak detection sensors with water shutoff valves through strategic programming.
Strategic programming seamlessly integrates leak detection sensors with automated water shutoff valves for intelligent system coordination.
Here are the essential programming components:
- Create `openRelay()` and `closeRelay()` functions to control your motorized ball valve’s relay operations.
- Map GPIO pins for relay control – assign SET pin to GPIO #16 and UNSET pin to GPIO #17.
- Implement a web server within your ESP32’s firmware for remote access via smartphone or computer.
- Set water detection thresholds that automatically trigger valve closure when moisture’s detected.
Your control logic should prioritize automatic shutdown when sensors detect water presence, minimizing potential damage while maintaining remote override capabilities for manual operation.
Setting Up Wireless Communication
You’ll need to configure your ESP32’s WiFi settings by defining your network SSID, password, and controller IP address in the code.
Set up a web server on the ESP32 that handles HTTP requests, enabling you to control the valve remotely through your smartphone or computer.
Create a sensor network by connecting multiple water sensors to the ESP32, which’ll communicate wirelessly and provide real-time monitoring of your water system.
ESP32 WiFi Configuration
Once you’ve assembled the hardware components for your water valve shutoff system, configuring the ESP32’s WiFi connection becomes essential for enabling remote control capabilities.
Setting up wireless communication allows you to monitor and control your water shut-off system from anywhere within your home network.
Here’s how to configure your ESP32’s WiFi connection:
- Define network credentials using `#define SSID “your_network”` and `#define PASSWORD “your_password”` at the top of your code
- Initialize the connection with `WiFi.begin(SSID, PASSWORD);` in your setup function
- Monitor connection status using a while loop checking `WiFi.status()` until it returns `WL_CONNECTED`
- Implement WebServer functionality by including the WebServer library to handle HTTP requests for remote valve control
Remote Web Interface
Building upon your ESP32’s WiFi connectivity, creating a remote web interface transforms your water valve system into a fully controllable smart home device.
You’ll implement a simple web server that handles HTTP requests to operate your water shut off valves through `openRelay()` and `closeRelay()` functions. The interface displays real-time sensor values and valve status, enabling effective leak detection monitoring from anywhere on your network.
Access your system using the ESP32’s assigned IP address, which prints during startup. Your web interface should include buttons for remote control of valve operations and display current sensor readings.
For security, incorporate authentication methods to prevent unauthorized access to your water valve controls, ensuring only approved users can manage your home’s water system remotely.
Sensor Network Setup
When establishing wireless communication for your water valve shutoff system, you’ll create a robust sensor network that connects multiple water leak detectors throughout your home to the central ESP32 controller.
Your ESP32’s wireless capabilities enable seamless communication between distributed sensors and the central automatic shut-off unit.
Here’s how to set up your leak detection network:
- Connect each water sensor to ESP32 GPIO pins using simple two-wire connections—ground and designated touch pin.
- Configure adequate power supply through stable connections or battery power for remote sensor locations.
- Implement web server functionality on the ESP32 for remote monitoring and HTTP request handling.
- Code efficient request functions that send real-time updates from sensors to the central unit when water presence triggers.
This network structure guarantees instant communication and rapid response for automatic shut-off activation.
Creating Remote Sensor Networks
Multiple water sensors positioned throughout your home create a thorough detection network that dramatically improves your ability to catch leaks before they cause serious damage.
You’ll build this network using affordable ESP32 microcontrollers that enable wireless communication between sensors and your central control unit. These Detection Systems utilize simple capacitive touch technology requiring only two wires per connection, making installation straightforward.
Position sensors strategically near appliances, water heaters, and plumbing fixtures where water leak risks run highest. Your network connects to Wi-Fi, allowing smartphone monitoring and remote control of Automatic valves even when you’re away.
Each sensor sends HTTP requests to your central module, providing real-time status updates and immediate shutoff capability when leaks occur.
Testing System Functionality and Calibration
After establishing your remote sensor network, you’ll need to confirm that every component functions correctly through systematic testing and precise calibration.
Testing your water valve shutoff system requires a methodical approach:
- Confirm wiring connections between the relay and motorized valve to guarantee proper operation when energized.
- Monitor valve response times during activation to validate it closes within expected timeframes for effective leak prevention.
- Test water leak sensors by introducing moisture to validate the system correctly triggers valve shutoff upon detection.
- Validate remote control capabilities through the ESP32’s web interface from your mobile device or computer.
Calibration involves fine-tuning response times and sensor sensitivity.
Document each test result, including response times and anomalies. This documentation helps identify potential issues with water leaks detection before full deployment, guaranteeing your system operates reliably when needed most.
Safety Considerations and Electrical Codes
You’ll need UL listed power adapters and certified components to meet safety standards.
Avoid non-grounded electrical parts, as they increase electrical shock risks. Low-voltage systems are your safest option, minimizing fire hazards and electrocution potential.
Check your local electrical codes before installation, as they dictate required safety measures. You’re responsible for following these regulations to protect your system and home.
Schedule regular inspections of all wiring and components to maintain compliance and prevent electrical failures.
Troubleshooting Common Installation Issues
When installation problems arise with your water valve shutoff system, loose wiring connections often top the list of culprits.
Loose wiring connections consistently rank as the primary cause of water valve shutoff system installation failures.
You’ll need to verify all connections between your motorized valve, Sonoff relay, and power supply are secure and properly configured.
Here’s your troubleshooting checklist:
- Test relay functioning – Use a multimeter to measure continuity and confirm your relay operates correctly.
- Implement pulse control – Configure your motorized ball valve with pulse control to prevent locking and premature wear.
- Inspect for water leaks – Check around the installation area for moisture or leaks indicating faulty sealing.
- Consult GitHub documentation – Reference specific wiring diagrams and troubleshooting guides for your particular setup.
Address these issues systematically to resolve most common installation problems effectively.
Comparing DIY Vs Commercial Solutions
When you’re deciding between building your own water valve shutoff system or buying a commercial solution, you’ll need to weigh costs, installation demands, and available features.
DIY systems can save you thousands of dollars but require technical skills and troubleshooting abilities that commercial options handle through professional services.
You’ll find significant differences in upfront expenses, setup complexity, and monitoring capabilities that directly impact which approach works best for your home.
Cost Analysis Breakdown
Although water valve shutoff systems can prevent thousands in damage, choosing between DIY and commercial solutions requires careful consideration of upfront costs versus long-term benefits.
When comparing your options, here’s what you’ll spend:
- DIY systems: $100-$300 using motorized ball valves and ESP32 microcontrollers
- Commercial solutions: $2,351-$5,007 for professional installation with advanced features
- Insurance discounts: Potential savings that offset commercial system costs over time
- Water damage prevention: Both options protect against average losses exceeding $8,000
While DIY solutions offer significant cost savings, they’ll require technical skills and troubleshooting.
Commercial systems provide ease of use and professional support but demand higher initial investment.
Consider your technical expertise, budget constraints, and insurance benefits when deciding which approach best suits your home protection needs.
Installation Complexity Factors
Installation complexity varies dramatically between DIY and commercial water shutoff systems, with technical skills serving as the primary determining factor.
DIY solutions demand extensive knowledge of wiring and plumbing, requiring you to understand electrical codes and safety regulations. You’ll spend considerable time researching components and troubleshooting connections. However, if you possess basic skills, you can complete a motorized ball valve installation in about an hour.
Commercial systems arrive pre-assembled and ready for installation, greatly reducing technical barriers. You’ll find these products already comply with safety standards and electrical codes.
Yet complexity increases with advanced features, potentially requiring professional installation depending on your chosen system.
DIY solutions offer customization flexibility for unique home layouts, while commercial systems provide standardized configurations that may not accommodate all residential requirements.
Feature Comparison Overview
Cost differences between DIY and commercial water shutoff systems reveal the most striking contrast, with DIY solutions typically running under $200 while professional systems demand several thousand dollars.
When you’re choosing between options, consider these key feature distinctions:
- Integration capabilities – Commercial systems seamlessly connect with existing smart home platforms, while DIY water shut-off system setups require manual configuration.
- Leak detection sophistication – Professional solutions offer multiple sensor types and 24/7 monitoring versus basic DIY detection methods.
- Support structure – Commercial options include warranties and professional assistance, but DIY systems rely on your troubleshooting skills.
- Safety considerations – DIY automatic valves typically use safer low-voltage components compared to some high-voltage commercial alternatives.
You’ll need to balance cost savings against convenience and advanced monitoring features.
System Maintenance and Monitoring
Once you’ve installed your water valve shutoff system, maintaining its reliability becomes essential for long-term protection of your home.
System maintenance requires regular testing by simulating leaks to verify your valve responds correctly and sensors function properly. You’ll want to monitor water system performance through your connected app or control panel, which provides real-time alerts whenever a leak is detected.
Schedule periodic maintenance checks for motorized valves and electrical components to guarantee operational compliance with safety standards.
Keep firmware updated on smart valves and sensors to enhance functionality while protecting against security vulnerabilities.
Document all incidents and maintenance activities to track your system’s reliability over time. This proactive approach guarantees your water shutoff system remains dependable when you need it most.
Frequently Asked Questions
How Much Does It Cost to Add a Shut-Off Valve to a Water Line?
You’ll spend $300 to $1,500 adding a shut-off valve to your water line. Labor costs $50-$150 hourly, while motorized ball valves cost $100-$400. Don’t forget potential permit fees.
Is It Illegal to Turn off Your Own Water Supply?
You can legally turn off your own water supply in most jurisdictions for maintenance or emergencies. However, you should check local ordinances and notify your utility company to avoid potential penalties.
How to Install a Shut off Valve in an Existing Water Line?
You’ll shut off your main water supply, drain the system, cut the pipe with a pipe cutter, install the valve using proper fittings, then restore water and check for leaks.
What Is the Best Valve for a House Water Shut Off?
You’ll want a motorized ball valve for your house water shut-off. The Taco 12M810 electro-mechanical ball valve’s ideal, operating on 24VAC power. Consider smart Z-Wave or Wi-Fi models for remote control capabilities.


Leave a Reply