You’ve probably considered upgrading to a smart lock but hesitated because it seemed like you’d need to replace your entire door hardware. Here’s what most people don’t realize: retrofit smart lock systems can transform your existing deadbolt into a connected device without changing how your door looks from the outside. The process isn’t as straightforward as manufacturers claim, and there are specific requirements your current setup must meet first.
What Is a Retrofit Smart Lock System
When you’re looking to modernize your home security without replacing your entire door hardware, a retrofit smart lock system offers the perfect solution.
These innovative devices transform your existing deadbolt into a smart lock while preserving your door’s original exterior appearance. You’ll maintain seamless integration with your current hardware, so no one will notice the upgrade from the outside.
Retrofit smart locks work by keeping your original locking mechanism intact, meaning you can still use your existing keys alongside new smart features.
You’ll gain access to functionalities like auto-locking, smartphone app control, and voice assistant compatibility with Amazon Alexa and Google Assistant.
The system accommodates various door materials and thicknesses, though you should verify compatibility requirements before purchasing.
Benefits of Upgrading Your Current Door Hardware
By upgrading your current door hardware to a smart lock system, you’ll dramatically enhance your home’s security while gaining unprecedented convenience and control.
Smart locks attach seamlessly to your existing door setup, providing keyless entry and remote monitoring capabilities that traditional locks simply can’t match.
The key advantages include:
- Enhanced Security Features – Auto-locking mechanisms and real-time notifications keep you informed about every locking and releasing event, ensuring your door’s security status is always monitored.
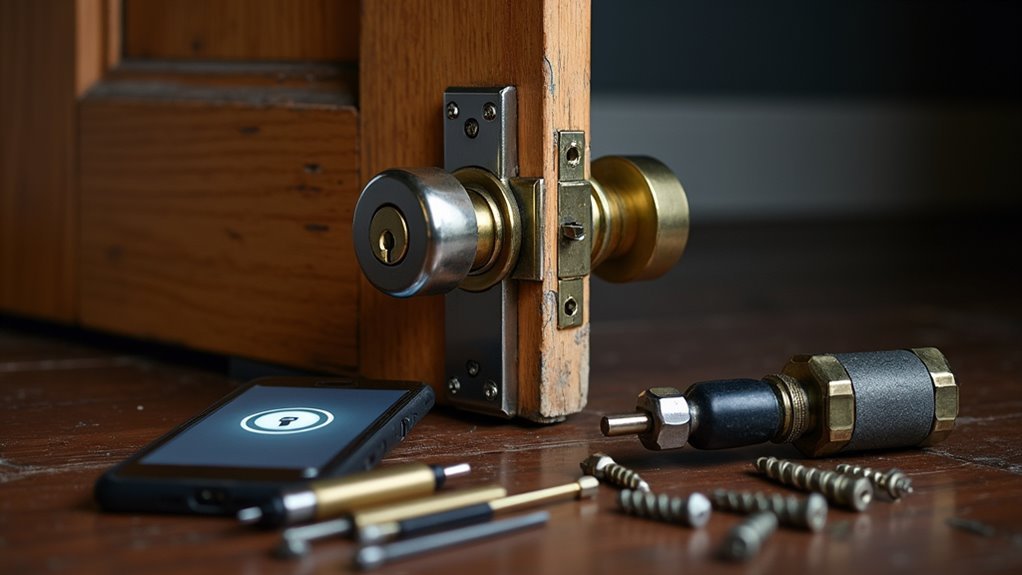
- Effortless Installation – Most retrofit systems require only a Phillips screwdriver and take under 10 minutes to install, making the upgrade accessible without complex modifications.
- Built-in Connectivity – Wi-Fi-enabled models eliminate the need for additional bridges, allowing direct integration into your home network for seamless app control.
Installation Requirements and Tools Needed
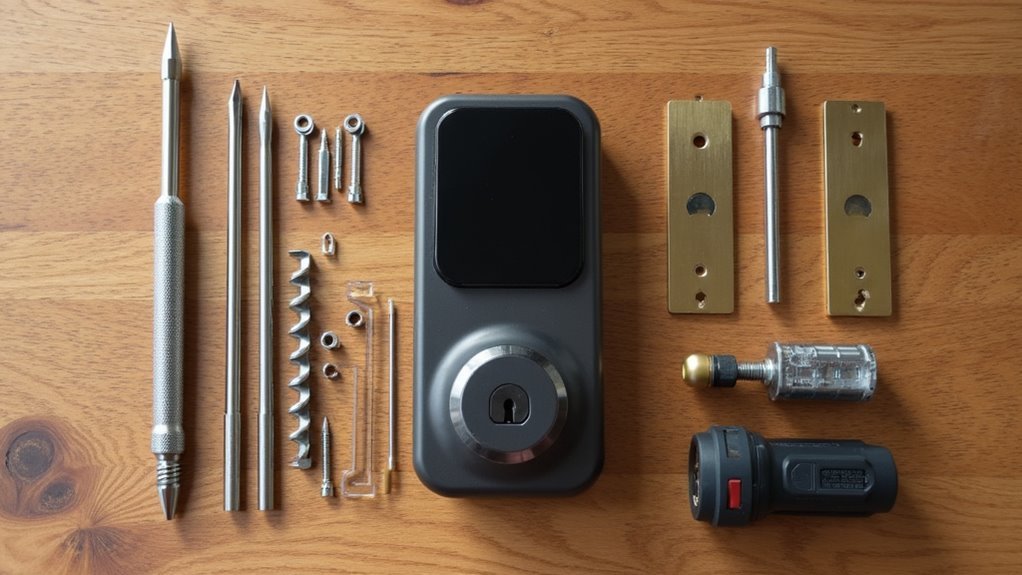
Three essential elements make smart lock installation remarkably straightforward: minimal tools, quick setup time, and compatibility with your existing hardware. The installation requirements for most retrofit smart locks are delightfully simple. You’ll need just a Phillips screwdriver – that’s it. Models like the Philips Wi-Fi Smart Lock include all necessary installation hardware, so you won’t scramble for additional components.
| What You Get | What You Keep |
|---|---|
| Complete hardware kit | Your original keys |
| 10-minute setup process | Existing deadbolt mechanism |
| Professional-grade security | Door’s current appearance |
The tools needed couldn’t be more basic, making this upgrade accessible to anyone. Before starting, verify your deadbolt’s compatibility with your chosen smart lock model. This simple check guarantees you’ll complete the four-step installation process smoothly, transforming your door’s security in minutes.
Compatible Door Types and Deadbolt Systems
Before you start that simple installation process, you’ll want to confirm your door and deadbolt system can accommodate your chosen smart lock. Retrofit smart locks like the Philips Wi-Fi Smart Lock are designed for compatibility with most standard deadbolt systems, letting you upgrade without changing your door’s exterior appearance.
Your deadbolt thickness is essential for proper fit and functionality. Here’s what you need to verify:
- Deadbolt thickness – Verify it’s between 40-90mm (1.57-3.54 inches)
- Compatible door types – Wood, metal, and fiberglass doors work with most smart locks
- Existing lock compatibility – Check if your current deadbolt brand and style work with your chosen smart lock model
Older mechanical locks or unique structures may restrict installation, so verify specific compatibility before purchasing.
Step-by-Step Retrofit Installation Process
Before you begin installing your retrofit smart lock, you’ll need to confirm your existing deadbolt can support the upgrade by checking its compatibility with your chosen smart lock model.
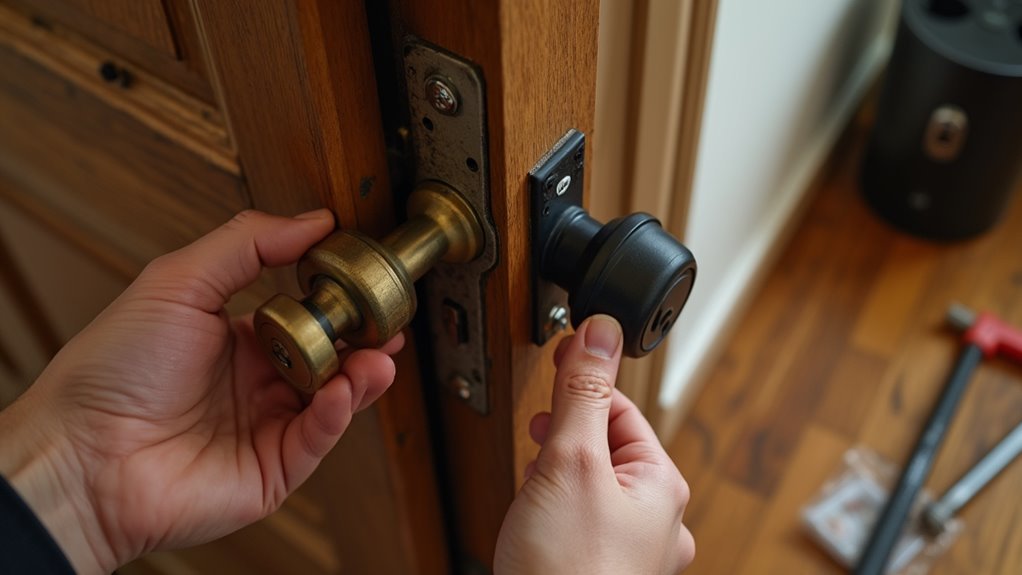
Start the installation by carefully positioning the motor assembly over your current deadbolt mechanism, ensuring it aligns properly with the existing hardware.
You’ll typically secure the assembly using the provided screws and your Phillips screwdriver, following the manufacturer’s specific alignment guidelines.
Pre-Installation Compatibility Check
Why rush into installation when a thorough compatibility check can save you hours of frustration?
Before you begin upgrading your existing door, you’ll need to verify several critical factors that determine whether your retrofit will succeed.
Here’s your essential pre-installation checklist:
- Deadbolt Compatibility – Confirm your current mechanical lock works with retrofit smart locks, as older lock types may prevent proper installation.
- Door Thickness Measurement – Verify your door measures between 40-90mm thick for ideal smart lock functionality.
- Clearance Assessment – Check that you’ve got adequate space around your existing lock to accommodate the new hardware without damaging your door structure.
You’ll also want to review the installation instructions and confirm the battery slot design allows convenient access, especially important for older doors with limited space.
Motor Assembly Installation
Once you’ve confirmed compatibility, the motor assembly installation becomes your next essential task.
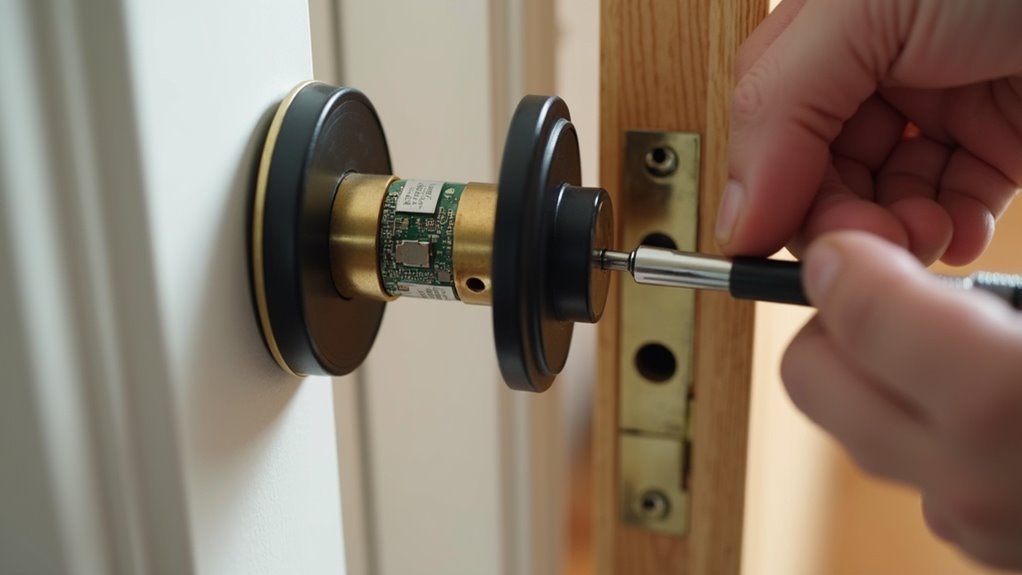
Start by removing your current deadbolt housings and bolt using a Phillips screwdriver, keeping your compatible deadbolt within reach. Next, insert the smart lock’s motor assembly into the existing deadbolt opening, ensuring proper alignment for ideal functionality.
Slide the motor onto the bolt, selecting one of the three provided adapters to guarantee correct alignment during this vital step.
Re-install the deadbolt housings while carefully aligning the tailpiece for seamless operation. The motor assembly installation process typically follows four straightforward steps outlined in your manufacturer’s user manual.
Complete your installation by following these guidelines precisely, ensuring your smart lock operates smoothly and securely.
Battery Life and Power Management Tips
Since the Philips Wi-Fi Smart Lock relies on two CR123A batteries for power, you’ll want to maximize their lifespan to avoid unexpected lockouts. The included CR123A batteries typically last up to five months, but you can extend battery life through smart power management practices.
Here are three essential tips for peak battery performance:
- Monitor battery status regularly through the Philips Home Access APP to track power levels and receive low-battery notifications.
- Protect from extreme conditions by avoiding direct weather exposure and temperature extremes that drain power faster.
- Use auto-locking strategically to minimize unnecessary lock cycles that consume battery power.
Keep spare CR123A batteries on hand for quick replacements when notifications indicate low power, ensuring your smart lock maintains reliable operation.
Wi-Fi Connectivity and Remote Access Setup
With your power management optimized, the Philips Wi-Fi Smart Lock’s built-in connectivity opens up a world of remote access possibilities. Unlike other systems, this Wi-Fi Smart Lock eliminates the need for additional bridges, connecting directly to your home network.
| Feature | Benefit | Setup Time |
|---|---|---|
| Built-in Wi-Fi | No bridge required | 5 minutes |
| Real-time notifications | Instant security alerts | Automatic |
| Remote smartphone control | Lock/unlock anywhere | App download |
| Voice assistant compatibility | Hands-free operation | Voice setup |
| CR123A battery power | 5-month operation | Battery install |
Download the Philips Home Access APP and follow the guided setup process. You’ll receive real-time notifications for every locking event, enabling complete security awareness. Voice commands through Amazon Alexa or Google Assistant provide hands-free convenience, making your Wi-Fi Smart Lock truly intelligent.
Voice Assistant Integration Options
You’ll find the Philips Wi-Fi Smart Lock works seamlessly with Amazon Alexa and Google Assistant, giving you hands-free control over your home security.
Setting up these voice integrations requires linking your lock’s app to your preferred voice platform through their respective smart home configuration menus.
Once connected, you can use simple voice commands to lock or open your door and receive real-time status updates through your smart devices.
Compatible Voice Platforms
Anyone can transform their home security experience by integrating the Philips Wi-Fi Smart Lock with popular voice assistants like Amazon Alexa and Google Assistant.
This smart door lock delivers hands-free convenience that streamlines your daily routines.
You’ll access thorough voice control through these compatible platforms:
- Amazon Alexa – Enables complete locking and opening commands with natural voice interaction
- Google Assistant – Provides seamless integration for voice-activated home access control
- Philips Home Access APP – Allows custom voice command setup and personalized automation preferences
While major platforms work exceptionally well, you might encounter limited automation capabilities with Siri.
The voice integration eliminates physical key dependency, making home access effortless for both residents and guests while you’re multitasking throughout your day.
Setup and Configuration
Setting up voice assistant integration with your Philips Wi-Fi Smart Lock requires proper configuration through the Philips Home Access APP to confirm peak performance.
You’ll need to carefully follow the setup process to avoid common issues with app performance and sensor accuracy that some users experience. The configuration involves linking your lock to either Amazon Alexa or Google Assistant, enabling voice commands for hands-free locking and opening.
During setup, pay close attention to network connectivity and sensor calibration to guarantee reliable voice command responses.
The app provides real-time notifications and basic smart home integration, though you should note that connectivity with other Philips systems like Hue lighting may be limited.
Proper initial configuration prevents functionality issues and maximizes your lock’s voice assistant capabilities.
Voice Command Features
These voice command features seamlessly connect with the Philips Home Access App, delivering real-time notifications while you maintain complete control through voice prompts.
You’ll find this particularly beneficial if you have mobility challenges or when your hands are full.
Voice integration enhances your home automation capabilities:
- Hands-free operation eliminates the need for physical keys or smartphone access
- Streamlined entry process simplifies daily routines and guest access
- Enhanced accessibility supports users with different mobility requirements
This integration greatly improves your overall smart home ecosystem’s functionality.
Auto-Locking and Security Features
When you’re away from home, the Philips Wi-Fi Smart Lock’s auto-locking feature automatically secures your door after closing, eliminating the worry of whether you remembered to lock up. This intelligent system enhances your home security by ensuring your door stays protected without manual intervention.
You’ll receive real-time notifications through the Philips Home Access APP whenever locking or releasing events occur, keeping you constantly informed about your door’s security status.
The lock’s integration with Amazon Alexa and Google Assistant adds another security layer through voice-activated controls.
Running on two CR123A batteries lasting up to five months, the auto-locking feature maintains consistent operation.
However, monitor your lock’s performance carefully, as some users have experienced sensor issues causing premature auto-locking that could affect ideal security functionality.
Mobile App Control and Notifications
You’ll gain complete control over your smart lock through the Philips Home Access APP, which lets you remotely lock or open your door from anywhere.
The app sends you real-time notifications whenever your door’s locked or opened, keeping you constantly informed about your home’s security status.
You can even use voice commands through Amazon Alexa or Google Assistant to control your lock hands-free.
Real-Time Door Notifications
While many smart locks require constant manual checking or separate hub devices, the Philips Wi-Fi Smart Lock delivers instant notifications directly to your smartphone whenever someone locks or unfastens your door.
You’ll receive real-time notifications through the Philips Home Access APP, keeping you informed of your door’s status whether you’re at work, traveling, or simply in another room.
The lock’s built-in Wi-Fi eliminates the need for additional bridge devices, ensuring consistent notification delivery without connectivity gaps.
Here’s what makes these notifications valuable:
- Instant security alerts when unexpected access occurs
- Remote monitoring capability from anywhere with internet connection
- Peace of mind notifications confirming your door locked properly
With a 3.8-star average rating, users appreciate the basic functionality, though some report occasional sensor accuracy issues.
Remote Lock Control
How often have you wished you could lock your door from across town or grant access to a family member while you’re stuck in traffic?
The Philips Wi-Fi Smart Lock transforms your smartphone into a powerful remote access tool through the Philips Home Access APP. You’ll control your door lock from anywhere without needing a separate Wi-Fi bridge cluttering your home setup.
The app delivers real-time notifications whenever someone locks or engages your door, keeping you informed of all entry activity. You’ll never wonder if you remembered to lock up again.
The auto-lock feature automatically secures your door after closing, preventing accidental engagements. Voice control compatibility with Amazon Alexa and Google Assistant adds another convenient layer to your smart home security system.
Keyless Entry and Access Code Programming
When you upgrade to a smart lock like the Philips Wi-Fi Smart Lock, you’ll gain keyless entry capabilities that transform how you access your home. You can open doors through your mobile app or programmed access codes, eliminating the need for physical keys entirely.
Access code programming offers remarkable flexibility for managing entry permissions:
- Multiple User Codes – Set unique codes for family members, guests, or service providers without duplicating physical keys.
- Keypad Backup Access – Enter codes directly on the lock’s keypad when your smartphone isn’t available or convenient.
- Real-Time Monitoring – Receive instant notifications about who enters or exits using specific programmed codes.
Remember that programming methods vary between manufacturers, so consult your user manual for specific setup instructions to maximize your smart lock’s keyless entry features.
Troubleshooting Common Installation Issues
When you’re installing a smart lock, you’ll likely encounter a few common hiccups that can derail your upgrade project.
Door compatibility issues, battery installation mistakes, and app connection failures represent the most frequent problems homeowners face during setup.
Understanding how to quickly identify and resolve these issues will save you time and prevent frustration during your installation process.
Door Compatibility Problems
Before diving into your smart lock upgrade, you’ll need to rule out potential door compatibility issues that could turn your installation into a frustrating experience.
Several factors can prevent successful installation, making compatibility checks essential before purchasing.
Here are three critical compatibility issues to verify:
- Door thickness requirements – Most smart locks need doors between 40-90mm thick, which can exclude thinner panel doors made of wood, wrought iron, or glass.
- Existing hardware limitations – Older mechanical locks and external latch systems may not accommodate modern smart lock bodies or unique structural designs.
- Battery access constraints – Older doors might’ve designs that complicate battery replacement, potentially hindering your lock’s normal operation after installation.
Always check manufacturer specifications against your current setup.
Battery Installation Errors
Battery installation errors can quickly derail your smart lock upgrade, turning what should be a straightforward process into hours of troubleshooting.
Start by using the correct battery type—your Philips Wi-Fi Smart Lock requires 2 CR123A batteries installed with proper polarity. Check the battery slot for debris or obstructions that might prevent secure insertion, especially on older doors where replacement access can be challenging.
Clean battery contacts thoroughly to eliminate corrosion that causes intermittent power issues. If your lock isn’t functioning correctly, replace the batteries immediately since they typically last only five months depending on usage.
Avoid exposing your smart lock to extreme temperatures or direct weather, as these conditions greatly reduce battery life and increase the likelihood of battery installation errors.
App Connection Failures
App connection failures represent the next major hurdle you’ll face after resolving power issues with your smart lock installation.
These connectivity problems can frustrate even tech-savvy users, but they’re typically straightforward to resolve.
When your smart lock won’t connect to your smartphone app, follow these essential troubleshooting steps:
- Verify Wi-Fi connectivity – Confirm your smartphone connects to the same Wi-Fi network as your smart lock for proper app functionality.
- Update software components – Check for firmware updates for both your smart lock and the companion app to eliminate compatibility issues.
- Reset when necessary – Follow manufacturer instructions to reset your smart lock if the app continues failing to establish connection.
Don’t forget to verify your smart lock’s batteries have sufficient charge, as low power levels directly impact app connectivity performance.
Maintenance and Long-Term Performance
While smart locks offer convenience and security, they’ll only deliver reliable performance when you maintain them properly.
Start with regular battery maintenance by checking and replacing your Philips Wi-Fi Smart Lock’s 2 CR123A batteries every five months, though usage patterns and environmental conditions may require more frequent changes.
Protect your investment by avoiding extreme temperatures and direct weather exposure, which can damage sensors and compromise the auto-locking feature.
Clean the exterior and keypad regularly to prevent dirt buildup that affects responsiveness.
Keep your Philips Home Access APP updated to access the latest performance improvements and security features.
Monitor your lock’s notifications for unusual locking and unsecuring activity—this helps you identify potential issues early and maintain ideal security for your upgraded door system.
Cost Comparison Vs Full Lock Replacement
Beyond ongoing maintenance considerations, you’ll find that smart lock retrofits offer compelling financial advantages over complete lock replacements. Retrofit smart locks like the Philips Wi-Fi model cost $130-$250, while full replacements range from $200-$500 plus installation fees.
You’ll preserve your existing deadbolt hardware and complete installation in under 10 minutes yourself.
Key Cost Benefits:
- No Professional Installation Required – You’ll save $50-$150 in labor costs compared to full lock replacements that often need professional installation.
- Preserve Existing Hardware – You won’t need door modifications or new entry hardware that add $100+ to replacement projects.
- Renter-Friendly Solution – You can upgrade without permanent changes, avoiding potential security deposits or landlord approval requirements.
Smart lock retrofits deliver enhanced security and convenience while keeping your budget intact and your existing door aesthetic unchanged.
Frequently Asked Questions
Can You Put a Smart Lock on an Old Door?
You can install a smart lock on your old door if it’s compatible with retrofit options. You’ll need to verify your existing deadbolt works and your door’s thickness meets requirements.
Can You Retrofit a Smart Lock?
You can retrofit a smart lock to your existing deadbolt in under 10 minutes using just a Phillips screwdriver. You’ll keep your original keys while gaining Wi-Fi connectivity and voice assistant compatibility.
What Are the Disadvantages of Smart Door Lock?
You’ll face battery replacements every few months, potential sensor misreadings causing premature locking, integration issues with home automation systems, confusing installation processes, and reduced functionality during extreme weather conditions.
Can I Install Digital Lock in Existing Door?
You can install a digital lock on your existing door using retrofit smart locks. They attach to current deadbolts without altering hardware, requiring only a Phillips screwdriver and under ten minutes.


Leave a Reply