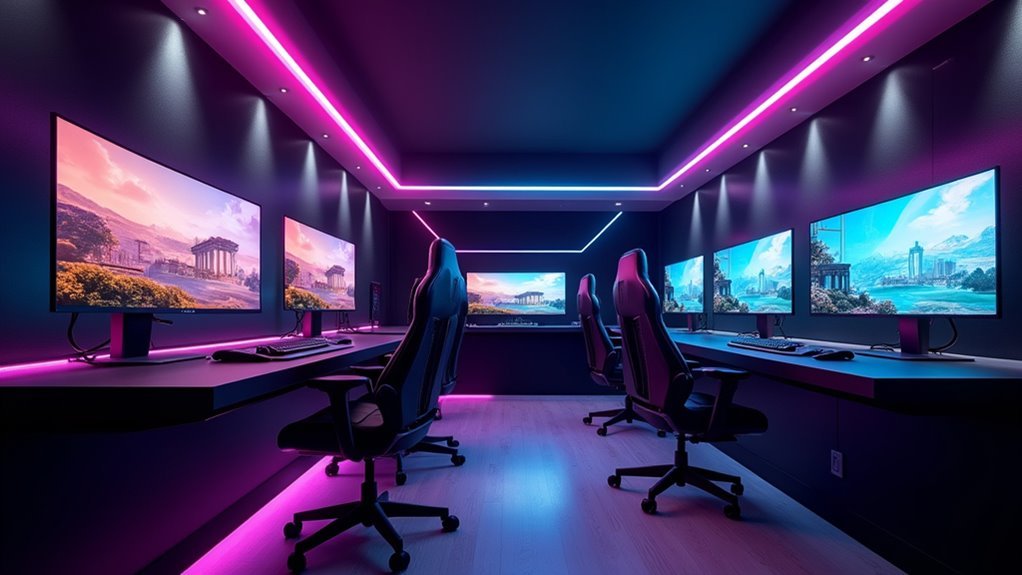
You’ve probably spent countless hours perfecting your gaming skills, but your setup might be holding you back from reaching peak performance. Most gamers overlook the transformative power of automation—smart lighting that responds to gameplay, motorized desks that adjust to your ideal height, and cable management systems that eliminate distractions. There’s a systematic approach to creating an environment that doesn’t just look impressive but actually enhances your reaction times and comfort during those marathon sessions.
Gaming Room Transformation Planning and Design Strategy
Before diving into purchases or renovations, you’ll want to establish a clear vision for your gaming room by exploring inspiration sources like YouTube setup tours and Reddit communities.
These platforms showcase diverse setups that’ll help you identify elements matching your aesthetic preferences and functional needs.
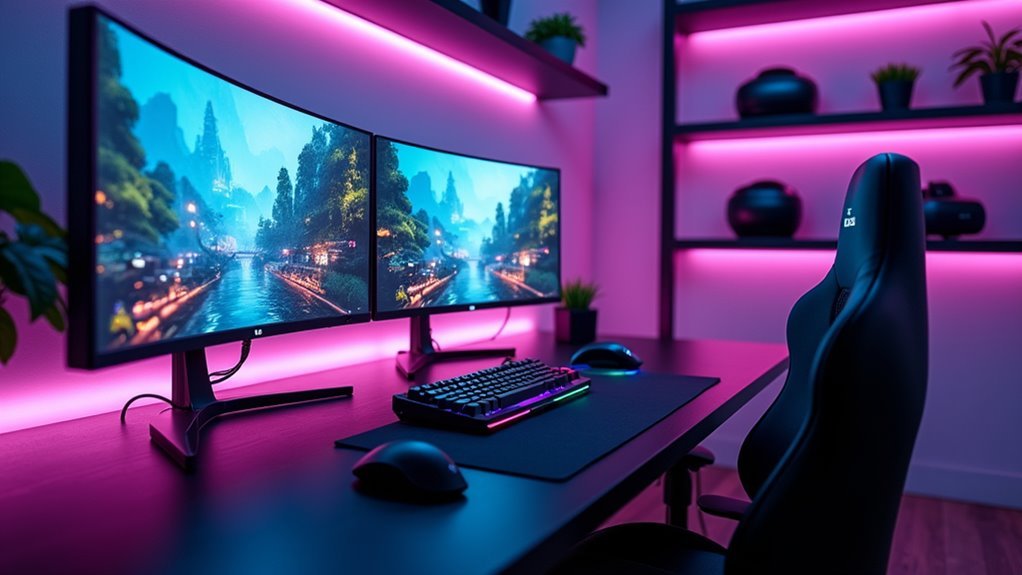
Make certain to focus on key components during your planning phase. An L-shaped sit-stand desk serves as your foundation, providing versatility for gaming sessions and productivity work.
An L-shaped sit-stand desk forms the cornerstone of any versatile gaming setup, balancing entertainment and productivity seamlessly.
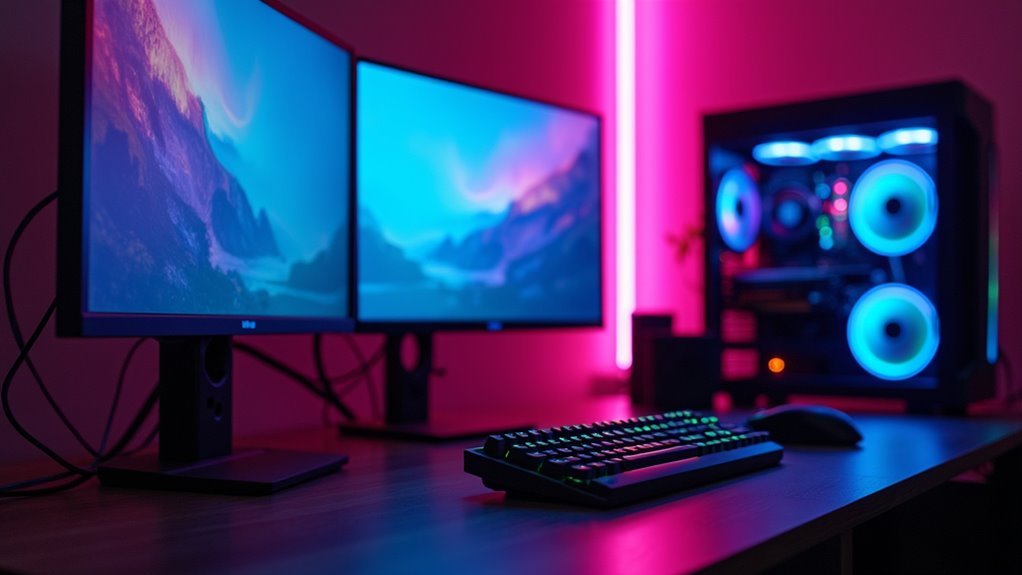
RGB lighting creates atmosphere – consider aluminum profiles for LED strips to achieve seamless light distribution without visible gaps.
Cable management represents an important part of your design strategy. Plan wire routing early using clips, covers, and mesh wraps to maintain clean aesthetics.
This preparation prevents future headaches and guarantees your gaming space looks professional rather than cluttered.
Choosing the Perfect Sit-Stand Desk for Your Gaming Setup
You’ll want to focus on heavy-duty L-shaped desks that can handle your gaming equipment’s weight while providing maximum surface area for multiple monitors and accessories.
The assembly process shouldn’t intimidate you – most quality desks take around 45 minutes to set up with clear instructions.
Smart cable management features like built-in clips and covers will keep your setup looking clean and professional while protecting your investment.
Heavy-Duty L-Shaped Options
When selecting a heavy-duty L-shaped sit-stand desk for your gaming setup, the Phebo desk stands out as an excellent example of what you should prioritize. You’ll want one that’s capable of supporting multiple monitors and gaming peripherals while offering the Best of Both Worlds – sitting and standing positions.
| Feature | Standard Desk | Phebo L-Shaped |
|---|---|---|
| Weight Capacity | 50-75 lbs | 150+ lbs |
| Assembly Time | 2-3 hours | 45 minutes |
| Cable Management | Basic | Integrated system |
| Height Adjustment | Fixed | Multiple positions |
| Monitor Support | 1-2 monitors | 3+ monitors |
The desk’s clear assembly instructions and integrated cable management system are going to make your setup process smooth while maintaining a clean aesthetic throughout your gaming space.
Assembly and Installation
Since most gamers dread complicated assembly processes, you’ll appreciate that setting up your Phebo L-shaped sit-stand desk requires just 45 minutes and basic tools. The clear instructions guide you through each step, making assembly straightforward even for beginners.
During setup, prioritize cable management from the start. Use clips, covers, and mesh wraps to route cables through the desk’s metal frame, keeping wires hidden and organized. This prevents the tangled mess that often plagues gaming stations.
Install a larger power strip with surge protection to handle your multiple devices safely. Tuck power cords into the frame’s channels for a clean appearance.
Proper cable management during initial assembly saves you from future headaches and maintains your gaming room’s professional aesthetic.
Cable Management Integration
Effective cable management transforms your gaming setup from chaotic to professional, and the right sit-stand desk makes this transformation seamless. Your heavy-duty L-shaped desk provides the perfect foundation for organizing wires through its metal frame.
Tuck power cords into the desk’s structure and secure them using clips, covers, and mesh wraps. Upgrade to a larger power strip for surge protection while replacing long cords with shorter ones to minimize clutter.
When you make a hole for wire feeding, be sure to check the desk’s structural integrity first. Use white duct tape and Velcro tape to secure cords against white surfaces for seamless blending.
Install raceway tracks to hide LED strip cords completely.
- Utilize the desk’s metal frame for internal cable routing
- Replace long cords with shorter alternatives to reduce bulk
- Secure cables with white tape for invisible wire management
- Drill strategic holes for professional wire feeding solutions
- Install raceway tracks to completely conceal LED lighting cables
Essential Cable Management Tools and Techniques
You’ll need the right tools and techniques to keep your gaming setup looking clean and professional.
Start with hidden wire routing using clips, covers, and mesh wraps that blend seamlessly with your room’s color scheme.
Combine these with adhesive mounting solutions and color-coordinated accessories to create a streamlined appearance that eliminates cable clutter.
Hidden Wire Routing
When building your dream gaming setup, mastering cable management transforms a cluttered mess into a sleek, professional environment that’ll enhance both functionality and aesthetics.
I’ve seen countless gaming rooms where smart wire routing keeps unsightly cables far away from view while maintaining accessibility.
Replace those long power cords with shorter white alternatives to instantly reduce desk clutter. Use white duct tape to flatten cables against surfaces, while Velcro tape secures power supplies discreetly.
For creative concealment, drill holes in white travel soap containers to hide wire bundles.
- Use clips, covers, and mesh wraps for organized cable concealment
- Replace long cords with shorter white alternatives
- Secure cables with white duct tape and Velcro
- Hide wires in modified soap containers
- Install small raceway tracks with removable 3M tape
Adhesive Mounting Solutions
Since proper adhesive mounting forms the backbone of any professional cable management system, you’ll want to master these essential attachment techniques that keep everything secure without permanent damage.
Start with thin double-sided sticky tape for aluminum RGB lighting profiles – it’ll create seamless installations without surface damage. Double-sided Velcro tape works perfectly for mounting power strips under your desk, keeping them accessible yet hidden.
White duct tape becomes your secret weapon for flattening cables against surfaces, especially in light-themed setups where it blends invisibly.
For LED strip cords, install small raceway tracks using 3M removable wall tape. This combination conceals wires completely while maintaining clean lines.
These adhesive solutions eliminate drilling while providing professional-grade cable organization that’s easily reversible.
Color-Coordinated Cable Accessories
Color-coordinated cable accessories transform chaotic wire tangles into seamless extensions of your gaming room’s aesthetic.
You’ll maintain visual harmony by selecting cable clips, covers, and mesh wraps in matching themes—white accessories work exceptionally well for clean, modern setups.
Replace standard power cords with shorter, color-matched alternatives to eliminate excess length and visual clutter.
Secure your power strips directly to your desk using double-sided Velcro tape for stability while minimizing visible wiring.
Install small raceway tracks with 3M removable wall tape to hide LED strip cords without damaging walls.
You can even repurpose white travel soap containers by drilling wire-management holes, creating functional storage that blends perfectly with your room’s color scheme.
- Use white-themed cable clips, covers, and mesh wraps for cohesive aesthetics
- Replace long power cords with shorter, color-coordinated alternatives
- Attach power strips to desks using double-sided Velcro tape
- Install raceway tracks with removable 3M tape for LED strip wires
- Repurpose white soap containers with drilled holes for wire organization
Power Strip Upgrades and Surge Protection Solutions
While setting up your gaming room, protecting your expensive equipment from power surges should be a top priority, and upgrading to a larger surge-protecting power strip is one of the smartest investments you’ll make.
You’ll want to strategically position your new power strip within your desk’s metal frame to maintain a clean appearance while keeping wires hidden from view. Use velcro tape to secure the strip firmly in place, preventing movement that could damage connections over time.
Consider implementing shorter power cords for your lift motors to reduce excess wiring and enhance your setup’s overall aesthetic.
These power management solutions won’t just extend your hardware’s lifespan—they’ll also give you peace of mind during those marathon gaming sessions.
RGB Lighting System Design and Component Selection
When you’re designing your RGB lighting system, you’ll need to focus on selecting quality components that deliver both performance and longevity for your gaming setup.
Your component choices should prioritize high-grade LED strips like 5V BTF lighting K6812 models paired with aluminum profiles that provide proper diffusion and heat management.
Professional installation techniques using precise measurements, proper soldering, and strategic wire management will transform your gaming room into a polished, seamless lighting environment.
Component Selection Strategy
Building an exceptional RGB lighting system starts with selecting the right LED strips, and 5V BTF lighting K6812 strips deliver the vibrant colors and flexibility you’ll need for any gaming setup.
These components work together to create a professional-looking installation that enhances your gaming atmosphere.
Your component selection should focus on both functionality and aesthetics:
- LED strips: Choose 5V BTF lighting K6812 strips for superior color reproduction and reliable performance
- Aluminum profiles: Order diffusion profiles to eliminate harsh lighting and create smooth, even illumination
- Adhesive solution: Use thin double-sided sticky tape for secure mounting that won’t damage your desk surface
- Wiring materials: Select 18 gauge silicone wires for durable connections that withstand repeated use
- Measurement planning: Calculate your desk’s perimeter (typically around 18 ft) to determine material quantities needed
Professional Installation Techniques
Three key techniques separate amateur RGB installations from professional-grade setups that’ll transform your gaming space. Start by using aluminum profiles with 45° angle cuts to create seamless joints that eliminate visible gaps. This technique diffuses your LED strips beautifully while maintaining clean lines throughout your setup.
| Component | Installation Method | Pro Tip |
|---|---|---|
| LED Strips | Solder 18-gauge silicone wires | Measure 18ft perimeter accurately |
| Aluminum Profiles | Cut at 45° angles | Use thin double-sided tape |
| Wire Management | Drill small feed holes | Secure with electrical tape |
| Cord Concealment | Install raceway tracks | Apply 3M removable wall tape |
| Strip Selection | Choose 5V BTF K6812 | Test before permanent mounting |
You’ll achieve professional results by properly measuring your perimeter and investing in quality components like 5V BTF lighting K6812 strips.
Aluminum Profile Installation for Professional LED Integration
Since high-quality LED integration requires proper diffusion and clean cable management, aluminum profiles become essential for achieving a professional gaming room aesthetic.
You’ll want to order 2-meter aluminum profiles and cut them at precise 45° angles to minimize visible seams around your desk perimeter. Attach these profiles using thin double-sided tape, which provides strong adhesion without surface damage.
For your BTF lighting K6812 LED strips covering approximately 18 feet, drill small wire-feeding holes in the profiles.
Install your strips clockwise while carefully removing the adhesive backing for clean placement.
- Use 2-meter profile sections with 45° angle cuts for seamless corners
- Apply thin double-sided tape for damage-free mounting
- Drill precise holes for clean wire management
- Install LED strips clockwise for consistent direction
- Remove adhesive backing carefully during installation
LED Strip Soldering and Wiring Best Practices
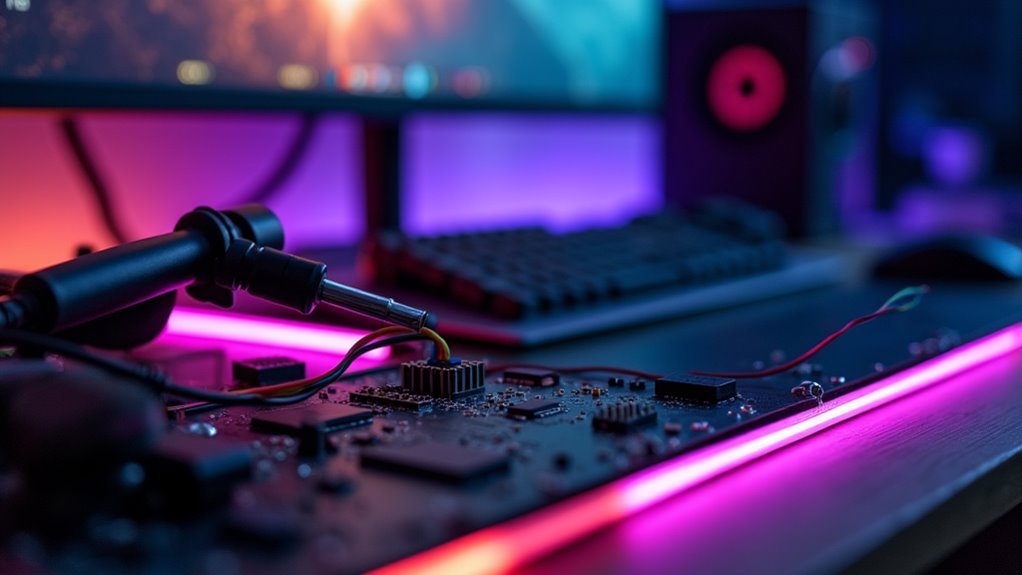
Proper soldering techniques will make or break your LED strip installation’s longevity and performance.
Master your soldering skills early—they’re the foundation that determines whether your LED installation thrives or fails completely.
You’ll want 18 gauge silicone wires for maximum flexibility and durability throughout your gaming setup. When cutting aluminum profiles, maintain 45° angles to achieve seamless, professional-looking joints that’ll elevate your room’s aesthetic.
Before starting, invest in a high-quality soldering iron to prevent LED strip damage during the connection process.
Drill small holes in your desk for wire management, then secure everything with electrical tape to eliminate unwanted movement. This keeps your setup clean and organized.
Don’t skip testing your LED strips after soldering but before final installation. Check for proper continuity and functionality to avoid troubleshooting headaches later.
These practices guarantee your gaming room lighting performs flawlessly for years.
Advanced Cable Hiding Methods Using Everyday Items
While professional cable management solutions work well, everyday household items can achieve equally impressive results at a fraction of the cost. You can transform your gaming room’s appearance using creative approaches that most people overlook.
White travel soap containers make excellent wire organizers. Drill strategic holes for cable entry and exit points, creating discrete hiding spots that blend seamlessly with your setup.
For LED strip cords, attach small raceway tracks using 3M removable wall tape to avoid wall damage. Replace lengthy power cords with shorter white alternatives to minimize visual clutter.
Secure power strips directly to your desk using double-sided Velcro tape, keeping them accessible yet hidden. Finally, flatten remaining cords against surfaces with white duct tape for a clean, professional finish.
- Use white soap containers as discrete wire organizers with drilled holes
- Install raceway tracks with removable 3M tape for LED strip management
- Replace long cords with shorter white alternatives for reduced clutter
- Secure power strips to desks using double-sided Velcro tape
- Flatten cords with white duct tape for seamless surface integration
Raceway Track Installation for Seamless Wire Management
You’ll want to select small raceway tracks that match your gaming room’s color scheme – white tracks work perfectly for white-themed setups.
Measure the length you need for your LED strips and other cables before installation to guarantee proper coverage.
Use 3M removable wall tape to secure the tracks, which lets you reposition them later without damaging your walls.
Choosing Proper Raceway Size
Most gaming setups require careful calculation when selecting raceway dimensions to guarantee your cable management system won’t become overcrowded or fail over time.
You’ll need to measure your cables’ combined diameter and add at least 25% extra space for proper airflow and future expansions. Standard raceway widths ranging from 1 to 2 inches work for most configurations.
Choose low-profile tracks that you can paint to match your wall color for better aesthetics.
Select raceways with adhesive backing or use 3M removable tape to avoid wall damage during future changes.
- Measure all cable diameters and add 25% buffer space
- Select 1-2 inch width raceways for typical gaming setups
- Choose paintable, low-profile tracks for clean appearance
- Use adhesive backing or removable 3M tape for installation
- Plan layout along baseboards to minimize visible seams
Securing With Removable Tape
After selecting your ideal raceway dimensions, the installation method becomes your next priority.
You’ll want to use 3M removable wall tape for secure attachment without damaging your walls or furniture. This adhesive solution provides strong hold while allowing clean removal when you reorganize your setup.
Apply the tape evenly along the raceway’s back surface, ensuring complete contact with your mounting surface. Press firmly for thirty seconds to activate the adhesive bond.
The removable tape works exceptionally well on painted walls, wood surfaces, and metal gaming desks.
This installation method gives you flexibility to adjust your wire management system as your gaming setup evolves. You won’t need drilling or permanent modifications, making it perfect for rental spaces or frequent room updates.
Custom Acrylic Speaker Stand Creation and Design
Since achieving the perfect aesthetic balance requires attention to every detail, creating custom acrylic edgelit speaker stands transforms your gaming room into a cohesive design masterpiece.
You’ll find the process involves cutting and sanding acrylic sheets—tedious work that delivers rewarding results. Your Cano Tuck speakers, featuring AMT Tweeters and 5 1/4 inch aluminum woofers, deserve stands that match your white theme while enhancing sound projection.
Take careful measurements to guarantee stability, then join the acrylic pieces with high-quality adhesive for seamless appearance. The finished stands position your speakers at ideal height and angle for superior audio performance.
Precision measurements ensure structural integrity while premium adhesives create flawless joints that optimize both acoustic performance and visual appeal.
- Cut acrylic sheets precisely to match your room’s dimensions
- Sand edges smooth for professional finish quality
- Use premium adhesive for durable, invisible joints
- Position speakers at ideal listening height and angle
- Integrate edgelighting for stunning visual enhancement
Desktop Speaker Selection and Audio System Setup
Your custom acrylic stands provide the perfect foundation, but selecting the right desktop speakers determines your gaming room’s audio quality. The Cano Tuck delivers exceptional performance with its AMT Tweeter and 5 1/4-inch aluminum woofer, creating that modern sound profile you need for immersive gaming.
| Speaker Component | Gaming Experience |
|---|---|
| AMT Tweeter | Crystal-clear dialogue |
| Aluminum Woofer | Thunderous explosions |
| Active Right Setup | Seamless power access |
| Passive Left Balance | Perfect stereo imaging |
Position your active speaker on the right for main power access and the passive on the left for balanced stereo. Cut and reroute power cords through your desk, reconnecting them with a white electrical box for clean organization. Hide speaker cables using drilled containers or raceway tracks for that polished, professional finish.
Renter-Friendly Lighting Solutions and Installation
While permanent lighting modifications can jeopardize your security deposit, renter-friendly corner ceiling-to-floor lights transform your gaming room’s ambiance without drilling holes or making structural changes.
Transform your rental gaming space with ambient lighting that won’t compromise your security deposit or require permanent modifications.
You’ll want to select 5V BTF lighting K6812 LED strips for vibrant, customizable colors. Measure your room’s perimeter—approximately 18 feet typically works for most setups. Incorporate aluminum profiles to diffuse the LED strips effectively, creating a polished look while minimizing visible seams.
Use double-sided sticky tape to attach aluminum profiles securely, ensuring easy removal without damaging surfaces when you move out. Employ small raceway tracks and 3M removable wall tape to conceal cords elegantly, maintaining your gaming space’s clean aesthetic.
- Measure total perimeter before purchasing LED strips
- Use aluminum profiles for professional light diffusion
- Apply double-sided tape for damage-free installation
- Conceal cords with raceway tracks and removable tape
- Choose 5V BTF K6812 strips for ideal color customization
DIY Nano Leaf Blocks and LED Accent Pieces
Creating your own Nano Leaf-inspired blocks transforms any gaming room into a dynamic visual experience that rivals expensive commercial alternatives.
You’ll arrange these DIY blocks in various configurations, personalizing designs that enhance your setup’s aesthetic appeal.
Integrate aluminum profiles for RGB lighting to diffuse LED strips effectively, creating seamless, polished appearances.
You’ll want 5V BTF lighting K6812 LED strips for vibrant colors and effects, with approximately 18 feet of total perimeter length providing extensive coverage throughout your space.
Install everything using thin double-sided sticky tape for a renter-friendly approach that won’t damage walls or surfaces.
Craft custom acrylic edgelit speaker stands to complement your LED accent pieces, combining functionality with eye-catching design elements that elevate your entire gaming environment.
Final Setup Testing and Performance Optimization
Once you’ve completed your DIY lighting installation, systematic testing becomes essential to verify that every component operates harmoniously within your gaming ecosystem.
Systematic testing ensures every component in your DIY gaming setup works together without interference or performance issues.
You’ll need to check your sit-stand desk, RGB lighting, and audio system for seamless integration without electrical interference. Test your upgraded power strip under full load with all devices connected to guarantee stable power delivery during intense gaming sessions.
Use software tools to monitor system performance and enhance settings for lower latency and higher frame rates. Regularly inspect cable management to prevent tangling or disconnections. Fine-tune your RGB settings by experimenting with different color schemes and brightness levels.
- Test all components together for electrical compatibility
- Monitor power strip performance under maximum load conditions
- Use software tools for latency and frame rate enhancement
- Maintain organized cable management throughout usage
- Experiment with RGB color schemes for ideal ambiance
Frequently Asked Questions
How to Make the Ultimate Gaming Room?
You’ll need a height-adjustable L-shaped desk, RGB lighting with aluminum profiles, organized cable management, custom audio stands, and upgraded power strips with surge protection for peak gaming performance.
How Do You Make an Awesome Gaming Setup?
You’ll need a sturdy L-shaped sit-stand desk, RGB lighting with aluminum profiles, organized cable management, quality desktop speakers on custom stands, and smart power strips tucked into frames.
How Much Does It Cost to Build a Gaming Room?
You’ll spend $1,500 to $10,000 building your gaming room, depending on equipment quality. Essential items include a $300-600 sit-stand desk, $100-300 RGB lighting, $50-150 speaker stands, and $20-100 cable management solutions.
What Does Every Gaming Room Need?
You’ll need a quality sit-stand desk, effective cable management, RGB lighting for ambiance, custom speaker stands for ideal audio, and reliable power management with surge protection for safety.


Leave a Reply