You’ll need a solid understanding of microcontroller programming and basic electronics to build a voice-activated pet feeder that actually works reliably. Most DIY tutorials skip the critical details about servo motor calibration and fail-safe mechanisms that prevent overfeeding your pet. The real challenge isn’t connecting a few wires—it’s creating a system that won’t malfunction when your internet goes down or when ambient noise interferes with voice recognition.
Gathering Required Components and Materials
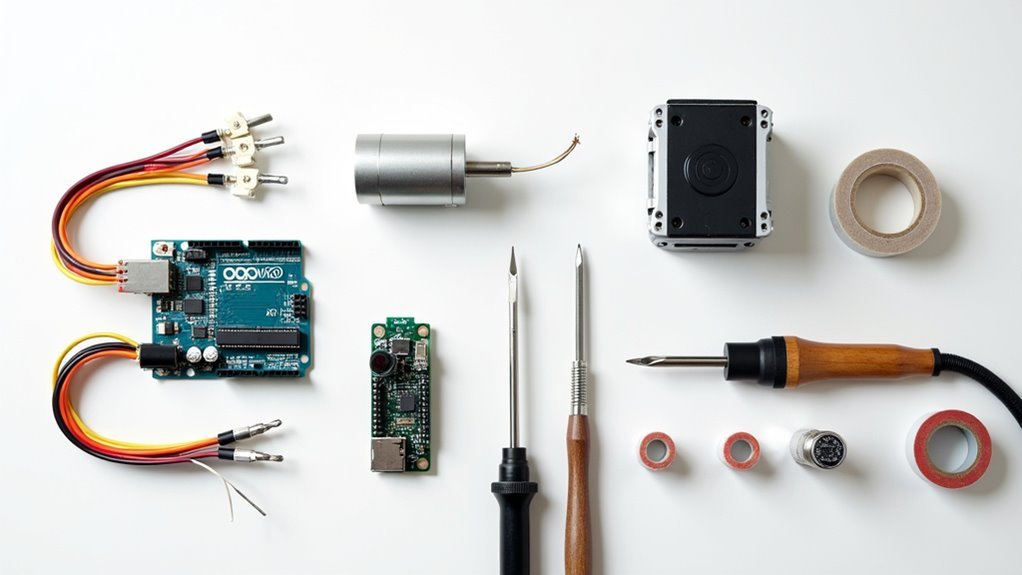
Five essential components form the foundation of your voice-activated pet feeder project.
You’ll need a NodeMCU Esp8266 Development Board as your main controller, providing Wi-Fi connectivity for voice commands. A continuous servo motor handles food dispensing with precise control, available from electronics suppliers. Jumper cables create essential electrical connections between all components and your NodeMCU board.
For the feeder’s structure, you’ll require 3D printed parts including a bottle connector and motor mount. Use ABS filament for these components since it offers superior durability and strength compared to other materials.
Finally, include a Piezo buzzer for audio notifications when food dispensation occurs or the system activates.
These core components work together to create a functional, responsive feeding system for your pet.
Setting Up Your Development Environment
You’ll need to configure both your hardware components and software tools to create a seamless development workflow for your voice-activated pet feeder.
Start by installing Eclipse Luna with Maven integration to manage your project dependencies.
Then set up your Raspberry Pi with the servo motor and power supplies for initial testing.
Finally, establish your programming environment by preparing Python scripts for servo control and creating an Alexa Skills Kit developer account for voice command functionality.
Hardware Components Setup
Before diving into the software programming, assembling the right hardware components forms the foundation of your voice-activated pet feeder project.
You’ll need a Raspberry Pi as your main controller, a servo motor for dispensing food, and a reliable power supply to keep everything running smoothly.
Start by connecting your servo motor to the Raspberry Pi’s GPIO pins.
Wire the servo’s power and ground lines appropriately, then connect the control pin to a designated GPIO port.
Verify all components share a common ground for proper electrical operation.
Don’t forget to add sensors like a photocell to monitor food levels in your feeder.
These additional components will make your automated system more intelligent and responsive to your pet’s feeding needs.
Software Installation Process
Once your hardware components are properly connected, setting up the development environment becomes your next critical step. The software installation process for your pet feeder requires several essential tools to function properly.
Start by downloading Eclipse Luna as your IDE, then configure Maven for dependency management. You’ll need Python installed on your system to control the servo motors and dispensing mechanisms.
| Component | Installation Method |
|---|---|
| Eclipse Luna IDE | Download from official website |
| Maven Integration | Configure within Eclipse |
| Python Runtime | System package manager |
| Raspberry Pi Libraries | Command line installation |
| Device Configuration | IDE target setup |
Use command line tools to install Raspberry Pi-specific libraries for hardware communication. Finally, configure Eclipse to recognize your Raspberry Pi as the target device for seamless development and testing.
Programming Environment Configuration
With your hardware connections verified, configuring the programming environment correctly determines whether your voice-activated pet feeder project succeeds or struggles with compatibility issues.
You’ll need to establish multiple development environments to handle different aspects of your feeder:
- Configure Eclipse Luna IDE with Maven dependencies for Raspberry Pi and servo motor libraries
- Set up Python environment with scripts for servo control and food dispensing automation
- Install email notification libraries for low food level alerts
- Initialize Git version control to track project changes and collaborate effectively
- Create Amazon Developer account and configure Alexa Skills Kit for voice commands integration
Each environment serves a specific purpose in your project’s architecture.
The Java IDE handles hardware interfacing, Python manages operational logic, and Alexa Skills processes voice commands from users.
3D Printing the Feeder Housing Components
You’ll need specific STL files for your feeder’s housing components before you can start printing.
Download these files from a trusted repository or create custom designs using CAD software to match your servo motor and dispensing mechanism requirements.
Once you’ve got the right files, focus on proper assembly techniques to guarantee all printed parts fit together seamlessly and create a sturdy, functional feeder housing.
Required STL Files
Several STL files form the foundation of your voice-activated pet feeder’s physical structure, and you’ll need to download the complete set before starting any 3D printing work.
These digital blueprints contain the precise measurements and geometry required for each component.
You’ll typically find the necessary STL files on these platforms:
- Thingiverse – Search for voice-activated or automatic pet feeder designs
- Project creator websites – Check the original designer’s official page
- Maker community forums – Browse dedicated 3D printing sections
- GitHub repositories – Look for open-source hardware projects
- Educational platforms – University or maker space project libraries
Verify that your chosen STL files specifically support ABS filament printing, as this material provides essential durability.
Download all components including the base unit, food container, and dispensing mechanism files before beginning your printing process.
Assembly Best Practices
Once you’ve downloaded all necessary STL files, begin printing the feeder housing components using ABS filament for maximum durability and resistance to wear from daily use.
Configure your 3D printer’s nozzle temperature between 230-250°C to guarantee ideal layer adhesion and minimize warping issues. You’ll need a quality 3D printer with a heated bed for best results, especially when printing larger housing components.
Design your feeder housing with precise dimensions so all parts fit seamlessly during assembly. Include ventilation holes in your design to prevent moisture buildup that could spoil pet food and cause mechanical problems.
Double-check measurements before printing to maintain proper component alignment. Test-fit printed pieces as you complete them, making adjustments if necessary before proceeding with the full assembly process.
Assembling the Physical Feeder Structure
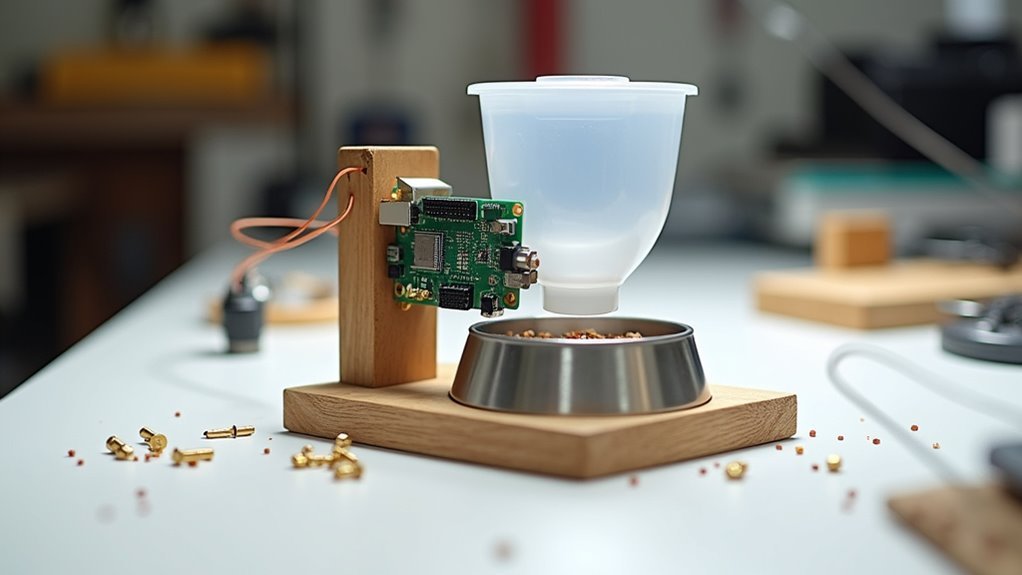
Before diving into the electronics, you’ll need to construct a sturdy physical foundation for your voice-activated pet feeder. This cat feeder requires precise assembly to guarantee reliable operation and longevity.
- 3D print all components using ABS filament for maximum strength and durability, verifying proper fit between parts.
- Create an elevated wooden base by cutting lumber to size, providing stable platform and comfortable pet access height.
- Modify your plastic container for food storage, assuring perfect alignment with the servo dispensing mechanism.
- Assemble printed parts using combination of strong adhesive and screws for enhanced structural integrity.
- Test servo motor placement and food dispenser mechanism, confirming smooth operation before proceeding to electronics integration.
This methodical approach prevents costly mistakes later.
Installing and Configuring the Microcontroller
You’ll need to select a NodeMCU ESP8266 development board as your microcontroller since it provides built-in Wi-Fi capabilities and sufficient GPIO pins for connecting your servo motor and buzzer components.
Next, you’ll set up the programming environment by installing the ESP8266 board package in Arduino IDE and downloading the necessary libraries for Adafruit IO communication.
Finally, you’ll configure your microcontroller’s software by entering your Wi-Fi credentials and Adafruit IO key to establish the MQTT connection that enables voice command processing.
Selecting Compatible Hardware Components
Two primary microcontroller options stand out for building your voice-activated pet feeder: the Raspberry Pi and the NodeMCU ESP8266. Your microcontroller choice determines compatibility with essential automation components like servo motors and sensors.
For peak performance, you’ll need these compatible hardware components:
- Power supply – Match voltage and current specifications to prevent component damage
- Servo motors – Verify GPIO compatibility with your chosen microcontroller for food dispensing control
- Photocell sensors – Check proper integration capabilities for food level detection
- Jumper cables – Use quality wires to establish secure connections and prevent short circuits
- Voice recognition module – Select modules compatible with your microcontroller’s communication protocols
The Raspberry Pi offers robust processing power for complex voice commands, while the NodeMCU ESP8266 provides built-in Wi-Fi for remote monitoring capabilities.
Programming Microcontroller Software Setup
Once you’ve assembled your hardware components, programming the microcontroller becomes your next priority. Start by selecting an appropriate microcontroller like Arduino Uno or NodeMCU, then connect it to your computer using the proper USB cable.
Install the relevant IDE—Arduino IDE or PlatformIO—and configure it by adding essential libraries for Wi-Fi connectivity and servo control.
Write firmware code that connects your microcontroller to your Wi-Fi network using your SSID and password. Make sure it can communicate with external services like IFTTT or Adafruit.
Implement servo motor control logic, including food dispensing functions and feedback mechanisms like buzzers for notifications. Upload the completed code to your microcontroller, verify all connections are secure, and test functionality using Google Assistant commands.
Wiring the Servo Motor and Sensors
The servo motor forms the mechanical heart of your voice-activated feeder, but it requires careful electrical connections to function safely and reliably.
You’ll need to establish proper power distribution and signal pathways to guarantee smooth operation.
Here’s how to wire your servo motor and sensors:
- Connect the servo motor’s power wire to a dedicated external power supply, never directly to your Raspberry Pi, to prevent potential damage from power surges.
- Link the servo motor’s ground wire to a common ground shared between your power supply and Raspberry Pi.
- Attach the servo motor’s control wire to a designated GPIO pin using jumper cables for signal transmission.
- Wire your photocell sensor’s output to another GPIO pin for food level monitoring.
- Test all connections thoroughly before final assembly.
Creating Your Voice Assistant Developer Account
Before your pet feeder can respond to voice commands, you’ll need to establish a developer account with Amazon’s voice assistant platform. Visit https://developer.amazon.com/ and click “Sign In” or “Create an Account.” You’ll provide your name, email address, and password during registration.
| Step | Action | Emotion |
|---|---|---|
| 1 | Register account | Excitement builds |
| 2 | Verify email | Anticipation grows |
| 3 | Access developer console | Confidence emerges |
| 4 | Review ASK documentation | Understanding deepens |
| 5 | Begin Alexa Skill creation | Pride swells |
After registering, verify your email through Amazon’s confirmation link to activate your account. Once activated, log into the developer console to access the Alexa Skills Kit tools. Familiarize yourself with the ASK documentation—it’s essential for building your pet feeder’s Alexa Skill effectively.
Programming the Food Dispensing Logic
After establishing your developer account, you’ll need to program the core logic that controls when and how much food your pet feeder dispenses. This voice activated system requires precise coordination between hardware components and software commands.
Your programming tasks include:
- Writing Python code to interface with the servo motor for controlling dispensing mechanisms with exact portion control
- Implementing photocell sensor logic to monitor food levels and trigger low-supply alerts automatically
- Using RPi.GPIO libraries to manage Raspberry Pi GPIO pins for servo control and sensor input reading
- Creating timer functions for scheduled feeding times that users can customize through voice commands
- Testing dispensing logic with simulated Alexa Skill voice commands to verify proper system response
This foundation guarantees your voice activated pet feeder operates reliably and responds accurately to commands.
Configuring IFTTT for Voice Command Integration
You’ll need to create an IFTTT account using the same Google account that’s linked to your Android device for seamless integration.
Once logged in, you’ll set up a new applet by selecting Google Assistant as your trigger service and configuring a specific voice command like “Feed my pet.”
The final step involves connecting this trigger to your pet feeder’s webhook endpoint so voice commands can activate the feeding mechanism.
Creating IFTTT Account
Setting up your IFTTT account forms the foundation for voice-activated pet feeding automation. You’ll need to establish this connection before integrating Google Assistant with your pet feeder system.
Follow these essential steps to create your IFTTT account:
- Visit the IFTTT website and click the sign-up option
- Use your Google email ID that matches your Android device for seamless integration
- Complete the registration process and verify your email address
- Sign in to access your personal dashboard
- Familiarize yourself with the interface before creating applets
Once you’ve successfully logged in, you’ll see the dashboard where all your automation magic happens.
This IFTTT account serves as the central hub connecting your voice commands to your pet feeder’s actions, enabling hands-free feeding control.
Setting Up Applets
Now that your IFTTT account is active and ready, you can configure applets to bridge the gap between your voice commands and pet feeder actions.
Start by creating a new applet and selecting Google Assistant as your trigger service. You’ll configure a specific voice command phrase like “Hey Google, feed my pet” to activate the feeder.
Next, set up the action portion by choosing webhook as your service. This webhook will send a request to your pet feeder’s API, triggering food dispensing when you speak the command. Input your device’s API endpoint and required parameters.
Test your applet thoroughly to guarantee voice commands activate correctly and the webhook communicates successfully with your feeder.
Use IFTTT’s documentation for troubleshooting any configuration issues.
Configuring Voice Triggers
When configuring your voice triggers, start by signing in to IFTTT using the same Google email address that’s linked to your Android device. This guarantees seamless integration with Google Assistant for your pet feeder automation.
Follow these essential steps to configure your voice commands:
- Create a new applet and select Google Assistant as your trigger service
- Configure your trigger phrase, such as “Feed my pet” for voice activation
- Set up the webhook action to send requests to your pet feeder’s API endpoint
- Record the URL format including your API key and device name with GET method
- Test your voice command with Google Assistant to verify the feeder activates properly
This voice-controlled setup transforms feeding schedules into simple spoken commands.
Setting Up SSL Certificates and Security
Since your voice-activated pet feeder will handle sensitive data and remote commands, you’ll need to implement SSL certificates to encrypt the communication between your device and Alexa’s servers. Start by generating a self-signed certificate with PEM file, private key, and configuration file. Then update your Alexa Skill Configuration with these certificate details.
| File Type | Purpose | Location |
|---|---|---|
| PEM File | Certificate data | /ssl/cert.pem |
| Private Key | Encryption key | /ssl/private.key |
| CNF File | Configuration settings | /ssl/config.cnf |
| Server.xml | Tomcat SSL setup | /conf/server.xml |
| Catalina.out | Error logging | /logs/catalina.out |
Install the certificate on your server by editing Tomcat’s server.xml file, uncommenting the SSL port, and linking to your keystore. Verify endpoint accessibility and check catalina.out logs for troubleshooting.
Connecting to Cloud Services and APIs
With your SSL certificates properly configured, you’ll connect your voice-activated pet feeder to cloud services that bridge the gap between voice commands and device actions.
Start by creating accounts on platforms like Adafruit or Bolt Cloud to obtain essential API keys for device communication. These cloud services will serve as the central hub for managing your pet feeder remotely.
Next, configure your integration setup:
- Set up IFTTT applets linking Google Assistant or Alexa voice commands to your pet feeder’s cloud service
- Configure webhooks in IFTTT to send real-time requests to your cloud endpoint
- Confirm your NodeMCU or Raspberry Pi connects to the internet properly
- Establish MQTT or HTTP protocol communication with your chosen cloud service
- Test the voice assistant integration regularly for seamless automation
Testing Voice Commands and Motor Functions
How effectively does your voice-activated pet feeder respond to commands and execute feeding actions?
You’ll need to thoroughly test both voice recognition and motor functionality to guarantee reliable operation.
Start by using your Amazon Echo or Google Assistant device to issue commands like “feed my pet.”
Verify the system properly recognizes these phrases and triggers the feeding mechanism.
Test the servo motor manually to confirm it operates smoothly and dispenses the correct food amount.
Use Alexa testing tools or IFTTT applets to simulate various voice commands while monitoring your feeder’s responses.
Check your photocell sensor’s accuracy by testing its reaction to different food levels.
If you encounter issues, consult the catalina.out log for errors related to voice recognition or motor operation.
Mounting and Final Hardware Installation
Once you’ve verified that your voice commands and motor functions work correctly, you’ll need to secure all components into their final positions for reliable operation.
Start by installing your 3D printed components to create a stable foundation for your feeder:
Begin with your 3D printed parts to establish a solid, reliable base that will support your entire automated feeding system.
- Attach the servo motor to the motor mount using screws, ensuring it’s properly angled for smooth food dispensing into the bowl.
- Secure the bottle connector to hold your food container in the best position for consistent flow.
- Mount your NodeMCU or Raspberry Pi in a sheltered location, protecting it from moisture and direct sunlight.
- Position the sensor and camera with clear, unobstructed views of the food levels and bowl area.
- Reinforce all connections with screws and glue to enhance the feeder’s durability and long-term stability.
Troubleshooting Common Issues and Optimization
Even after careful assembly, your voice-activated pet feeder may encounter operational hiccups that require systematic diagnosis and fine-tuning. Start by verifying all components maintain proper power and grounding to prevent short circuits between your Raspberry Pi and servo motor. Regular connection checks prevent mechanical failures that could disrupt cat food dispensing.
| Issue | Solution |
|---|---|
| Voice commands not recognized | Test Alexa skill and IFTTT applet frequently |
| Food level detection problems | Clean photocell sensor, remove obstructions |
| SSL/connection errors | Check catalina.out log in Tomcat for diagnostics |
Keep your photocell sensor clean for accurate food level detection. Monitor the catalina.out log when troubleshooting SSL certificate issues during Alexa command testing. Test voice recognition regularly to verify seamless operation.
Frequently Asked Questions
How to Make an Automatic Pet Feeder?
You’ll need a microcontroller, servo motor, and food container. Program the microcontroller to control dispensing schedules, add sensors for monitoring food levels, and design a dispenser mechanism for reliable operation.
How Does a Smart Pet Feeder Work?
You control a smart pet feeder through voice commands to your virtual assistant. It monitors food levels with sensors, sends camera updates to your phone, and automatically schedules feedings for consistent routines.
What Is Automatic Pet Feeder?
An automatic pet feeder’s a device that dispenses food for your pets at scheduled times without manual intervention. You’ll control it through apps, voice commands, or sensors, ensuring your pet’s fed even when you’re away.
How Do I Connect My Pet Feeder to WIFI?
You’ll need a NodeMCU ESP8266 microcontroller with Wi-Fi capabilities. Code it with your network’s SSID and password, then connect to a cloud platform like Adafruit IO using an AIO key for remote access.


Leave a Reply