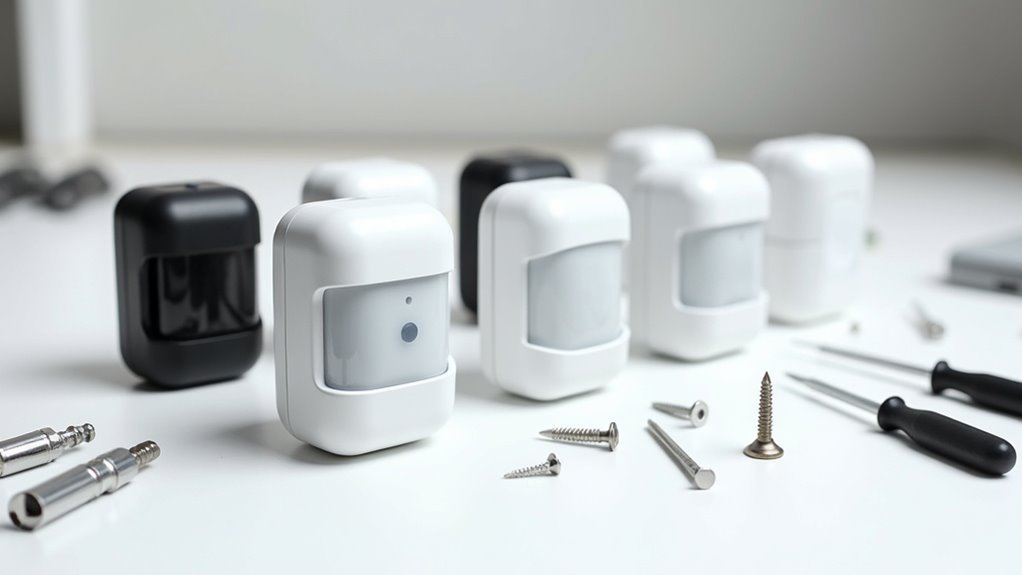
You’re likely exhausted from wrestling with complicated smart home setups that promise simplicity but deliver hours of frustration. The right Zigbee motion sensor can transform your space into an intelligent environment that responds instantly to your presence, but only if you choose wisely and install it correctly. Most homeowners make critical mistakes during the selection process that cost them time, money, and their sanity—mistakes that could’ve been easily avoided.
Philips Hue Motion Sensor Setup and Configuration
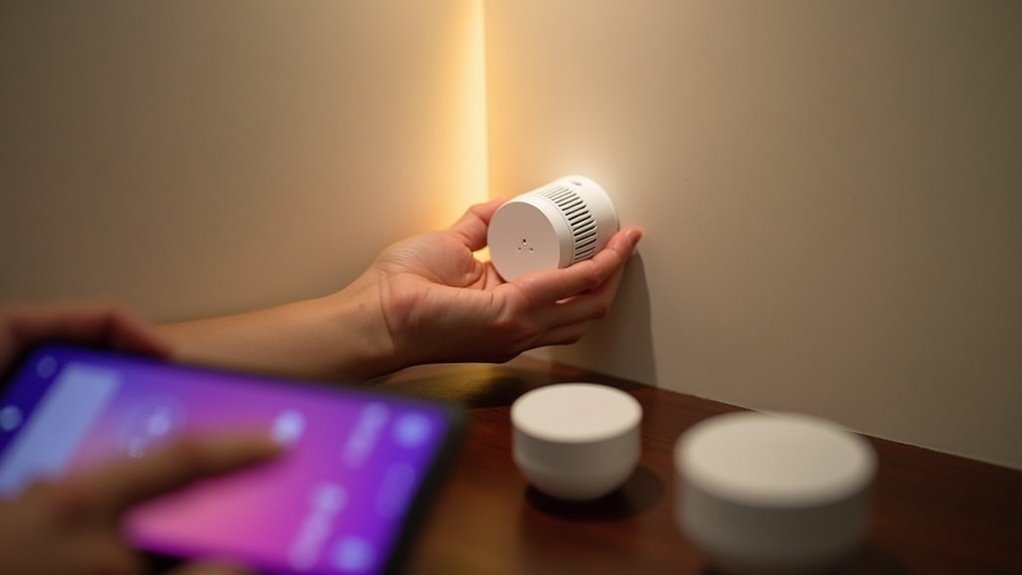
Getting your Philips Hue Motion Sensor up and running takes just a few simple steps. First, install the AAA batteries and use the included mounting bracket to position your sensor in the desired location. The bracket’s flexible design lets you install it anywhere without additional tools.
Install AAA batteries, attach the flexible mounting bracket to your desired location, and position your sensor without needing any additional tools.
For the Philips Hue motion sensor setup, simply press the reset button to initiate pairing with your smart home hub. The sensor seamlessly integrates with the Philips Hue ecosystem and other Zigbee devices for complete automation.
You’ll want to adjust the customizable cooldown period to match your preferences. This feature controls how long the sensor waits before detecting motion again.
The straightforward setup process means you’ll have your motion sensor working within minutes.
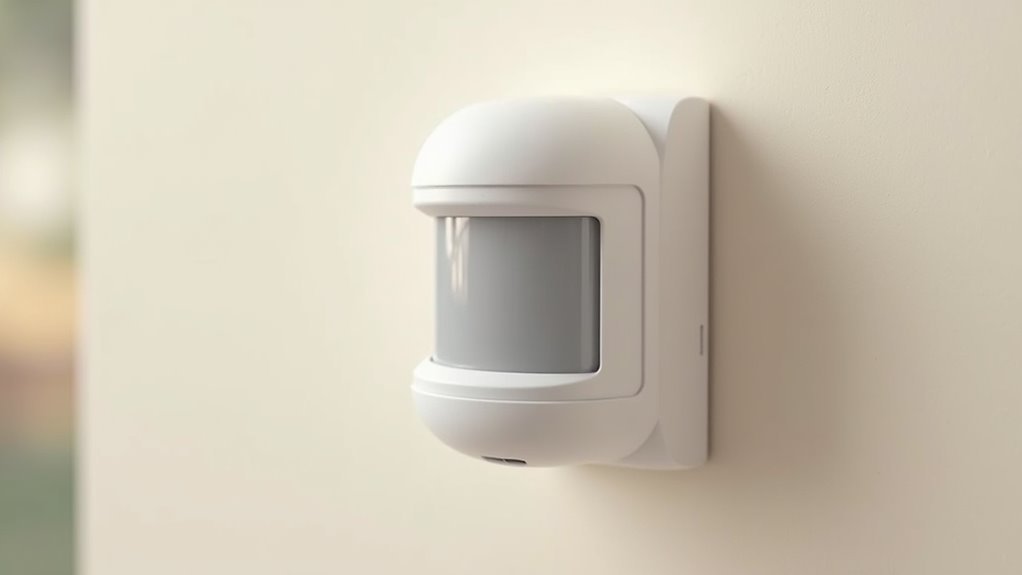
ThirdReality Pet-Immune Motion Sensor Installation
You’ll find that the ThirdReality Pet-Immune Motion Sensor’s angled design specifically reduces false triggers from your pets while maintaining reliable human detection.
The sensor’s mounting bracket makes installation straightforward, letting you position it on walls or ceilings at the ideal angle for your space.
This thoughtful design guarantees you won’t deal with constant false alarms from your furry friends moving around the house.
Pet-Immune Design Features
When installing the ThirdReality Pet-Immune Motion Sensor, you’ll benefit from several specialized design features that distinguish it from standard motion detectors.
The angled sensor represents the core of its pet-immune design features, strategically positioned to minimize false triggers from household pets while maintaining accurate detection of human movement.
You’ll appreciate the tamper alert system that immediately notifies you if someone removes or interferes with the sensor, providing enhanced security monitoring.
The AAA battery configuration guarantees you can quickly replace power sources without complicated procedures or extended downtime.
Additionally, the adjustable mounting bracket gives you positioning flexibility to optimize coverage areas while preserving the pet immunity function, allowing you to fine-tune detection zones based on your specific room layout and pet behavior patterns.
Mounting Bracket Setup
Three simple steps complete the mounting bracket setup for your ThirdReality Pet-Immune Motion Sensor, starting with selecting the ideal wall location that’s 6-8 feet above ground level.
The mounting bracket’s design eliminates the need for special tools, making installation straightforward for any homeowner. You’ll appreciate how the bracket’s adjustable positioning lets you tilt the sensor to achieve optimal detection angles based on your room’s layout.
- Position the mounting bracket at your chosen location and mark screw holes with a pencil
- Secure the bracket to the wall using appropriate screws for your wall type
- Insert AAA batteries into the sensor before final mounting to avoid future removal
- Attach the sensor to the mounted bracket and adjust the angle for maximum coverage
Linkind Motion Sensor With Tamper Alert Features
You’ll find the Linkind Motion Sensor stands out with its tamper alert technology that immediately notifies you when someone removes the device from its mounted position.
The sensor runs on standard AAA batteries, making replacements quick and affordable while minimizing any downtime.
Setup couldn’t be easier thanks to the simple reset button that streamlines the pairing process with your Zigbee hub.
Tamper Alert Technology
Although motion sensors excel at detecting movement, the Linkind motion sensor takes security a step further with its advanced tamper alert technology.
This innovative feature sends instant notifications when someone attempts unauthorized removal, creating an additional security barrier that traditional sensors can’t provide.
The tamper alert technology proves especially valuable in high-risk areas where intruders might try disabling your security system.
You’ll receive immediate alerts if someone tampers with your sensor, allowing you to respond quickly to potential threats.
- Instant notifications alert you when unauthorized removal is detected
- Enhanced protection specifically designed for high-risk areas and vulnerable locations
- Additional security layer that works alongside standard motion detection capabilities
- Quick response capability enables immediate action against tampering attempts
Battery and Setup
Beyond these impressive security features, the Linkind motion sensor’s practical design makes it accessible for any homeowner to install and maintain.
You’ll appreciate the AAA battery system that guarantees easy replacement when needed, contributing to extended battery life without complicated charging procedures. The straightforward setup process features a simple reset button that streamlines pairing with your Zigbee hub, eliminating technical headaches during installation.
The included mounting bracket provides flexible placement options, allowing you to position the sensor strategically for ideal motion detection coverage.
You won’t struggle with complex wiring or professional installation requirements. Simply mount the sensor, press the reset button, and connect it to your smart home system.
This user-friendly approach means you’ll have enhanced security monitoring operational within minutes of unboxing.
AGSHome Motion Sensor Battery Management
Three AAA batteries power the AGSHome Motion Sensor, delivering extended operation that minimizes replacement frequency and maintenance hassles.
You’ll appreciate the straightforward battery management design that balances performance with energy efficiency. The built-in on/off switch lets you conserve power when the sensor isn’t needed, extending battery life even further.
Setting up your sensor is hassle-free with the simple pairing process and convenient reset button for quick configuration.
When it’s time for battery replacement, you can easily access the compartment without tools or complicated procedures.
Key battery management features include:
- On/off switch for power conservation during inactive periods
- Easy-access battery compartment for quick AAA replacement
- Extended battery life reducing maintenance frequency
- Energy-efficient design optimizing power consumption
Itead Sonoff SNZB-03 Wide-Angle Installation

The Itead Sonoff SNZB-03 takes a different approach to motion detection with its wide-angle lens that expands coverage for larger spaces. Among zigbee motion sensors, this model stands out for its broader detection range, making it perfect for monitoring expansive rooms or open areas.
| Feature | Specification |
|---|---|
| Battery Type | CR2450 coin cell |
| Pairing Method | Reset button + SIM tool |
| Mounting Options | Adhesive tape or screws |
| Dedicated Holes | Not available |
| Reliability | Inconsistent performance |
You’ll find the pairing process straightforward—simply use the reset button with a SIM card tool. However, installation options are somewhat limited since there aren’t dedicated mounting holes. You can use adhesive tape or screws, but be aware that reliability issues may affect your automation setups.
Aqara/Xiaomi RTCGQ11LM Multi-Sensor Setup
While most zigbee motion sensors focus solely on movement detection, Aqara’s RTCGQ11LM takes a multi-functional approach by combining motion sensing with ambient light measurement capabilities.
This compact sensor operates on a CR2450 battery that you can easily replace when needed. The built-in lux sensor adds valuable functionality for automations that depend on lighting conditions.
Setting up your Aqara/Xiaomi RTCGQ11LM is straightforward thanks to its dedicated reset button, which streamlines the pairing process with your smart home hub.
The included mounting sticker lets you position it anywhere without requiring additional tools.
- Combines motion detection with ambient light sensing
- Features easy CR2450 battery replacement
- Includes temperature sensing for enhanced automation
- Consider cooldown periods when planning automation responses
SmartThings Aeotec Motion Sensor Integration
You’ll find the SmartThings Aeotec Motion Sensor offers straightforward pairing that doesn’t require special flashing or complicated setup procedures.
The sensor works seamlessly with multiple hub options, including SmartThings and Amazon Echo platforms, giving you flexibility in your smart home ecosystem.
Let’s walk through the specific pairing steps and explore which hubs provide the best compatibility for your automation needs.
Pairing Process Steps
Success with your SmartThings Aeotec Motion Sensor integration begins with proper preparation of your hub.
You’ll need your SmartThings hub powered on and connected to your Wi-Fi network before starting the pairing process.
The pairing process involves these essential steps:
- Open the SmartThings app and tap the “+” icon to add a new device
- Select “Scan” to search for nearby Zigbee devices in your area
- Press the reset button on your Aeotec Motion Sensor when prompted during detection
- Follow the on-screen instructions to complete the connection successfully
After pairing, you’ll configure your sensor settings through the app, adjusting sensitivity and cooldown periods.
Test the functionality by walking within the detection range to verify it triggers your intended automations or notifications properly.
Hub Compatibility Options
Once you’ve mastered the pairing process, understanding which hubs work with your Aeotec Motion Sensor becomes your next priority. The SmartThings hub stands out among hub compatibility options, offering seamless Zigbee integration with your Aeotec Motion Sensor.
You’ll benefit from local processing capabilities, ensuring your motion detection continues working even when your internet connection drops.
Within the SmartThings app, you can customize essential settings like motion sensitivity and cooldown periods to match your specific needs. The platform’s automation features let you create sophisticated triggers based on motion detection, enhancing both security and energy management throughout your home.
This compatibility makes SmartThings an excellent choice for maximizing your Aeotec Motion Sensor’s potential in your smart home ecosystem.
Ouvopo Motion Sensor Pairing Process
Setting up your Ouvopo motion sensor requires a straightforward pairing process that connects the device to your Zigbee hub. The sensor identifies as eWelink MS01 or eWelink SNZB-03 in ZHA, making it compatible with most Zigbee networks.
Follow these steps for successful Ouvopo motion sensor pairing process:
- Power and position – Confirm your sensor is powered and within range of your Zigbee hub before beginning the pairing sequence.
- Activate pairing mode – Press the reset button on your Ouvopo sensor to initiate pairing mode, which stays active for several minutes.
- Add through hub app – Open your Zigbee hub’s application and select the option to add a new device, then wait for detection.
- Test functionality – Verify successful pairing by checking the sensor’s status and testing motion detection capabilities.
Screek Human Sensor 2A Zone Configuration
Advanced zone configuration transforms how your Screek Human Sensor 2A detects and responds to motion throughout your space.
The LD2450 sensor enables precise zone definition, letting you create specific monitoring areas that reduce false alerts from unwanted motion detection.
Precise zone definition creates specific monitoring areas that eliminate false alerts from unwanted motion detection throughout your space.
You’ll access zone configuration through the sensor’s configuration menu, where you can customize detection zones according to your room layout and automation needs.
This targeted approach prevents triggers from pets walking outside designated areas or movement in adjacent rooms.
The sensor’s zone differentiation capabilities enhance your smart home automation by enabling location-specific responses.
For instance, you can set different lighting scenes based on which zone detects motion.
Research user guides and community experiences to optimize your zone configuration setup for maximum effectiveness and reliability.
LD2410C Mmwave Sensor Wiring and Calibration
The LD2410C mmWave radar sensor demands careful attention to both wiring connections and calibration settings to achieve reliable motion detection in your smart home setup.
You’ll need to solder connections between the LD2410C and your ESP32 microcontroller for proper signal processing. Position the sensor near a power source since it requires constant power to function effectively.
Unlike standard motion sensors, the LD2410C detects movement through walls and obstacles, making it versatile for various smart home applications.
Proper calibration involves adjusting detection range and sensitivity based on your specific environment and intended use.
- Consult detailed wiring diagrams before making connections
- Place sensor near power sources to avoid wiring complications
- Adjust detection range and sensitivity during calibration process
- Use ESP32 microcontroller for signal processing and smart home integration
Frequently Asked Questions
Where Is the Best Place to Put the Motion Sensor on Simplisafe?
You’ll get the best results by mounting your Simplisafe motion sensor in a corner, 7-8 feet high, facing high-traffic areas like doorways. Avoid heat sources and obstructions that’ll interfere with detection.
Do You Need an Electrician to Install a Motion Sensor Light?
You don’t need an electrician for most motion sensor lights. Battery-operated and wireless models require only basic tools like screwdrivers. However, you’ll want professional help for hardwired installations requiring electrical connections.
What Is the Range of the Zigbee Motion Sensor?
You’ll get 20-30 feet of detection range in open spaces with most Zigbee motion sensors. Walls and furniture reduce this distance, while the field of view typically spans 110-180 degrees for broad coverage.
How to Pair a Zigbee Motion Sensor?
Put your motion sensor in pairing mode by pressing its reset button. Keep it close to your Zigbee hub, then use your hub’s app to search for new devices and select the detected sensor.


Leave a Reply