You’ve probably watched countless Ring doorbell installation videos, yet your project still feels overwhelming or didn’t go as planned. The truth is, most tutorials skip the critical steps that separate a frustrating weekend project from a smooth, professional-looking installation. While the basic process seems straightforward, there are specific techniques and common pitfalls that can make or break your success—and knowing which steps actually matter will save you hours of troubleshooting.
Gather Essential Tools and Equipment
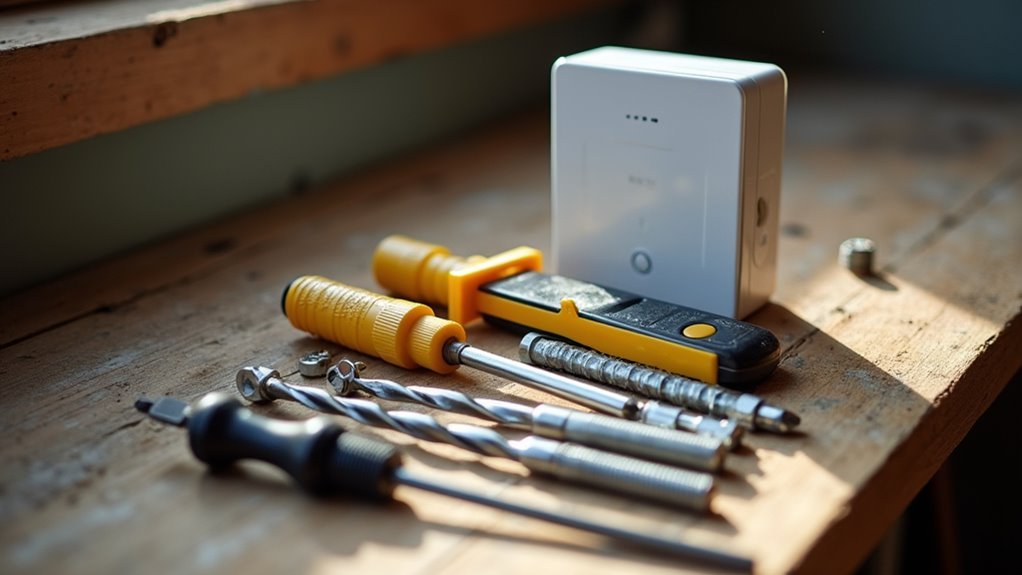
Before installing your Ring doorbell, you’ll need several essential tools to confirm a smooth setup process.
Start with a PH2 Phillips screwdriver for removing your old doorbell and securing the new mounting bracket. You’ll also need a box cutter or flathead screwdriver for additional installation tasks.
A PH2 Phillips screwdriver is your primary tool for doorbell removal and bracket installation tasks.
If you’re mounting on brick, stucco, or concrete surfaces, grab a masonry drill bit to create holes for wall anchors. A level tool verifies your mounting bracket sits perfectly straight during installation.
Your Ring doorbell kit includes a screwdriver, screws, charging cable, and detailed instructions.
Before starting, check your existing doorbell system’s compatibility if you’re connecting to an existing chime – it should operate between 10-24 volts AC for proper functionality.
Charge the Built-in Battery Completely
Before installing your Ring Doorbell, you’ll need to charge the built-in battery completely using the provided orange USB cable.
Connect the cable and allow approximately 4 to 6 hours for a full charge, monitoring the power indicator lights throughout the process.
The red charging light will turn off when the battery reaches full capacity, signaling you’re ready to proceed with installation.
Battery Charging Duration
One essential step you’ll need to complete involves charging your Ring Doorbell’s built-in battery for 4 to 6 hours to achieve a full charge. The charging duration confirms your device operates efficiently once installed. You’ll monitor the status lights during this process to track progress.
| Charging Stage | Light Color | Status |
|---|---|---|
| In Progress | Red | Battery charging |
| Complete | Green | Ready for use |
| Installation | Off | Battery is fully charged |
Before you install your Ring doorbell, verify the battery shows a green light. This charging duration guarantees peak performance from the start. Regular charging every few months maintains functionality based on your usage patterns. Don’t rush this step—proper charging prevents setup interruptions and assures reliable operation.
Charging Cable Connection
Now that you understand the charging timeline, you’ll connect the provided orange USB cable to begin the charging process. The charging cable connection is straightforward and essential for proper battery preparation before installation.
Here’s how to establish the charging cable connection:
- Locate the orange USB cable that came with your Ring Doorbell package
- Connect one end to your Ring Doorbell’s charging port
- Plug the other end into any available power source like a wall adapter or computer
- Verify the red light appears indicating the battery is receiving power
Once you’ve secured the charging cable connection, the battery will begin charging immediately.
You’ll see a red light during charging, which will turn green when complete. Wait for the red light to turn off completely before proceeding with installation.
Power Indicator Lights
After connecting your charging cable, you’ll notice specific power indicator lights that communicate your Ring Doorbell’s charging status. These lights are essential for determining when your device has sufficient power for installation.
The charging process is indicated by red and green lights that show your battery’s current state. You’ll see a red light during charging, which will turn off when the battery is fully charged. This visual confirmation guarantees you don’t proceed with installation prematurely.
| Light Color | Status | Action Required |
|---|---|---|
| Red | Charging in progress | Wait for completion |
| Red off | Fully charged | Ready for installation |
| Green | Battery healthy | Continue charging |
| No light | Connection issue | Check cable |
| Flashing red | Low battery | Extended charging needed |
Always confirm your battery’s charged status before installation to prevent malfunctions.
Download and Set Up the Ring App
Before you can control and monitor your Ring Doorbell, you’ll need to download the official Ring app on your smartphone or tablet.
Getting started is straightforward. Access the App Store for iOS devices or Play Store for Android devices and search for “Ring.” Alternatively, visit ring.com/app on your mobile device for direct access.
Follow these steps to complete setup:
- Download the Ring app and create your account when prompted.
- Open the app and tap “Set Up a Device” at the bottom of the main dashboard.
- Locate the QR code on your Ring Doorbell’s back or under the removable faceplate.
- Scan the QR code within the Ring app and follow in-app instructions to connect to Wi-Fi.
This process guarantees your doorbell integrates seamlessly with your smartphone.
Turn Off Power at the Circuit Breaker
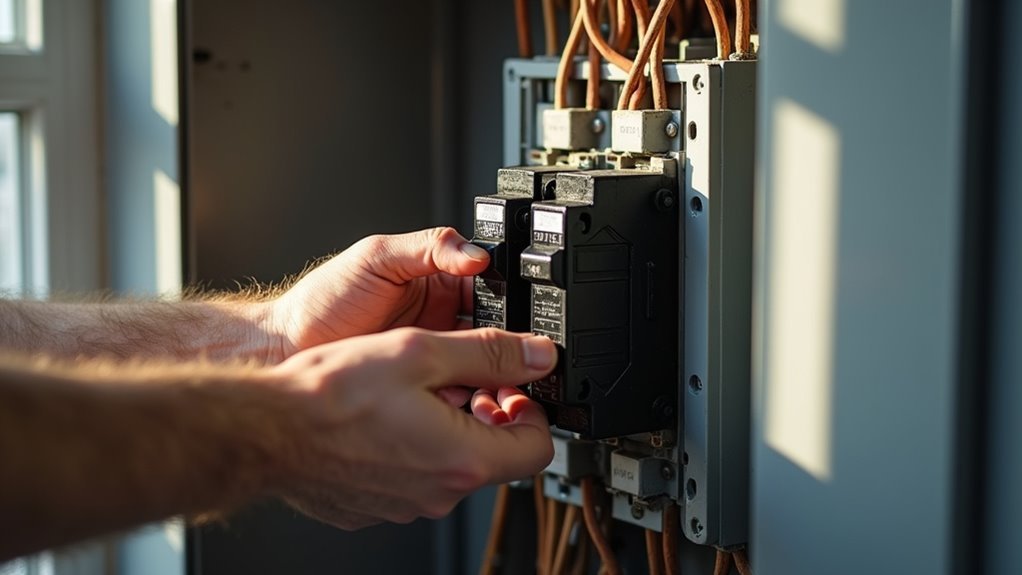
Before handling any electrical connections, you’ll need to locate your home’s circuit breaker box and identify the breaker that controls your doorbell’s power supply.
Flip the appropriate breaker to the “off” position, then test your existing doorbell by pressing the button to confirm there’s no power flowing to the circuit.
This essential safety step protects you from electrical shock and prevents potential damage to your new Ring Doorbell during installation.
Locate Circuit Breaker Box
Why is turning off the power the most critical step in your Ring Doorbell installation? Safety must come first when working with existing doorbell wires and electrical components.
Finding your circuit breaker box is essential before you can properly turn off power to prevent electrical shock or damage.
Here’s how to locate and use your circuit breaker box:
- Find the main panel – Check basements, garages, utility rooms, or exterior walls where the electrical service enters your home.
- Identify the correct breaker – Look for labels indicating doorbell circuits or the area you’re working in.
- Switch off the appropriate breaker – Flip the designated circuit breaker to the “off” position.
- Verify power is off – Use a voltage tester on the wires to confirm no electrical current flows.
Confirm Power Is off
After switching off the circuit breaker, you must verify that electrical current no longer flows through your doorbell system. Press your existing doorbell button to confirm power is off—it shouldn’t produce any sound or activate. This simple test guarantees you’ve identified the correct circuit breaker switch.
For added safety during electrical work, use a non-contact voltage tester on all wires you’ll handle during installation. This device detects electrical current without requiring direct contact, providing an extra layer of protection.
If you don’t have an existing doorbell system, still verify the main breaker is off using the voltage tester.
Never skip this verification step, as working with live electrical components poses serious safety risks. Proper confirmation protects you throughout the installation process.
Safety Precautions Required
Power safety extends beyond simple verification—you need thorough precautions throughout your Ring Doorbell installation. Taking proper electrical work safety measures protects you from potential hazards and guarantees a successful installation.
Follow these essential safety steps:
- Turn off power at the circuit breaker or fuse box before beginning any work on your doorbell wiring.
- Verify the breaker’s properly labeled to prevent accidental power restoration while you’re working on the installation.
- Use a voltage tester on existing doorbell wires to confirm no electrical current remains present before handling.
- Exercise caution throughout the entire process, even if no existing doorbell system requires disconnection.
Remember to restore power only after completing the installation to activate your Ring Doorbell properly.
Remove Your Existing Doorbell Button
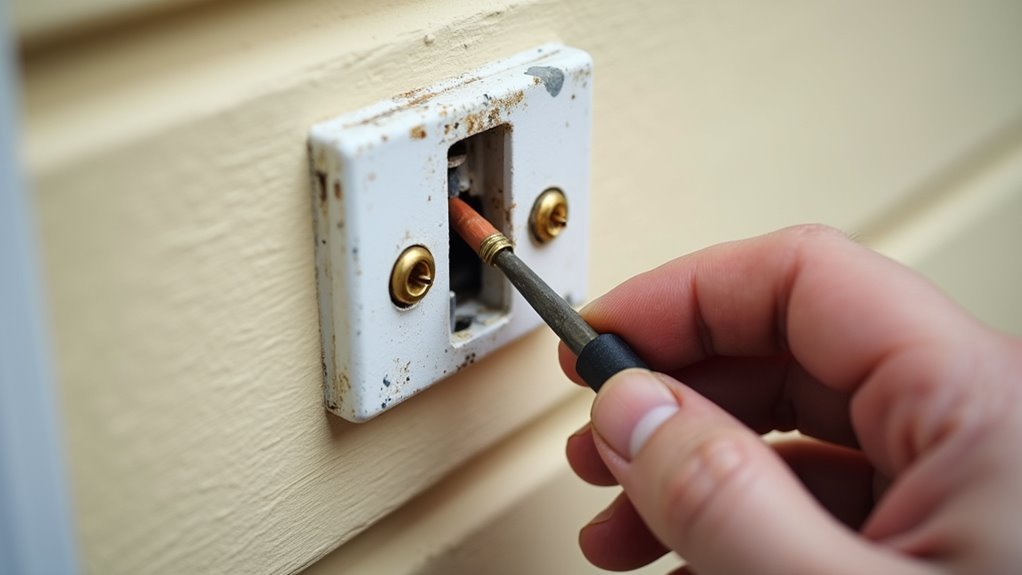
Before installing your new Ring Doorbell, you’ll need to safely remove your current doorbell button from the wall. Start by turning off power at the circuit breaker to prevent electrical shock. Use a screwdriver or box cutter to carefully remove the faceplate, exposing the mounting screws beneath.
| Step | Tool Needed | Action Required |
|---|---|---|
| 1 | Circuit Breaker | Turn off power |
| 2 | Screwdriver/Box Cutter | Remove faceplate |
| 3 | Screwdriver | Unscrew from wall |
| 4 | Screwdriver | Detach wires from terminals |
Unscrew the existing doorbell button from the wall while keeping wires accessible. Loosen the terminal screws to detach wires, noting their positions for reconnection. Remove all components, including mounting brackets, before proceeding with your Ring installation.
Mark and Prepare the Mounting Location
With the old doorbell button removed and wires exposed, you’re ready to position your new Ring Doorbell for mounting. Proper placement guarantees ideal performance and functionality.
- Position the mounting bracket approximately four feet above ground level, confirming it’s perfectly level before proceeding with any marking.
- Mark the location by using your Video Doorbell as a template, holding it against the wall to identify exact screw hole positions for accurate placement.
- Drill the holes at marked locations, using appropriate drill bits for your wall material to guarantee clean, properly-sized openings.
- Install wall anchors if mounting on stucco, brick, or concrete surfaces to provide secure attachment points for the mounting bracket screws.
Install Wall Anchors for Hard Surfaces
When installing your Ring Doorbell on hard surfaces like brick, concrete, or stucco, you’ll need to select the right wall anchors for your specific material.
Use a masonry drill bit that matches the anchor size provided in your installation kit to create precise pilot holes at the marked locations.
Proper hole sizing guarantees your anchors fit snugly and won’t compromise the mounting bracket’s stability.
Choose Proper Anchor Type
The type of wall anchor you select determines whether your Ring Doorbell stays securely mounted or eventually pulls away from the surface.
Different hard surfaces require specific anchor types to achieve a secure fit that’ll withstand daily use and weather conditions.
Here’s how to choose the right anchor type:
- Toggle bolts – Best for hollow masonry or thick stucco walls where the anchor can expand behind the surface.
- Masonry anchors – Ideal for solid concrete, brick, or dense stone surfaces that need direct drilling.
- Weight-rated anchors – Always verify the anchor’s weight capacity matches your Ring Doorbell model’s specifications.
- Size compatibility – Confirm your masonry bit matches the anchor diameter for proper hole preparation before installing the mounting bracket.
Follow manufacturer guidelines for ideal anchor selection and long-lasting installation results.
Drill Precise Pilot Holes
Precise pilot holes form the foundation of a secure Ring Doorbell installation on hard surfaces like brick, concrete, or stucco.
You’ll need a masonry bit specifically designed for these tough materials to drill holes effectively without damaging your surface.
Start by positioning the mounting bracket as a template and mark each screw location with a pencil.
When you drill holes, maintain steady pressure and use the masonry bit at a moderate speed to prevent overheating.
Make sure each hole matches the depth of your wall anchors.
Once you’ve finished drilling, insert the wall anchors completely into each pilot hole.
They should sit flush with the surface before you install the mounting screws to secure your Ring Doorbell bracket properly.
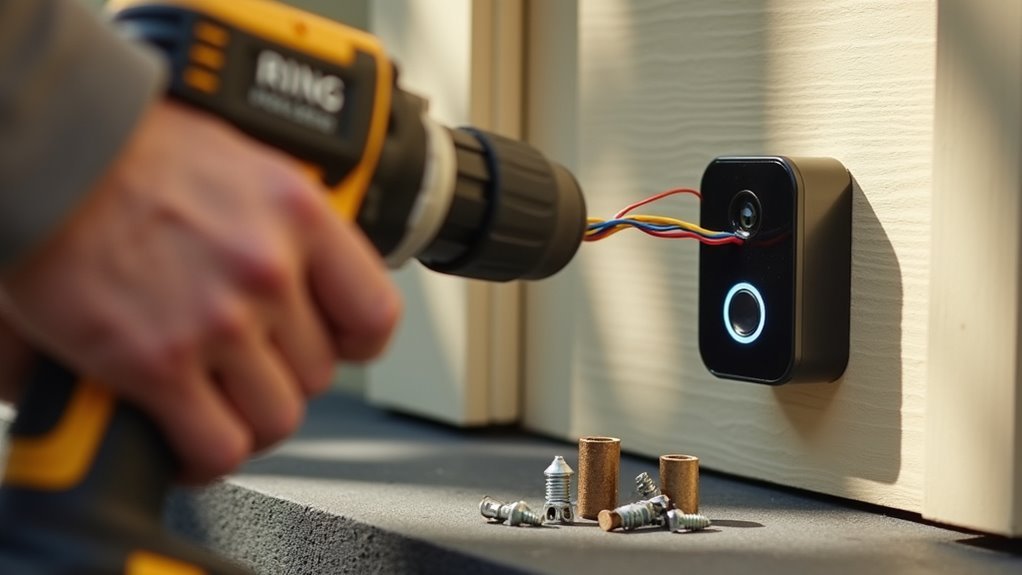
Attach the Mounting Bracket Securely
Position the mounting bracket against your chosen installation surface and use it as a template to mark the screw hole locations with a pencil or marker. This guarantees proper alignment during the installation process.
For different surface types, you’ll need specific approaches to achieve a secure mounting:
- Hard surfaces (stucco, brick, concrete) – Drill holes at marked locations and insert appropriate wall anchors before securing the bracket with screws from Bag A.
- Height positioning – Install the mounting bracket approximately four feet above ground level for best camera functionality and user accessibility.
- Level verification – Use a level tool to confirm the bracket is straight before tightening screws completely to prevent misalignment issues.
- Final inspection – Double-check that the bracket is firmly attached to avoid detachment risks when installing your doorbell unit.
Connect Doorbell Wires to Terminals
Before connecting any wires, you’ll need to turn off the power at your circuit breaker to eliminate electrical hazards during installation.
Once the power’s off, loosen the screws on your Ring Doorbell’s back panel to access the terminals.
Carefully wrap each doorbell wire around its corresponding terminal screw, ensuring the bare wire makes secure contact with the screw.
Keep wires separated to prevent them from touching each other, which could cause a short circuit or malfunction.
Before making connections, confirm your doorbell system supplies between 8 to 24 VAC for compatibility.
Using incorrect voltage can damage your device.
Once positioned properly, tighten the terminal screws firmly to hold the wires in place and prevent disconnection during operation.
Mount the Ring Doorbell to Bracket
Align your Ring Doorbell with the mounting bracket and hook it onto the top tab to begin the attachment process. This initial step guarantees proper positioning before completing the secure installation.
- Position the device – Hook the Ring Doorbell onto the mounting bracket’s top tab, guaranteeing correct alignment with the bracket’s structure.
- Pivot downward – Gently rotate the doorbell down until it sits completely flush against the mounting bracket surface.
- Secure with screws – Use the star-shaped screws from Bag B and the included screwdriver to tighten the device firmly to the bracket.
- Verify installation – Double-check that your doorbell is level, unobstructed, and securely attached to prevent detachment or functionality issues.
Secure With Star-Shaped Security Screws
Once you’ve mounted your Ring Doorbell to the bracket, the star-shaped security screws provide the final layer of protection against theft and tampering.
These T6-sized screws create a secure connection that standard tools can’t easily remove, making your installation considerably more theft-resistant.
Use only the screwdriver included in your Ring Doorbell kit for this step.
The star-shaped screws require precise handling – tighten them until they’re snug but don’t over-tighten, as this could damage your device.
The unique star design makes unauthorized removal extremely difficult while ensuring your doorbell stays firmly attached to the mounting bracket.
This final securing step completes your installation and gives you confidence that your Ring Doorbell will remain safely in place.
Restore Power and Test Functionality
With your Ring Doorbell securely fastened, it’s time to restore power at the circuit breaker and bring your device online. This critical step activates your doorbell and confirms proper installation.
- Restore power at the circuit breaker to supply electrical current to your Ring Doorbell.
- Wait for startup indicators – your device will light up and speak when ready for configuration.
- Connect to your Wi-Fi network through the Ring app and verify video quality appears clear.
- Test functionality by pressing the doorbell button and confirming you receive notifications with live video feed.
If you’re experiencing weak connectivity, consider repositioning your router closer or installing a Wi-Fi extender.
Your Ring Doorbell requires stable internet connection for peak performance and reliable security monitoring.
Connect to WiFi and Configure Settings
Establishing a reliable WiFi connection forms the foundation of your Ring Doorbell’s smart functionality.
You’ll need your WiFi password ready before beginning the setup process. Press the setup button on your doorbell to initiate connection mode, then open the Ring app on your smartphone.
Scan the QR code located on the doorbell’s back or under the removable faceplate when prompted. Select “The white light is spinning” to join the Ring network temporarily.
Next, choose your home WiFi from the available networks and enter your password carefully.
The app will guide you through the complete configuration process. Allow time for automatic software updates to guarantee peak performance.
Customize your settings by adjusting notification preferences and exploring additional features to enhance your doorbell’s functionality and your overall user experience.
Optimize Camera Angle and Performance
After completing your WiFi setup and configuration, you’ll want to fine-tune your doorbell’s physical positioning for maximum effectiveness.
Proper camera angle adjustment guarantees you capture clear footage of visitors while maintaining reliable performance. Your installation height and positioning directly impact both video quality and device functionality.
- Mount at ideal height – Position your Ring Doorbell approximately four feet above ground level to achieve the best camera angle and minimize door frame obstructions.
- Test camera angle in real-time – Use the Ring app to preview your view before finalizing the mounting position, allowing immediate adjustments.
- Add angle correction – Consider a Wedge Kit for downward angling to capture better visitor footage and reduce sunlight glare.
- Monitor Wi-Fi signal strength – Regularly check performance through the app and adjust router placement if needed.
Frequently Asked Questions
How Do You Install a Ring Doorbell Step by Step?
You’ll charge the battery for 4-6 hours, disconnect power at the breaker, remove your old doorbell, mark and drill mounting holes, connect the wires, mount the device, and test functionality.
Do You Need an Electrician to Put in a Ring Doorbell?
You don’t need an electrician for basic Ring Doorbell installations with existing wiring. However, you should hire one if you’re uncomfortable with electrical work or local codes require professional installation.
What Is the Drawback of a Ring Camera?
You’ll face Wi-Fi dependency issues, privacy concerns with cloud storage, ongoing subscription costs, limited battery life requiring frequent charging, and false motion alerts that create unnecessary notifications and potential security problems.
How Does a Ring Doorbell Work Without a Subscription?
You’ll get live video feeds, real-time notifications, two-way audio, and motion detection without paying. However, you can’t access cloud storage, save clips long-term, or use advanced sharing features.


Leave a Reply