
You’re probably tired of manually watering your garden or forgetting to turn off sprinklers that flood your lawn. A HomeKit garden watering system can solve these problems by automating your irrigation while giving you complete control from your iPhone. However, installing one isn’t as straightforward as plugging in a smart speaker—you’ll need to navigate compatibility issues, pressure requirements, and network connectivity challenges that could make or break your setup.
Selecting Compatible HomeKit Irrigation Controllers
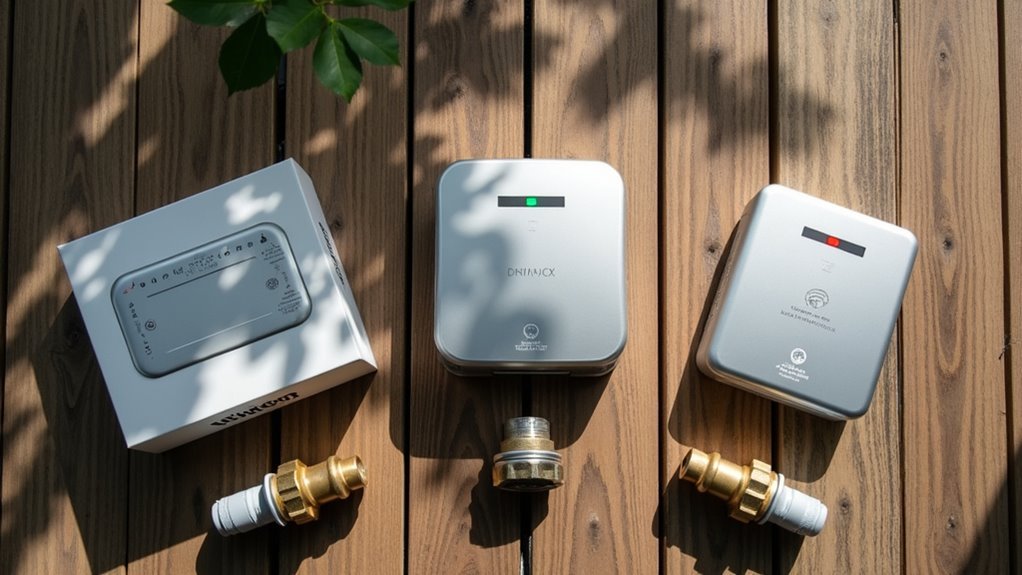
Before diving into installation, you’ll need to choose a HomeKit-compatible irrigation controller that meets your garden’s specific needs. The Eve Aqua stands out as an excellent option, costing around £120 and supporting both indoor and outdoor watering applications.
The Eve Aqua irrigation controller offers versatile HomeKit compatibility for both indoor and outdoor garden watering needs at £120.
When selecting your irrigation controller, ascertain it’s compatible with a HomeKit hub like Apple TV or HomePod for seamless remote access and automation.
Look for controllers offering scheduled watering routines, water consumption tracking, and zone-specific control to reduce waste. Advanced models integrate with weather data, automatically adjusting watering based on rainfall and temperature.
Some controllers also monitor soil moisture levels for ideal plant health. Research user reviews and community feedback to understand real-world performance before making your final decision.
Setting Up Your Smart Water Controller Device
Once you’ve selected your HomeKit irrigation controller, you’ll start by creating a Y-junction at your main water tap to split the water flow between your regular garden hose and the smart watering system. Install the master ON/OFF switch for manual control when needed.
| Component | Purpose | Connection Method | Cost | Notes |
|---|---|---|---|---|
| Y-junction | Split water flow | Direct tap attachment | £8-12 | Essential for dual use |
| Eve Aqua | Smart water control | Butterfly clip to micro-hose | £100 | HomeKit compatible |
| Irrigation kit | Hose distribution | Various connectors | £24 | Flexible plant routing |
| Micro-hose system | Targeted watering | Clip connections | £15-20 | Precise water delivery |
| HomeKit hub | Automation control | WiFi network | £99+ | Required for remote access |
Connect your Eve Aqua using the butterfly clip to guarantee ideal water pressure throughout your irrigation system.
Connecting to Wi-Fi and HomeKit Networks

With your Eve Aqua physically installed and water connections secured, you’ll need to establish the digital bridge between your smart controller and Apple’s ecosystem.
First, verify your irrigation system is powered on and connected to your Wi-Fi network, as this stable connection enables remote control and automation features essential for smart home integration.
Open the Home app on your iPhone or iPad and add the watering system by scanning the HomeKit setup code found on the device or packaging.
Confirm your HomeKit hub is connected to the same network for seamless automation.
- Check that firmware is updated for ideal HomeKit compatibility
- Verify your Apple TV or HomePod hub maintains stable connectivity
- Create irrigation automations directly within the Home app interface
Installing Solenoid Valves and Water Components
You’ll need to select the right solenoid valve and set up proper water connections to control your irrigation system effectively.
A normally closed brass solenoid valve running on 230v works best since it opens when powered and automatically closes when power’s removed for safety.
Your mounting setup and connection quality will determine how reliably your automated watering system performs over time.
Valve Selection and Specifications
When building your HomeKit garden watering system, selecting the right solenoid valve forms the foundation of reliable automated irrigation. Your valve selection should prioritize a normally closed brass solenoid valve operating on 230V for peak performance and safety. This configuration guarantees the valve opens when powered and automatically closes when power’s removed, preventing water waste and providing fail-safe operation.
Key specifications for your solenoid valve include:
- Normally closed brass construction – Provides durability and automatic shutoff during power failures
- 230V operation – Delivers sufficient power for reliable valve actuation in garden applications
- Three-wire connection capability – Enables proper integration with your HomeKit automation controller
Choose a valve rated for your water pressure and flow requirements to guarantee consistent irrigation water delivery throughout your garden zones.
Mounting and Connection Setup
Three critical considerations guide successful solenoid valve installation: proper mounting location, secure water connections, and leak prevention measures. Mount your solenoid valve outside using a 3D printed bracket for ideal positioning and flood prevention. Apply Teflon tape to all threaded connections before assembly to eliminate potential leaks.
| Component | Connection Method | Protection |
|---|---|---|
| Solenoid Valve | 3D Printed Bracket | Wooden Cover |
| Water Hose | Threaded Fitting | Teflon Tape |
| Filter | Inline Connection | Pre-Valve Position |
Connect the three-wire cable to your solenoid valve, ensuring proper electrical continuity. Install the filter before the valve to prevent debris from compromising system performance. Test water flow and electrical functionality before final mounting to verify proper operation of your connection setup.
Routing Water Lines Through Your Garden

You’ll need to strategically plan your water network before laying any hoses to guarantee efficient coverage of your entire garden.
Start by installing hose connections using T-junctions and Y-junctions to create multiple water zones that can be controlled independently.
Navigate carefully around existing plants and established garden features to avoid damaging roots while maintaining ideal water flow to each area.
Planning Your Water Network
Before you start digging or laying any hoses, you’ll need to map out an efficient water network that maximizes coverage while minimizing disruption to your existing plants.
Create a Y-junction at your tap to effectively route water to various sections like your greenhouse and flower beds. A £24 irrigation kit provides diverse connectors and distributors for flexible hose routing.
- Design T-junctions to control the amount of water flowing to individual sections, reducing waste and ensuring proper hydration.
- Navigate around established plant roots when planning your irrigation: water lines should complement, not compete with existing growth.
- Keep leftover connectors and hoses for future expansion as your garden evolves.
This strategic approach helps you water the plants efficiently while maintaining system flexibility.
Installing Hose Connections
Start your installation by connecting the Y-junction directly to your main water tap, creating the foundation for your entire irrigation network.
This initial connection enables efficient hose routing to different garden sections without compromising water pressure.
Your £24 irrigation kit provides essential connectors and distributors for flexible navigation around existing plants.
Plan your hose routing carefully before securing connections, considering future plant growth and maintenance access.
Install butterfly clips to connect your main hoses to the micro-hose system, ensuring secure connections that won’t leak under pressure.
Add T-junctions at strategic points to create individual control zones for different garden areas.
Consider installing a master ON/OFF switch near your tap for manual override capabilities.
This feature allows you to bypass automation when needed, giving you complete control over your watering schedule.
Managing Plant Obstacles
With your hose connections secured, maneuvering water lines around existing plants requires strategic planning to protect established root systems and foliage.
Start by creating a Y-junction at your main tap to effectively direct water flow to different garden sections while minimizing plant disruption. The £24 irrigation kit provides essential connectors and distributors that simplify your setup process.
Use flexible hose routing with T-junctions to navigate around established plants, ensuring water reaches all desired locations without overwatering sensitive areas.
Plan your layout carefully to avoid damaging plant roots during installation.
- Create strategic pathways that follow natural garden boundaries and walkways
- Use T-junctions to split water flow around large plants or garden features
- Leave extra connectors and hose length for future system expansions or adjustments
Configuring Watering Zones in the Home App
Once you’ve successfully connected your HomeKit-compatible watering controller to your network, you’ll need to organize your garden into manageable zones within the Home app.
Start by opening the Home app and tapping the “+” icon, then select “Add Accessory” to discover your smart watering controller like Eve Aqua. Verify your device connects through your HomeKit hub for proper automation functionality.
Always ensure your smart watering controller connects through your HomeKit hub to enable reliable automation features and seamless integration.
Create distinct watering zones by establishing virtual rooms or areas for each section of your garden. This allows individual control of different plant areas.
Once configured, you’ll leverage the automation feature to schedule ideal watering times for each zone, such as sunrise or sunset. For advanced control, integrate Siri Shortcuts to create personalized commands based on weather conditions or specific plant requirements.
Creating Basic Automation Schedules
Automation transforms your smart watering system from a manual tool into an intelligent garden companion that operates independently.
Start by opening the Home app and selecting your connected Eve Aqua or compatible controller. Create automation routines that schedule watering without needing constant manual intervention.
Set up your automated schedules using these essential steps:
- Schedule ideal timing – Program twice-daily watering at sunrise and sunset for maximum plant absorption
- Customize duration settings – Adjust timers between 1-15 minutes based on specific plant requirements and zone needs
- Enable voice control – Configure Siri Shortcuts for hands-free schedule adjustments when the system checks the weather forecast
Monitor your automation throughout the growing season, fine-tuning schedules to enhance water usage while ensuring adequate hydration for healthy plant growth.
Setting Up Weather-Responsive Watering
Smart irrigation systems reach their full potential when they respond automatically to changing weather conditions rather than following rigid schedules.
To set up weather-responsive watering, integrate your Eve Aqua or compatible smart irrigation controller with a weather service that provides real-time forecasts for your area. Use automation features in the HomeKit or third-party app to create routines that adjust watering schedules based on temperature, humidity, and precipitation predictions.
Weather-responsive irrigation automation adjusts watering schedules dynamically using real-time forecast data rather than static programming.
Implement Siri Shortcuts to trigger watering based on specific conditions, like skipping irrigation when rain’s forecasted.
Consider adding soil moisture sensors to further refine schedules, ensuring plants receive water only when necessary. Regularly review and adjust automation settings throughout the growing season to optimize watering times and account for changing weather patterns.
Integrating Soil Moisture Sensors
While weather forecasts provide valuable insights for irrigation planning, soil moisture sensors deliver the precise, ground-level data your plants actually need.
These sensors automatically trigger your HomeKit watering system only when soil moisture drops below your predetermined threshold, preventing overwatering and conserving water.
Many soil moisture sensors integrate seamlessly with HomeKit through the Apple Home app, though you might need Home Assistant to facilitate communication between certain sensor models and your system.
When paired with irrigation devices like Eve Aqua, these sensors dramatically enhance efficiency by providing accurate, real-time data.
Key benefits include:
- Automated precision watering based on actual soil conditions rather than guesswork
- Reduced water waste through targeted irrigation scheduling
- Healthier plants from ideal hydration levels
Programming Siri Shortcuts for Voice Control
Enhance your shortcuts by adding weather conditions using the “If” action to check for rain before watering begins, preventing unnecessary water waste.
Program Siri to trigger specific watering schedules at designated times throughout the day.
Test your voice commands regularly to guarantee accurate recognition and execution, as some gardening phrases can be misinterpreted by Siri’s voice processing system.
Monitoring Water Consumption and Usage
Once your HomeKit garden watering system is operational, you’ll want to track how much water you’re actually using throughout your irrigation cycles.
The Eve Aqua smart water controller makes this monitoring process straightforward by automatically tracking your water consumption and providing detailed statistics through the Eve app.
You can analyze usage patterns to identify when you’re using the most water and adjust your schedules accordingly.
The HomeKit integration sends notifications about your consumption habits, keeping you informed even when you’re away from home.
- Access detailed statistics through the Eve app to identify watering patterns and optimize schedules
- Receive consumption notifications via HomeKit to stay informed about usage even when away
- Identify excessive usage periods to make adjustments that conserve water and reduce costs
Troubleshooting Common HomeKit Connection Issues
When your HomeKit watering system won’t connect or respond properly, you’re likely dealing with network connectivity problems or device recognition failures.
These issues can prevent your system from communicating with your HomeKit hub or appearing in the Home app altogether.
Let’s examine the most effective solutions to get your watering system back online and functioning smoothly.
Network Connectivity Problems
Network connectivity problems can frustrate even the most tech-savvy homeowners trying to integrate their garden watering system with HomeKit.
These issues often stem from basic network configuration problems that you can resolve with systematic troubleshooting.
Start by ensuring your HomeKit hub is powered on and connected to the same Wi-Fi network as your watering system.
Check your network’s signal strength in the installation area, as weak signals cause frequent disconnections.
- Restart both your HomeKit hub and watering system to refresh their connections and clear temporary glitches.
- Update your watering system’s firmware to access the latest bug fixes and connectivity improvements.
- Remove and re-add the device in the Home app if problems persist, following proper pairing procedures.
These steps resolve most network-related connectivity issues effectively.
Device Recognition Failures
Device recognition failures present another common hurdle that can prevent your HomeKit watering system from appearing in the Home app altogether.
First, verify that your Eve Aqua or Rachio sprinkler controller has the latest firmware installed, as outdated versions often cause recognition issues. Confirm your HomeKit hub—whether it’s an Apple TV or HomePod—is powered on and connected to the same Wi-Fi network as your watering devices.
If problems persist, reset your device by following the manufacturer’s instructions, typically involving holding the reset button for a specified time.
Double-check that you’ve completed the HomeKit setup correctly, including scanning the device’s setup code while maintaining close proximity to your hub during pairing.
Optimizing System Performance and Efficiency
Once you’ve installed your HomeKit garden watering system, maximizing its performance requires strategic enhancement of both timing and water delivery methods.
You’ll want to implement a micro-drip irrigation system that delivers water directly to plant roots, considerably reducing evaporation and runoff compared to traditional sprinklers.
Your smart water controller like Eve Aqua enables precise scheduling automation, ensuring efficient water delivery while minimizing waste.
Smart water controllers provide automated precision scheduling that optimizes water delivery efficiency while significantly reducing household water waste.
Schedule watering during cooler periods—early morning or late evening—to reduce evaporation and improve absorption.
- Install temperature and soil moisture sensors to dynamically adjust watering schedules based on real-time conditions
- Monitor and adjust flow rates seasonally to match specific plant requirements
- Configure automated schedules that respond to weather changes for ideal water conservation
Expanding Your System for Future Growth
As your garden evolves and expands, you’ll need a watering system that can grow alongside it without requiring complete reinstallation. Consider purchasing an irrigation kit with various connectors and distributors that’ll facilitate easy expansion and customization as your garden grows.
Plan flexible hose routing using T-junctions and butterfly clips to accommodate new plants and layouts without significant rework. Keep leftover connectors and hoses from your initial setup—you’ll need these components for future enhancements or additional plant areas.
Monitor water consumption through your smart controller to identify optimization opportunities before expanding. This guarantees efficiency in future installations.
Regularly reassess automation schedules and integrate features like soil moisture sensors to adapt your watering system to evolving garden needs and environmental conditions.
Frequently Asked Questions
How Do I Set up a Garden Watering System?
Start by installing a Y-junction at your water tap with an ON/OFF switch. Connect micro-drip irrigation lines to deliver water efficiently. Add smart controllers and soil moisture sensors for automated scheduling based on actual plant needs.
How to Install a Smart Irrigation Controller?
Connect your smart irrigation controller to the main water source, download the companion app, follow pairing instructions to link it with your home network, then configure watering schedules and zones through the app’s interface.
How to Install a Home Irrigation System?
You’ll start by installing a Y-junction at your water source, then connect solenoid valves for automated control. Add micro-drip lines to plant areas and integrate smart relays for remote scheduling through smartphone apps.
How to Set up an Automatic Watering System for Indoor Plants?
You’ll need a smart water controller like Eve Aqua, create Y-junctions at taps, install micro-drip irrigation kits, and set automated schedules through compatible apps for efficient indoor plant watering.


Leave a Reply