You’ve decided to install a wireless home surveillance system, but you’re quickly realizing there’s more to it than simply mounting cameras and hoping for the best. Poor placement, weak signals, and unreliable power sources can turn your security investment into a frustrating money pit. The difference between a system that actually protects your home and one that fails when you need it most comes down to following proven setup strategies that most homeowners overlook.
Choose Strategic Camera Locations for Maximum Coverage
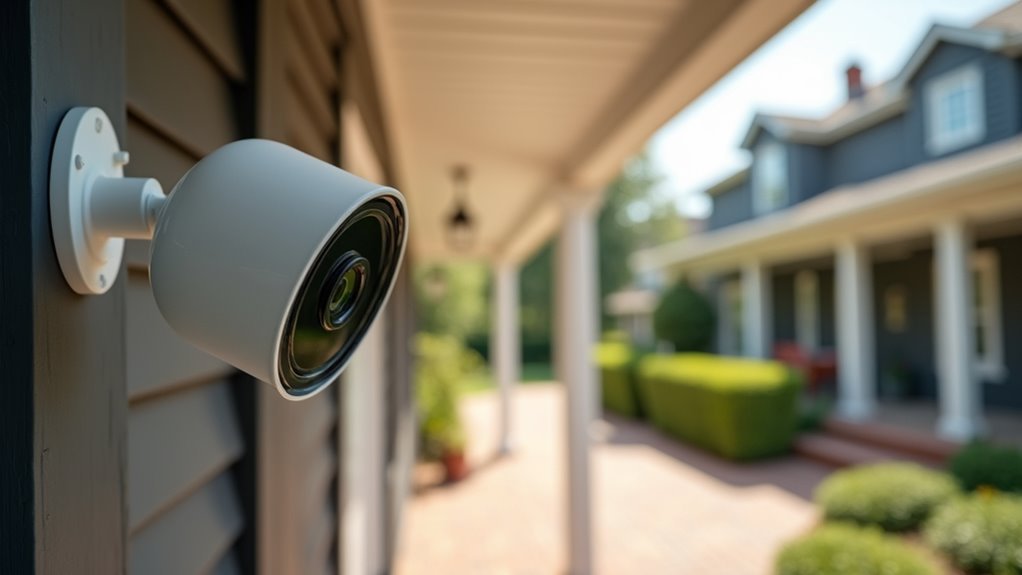
When setting up your wireless home surveillance system, the placement of your cameras determines whether you’ll capture essential security footage or miss critical incidents entirely.
Strategic locations like front and back doors are essential, as they’re common targets for break-ins and package theft. Don’t overlook vulnerable areas such as windows and garages, which intruders often use as alternative entry points.
For maximum coverage, avoid corners where obstructions limit your camera’s field of view. Instead, choose positions that provide broader, unobstructed monitoring capabilities.
Mount outdoor cameras 8-10 feet high to prevent tampering while maintaining clear footage quality.
To eliminate blind spots effectively, test your camera placement temporarily before permanent installation. Review the footage to confirm all critical areas receive adequate coverage.
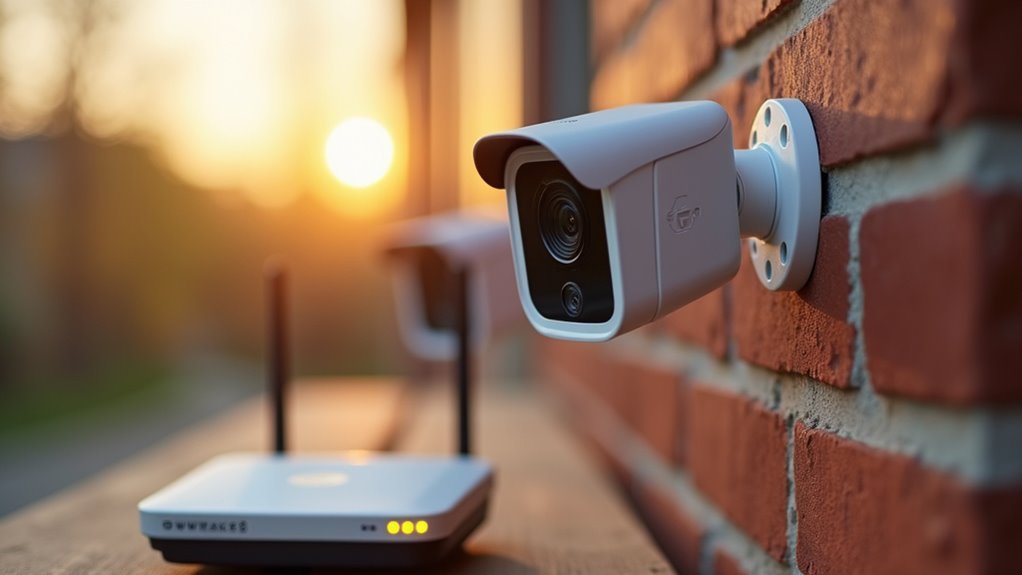
Ensure Strong Wi-Fi Signal Throughout Your Property
Your wireless cameras can’t function properly without a reliable Wi-Fi connection, making signal strength a critical factor in your surveillance system’s effectiveness.
You’ll need to test the Wi-Fi signal at each camera location to identify weak spots that could cause connection drops or poor video quality.
Start by optimizing your router’s placement in a central location, then use a smartphone app to measure signal strength throughout your property.
Test Signal Strength
How strong is your Wi-Fi signal where you plan to install your cameras?
You’ll need to test Wi-Fi signal strength throughout your property before placing wireless cameras. Use smartphone apps or online tools to identify weak spots that could affect performance. Your cameras should stay within 100-150 feet of your router to maintain a strong connection.
Install Wi-Fi extenders or mesh systems in areas with poor coverage, especially where walls and obstacles block signals.
After installation, regularly check signal strength during routine maintenance to guarantee consistent performance and reliable footage capture.
For 4G LTE cameras, verify your SIM card is activated and you’re in an area with solid cellular coverage to prevent connectivity issues.
Strong signals equal reliable surveillance.
Optimize Router Placement
Since your router’s location directly impacts your surveillance system’s reliability, you’ll want to position it centrally within your home to maximize Wi-Fi coverage.
When you optimize router placement, elevate it away from walls and obstructions to eliminate dead zones that could compromise your wireless cameras’ performance.
Keep your Wi-Fi network running smoothly by avoiding electronic devices like microwaves and cordless phones, which interfere with signal transmission.
For larger properties or multi-story homes, you’ll need range extenders or mesh systems to maintain consistent signal strength throughout all areas.
Consider upgrading to a dual-band router for better bandwidth management, allowing multiple devices to connect simultaneously without sacrificing speed.
Regularly test signal strength using smartphone apps in camera locations to identify weak spots requiring attention.
Select Weather-Resistant Cameras for Outdoor Installation
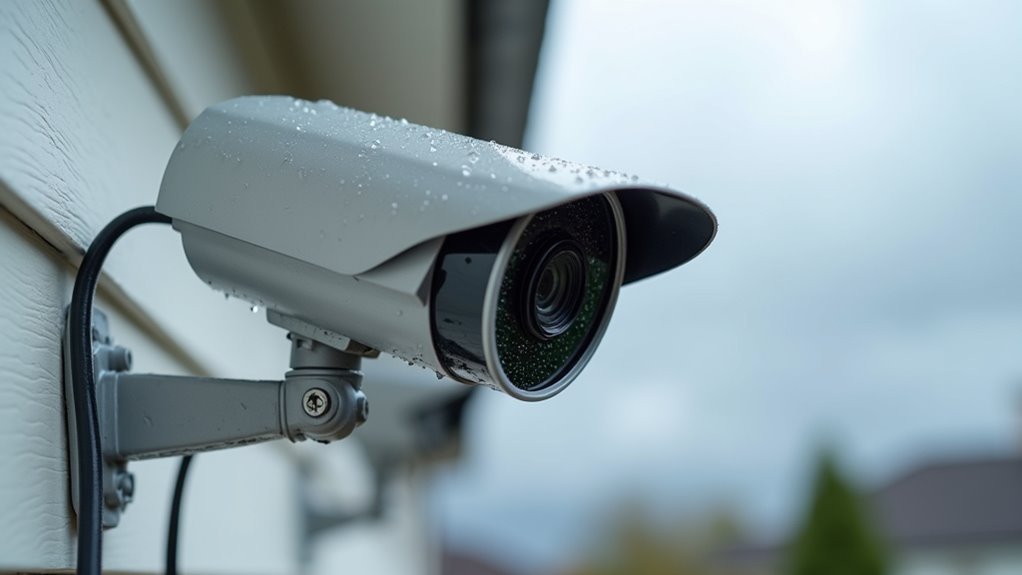
When installing surveillance cameras outdoors, you’ll need equipment that can withstand Mother Nature’s toughest challenges. Choose cameras with high IP rating standards—ideally IP65 or higher—to guarantee complete protection against dust and water ingress during outdoor installation.
Look for weather-resistant features like UV protection, which prevents sun damage and overheating in direct sunlight. Select models with durable housing materials such as aluminum or high-grade plastic that resist harsh environmental conditions.
Seal all outdoor connections using waterproof tape or silicone sealants to prevent moisture from damaging electronic components.
Don’t forget about regular maintenance—inspect outdoor cameras frequently for signs of wear or weather damage. This proactive approach guarantees your surveillance system maintains peak functionality year-round, protecting your investment while keeping your property secure.
Optimize Camera Range and Field of View Settings
You’ll want to choose cameras with wide-angle lenses to maximize your coverage of larger areas around your property.
These lenses greatly reduce blind spots that intruders could exploit, ensuring you’re monitoring all critical zones effectively.
Wide-Angle Lens Benefits
Wide-angle lenses revolutionize home surveillance by providing an expansive field of view that ranges from 90 to 180 degrees, effectively covering larger areas with a single camera. You’ll greatly reduce blind spots in your security coverage while capturing clear details across broader zones. The installation of fixed wide-angle cameras delivers cost-effective monitoring since you need fewer units compared to narrow lens setups.
| Advantage | Benefit |
|---|---|
| Coverage Area | Monitor 90-180 degree field of view |
| Cost Efficiency | Fewer cameras needed for same area |
| Blind Spot Reduction | Enhanced zone monitoring capabilities |
| Detail Capture | Identify individuals across wider spaces |
Your ideal camera placement becomes more strategic with wide-angle technology, allowing better monitoring of entry points and vulnerable areas while maintaining thorough surveillance effectiveness.
Eliminating Blind Spot Areas
Although strategic camera placement provides excellent coverage, blind spots can still compromise your surveillance system’s effectiveness if you don’t carefully optimize each unit’s range and field of view settings.
Security cameras require thorough assessment of your surveillance area to achieve extensive coverage. Positioning cameras properly eliminates gaps that intruders could exploit.
Follow these steps to eliminate blind spots:
- Survey your property layout – Walk around and identify corners, obstructions, and key areas that need monitoring before installing cameras.
- Mount cameras 8-10 feet high – This height minimizes obstructions while providing clear sight lines across your property.
- Test placement temporarily – Mount cameras briefly and review footage to confirm all vulnerable zones are covered.
- Adjust angles through your app – Fine-tune camera positioning to capture every critical entry point without gaps.
Implement Reliable Power Solutions for Continuous Operation
Nothing undermines your wireless home surveillance system faster than cameras that lose power at critical moments. You’ll need reliable power solutions to guarantee continuous operation of your wireless security cameras.
Battery-powered cameras offer flexibility, but choose models with several months of battery life for peak performance. Position solar panels where they’ll receive maximum sunlight exposure throughout the day to keep batteries charged.
| Power Type | Best For | Maintenance |
|---|---|---|
| Battery-powered | Remote locations | Monthly checks |
| AC-powered | High-traffic areas | Minimal |
| Solar-powered | Outdoor placement | Seasonal cleaning |
AC-powered cameras provide uninterrupted surveillance when connected to reliable outlets. Implement backup power solutions like UPS systems to maintain operation during outages, assuring your security system never goes dark when you need it most.
Configure Night Vision and Motion Detection Features
You’ll need to configure your camera’s infrared LED setup to guarantee clear night vision capabilities in low-light conditions.
Adjusting motion sensitivity settings prevents false alarms while maintaining effective detection of genuine security threats.
Setting up proper alert notifications keeps you informed instantly when your camera detects movement in monitored areas.
Infrared LED Setup
When darkness falls, your wireless security cameras must rely on infrared LED technology to maintain effective surveillance coverage.
These invisible light sources illuminate your property without alerting intruders or disturbing wildlife, ensuring continuous protection throughout the night.
To optimize your infrared LED setup:
- Verify LED functionality – Test your night vision capabilities by reviewing recorded footage in complete darkness to confirm proper illumination.
- Adjust sensitivity settings – Fine-tune motion detection thresholds through your camera app to prevent false alarms from small animals or environmental movements.
- Configure detection zones – Target specific surveillance areas within the app, excluding non-critical spaces like public sidewalks.
- Maintain clean lenses – Regularly wipe infrared sensors and camera lenses to prevent obstructions that compromise your wireless security camera system’s performance.
Motion Sensitivity Adjustment
Fine-tuning your camera’s motion sensitivity prevents the flood of unnecessary notifications that plague many homeowners with wireless surveillance systems.
You’ll want to adjust settings so your wireless camera system detects significant movements like people or vehicles while ignoring pets or small animals. This helps reduce false alarms that can desensitize you to real threats.
Test different motion detection zones within your camera’s app, focusing on critical entry points while excluding areas with constant movement.
Customize your notification settings to receive alerts only for specific motion types that matter to you.
Remember to regularly review and enhance monitoring settings based on environmental changes.
Seasonal foliage shifts or new nearby structures can affect detection effectiveness, requiring periodic sensitivity adjustments to maintain peak performance.
Alert Notification Configuration
Proper alert notification configuration maximizes your wireless surveillance system’s effectiveness by combining optimized motion detection with robust night vision capabilities.
Your wireless surveillance camera’s alert notifications require careful calibration to deliver actionable real-time notifications without overwhelming false alarms.
- Customize sensitivity settings in your camera app to distinguish between significant threats and harmless movements like pets or swaying branches, preventing notification fatigue.
- Configure detection zones to monitor critical areas such as entry points and driveways while excluding irrelevant spaces that might trigger unnecessary alerts.
- Enable instant mobile alerts through your camera app to guarantee immediate notification when legitimate motion detection occurs.
- Test night vision performance regularly during various lighting conditions to verify infrared LED functionality and adjust motion detection settings accordingly for consistent 24/7 monitoring effectiveness.
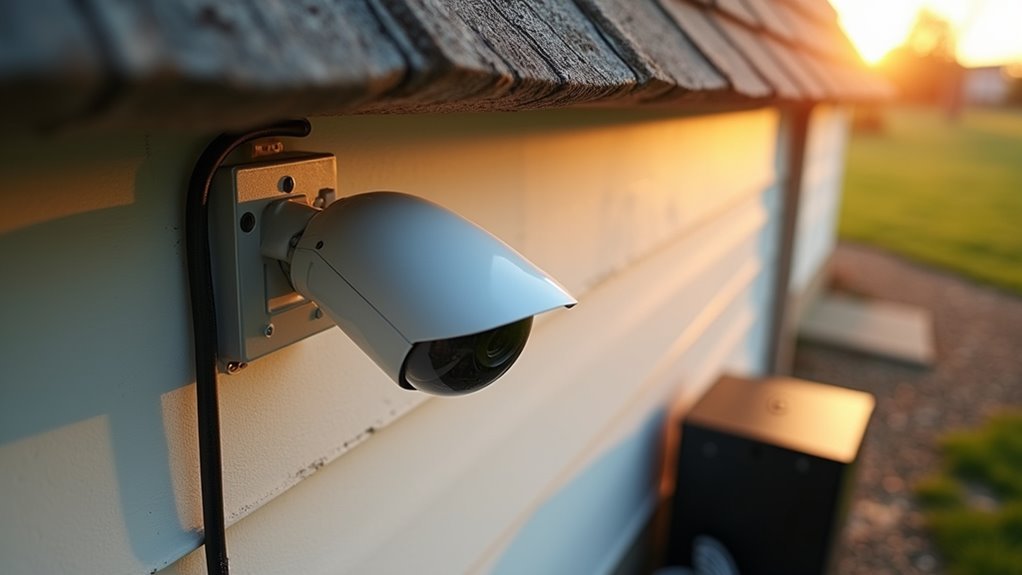
Secure Camera Mounting to Prevent Tampering and Theft
Although wireless surveillance cameras offer installation flexibility, their exposed positions make them vulnerable targets for tampering and theft.
Wireless cameras provide convenient installation options but create security risks due to their accessible outdoor locations.
You’ll want to mount your security cameras at 10-12 feet high, making them less accessible while maintaining ideal coverage of high-traffic areas. Use robust mounting brackets designed for outdoor conditions to guarantee your cameras stay securely attached despite weather challenges.
Consider installing security screws or tamper-proof hardware to prevent easy removal from mounting points. Protective housings or lock boxes provide additional deterrence against vandalism while shielding cameras from harsh weather.
Regular inspections help you identify signs of tampering or wear early. When necessary, reposition or reinforce mounts to maintain proper secure camera mounting and preserve your surveillance system’s effectiveness.
Set Up Mobile App Integration for Remote Monitoring
Since modern surveillance systems rely heavily on remote accessibility, setting up mobile app integration becomes essential for effective monitoring. Your security cameras won’t reach their full capability without proper mobile connectivity.
Start by downloading your camera manufacturer’s specific mobile app, as generic apps won’t provide maximum functionality. Verify your device maintains a stable connection to Wi-Fi before beginning the setup process.
Follow these steps for seamless integration:
- Create your account using the installation instructions provided with your cameras
- Configure live streaming settings to monitor your property in real-time
- Enable motion detection alerts to receive instant notifications of suspicious activity
- Set up cloud storage options to automatically backup important footage
Remember to update your mobile app regularly for enhanced security features and improved remote monitoring capabilities.
Plan Adequate Storage Solutions for Video Footage
After establishing mobile connectivity for remote monitoring, you’ll need to determine how much storage space your surveillance system requires.
Calculate your needs based on camera count, video resolution, and retention period—high-resolution footage can consume up to 60GB per camera daily.
You’ve got two main options: local storage or cloud storage.
Local storage using SD cards or NVRs offers one-time costs but limited capacity. Cloud storage provides remote access but involves ongoing subscription fees that accumulate over time.
Ensure your chosen solution supports your cameras’ recording formats and resolutions.
Implement a solid backup strategy for important video surveillance footage to prevent loss from storage failures or overwriting.
Regular backups protect your investment and maintain security coverage continuity.
Test System Performance and Schedule Regular Maintenance
Once you’ve configured your wireless surveillance system, you’ll want to establish a consistent testing routine to confirm everything operates at peak performance.
Regular maintenance is essential for ideal security coverage and system reliability.
To test system performance effectively, implement these critical practices:
- Monitor live feeds monthly – Access your mobile app to verify image quality and confirm all cameras transmit clearly without lag or connectivity issues.
- Validate motion detection settings – Conduct routine checks to confirm alerts trigger correctly and response times remain prompt across all designated zones.
- Review recorded footage regularly – Verify data saves properly and remains accessible for security audits or investigations when needed.
- Install firmware updates promptly – Apply available updates to enhance functionality and protect against security vulnerabilities while maintaining clear visibility through monthly lens cleaning.
Frequently Asked Questions
How Do I Set up My Wireless Home Security Camera?
You’ll need to choose a strategic location, download the camera’s app, connect to power, link to your Wi-Fi network through the app, set detection zones, then test functionality and notifications.
What States Are Illegal to Have Hidden Cameras?
Hidden cameras are illegal in private areas across most states, including California, Florida, Illinois, New York, and Texas. You’ll face criminal charges if you record without consent in bedrooms, bathrooms, or other private spaces.
What Is the Best Wireless Home Security System Without Monthly Fee?
You’ll find the Reolink Argus 2 offers excellent value with 1080p HD video and local SD storage. The Eufy SoloCam E40 provides 2K resolution with built-in 16GB memory, eliminating subscription fees entirely.
How Can I Boost My Wireless Security Camera Signal?
Position your cameras within 30 feet of your router, use Wi-Fi extenders for weak areas, keep antennas vertical and unobstructed, choose 5 GHz frequency, and optimize channel settings regularly.


Leave a Reply