
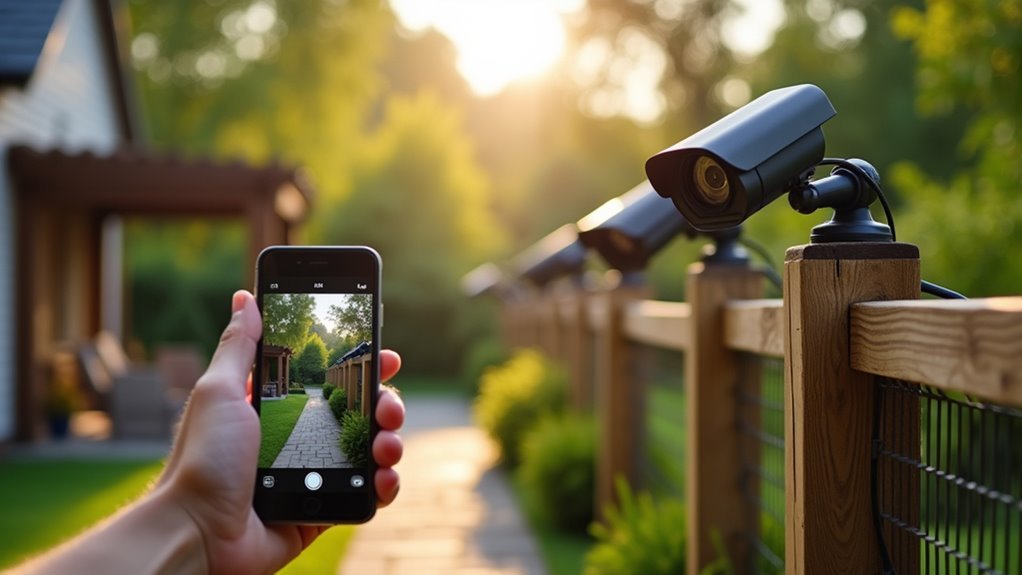
You’ve invested in backyard security cameras, but they’re only as effective as your ability to monitor them when it matters most. Whether you’re at work, traveling, or simply away from home, remote access transforms your security system from a passive recording device into an active monitoring tool. The setup process involves several critical steps that determine whether you’ll have seamless access or frustrating connectivity issues when you need surveillance most.
Understanding Remote Viewing Technology for Backyard Cameras
Several modern technologies converge to make remote viewing of your backyard cameras possible, transforming how you monitor your property from anywhere in the world.
IP security cameras connect to your home network through built-in Wi-Fi or Ethernet capabilities, establishing the foundation for remote access. Your internet connection serves as the bridge, enabling live camera feeds to reach your devices regardless of location.
You’ll access these feeds through dedicated mobile app solutions or web browsers using your camera’s unique IP address. The setup process typically involves configuring port forwarding on your router or utilizing manufacturer-provided online tools that simplify complex network settings.
This technology eliminates geographical barriers, allowing seamless monitoring cameras from smartphones, tablets, or computers while maintaining real-time surveillance capabilities.
Essential Equipment Needed for Remote Camera Access
You’ll need specific equipment to successfully access your backyard cameras from anywhere.
The three main categories include camera and recording equipment to capture footage, network infrastructure components to transmit data, and remote access devices to view your feeds.
Let’s examine each component type to guarantee you’re properly equipped for seamless remote monitoring.
Camera and Recording Equipment
When setting up remote access to your backyard cameras, the foundation starts with selecting outdoor-rated surveillance cameras that deliver at least 1080p resolution for crisp, detailed footage. Your recording equipment choice depends on camera type – IP cameras require a Network Video Recorder (NVR) while traditional wired systems need a DVR to capture and store video footage.
| Camera Type | Recording Equipment |
|---|---|
| IP cameras | Network Video Recorder (NVR) |
| Wired cameras | Digital Video Recorder (DVR) |
| Wireless cameras | NVR or cloud storage |
Ensure your internet connection provides sufficient upload speed for real-time streaming. You’ll also need the manufacturer’s mobile app or PC software for remote access functionality. This surveillance cameras setup enables monitoring your property from anywhere with proper connectivity.
Network Infrastructure Components
Your camera system’s network infrastructure forms the digital backbone that enables remote monitoring capabilities.
You’ll need a router with port forwarding capability to establish external connections between your cameras and the internet. This router must allow communication pathways for your surveillance video feeds to reach your remote devices.
Each camera requires a unique IP address on your local network for proper identification and seamless remote access.
Configure your network settings to accommodate multiple cameras without conflicts. Your internet connection should provide at least 1 Mbps upload speed for smooth video streaming.
Port forwarding configuration is essential for enabling outside access to your camera feeds.
This network configuration allows your surveillance system to transmit data through your router’s firewall, ensuring reliable internet access for monitoring your backyard cameras from anywhere.
Remote Access Devices
Once your network infrastructure is established, specific devices become necessary to complete your remote monitoring setup. Your security system requires IP cameras that connect directly to your internet network, enabling seamless remote access from anywhere. These cameras transmit live view footage through your established network connection.
Essential remote access devices include:
- Mobile device with camera app – Your smartphone or tablet becomes the primary viewing portal for monitoring live feeds.
- DVR/NVR system – Records and stores footage while facilitating internet connectivity for remote streaming.
- Router with port forwarding capabilities – Manages data flow between your cameras and external internet connections.
Download the manufacturer’s dedicated camera app to your mobile device for ideal functionality. This software provides live view access, camera controls, and security notifications, transforming your smartphone into a thorough monitoring command center.
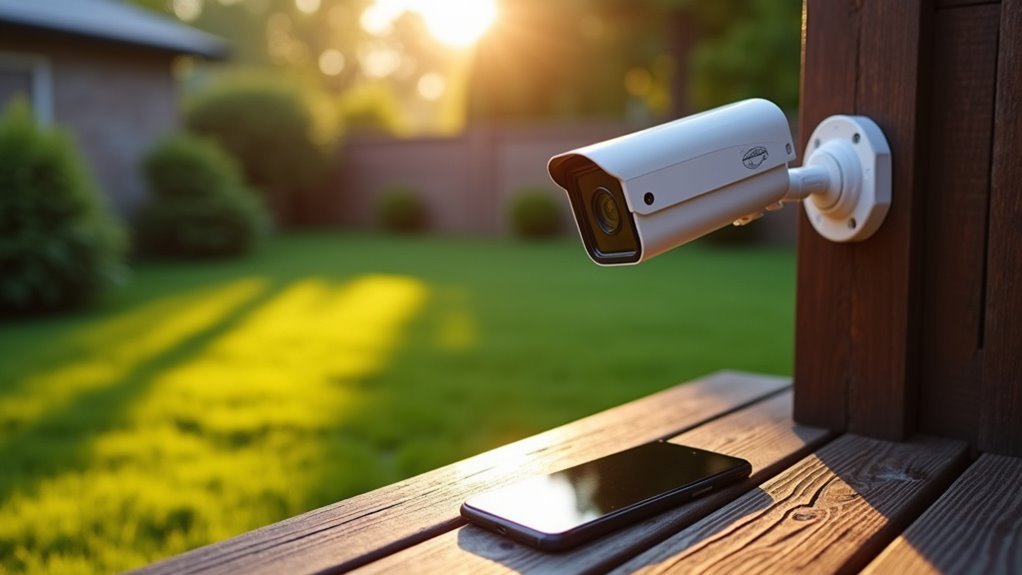
Choosing the Right Camera Placement in Your Backyard
Strategic camera placement makes the difference between effective surveillance and wasted equipment in your backyard security system. When you connect cameras to monitor your property, strategic placement at entry points like back and side doors creates effective deterrence. Position cameras to view your security perimeter along driveways and pathways for thorough surveillance coverage.
| Placement Location | Coverage Benefits |
|---|---|
| Entry Points | Monitor access, deter intruders |
| Driveways/Pathways | Capture movement patterns |
| High-Traffic Areas | Enhance family safety |
| Above Head Height | Prevent tampering, wider view |
Mount cameras above head height to prevent tampering while avoiding direct sunlight that causes glare. Security systems require multiple cameras covering blind spots around patios and decks where family activities occur, ensuring complete backyard monitoring and access control.
Installing and Positioning Your Security Cameras
You’ll need to follow a systematic camera installation process to guarantee your backyard security system works effectively.
Start by securely mounting each camera using the appropriate brackets and tools, then adjust the angles to capture clear views of your targeted areas.
Focus on strategic placement locations like entry points, driveways, and corners where intruders are most likely to approach your property.
Camera Installation Process
Three key steps form the foundation of successful camera installation: selecting the right equipment, planning your layout, and executing proper mounting techniques.
Start by choosing an outdoor cameras security camera model designed for weather resistance, then download its app before installation begins. Your camera placement strategy should prioritize high-traffic areas through careful planning.
The camera installation process follows this sequence:
- Connect the camera to your Wi-Fi connection first, testing functionality before mounting
- Securely attach the device to its mount, adjusting angles for ideal field coverage
- Verify cameras are powered and networked properly after installation completion
Once mounted, test your live feed through the app to confirm positioning captures your desired surveillance area.
Adjust camera settings as needed to enhance image quality and motion detection zones for maximum security coverage.
Strategic Placement Locations
Once you’ve mastered the installation process, determining where to position your cameras becomes essential for effective home security.
Strategic placement of your security cameras at entry points like main entrances and back doors guarantees thorough coverage against potential intruders. Position backyard cameras to overlook driveways and yards where you can monitor vehicle activity and detect theft attempts.
Install surveillance systems in detached structures such as garages and sheds to protect valuable assets.
Mount cameras high enough to capture clear footage while preventing tampering or vandalism. Consider natural obstructions and lighting conditions when selecting angles to maximize visibility and minimize glare.
Proper positioning transforms your cameras from simple recording devices into an effective security network that deters crime and provides reliable evidence.
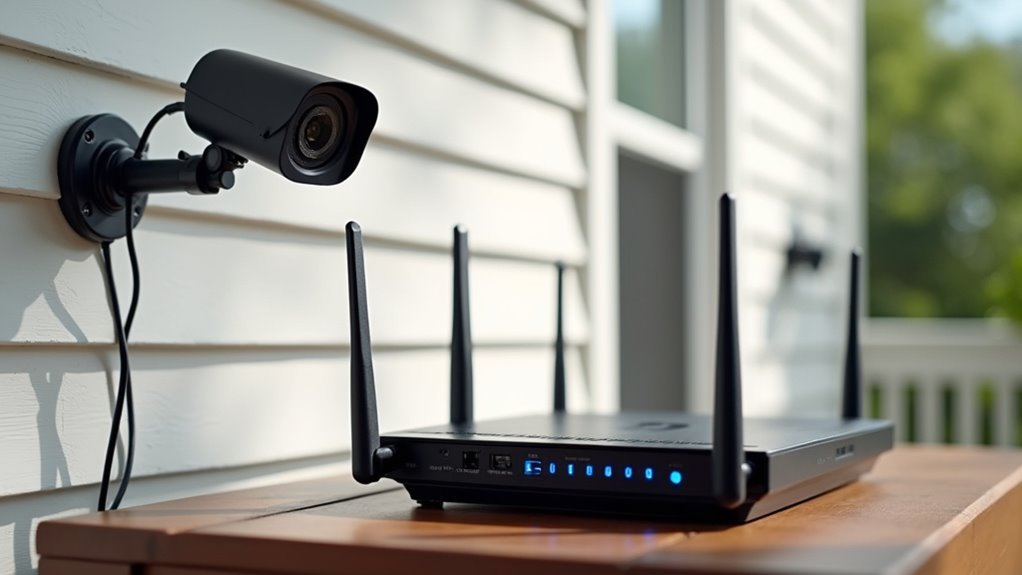
Connecting Cameras to Your Home Network
Before setting up your backyard cameras, verify they’re compatible with your home network by checking the specifications for Wi-Fi or Ethernet connectivity options.
Once confirmed, use the camera’s app or web interface to connect the cameras during the setup process by entering your correct SSID and password.
For wired installations, consider these connection methods:
- Run Ethernet cables directly from cameras to your router for maximum stability
- Use powerline adapters to transmit data through existing electrical wiring
- Install outdoor-rated network switches to expand connection points
After physical connection, access your router’s settings to assign a static IP address to each camera.
This prevents IP changes that could disrupt remote functionality.
Finally, test the connection by viewing camera feeds on your smartphone or computer to confirm you can successfully access your cameras from anywhere.
Setting Up Port Forwarding on Your Router
You’ll need to configure your router’s port forwarding settings to access your backyard cameras from outside your home network.
Start by entering your router’s default gateway IP address into your web browser to reach the configuration interface.
The process involves setting up specific port mappings and selecting the right protocols to guarantee your cameras communicate properly over the internet.
Router Configuration Steps
While setting up port forwarding might seem technical, the process becomes straightforward when you break it down into clear steps.
Start by accessing your router’s web interface through a web browser using the default gateway IP address, typically printed on your router’s label.
Once inside, locate the port forwarding section and configure these essential settings:
- Enter your security camera’s internal IP address
- Assign external and internal port numbers (80 for HTTP, 554 for RTSP)
- Select both TCP and UDP protocols for ideal compatibility
After completing the configuration, save your changes to activate port forwarding.
Test your setup by entering your router’s external IP address followed by the assigned port number in your web browser to verify successful remote access to your security camera.
Common Port Settings
Understanding which ports to configure makes the difference between a successful camera connection and hours of troubleshooting. Common port settings for backyard cameras require specific port forwarding configurations to access camera feeds remotely.
| Service Type | Internal Port | External Port |
|---|---|---|
| HTTP Stream | 80 | 8080 |
| RTSP Feed | 554 | 8554 |
| HTTPS Access | 443 | 8443 |
Navigate to your router settings and locate the port forwarding section. Enter your camera’s internal IP address along with the designated external port numbers. Map each external port to the camera’s corresponding internal port. Always save changes after configuring these settings to guarantee remote access works properly. Check your router’s documentation for model-specific instructions, as interfaces vary between manufacturers.
Configuring Mobile Apps for Remote Viewing
Once you’ve physically installed your backyard cameras, setting up the mobile app becomes your gateway to remote monitoring and control.
Download your camera manufacturer’s mobile app from the Google Play Store or Apple App Store, ensuring device compatibility. Create an account and follow the instructions to verify your email and establish security measures.
Start by downloading your camera manufacturer’s official app from your device’s app store and create a secure account.
Connect your camera system to Wi-Fi through the app’s setup process, which typically involves:
- Scanning a QR code displayed on your camera or manual
- Entering your camera’s unique identification number
- Selecting your home network and entering credentials
Enable remote viewing within app settings to access your camera feeds from anywhere. This allows live video streaming and motion notifications.
Regularly update the mobile app to maintain peak performance and receive latest security patches.
Establishing Web Browser Access to Your Cameras
Although mobile apps provide convenient camera access, web browser access offers greater flexibility and screen real estate for monitoring your backyard security system.
You’ll need to identify your security camera’s IP address and port number from the device settings or manual.
Next, log into your router’s configuration page and navigate to the port forwarding section. Set up port forwarding rules using your camera’s IP address and appropriate ports like 80 for HTTP or 554 for RTSP.
Once configured, access your live video surveillance by entering your external IP address followed by the port number in any web browser.
Always establish secure login credentials and enable HTTPS when possible to protect your camera connected to your network from unauthorized access.
Optimizing Video Quality for Remote Monitoring
After setting up browser access to your cameras, you’ll want to maximize the video quality for clear remote monitoring. Optimizing your security cameras requires attention to several key factors that directly impact video performance.
Achieving optimal video quality for remote surveillance depends on properly configuring your security camera settings and positioning.
Set your cameras to minimum 1080p resolution for detailed surveillance footage. Configure bitrate settings appropriately – higher bitrates enhance video quality but demand faster internet connections to prevent buffering during remote monitoring.
Essential optimization steps include:
- Position cameras strategically – Avoid direct sunlight and reflective surfaces that create glare and compromise clear images throughout the day.
- Enable motion detection features – Focus recording on key events while conserving bandwidth without sacrificing video clarity.
- Schedule regular firmware updates – Install latest improvements and fixes that enhance stability and performance for remote access.
These adjustments guarantee consistent, high-quality surveillance footage accessible from anywhere.
Troubleshooting Common Remote Access Problems
When remote access to your backyard cameras fails, you’ll need to systematically address the most common connectivity issues that prevent successful monitoring.
Start troubleshooting by verifying your security cameras have stable internet connections through Wi-Fi or Ethernet. Check your camera settings to confirm remote access is properly enabled, as this feature requires activation for offsite viewing.
Next, reboot both your cameras and router to refresh network connections and resolve temporary glitches.
Verify you’re using the correct IP address and port numbers for remote login attempts, as incorrect configurations block access.
Install any available firmware updates on both cameras and routers, since outdated software creates compatibility problems.
These systematic troubleshooting steps will restore reliable remote monitoring capabilities for your backyard security system.
Frequently Asked Questions
How to Access Home Security Camera Remotely?
You’ll connect your cameras to Wi-Fi, enable remote access in settings, then use the manufacturer’s app or web browser with your camera’s IP address and login credentials to view footage remotely.
How Can I Access My Wi-Fi Camera Away From Home?
You’ll need to download your camera manufacturer’s app and make certain port forwarding is configured on your router. Connect your camera to Wi-Fi, enable remote viewing, then access it using your phone or browser.
Can You Access Security Camera Footage?
You can access security camera footage remotely through mobile apps or web browsers. You’ll need your camera’s IP address, login credentials, and stable internet connection for viewing live feeds and recordings.
How Do You See Cameras on Your Network?
You’ll find cameras on your network by checking your router’s device list for their IP addresses. Connect to each camera using its IP address and port number in your web browser to access feeds directly.


Leave a Reply