
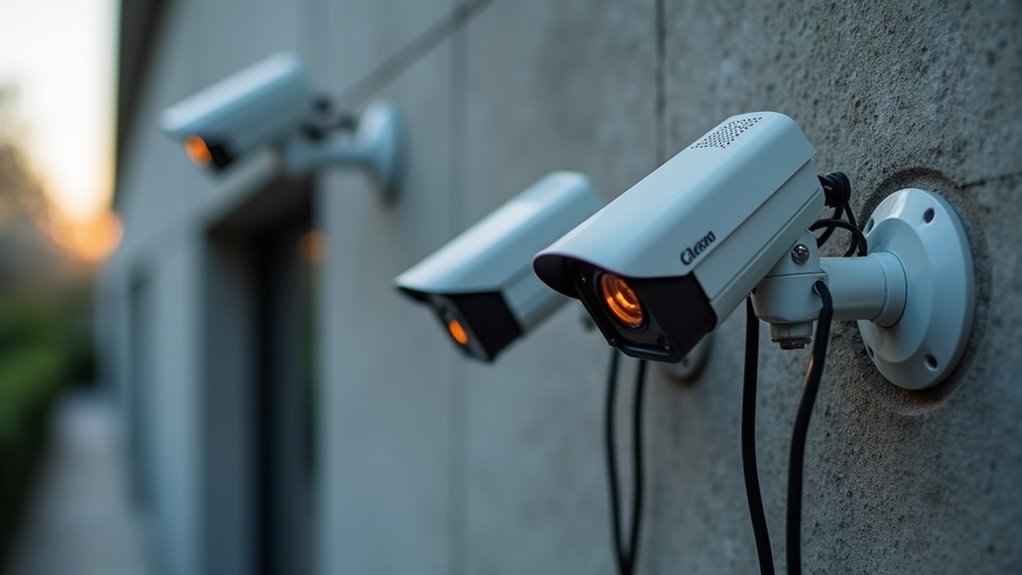
You’ve probably noticed that basic video surveillance isn’t enough anymore. While watching recorded footage after an incident has its place, you’re missing out on real-time interaction that could prevent problems before they escalate. Two-way audio transforms your security cameras from passive observers into active communication tools, letting you speak directly with visitors, deter intruders, or check on family members instantly. However, the setup process involves several technical considerations that’ll determine whether your system works flawlessly or becomes a source of frustration.
Understanding Two-Way Audio Technology in Security Cameras
While traditional security cameras only record video and audio, two-way audio technology transforms your security system into an interactive communication device. You can now listen and speak through your camera using a smartphone app, creating real-time conversations with anyone near the device.
This technology enhances your monitoring capabilities by allowing direct interaction with visitors at your door, deterring potential intruders through immediate communication, and enabling you to check on vulnerable family members remotely.
When someone approaches your property, you’ll receive notifications and can instantly communicate without being physically present.
Two-way audio systems require specific connections, typically using 2-lead wire connectors or RCA connectors for audio input and output. You’ll access these features through your camera’s web interface or mobile app settings, where you can adjust microphone and speaker configurations.
Benefits of Installing Two-Way Audio on Your Security System
Installing two-way audio on your security system transforms basic surveillance into an interactive protection network that delivers multiple advantages for your home or business.
You’ll gain the ability to communicate directly with visitors, delivery personnel, or family members without opening doors or leaving your current location. This feature acts as a powerful deterrent against potential intruders who feel observed and are less likely to proceed with criminal activities.
Two-way audio enables real-time monitoring of children or elderly family members, providing essential peace of mind for caregivers.
For businesses, it enhances operations by facilitating seamless communication between employees and management, particularly valuable in remote work environments.
When integrated with your existing surveillance system, two-way audio improves overall functionality and helps you manage security incidents more effectively.
Types of Audio Connections for IP Cameras
Two primary audio connection types enable IP cameras to deliver effective two-way communication capabilities for your security system.
You’ll encounter 2-lead wire audio connectors and RCA connectors, each offering distinct advantages for your setup.
2-lead wire connectors require separate RCA audio connectors and a ground wire. You’ll need additional components like female RCA audio baluns and proper grounding to guarantee effective audio transmission.
While this setup involves multiple termination steps, it provides flexibility for custom installations.
RCA connectors simplify your installation process with built-in RCA ports on the camera. They eliminate multiple termination steps, making them user-friendly when connecting audio devices.
You’ll achieve enhanced audio quality by using external microphones and speakers, enabling clearer audio communication throughout your security system.
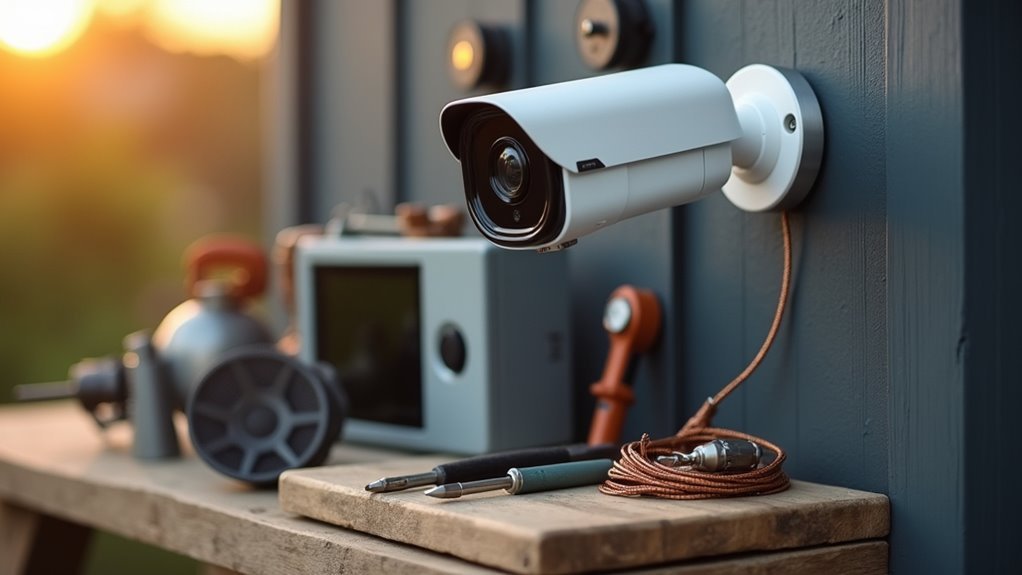
Essential Equipment and Components for Two-Way Audio Setup
Before establishing effective two-way communication, you’ll need specific equipment components that work together seamlessly. Your primary requirement is a two-way audio mic and speaker combo, preferably outdoor-rated for weather resistance. Your camera must feature either 2-lead wire audio connectors or built-in RCA connectors for external audio equipment integration.
| Component | Purpose |
|---|---|
| PoE Power Splitter | Connects camera to NVR or PoE switch |
| Female RCA Audio Baluns | Proper wire connections for 2-lead setups |
| RCA Connections | Simplified setup with fewer termination steps |
You’ll also need appropriate wiring to complete your connections. Once you’ve assembled these components, you’ll access your camera’s web interface to enable two-way audio functionality and adjust volume settings for ideal performance.
Choosing the Right Microphone and Speaker Combination
You’ll need to evaluate whether indoor or outdoor-rated microphones and speakers suit your specific installation environment.
Check the audio quality specifications like frequency response and signal-to-noise ratio to guarantee clear communication meets your security needs.
Verify that your chosen microphone and speaker combination’s power requirements align with your camera system’s capabilities, especially when using PoE splitters or external power sources.
Indoor Vs Outdoor Options
When selecting microphone and speaker combinations for your two-way audio security cameras, the installation environment dictates your equipment choices.
Indoor setups allow you to use smaller, less robust equipment since you won’t face harsh weather conditions. Your microphone and speaker don’t need extensive weatherproofing, giving you more flexibility in size and design options.
Outdoor installations require weatherproof equipment that can withstand moisture and temperature fluctuations. Models like the Louroe AOP-SP-PB are specifically designed for external environments, handling both environmental challenges and outdoor noise levels effectively.
Consider ambient noise levels in your chosen location, as this affects communication clarity. Also, verify compatibility between your selected audio components and your specific camera model to guarantee peak performance and seamless integration.
Audio Quality Specifications
Audio quality specifications determine how effectively you can communicate through your two-way security camera system.
External microphones and speakers deliver remarkably better audio input and output performance compared to built-in options, providing enhanced clarity and volume for reliable two-way communication.
Choose outdoor-rated audio components that withstand environmental conditions for exterior installations.
Two-way audio mic and speaker combos designed specifically for security applications perform better in noisy environments and deliver superior sound quality.
Use RCA connectors for simplified installations that eliminate additional termination steps.
These connections streamline your setup process and guarantee reliable audio transmission.
Regularly assess your system’s performance by adjusting settings through your camera’s web interface or mobile app.
Fine-tuning these configurations optimizes both clarity and volume for effective communication.
Power Requirements Compatibility
Power compatibility becomes critical once you’ve identified the ideal microphone and speaker combination for your security camera system.
You’ll need to verify that your chosen audio devices match your camera’s power output capabilities by checking voltage and current ratings in the specifications.
When dealing with power requirements compatibility, you have several distribution options:
- Use a PoE power splitter to provide adequate power to both microphone and speaker without additional power sources
- Install a 1-to-2 DC power splitter to effectively distribute power to multiple audio devices in your camera system
- Verify connector compatibility with your camera’s audio inputs, including RCA or 2-lead wire connections
Proper power planning prevents audio dropouts and guarantees reliable two-way communication functionality throughout your security system’s operation.
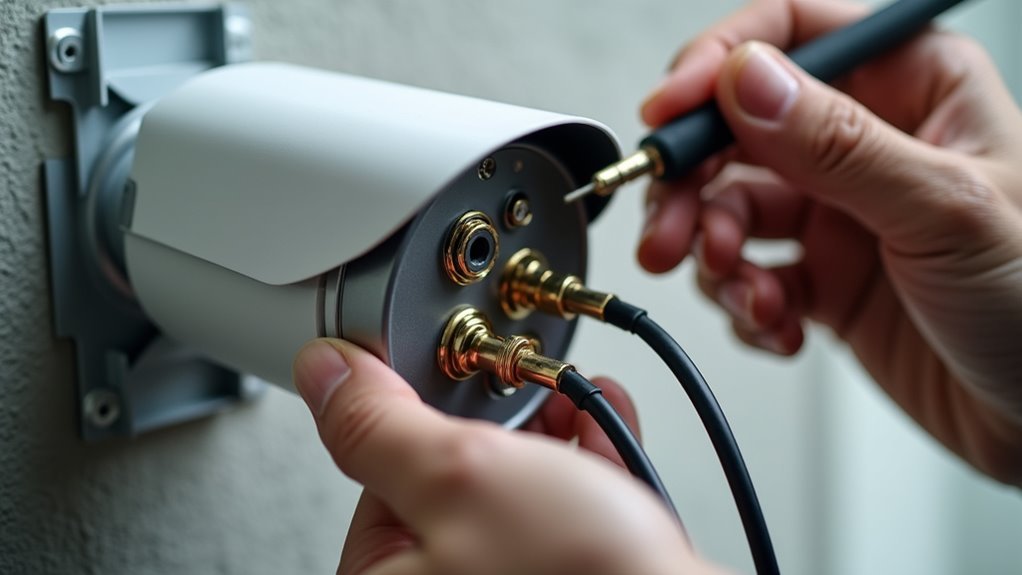
Connecting Cameras With 2-Lead Wire Audio Connectors
When you’re setting up cameras with 2-lead wire audio connectors, you’ll need specific wiring components to establish proper audio communication.
You must use separate RCA audio connectors along with a dedicated ground wire to guarantee the system functions correctly.
Installing female RCA audio baluns becomes essential for connecting your camera wires while maintaining a secure ground connection.
Required Wiring Components
Since 2-lead wire audio connectors require a more complex setup than standard configurations, you’ll need several specific components to establish reliable audio transmission.
These required wiring components guarantee your IP camera delivers clear two-way audio functionality without interference or connectivity issues.
Essential components include:
- Female RCA audio baluns – Connect your camera’s audio wires to microphone and speaker systems for proper signal conversion
- PoE power splitter – Distributes power from your NVR or PoE switch while maintaining audio connections
- Separate RCA connectors with ground wire – Handle audio transmission and provide necessary grounding to prevent signal interference
You’ll connect the camera wires directly to the RCA baluns, guaranteeing the ground connection remains secure throughout the installation.
After completing your physical setup, verify all connections through your camera’s web interface to confirm audio functionality.
RCA Balun Installation
Installing RCA baluns correctly guarantees your 2-lead wire audio connectors integrate seamlessly with your security camera system.
You’ll need female RCA audio baluns to establish the connection between your camera’s audio output and your microphone/speaker configuration.
Start by identifying your camera’s positive and negative audio leads. Connect these wires to the corresponding terminals on your RCA audio baluns, ensuring proper polarity alignment.
Don’t skip grounding your setup – it’s essential for preventing interference and maintaining clear audio transmission.
If you’re using a PoE Power Splitter, connect it now while preserving your audio balun connections. The splitter allows simultaneous power delivery and audio functionality.
Once your wiring’s complete, access your camera’s web interface to activate audio settings and adjust volume levels for ideal two-way communication performance.
Connecting Cameras With RCA Audio Connectors
RCA audio connectors offer a streamlined approach to setting up two-way audio on your security cameras by eliminating complex termination procedures.
You’ll find these connectors greatly simplify your installation process, allowing direct connections between cameras, microphones, and speakers without additional steps.
When your cameras feature built-in RCA audio connectors, you can directly pair RCA wires from the camera with your microphone and speaker for straightforward audio integration.
This plug-and-play functionality saves time and reduces potential connection errors.
- Match RCA wire colors correctly – typically red for right audio, white for left audio, and yellow for video
- Confirm secure connections by pushing RCA plugs firmly into their corresponding jacks until they click
- Test audio quality immediately after connection to verify proper signal transmission
After completing connections, access your camera’s web interface to enable two-way audio and adjust volume settings for best performance.
Power Requirements and PoE Splitter Configuration
You’ll need to configure your PoE splitter correctly to guarantee your two-way audio cameras receive adequate power for both video processing and audio functionality.
Start by following the proper installation steps, which include connecting the PoE input to your network switch and routing the separated data and power outputs to your camera.
Pay close attention to power distribution methods and DC coupler connections, as improper setup can result in insufficient power for the camera’s audio components.
PoE Splitter Installation Steps
The foundation of a successful two-way audio security camera installation relies on proper PoE splitter setup, which requires careful attention to power specifications and configuration steps.
You’ll need to verify your camera’s voltage requirements before selecting a compatible PoE splitter that outputs 5V, 12V, or 24V. Position the PoE splitter near a power outlet to accommodate DC connections for your speaker and microphone.
- Connect the input port of your PoE splitter to the PoE switch or injector using an Ethernet cable.
- Run a separate Ethernet cable from the PoE splitter’s output to your camera.
- Connect the DC output cables to your external audio devices according to their voltage specifications.
Regular maintenance checks guarantee uninterrupted power delivery and peak audio performance.
Power Distribution Methods
Multiple power distribution strategies exist for two-way audio security cameras, each designed to address specific installation requirements and equipment configurations. When implementing PoE power distribution methods, you’ll need to take into account your network infrastructure and audio component requirements.
| Component | Power Method | Required Equipment |
|---|---|---|
| Camera Only | Direct PoE | Standard PoE switch |
| Camera + Audio | PoE Splitter | 1-to-2 DC splitter |
| Non-PoE Setup | Separate Power | Female DC couplers |
For 2-lead audio connector setups, you’ll require a 1-to-2 DC power splitter to distribute power between your microphone and speaker while maintaining the camera connection. Female DC power couplers guarantee secure bridging between components. Always verify your total power consumption doesn’t exceed the PoE splitter’s output capacity to maintain ideal security cameras performance.
DC Coupler Connections
Building on these power distribution foundations, DC coupler connections form the backbone of your two-way audio camera’s electrical system.
You’ll need a Female DC Power Coupler to bridge connections between your camera and power source, guaranteeing stable power delivery for consistent audio transmission.
When implementing PoE solutions, your Power over Ethernet splitters enable simultaneous power and data transmission, streamlining installation by eliminating multiple cable runs.
Always verify your PoE switch or injector matches your camera’s power specifications to prevent equipment damage.
For multi-device setups, a 1-to-2 DC Power Splitter distributes power to both cameras and external audio equipment like microphones or speakers.
- Confirm proper grounding in 2-lead audio configurations to minimize interference
- Match PoE equipment specifications with camera requirements
- Use quality female DC couplers for reliable power bridging
Accessing Your Camera’s Web Interface for Audio Settings
Configuration of audio settings requires accessing your camera’s web interface through a compatible browser.
You’ll need to make sure your camera connects to the same local network as your computer or mobile device before proceeding.
Use Microsoft Edge or Chrome to navigate to your camera’s IP address or NVR web interface.
When accessing the cameras, you’ll need proper login credentials to reach the settings menu where audio configurations are available.
Once logged in, locate the audio settings section within your camera’s menu.
Here you can enable two-way audio functionality and adjust both microphone and speaker volume levels according to your needs.
The Config Tool helps identify cameras on your local network, allowing you to make necessary audio adjustments for peak performance across all connected devices.
Enabling Two-Way Audio Through Camera Configuration
Once you’ve accessed your camera’s web interface, you’ll need to locate the audio settings section to activate two-way communication features.
Navigate to the configuration menu and look for options labeled “Audio,” “Two-Way Audio,” or “Intercom” depending on your camera model.
You can then enable the microphone and speaker functions by toggling the appropriate switches or checkboxes in this section.
Camera Settings Access
Before you can establish two-way communication through your security camera, you’ll need to access the camera’s configuration settings through its web interface.
You can accomplish this through your local network using compatible browsers like Microsoft Edge or Chrome. Once you’ve accessed the interface, you’ll be able to enable two-way audio and configure essential settings.
Here are three methods for camera settings access:
- Direct web interface access – Connect to your camera’s IP address through a compatible browser on your local network
- NVR web interface navigation – Access camera settings through your network video recorder’s web portal to enable two-way audio
- Config Tool utilization – Use the manufacturer’s Config Tool to locate cameras and modify audio settings for enhanced functionality
Audio Feature Activation
When you’ve successfully accessed your camera’s configuration interface, the next step involves locating and activating the two-way audio feature within the settings menu.
Navigate to the audio options section where you’ll find the toggle for enabling two-way communication. Once you activate this feature, you’ll need to adjust both microphone and speaker volume settings to guarantee ideal communication clarity during conversations.
For cameras requiring external audio connections, verify that your RCA or 2-lead wire audio connectors are properly configured before proceeding with audio feature activation.
After completing the setup, use your mobile application to test the microphone and speaker functions. This allows you to confirm real-time communication capabilities work correctly.
Remember to regularly update your camera’s firmware to maintain proper audio functionality and access the latest enhancements.
Adjusting Microphone and Speaker Volume Settings
Since proper audio levels are essential for effective two-way communication, you’ll need to access your camera’s web interface through a compatible browser to adjust both microphone and speaker volume settings.
Optimal audio levels require accessing your camera’s web interface to fine-tune microphone and speaker volume settings for clear two-way communication.
If you’re having trouble locating your camera, use the Config Tool to find it on your local network first.
Within the camera settings, navigate to the dedicated audio options where you can enable two-way audio and specify volume levels.
Look for the microphone button and speaker controls to make precise adjustments based on your environment’s needs.
- Test audio functionality immediately after making volume changes to verify clarity and communication quality
- Consult your camera’s documentation for model-specific audio setting instructions and ideal configuration recommendations
- Regularly fine-tune volume levels based on ambient noise conditions and user feedback
Mobile App Setup for Remote Two-Way Communication
After configuring your camera’s audio settings, you’ll want to establish remote access through the manufacturer’s dedicated mobile app. Download the specific app for your IP cameras to gain live feed access and two-way audio capabilities. Once installed, select your desired camera from the interface to access its settings and enable the communication features.
| Setup Step | Action Required | Result |
|---|---|---|
| App Download | Install manufacturer’s mobile app | Access to camera controls |
| Camera Selection | Choose specific IP camera | Enable settings access |
| Audio Activation | Toggle microphone/speaker features | Two-way communication ready |
Activate the microphone to speak with individuals near your camera, while the speaker allows you to hear captured audio. Maintain a stable internet connection for ideal performance and regularly update your app to enhance mobile app setup for remote two-way communication functionality.
Testing Audio Quality and Troubleshooting Common Issues
With your mobile app configured and ready for remote communication, you’ll need to verify that your audio components deliver clear, reliable performance.
Start by accessing your camera’s web interface or mobile app to adjust microphone and speaker settings, focusing on volume levels and clarity. Test the two-way audio feature in various environmental conditions to identify potential issues from background noise or weather exposure.
If you experience audio feedback, reposition the microphone and speaker to minimize proximity interference. For RCA connector cameras, guarantee all audio connections are secure and compatible to prevent distortion.
- Confirm your camera connects to the same Wi-Fi network as your device
- Enable all app permissions for microphone access in your device settings
- Test audio quality during different times and weather conditions for consistency
Practical Applications and Best Practices for Two-Way Audio
Once you’ve verified your two-way audio system works reliably, you can implement it across numerous scenarios that enhance both security and convenience.
You’ll find two-way audio particularly valuable at entry points, where you can greet visitors or delivery personnel remotely without opening doors. This feature proves essential for monitoring children or elderly family members, providing immediate interaction when needed.
For security purposes, you can use two-way audio to deter intruders by announcing your awareness of their presence.
In business settings, leverage this technology for seamless communication with remote employees, improving collaboration and operational efficiency.
To maintain peak performance, confirm you’re updating firmware regularly and adjusting audio settings appropriately. These practices guarantee your surveillance system delivers effective communication capabilities.
Frequently Asked Questions
How Does Two-Way Audio Work on Security Cameras?
You’ll connect a microphone and speaker to your camera, enabling voice transmission through your smartphone app. The system captures audio input, transmits it digitally, and plays it through the camera’s speaker for real-time communication.
How Well Do Security Cameras Pick up Audio?
You’ll find audio pickup varies greatly between camera brands and models. External microphones improve clarity considerably, while built-in ones often struggle with distance and ambient noise, requiring sensitivity adjustments.
How Do I Set up Two-Way Audio on Blink?
You’ll need to download the Blink app, verify your camera model supports audio, navigate to camera settings, enable two-way audio, then use live view’s microphone icon to communicate.
Can I Connect a Speaker to a DVR?
You can connect a speaker to most DVRs using RCA connectors or audio output ports. You’ll need to enable audio settings in your DVR configuration and guarantee your cameras support audio recording capabilities.


Leave a Reply