You’ve invested in home climate sensors to monitor temperature, humidity, and air quality, but placement can make or break their effectiveness. Mount them incorrectly, and you’ll get skewed readings that lead to poor HVAC decisions and wasted energy. The difference between accurate environmental data and misleading measurements often comes down to understanding the subtle factors that influence sensor performance in your specific living space.
Understanding Climate Sensor Technology and Types
Modern homes rely on sophisticated climate sensors to monitor and maintain ideal indoor environments. You’ll find several types of sensors working together to create optimal conditions.
Temperature sensors track thermal variations, while humidity sensors measure moisture levels that directly impact your comfort and health. Air quality monitors assess particulate matter like PM2.5 and PM10, helping you breathe cleaner air indoors.
Smart thermostat sensors represent the most advanced option, automatically adjusting your heating and cooling based on occupancy patterns and real-time environmental data. These intelligent devices can remarkably reduce energy consumption while maintaining consistent comfort levels throughout your home.
Each sensor type serves a specific function, but they work best when integrated into a thorough climate monitoring system that responds to your home’s unique environmental needs.
Why Proper Placement Matters for Accuracy
Having the right sensors means nothing if you don’t position them correctly throughout your home. Poor sensor placement leads to inaccurate readings that’ll sabotage your heating and cooling systems’ efficiency.
When sensors capture skewed data, your HVAC system can’t maintain comfortable temperatures, resulting in wasted energy and higher bills.
Proper sensor placement requires strategic thinking about environmental factors:
Strategic sensor positioning demands careful consideration of heat sources, airflow patterns, mounting height, and surrounding surfaces to ensure optimal performance.
- Avoid direct sunlight and heat sources – These create false readings that don’t reflect actual room conditions
- Stay clear of drafts – Airflow disrupts accurate temperature measurements
- Install at 5-foot height – This positioning best represents the ambient conditions you’ll experience
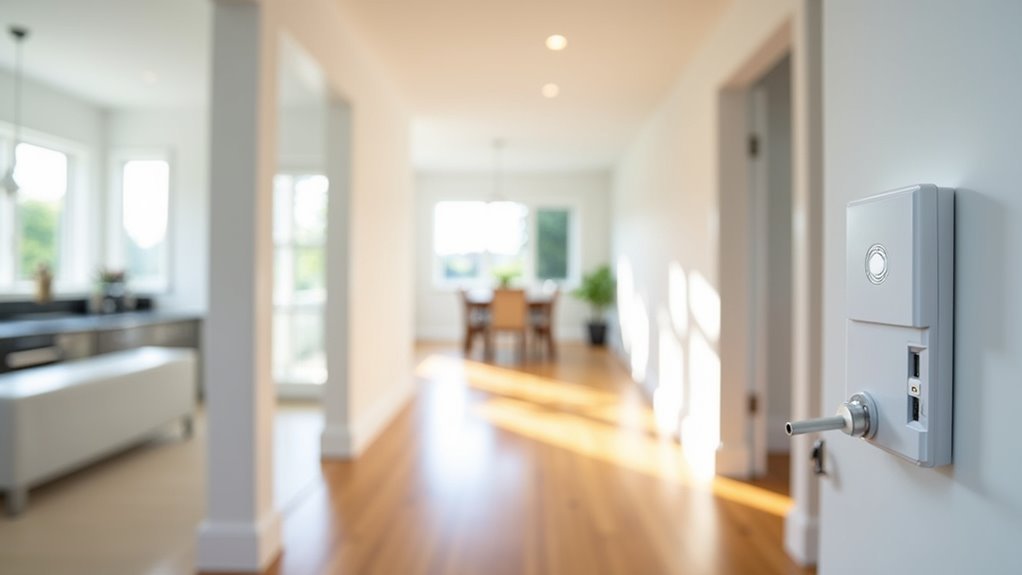
- Consider wall proximity – Nearby surfaces can influence sensor readings and compromise accuracy
Multiple sensors throughout your home provide thorough temperature data, enabling precise climate control that responds to actual conditions rather than isolated hot or cold spots.
Indoor Temperature Sensor Positioning Guidelines
You’ll achieve the most accurate temperature readings by mounting your sensors at chest height—roughly 5 feet from the floor—where they can capture the air you actually breathe.
Keep them away from windows, heating vents, appliances, and other heat sources that’ll throw off their measurements.
Focus on placing sensors in the rooms you use most, like your living room and bedrooms, where precise temperature control matters most for your comfort.
Optimal Height Placement
Finding the sweet spot for your indoor temperature sensor’s height can make the difference between accurate readings and misleading data.
You’ll want to position your temperature sensor between 1.25 to 2 meters (4 to 6.5 feet) above ground level to capture the average temperature of occupied spaces where you actually live and work.
This height range guarantees you’re measuring the air temperature that truly affects your comfort.
Here’s why proper height placement matters:
- Avoids temperature stratification that occurs near ceilings
- Reflects the actual conditions in your living zone
- Prevents interference from floor-level cold drafts
- Maintains consistency with standard meteorological practices
Skip mounting your temperature sensor too high or too low—stick to this proven range for reliable climate monitoring.
Avoiding Heat Sources
Beyond proper height placement, strategic positioning away from heat sources becomes equally important for accurate temperature readings.
You’ll need to maintain at least three feet of distance from heat-generating appliances like ovens, refrigerators, and dishwashers. These devices create localized warm zones that’ll skew your sensor’s data considerably.
Windows and areas receiving direct sunlight present another challenge you must address. Solar gain causes dramatic temperature spikes that don’t reflect your room’s actual ambient conditions.
You should also avoid placing sensors near HVAC vents or returns, where air drafts create misleading readings.
Instead, choose interior wall locations where unobstructed airflow exists around your sensor. This positioning prevents thermal interference from nearby structures and furnishings, ensuring your climate monitoring system provides reliable, accurate data for ideal home comfort management.
Room-Specific Positioning Strategies
While general placement principles apply throughout your home, each room type demands specific sensor positioning considerations based on its unique characteristics and usage patterns.
In living rooms, position temperature and humidity sensors on interior walls away from entertainment centers and fireplaces. The central seating area provides the most representative readings for this high-traffic space.
For bedrooms, mount sensors on walls opposite to windows at the standard 5-foot height. This placement captures accurate temperature data without interference from external temperature fluctuations.
Kitchen sensors should avoid placement near ovens, dishwashers, or refrigerators.
Bathroom positioning requires distance from shower areas to prevent humidity spikes.
Home office sensors work best on walls away from computers and printers.
Basement sensors need protection from moisture sources and heating equipment.
Optimal Humidity Sensor Installation Locations
When you’re installing humidity sensors throughout your home, proper placement determines whether you’ll get accurate readings or misleading data that could throw off your entire climate control system.
Mount your humidity sensor between 1.25 and 2 meters above the ground to capture readings in the breathing zone while avoiding floor heat interference.
Keep sensors away from windows and direct sunlight, which cause solar heating and false high readings. Don’t position them near heat-generating appliances or air vents that create localized temperature variations.
Avoid windows, direct sunlight, heat sources, and air vents when positioning humidity sensors to prevent inaccurate readings from temperature fluctuations.
Install sensors over natural surfaces like carpet or tile rather than heat-retaining materials.
Choose central locations in frequently used rooms like living rooms and bedrooms for the most representative humidity measurements of your overall indoor environment.
Air Quality Monitor Placement Strategies
You’ll need to contemplate two distinct placement approaches when installing air quality monitors in your home.
Indoor air quality sensors require strategic positioning in frequently occupied rooms like bedrooms and living areas, away from windows and vents that could skew readings.
Outdoor air quality sensors serve a different purpose, helping you monitor external pollution levels and make informed decisions about ventilation and outdoor activities.
Indoor Air Quality Sensors
Since indoor air quality directly impacts your health and comfort, strategic placement of air quality monitors becomes essential for accurate readings and effective environmental management.
Your indoor air quality sensors need proper positioning to effectively track PM2.5, PM10, and CO2 levels throughout your home.
Key placement guidelines for ideal sensor performance:
- Install at breathing zone height – Position monitors 4 to 5 feet above floor level where you spend most of your time
- Choose rooms with limited ventilation – Focus on offices and bedrooms where air circulation may be restricted
- Avoid environmental interference – Keep sensors away from direct sunlight, heaters, and AC vents that skew readings
- Stay clear of pollution sources – Don’t place near kitchens or garages where localized contamination occurs
Regular calibration based on specific locations maintains accuracy over time.
Outdoor Air Quality Sensors
Monitoring outdoor air quality requires different placement strategies than indoor sensors, as environmental factors like wind patterns, precipitation, and structural interference greatly impact measurement accuracy. Your outdoor air quality sensors need strategic positioning to deliver reliable data.
Place your PM25 Wireless Outdoor Particulate Monitor in sheltered areas like patios, positioning it 1.5 to 2 meters above ground. This height captures accurate readings without ground-level pollutant interference. Install on level terrain with short grass to minimize rain splash-back effects.
| Location Factor | Best Practice |
|---|---|
| Height | 1.5-2 meters above ground |
| Surface | Level ground with short grass |
| Shelter | Protected patios or covered areas |
| Distance from structures | Away from buildings and trees |
| Maintenance | Regular seasonal calibration |
Avoid placing sensors near structures that create air turbulence, and calibrate regularly for seasonal accuracy.
Leak Detection Sensor Installation Points
When water damage strikes your home, it’s often in predictable locations where pipes, appliances, and plumbing fixtures create the highest risk.
Strategic leak detection sensor installation points can save you thousands in repairs by providing timely alerts before minor leaks become major disasters.
Position your WH31LA Leak Detector at ground level on flat surfaces where water presence is most likely detected.
Focus on these critical areas:
- Under kitchen and bathroom sinks where pipe connections frequently develop leaks
- Near water heaters and HVAC units in basements or utility rooms
- Behind washing machines and dishwashers where hose failures commonly occur
- Around toilets and bathtubs where seal deterioration creates moisture problems
Install multiple detectors in high-risk zones and verify they’re unobstructed for peak performance and audible alarm functionality.
Multi-Room Sensor Distribution Planning
You’ll maximize your home’s climate control effectiveness by establishing an extensive sensor network that covers multiple rooms rather than relying on a single unit.
Your distribution strategy should focus on high-traffic areas like living rooms and bedrooms while maintaining proper spacing between sensors to avoid coverage gaps.
Consider implementing zone-based planning that groups rooms with similar usage patterns, allowing you to create customized climate zones that respond to your family’s daily routines.
Prioritizing High-Traffic Areas
Since you spend most of your time in certain rooms, these high-traffic areas should receive priority when you’re planning your sensor distribution strategy.
Living rooms and hallways represent the most critical locations because they accurately capture average occupancy patterns and environmental conditions throughout your home.
When selecting high-traffic areas for sensor placement, focus on spaces where family members gather regularly:
- Living rooms – Central gathering spaces that reflect overall home comfort levels
- Main hallways – Transit zones that experience consistent foot traffic and air circulation
- Kitchens – Active areas with varying temperature conditions from cooking activities
- Master bedrooms – Primary sleeping spaces requiring ideal climate control for comfort
These locations provide extensive data about your home’s climate patterns, ensuring your HVAC system responds effectively to actual usage.
Strategic Sensor Spacing
After identifying your high-traffic priority areas, proper spacing between sensors becomes essential for creating an effective multi-room monitoring network.
You’ll want to maintain 10-15 feet between each unit to prevent interference while capturing localized climate variations without overlap.
When sensors are placed throughout larger homes, create distinct zones that correspond to specific areas for precise monitoring.
This strategic distribution guarantees you’re getting accurate readings from each room’s unique microclimate rather than redundant data from overlapping coverage areas.
Focus on positioning sensors in central locations within each designated zone.
This approach allows your HVAC system to respond appropriately to actual conditions in different areas, creating targeted comfort zones that adapt to your home’s varying thermal characteristics and usage patterns.
Zone-Based Coverage Planning
When creating an extensive zone-based coverage plan, divide your home into distinct climate zones that reflect actual living patterns and architectural features.
You’ll want to strategically place sensors in each frequently used room to monitor temperature, humidity, and occupancy patterns effectively. This approach enables your HVAC system to deliver tailored climate control based on real-time conditions.
Position sensors in central locations approximately 5 feet above the floor to capture accurate readings from the breathing zone. Avoid placing them near problematic areas that’ll skew your data.
- Install sensors in bedrooms, living areas, and home offices where occupancy varies throughout the day
- Avoid heat sources, direct sunlight, and air vents that create misleading readings
- Calibrate sensors consistently to maintain data accuracy for ideal system performance
- Monitor multiple zones simultaneously for thorough environmental control
Avoiding Common Placement Mistakes
While proper sensor placement can greatly improve your home’s climate control, incorrect positioning often undermines accuracy and wastes energy.
Don’t place sensors near heat-generating appliances like ovens or radiators, as they’ll create false temperature readings. Minimize direct sunlight exposure, which causes temperature spikes that don’t reflect actual room conditions or humidity levels.
Heat sources and direct sunlight distort sensor readings, causing your HVAC system to make decisions based on inaccurate temperature data.
Keep sensors away from air vents where drafts skew measurements. Avoid hiding them behind furniture or curtains, as obstructed airflow leads to erroneous readings.
Instead, position sensors at least five feet above the floor on interior walls. This height captures the average breathing zone temperature in frequently used rooms, ensuring your HVAC system responds to conditions where you actually spend time rather than floor-level air.
Heat Sources and Interference to Avoid
Beyond basic positioning mistakes, heat-generating devices create microclimates that’ll throw your sensors completely off track.
Heat sources artificially inflate temperature readings, making your data worthless for understanding your home’s actual conditions.
You’ll want to maintain distance from these interference culprits:
- Radiators and heating appliances – These create concentrated hot zones that skew readings considerably upward
- Electronics like computers and televisions – They emit constant heat that affects nearby temperature measurements
- Kitchen appliances and stoves – Cooking equipment generates intense localized heating that corrupts sensor data
- Direct sunlight through windows – Solar exposure causes dramatic temperature spikes throughout the day
Position sensors at least three feet away from any heat-emitting device.
This buffer zone guarantees you’re measuring ambient room conditions rather than artificial heat signatures.
Calibration and Fine-Tuning for Your Space
Even with perfect placement, your climate sensors won’t deliver accurate readings until you’ve properly calibrated them for your specific environment.
Start by testing multiple sensors in identical locations to identify discrepancies between devices. Use thermocouples as your calibration standard, adjusting each sensor’s settings to match these reliable reference points.
Conduct calibration across wide temperature and humidity ranges that reflect your home’s actual conditions.
Consider unique environmental factors like temperature gradients, airflow patterns, and seasonal variations that affect each sensor’s location. Don’t let local calibration negate important seasonal effects that could skew your readings.
Establish consistent reference points throughout your space and regularly compare sensors to maintain accuracy.
When you discover discrepancies, investigate the causes thoroughly before making adjustments to guarantee your calibration truly improves performance.
Seasonal Considerations for Sensor Performance
As seasons change throughout the year, your carefully calibrated climate sensors face new challenges that can throw off their accuracy.
Seasonal changes bring unique environmental pressures that require proactive adjustments to maintain reliable readings.
Winter drafts near windows can create artificially low temperature readings, while summer’s direct sunlight exposure causes false high measurements.
Spring and fall shifts create particularly volatile conditions as outdoor weather patterns fluctuate dramatically.
To optimize your sensor performance year-round:
- Relocate sensors away from windows during extreme seasons to avoid draft and sunlight interference
- Schedule quarterly calibration checks to account for seasonal environmental shifts
- Monitor local climate patterns to anticipate when adjustments become necessary
- Consider multiple sensor locations to cross-reference readings during transitional periods
Understanding these seasonal impacts guarantees your climate control systems respond accurately to your home’s true environmental conditions.
Outdoor Weather Monitoring Integration
When you’re setting up outdoor weather monitoring, you’ll need to position your sensors at least 4 feet above ground level to capture accurate readings without interference from vegetation.
You must also shield your temperature and humidity sensors from direct sunlight and rain using proper radiation covers to prevent data corruption.
Keep your sensors well away from buildings, trees, and fences since these obstructions can create turbulence that’ll compromise your wind measurements and overall data quality.
Optimal Sensor Heights
While indoor climate sensors offer flexibility in placement, outdoor weather monitoring demands precise height specifications to guarantee accurate data collection.
You’ll need to follow specific ideal sensor heights to make certain your weather station provides reliable measurements.
Here are the essential height requirements for your outdoor sensors:
- Precipitation sensors: Position 0.3–2 meters (1–6.5 feet) above ground to measure rainfall without structural interference.
- Temperature sensors: Install at 1.25–2 meters (4–6.5 feet) to avoid ground heat and capture true atmospheric readings.
- Wind sensors: Mount at 10 meters (33 feet) to minimize turbulence from nearby obstructions.
- Humidity sensors: Place over natural ground surfaces rather than concrete or asphalt to prevent heat absorption.
These ideal sensor heights make certain you’ll capture accurate environmental data for reliable home weather monitoring.
Weather Shield Protection
Protecting your outdoor weather sensors from environmental elements requires more than just proper height placement—you need effective weather shield protection to maintain data accuracy.
Radiation shields are essential for temperature and humidity sensors, preventing direct sunlight from creating artificially elevated readings that don’t reflect true ambient conditions.
When setting up your weather station, position PM2.5 monitors in protected areas away from direct sunlight and wind exposure. This shielding guarantees accurate particulate measurements without environmental interference skewing your data.
Following World Meteorological Organization guidelines for weather shield placement minimizes environmental factors that compromise sensor integrity.
Proper shielding allows your sensors to measure actual atmospheric conditions rather than localized heat effects from sun exposure or wind turbulence that can distort readings.
Distance From Obstructions
Strategic distance from obstructions determines whether your outdoor weather sensors capture accurate atmospheric data or compromised readings influenced by local interference.
You’ll need to position sensors at least ten times the height of nearby obstacles to minimize turbulence effects. When you place a sensor near buildings, trees, or structures, you’re introducing variables that distort natural atmospheric conditions.
Follow these placement guidelines for maximum accuracy:
- Precipitation sensors: Mount 0.3–2 meters above ground in open areas to prevent splash-back interference
- Wind sensors: Install at 10-meter height in completely unobstructed spaces for reliable speed/direction readings
- General sensors: Maintain significant clearance from vertical obstructions like walls, fences, and vegetation
- Reference standards: Apply World Meteorological Organization guidelines to guarantee data consistency and professional-grade monitoring
HVAC System Compatibility and Optimization
When you’re integrating climate sensors with your HVAC system, proper placement becomes the foundation of efficient temperature control and energy savings.
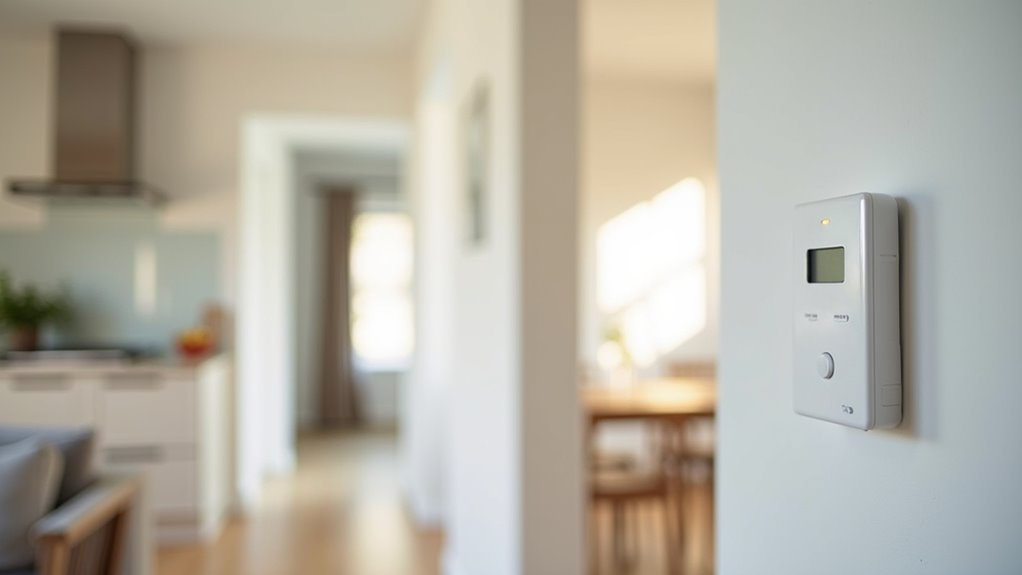
Position your sensors on interior walls approximately 5 feet above the floor in central locations of frequently used rooms. This strategic placement guarantees your HVAC systems receive accurate temperature readings for peak performance.
Strategic sensor placement at 5-foot height on interior walls in central room locations ensures accurate temperature readings for optimal HVAC performance.
Avoid installing sensors near heat-generating appliances, air vents, or areas with direct sunlight, as these create false readings that lead to inefficient operation.
You’ll achieve better results by deploying multiple sensors throughout different zones of your home, creating an all-encompassing temperature profile.
Don’t forget calibration – it’s vital for preventing discrepancies that cause improper HVAC operation, increased energy consumption, and discomfort.
Maintenance and Long-Term Performance Tips
Proper sensor placement sets you up for success, but consistent maintenance guarantees your climate sensors deliver reliable performance for years to come.
Without regular upkeep, even perfectly positioned sensors can provide inaccurate readings that compromise your home’s comfort and energy efficiency.
Essential maintenance practices include:
- Regular calibration – Recalibrate sensors after environmental changes or renovations to maintain accuracy
- Cleaning protocols – Remove dust and obstructions monthly to prevent skewed readings
- Battery monitoring – Check wireless sensor batteries quarterly and replace proactively
- Environmental assessment – Verify sensors remain away from heat sources, vents, and direct sunlight
You’ll also want to analyze data from multiple sensors regularly to identify patterns and optimize your HVAC system’s performance for maximum comfort.
Frequently Asked Questions
Where Is the Best Place to Put Thermostat Sensors?
You should place thermostat sensors on interior walls about five feet high in central, frequently-used rooms. Avoid spots near heat sources, direct sunlight, air vents, or windows to guarantee accurate temperature readings.
Where Is the Best Place to Put a Weather Station Sensor?
You’ll want to place weather station sensors 1.25-2 meters above ground in open areas. Keep them away from buildings, trees, and heat sources that’ll interfere with accurate temperature, humidity, and precipitation measurements.
Where to Put a Humidity Sensor in a House?
You should place humidity sensors on interior walls about five feet high in central locations within frequently used rooms. Avoid areas near windows, doors, vents, or heat sources that’ll cause inaccurate readings.
What Is the Best Height for a Temperature Sensor?
You should mount your temperature sensor between 1.25 to 2 meters above ground level. This height range guarantees you’ll get accurate readings that reflect your room’s average temperature and occupants’ comfort levels.


Leave a Reply