You’ve probably looked at your manual window blinds and wondered if there’s an easier way to control them throughout your home. Motorizing your existing blinds isn’t as complicated as you might think, and it doesn’t require replacing your entire window treatments. With the right approach and planning, you can transform those daily chores into automated convenience. However, choosing the wrong components or skipping essential preparation steps could leave you with expensive mistakes.
Assess Your Current Window Blinds for Motorization Compatibility

Why settle for manually adjusting your blinds when you can upgrade to motorized convenience?
Before installing motorized blinds, you’ll need to assess your existing window treatments for compatibility. Start by checking your blind style—vertical, horizontal, and roller blinds each have different motorization requirements. Measure the dimensions and weight to determine the appropriate motor strength needed for smooth operation.
Examine your current control mechanisms, as these must be removed or adapted during conversion.
Inspect the mounting hardware to ascertain it can support the additional weight and mechanics of the motorized system.
Finally, evaluate available power source options like battery, solar, or hardwired connections. This thorough assessment guarantees your existing blinds can successfully accommodate motorization without costly modifications.
Choose the Right Motor Kit and Power Source for Your Setup
Once you’ve confirmed your blinds can accommodate motorization, selecting the right motor kit becomes your next essential decision.
Start by measuring your window treatments’ dimensions and weight to determine required motor strength. This guarantees your motorized window treatments will operate smoothly without strain.
Next, choose your power source based on your specific needs:
- Battery-powered systems – Offer installation flexibility but need regular battery replacements
- Hardwired systems – Provide consistent power without ongoing maintenance requirements
- Solar-powered solutions – Eco-friendly option requiring adequate sunlight in the installation area
Consider your budget carefully, as motorization kit prices vary considerably.
Look for options balancing features with cost-effectiveness. Verify compatibility with your existing blinds to prevent installation complications.
The right combination of motor strength and power source will deliver reliable, long-term performance.
Gather Essential Tools and Components for Installation
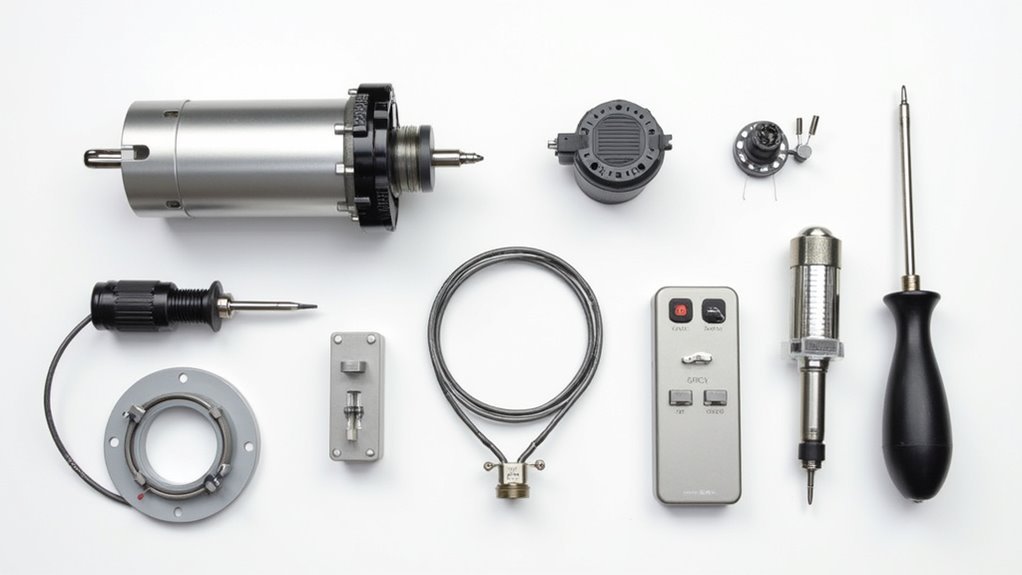
You’ll need to collect your motorization kit components, which typically include the motor unit, remote control, and mounting hardware specific to your window treatment type.
Gather basic installation tools like a drill, screwdriver, measuring tape, and level to guarantee proper alignment and secure mounting.
Don’t forget measurement and testing equipment to verify compatibility and confirm everything’s working correctly before finalizing the installation.
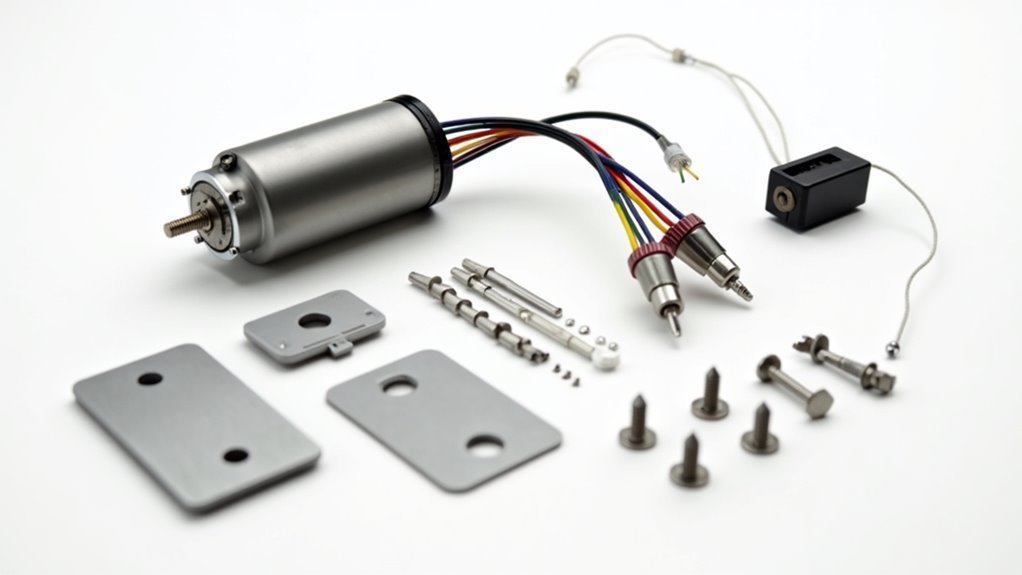
Required Motorization Kit Components
Success with motorizing your window blinds depends heavily on having the right components and tools before you begin installation. Your motorization kit should include specific essential elements to transform your existing window treatments into motorized window coverings.
Every complete kit contains these core components:
- Motor unit with adequate torque for your blind’s weight and size
- Remote control for convenient wireless operation
- Mounting hardware including brackets and necessary screws
You’ll also need to evaluate power source options for your setup. Battery-powered systems offer flexibility but require periodic battery changes. Hardwired systems provide consistent power without maintenance concerns. Solar options work well for windows with adequate sunlight exposure.
The installation process becomes straightforward when you’ve verified compatibility and gathered all required components beforehand.
Basic Installation Tools
Five basic tools make the difference between a smooth installation and frustrating delays when motorizing your blinds.
You’ll need a complete screwdriver set with both flathead and Phillips heads to attach the motor and mounting brackets securely to your window frame. A measuring tape guarantees accurate window dimension assessment and confirms motorization kit compatibility.
Wire cutters and strippers are vital for preparing electrical connections, particularly if you’re choosing a hardwired system for your motorized blinds. Your drill creates necessary holes in walls or window frames for motor mounting and bracket installation.
Finally, keep a level handy to assure straight installation, which is essential for peak operation and visual appeal of your newly motorized window treatment.
Measurement and Testing Equipment
While basic installation tools get you started, precise measurement and testing equipment guarantee your motorization project succeeds without costly mistakes or safety hazards.
You’ll need accurate measurements of your existing blinds’ dimensions and weight specifications to confirm compatibility with your chosen motorization kit. A measuring tape and notepad become essential for recording these vital details during your assessment phase.
Testing equipment proves equally important for motorized blinds installation. A level guarantees proper alignment for smooth operation, while a multimeter becomes essential for hardwired solutions requiring voltage verification.
These testing tools help you:
- Verify electrical connections meet safety standards
- Confirm proper voltage supply for motorized components
- Test operational functionality before finalizing installation
Document all measurements and testing results to streamline your installation process.
Remove Existing Manual Controls and Prepare the Blinds
The transformation from manual to motorized blinds starts with dismantling your existing control system.
Begin by carefully disconnecting cords or wands, which typically involves unscrewing attachments from the blind mechanism. Remove existing manual controls completely to make room for your motorization kit components.
Next, clean surfaces where the motor mount will attach, guaranteeing ideal adhesion and performance. Measure dimensions of your blinds to confirm compatibility with your chosen kit. Check weight specifications since motors have load limits that must accommodate your blind’s mass.
Prepare area around the installation site, clearing space for the motor housing and any wiring requirements.
Verify you have adequate room for battery compartments if using wireless systems. This preparation guarantees proper fit and prevents obstructions during operation.
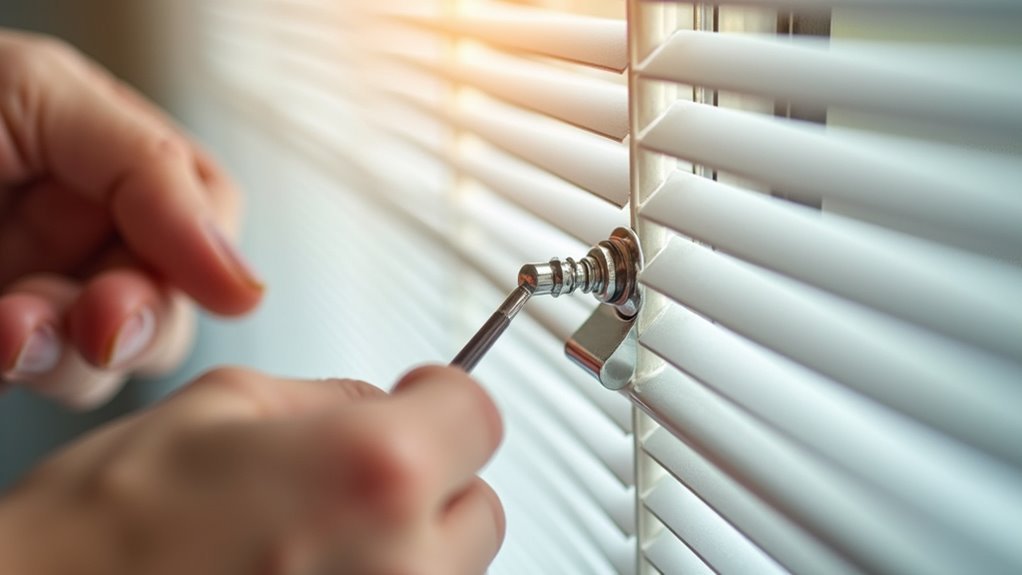
Install the Motor Assembly and Mounting Hardware
Position your motor assembly at the head rail’s designated mounting point, making sure it aligns perfectly with the blind’s operating mechanism. Confirm your motorized window blinds properly fit before proceeding with installation. Secure the motor assembly using the provided mounting hardware, including screws and brackets designed for your specific window type.
Follow these critical installation steps:
- Verify the motor can support your blind’s weight and dimensions
- Install brackets securely to prevent movement during operation
- Test alignment before final tightening to make certain smooth functionality
Carefully attach all mounting hardware according to manufacturer specifications. Use appropriate screws for your wall material to guarantee stable installation.
Once mounted, test the motor assembly to confirm it can operate effectively. The unit should raise and lower blinds smoothly without binding or excessive noise, indicating proper installation.
Connect Wiring and Configure Control Systems
Now you’ll wire the motor connections to establish power and communication between components.
Start by connecting the motor leads to your chosen power source, whether it’s battery, solar, or hardwired electrical supply.
Once the wiring’s secure, you can program the control settings through your remote, smartphone app, or smart home system to customize operation preferences.
Wire Motor Connections
Once you’ve mounted your motor, establishing proper electrical connections becomes critical for reliable blind operation. Your motorized shades and blinds require compatible connections with your existing window treatment system, which means proper power supply and control wiring integration.
For AC motors, connect the power cord directly to an outlet while ensuring voltage compatibility. DC motors need either a battery pack or solar panel connection.
Follow these essential steps:
- Use a terminal block to securely organize motor wires
- Follow the manufacturer’s wiring diagram precisely for proper polarity
- Pay attention to control system connections for functionality
Once you’ve completed the electrical connections, test the system thoroughly by activating your control mechanism.
Verify the motor responds correctly to open and close commands, ensuring your blinds operate smoothly.
Program Control Settings
After establishing secure electrical connections, programming your control settings transforms basic motor wiring into an intelligent automated system.
You’ll use the Light Activated Blind Controller v.1.2.BAS code to program your PICAXE microcontroller, creating a remote controlled system that responds to ambient conditions. Set specific light thresholds for opening and closing your blinds based on your preferences.
The programming includes a vital 10mS delay before motor activation, preventing arcing that could damage your relay and power components.
Position your light-dependent resistor carefully for ideal sensors performance, guaranteeing accurate detection of ambient light levels.
Test your programmed settings by manually operating the control system and observing how your motor responds to different lighting conditions. This verification guarantees your automated blinds function properly before final installation.
Test Operation and Program Smart Home Integration
When you’ve completed the physical installation, testing your motorized blinds becomes the essential next step to confirm everything functions as intended.
First, test operation by checking the opening and closing mechanisms respond correctly to your programmed light sensitivity settings. Verify your motorization kit’s compatibility with existing smart home systems for seamless remote operation connectivity.
Follow manufacturer instructions to pair blinds with your smart home hub, enabling voice control and automated scheduling.
Key integration steps include:
- Customizing routines through apps for time-based or environmental triggers
- Configuring light level responses for automatic operation
- Setting up automated scheduling based on your daily preferences
Regularly monitor battery status to maintain consistent performance and prevent disruptions in your motorized blinds’ automated operation.
Frequently Asked Questions
How Do I Motorize My Existing Blinds?
You’ll need to check your blinds’ compatibility, buy a motorization kit with motor and controls, remove existing manual controls, install following instructions carefully, then test everything works properly.
Can I Make My Blinds Motorised?
You can make your existing blinds motorized by purchasing a compatible motorization kit. You’ll need to measure dimensions and weight to select the right motor strength for your specific window treatments.
Can You Automate Window Blinds?
You can automate window blinds using motorization kits that work with existing treatments. Control them through remotes, smartphone apps, or smart home systems for scheduled adjustments and improved energy efficiency.
How Do You Get Power to Motorized Blinds?
You’ll power motorized blinds through three options: battery-powered systems using lithium-ion batteries, solar-powered units with charging panels, or hardwired connections to your home’s electrical supply requiring professional installation.


Leave a Reply