
You’ve probably watched your energy bills climb while your old blinds hang there doing absolutely nothing to help. Installing energy-saving automated window blinds isn’t just about adding convenience to your home—it’s about creating a system that actively works to reduce your heating and cooling costs while you’re not even thinking about it. But there’s a specific way to approach this installation that determines whether you’ll see real savings or just end up with expensive window dressing.
Why Energy-Saving Automated Blinds Transform Your Home
When you install energy-saving automated blinds, you’re making a smart investment that can slash your heating and cooling costs by up to 30% while transforming how your home manages energy.
These motorized options automatically close during peak sunlight hours, dramatically reducing indoor temperatures and your air conditioning dependency.
Smart blinds work around the clock to keep your home cool naturally, cutting air conditioning costs without sacrificing comfort.
Your automated blinds integrate seamlessly with smart home systems, enabling real-time adjustments based on current weather conditions.
This intelligent light control optimizes energy efficiency throughout the year by managing solar heat gain and loss.
You’ll also boost your property value while appealing to environmentally-conscious buyers.
Beyond energy savings, these smart window coverings enhance your comfort and privacy through customizable light-filtering or blackout features, creating the perfect ambiance for any room.
Types of Automated Window Blinds for Maximum Energy Efficiency
Choosing the right type of automated window blind directly impacts your energy savings potential, with several distinct options offering unique benefits for different rooms and climate conditions.
- Motorized blinds operate through remote control or smart devices, allowing you to regulate natural light precisely and reduce artificial lighting dependency for significant energy savings.
- Light-filtering shades maintain privacy while permitting natural light entry, lowering daytime lighting costs and enhancing overall energy efficiency throughout your home.
- Blackout shades excel in bedrooms and media rooms by completely blocking sunlight, maintaining cooler indoor temperatures and reducing air conditioning demands during hot weather.
- Smart automated shades integrate seamlessly with your smart home system, programming themselves to open and close based on temperature changes or time schedules for ideal energy management.
Essential Tools and Materials for Smart Blind Installation
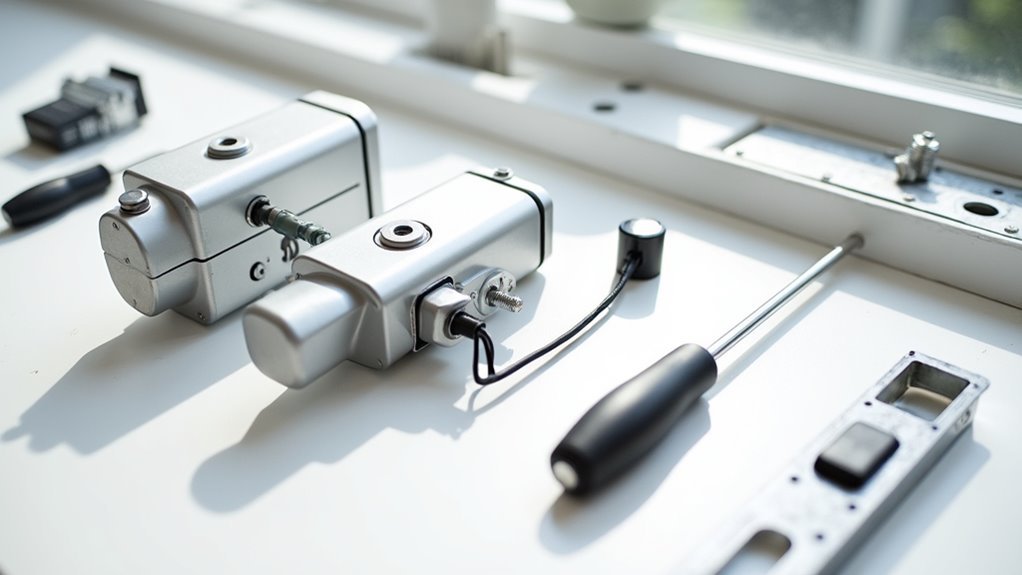
Before you can transform your home with energy-efficient automated blinds, you’ll need to gather the right tools and materials to guarantee a smooth, professional-quality installation.
| Essential Tools | Purpose |
|---|---|
| Measuring tape | Accurate window dimensions |
| Drill with bits | Secure the brackets firmly |
| Level | Ensure straight alignment |
Having these essential tools ready guarantees you can install smart blinds efficiently. Your measuring tape provides precise measurements, while the drill creates holes to secure the brackets properly. A level prevents crooked installation that could affect operation.
Don’t forget Phillips and flathead screwdrivers for tightening screws, plus a step ladder for elevated windows. Pre-drilling holes prevents material splitting and creates stronger bracket attachment. Gather your complete smart blind kit beforehand to avoid installation interruptions and achieve professional results.
Measuring Your Windows for Perfect Automated Blind Fit
Accurate measurements form the foundation of successful automated blind installation, turning your carefully gathered tools into the precision instruments needed for a flawless fit.
Precision measurements transform basic tools into specialized instruments, ensuring your automated blinds achieve perfect alignment and optimal performance.
Getting these measurements right guarantees your smart blinds operate smoothly and provide maximum energy efficiency.
Essential Measurement Steps:
- Measure the width at three points (top, middle, bottom) and use the narrowest measurement to confirm proper fit across all sections.
- Check height measurements from the window frame top to your desired length at three different points to account for irregularities.
- For inside mounts, subtract 1/4 inch from both width and height measurements to guarantee snug positioning within the frame.
- For outside mounts, add 2-3 inches to both dimensions for better light coverage and enhanced privacy.
Always double-check your measurements before ordering custom blinds to avoid costly sizing mistakes.
Choosing the Right Mounting Method for Your Window Type
How do you determine which mounting approach works best for your specific window configuration? Your mounting method depends primarily on your window style and desired aesthetic. Inside mount creates a clean, built-in appearance that maximizes window space, while outside mount makes windows appear larger and increases light coverage.
| Window Type | Recommended Mount | Reason |
|---|---|---|
| Casement | Outside Mount | Hardware interferes with inside installation |
| Double-Hung | Inside Mount | Clean fit within frame |
| Bay Windows | Outside Mount | Complex angles require external mounting |
Consider accessibility for motorized blinds—outside mount provides easier power outlet access compared to inside mount, which complicates wiring. Verify proper bracket alignment regardless of your chosen method to guarantee smooth operation of your automated system.
Preparing Your Installation Area and Work Space
Three critical steps will set you up for a smooth automated blind installation.
Preparing your installation area starts with clearing furniture and obstructions to create a safe workspace. You’ll need adequate room to maneuver tools and components without damage.
Follow these essential preparation steps:
- Clear the space – Remove all furniture and obstacles from around windows to guarantee unobstructed access.
- Measure windows accurately – Check width and height at three different points to ensure proper fit.
- Gather essential tools – Collect measuring tape, drill, screwdriver, and level before starting.
- Review the installation manual – Study brand-specific instructions thoroughly for complete understanding.
Organize your workspace by laying out all components and tools neatly. This prevents losing important parts and streamlines the entire installation process.
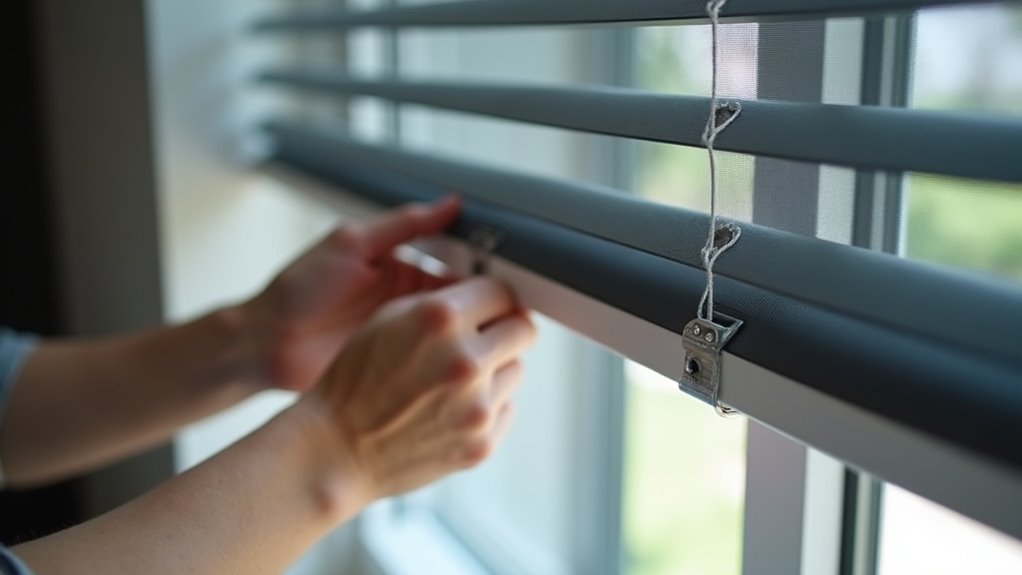
Installing Mounting Brackets for Automated Blinds
You’ll need to measure your window frame at three different points to guarantee accurate bracket placement for your automated blinds.
Use a level to mark the bracket positions on your wall or window frame, then pre-drill holes based on your bracket size and mounting surface type.
Secure the brackets tightly with the provided screws and double-check their alignment before mounting your blinds.
Bracket Positioning and Measurements
Before you begin installing your automated window blinds, accurate measurements and precise bracket positioning form the foundation of a successful installation. Proper measurements guarantee your blinds operate smoothly and provide ideal energy efficiency.
Follow these essential steps for perfect bracket positioning:
- Measure the window width at three points (top, middle, bottom) to determine ideal bracket placement and guarantee level installation.
- Position inside mount brackets 1-2 inches from the top of the window frame for unobstructed blind operation.
- Place outside mount brackets 2-3 inches above the frame and 3-5 inches wider than the window for maximum light coverage.
- Mark bracket positions with a pencil before drilling pilot holes, then use a level to confirm alignment before securing with screws.
Securing Brackets Properly
Once you’ve marked your bracket positions accurately, the actual installation process determines whether your automated blinds will function reliably for years to come. Installing motorized blinds requires methodical precision to secure mounting brackets effectively.
Start by pre-drilling holes at your marked positions to prevent material splitting and guarantee clean installation. Use a level throughout the process to maintain perfect alignment – even slight deviations can cause operational problems later.
| Installation Step | Key Consideration |
|---|---|
| Pre-drill holes | Prevents splitting, guarantees clean entry |
| Check alignment | Use level for straight installation |
| Tighten screws | Firm but not overtightened |
For accurate placement, tighten screws firmly while avoiding overtightening that could damage brackets or mounting surfaces. Proper securing prevents slippage and misalignment during operation.
Securing the Motor and Blind Components
After positioning your automated window blind system, securing the motor and blind components becomes critical for reliable operation.
You’ll need to install the motorized blinds following the manufacturers instructions precisely to achieve peak performance. Start by attaching the motor securely to your mounting brackets using the provided screws, preventing any potential misalignment issues.
Here’s your essential checklist:
- Verify compatibility – Double-check that all components match your specific blind model for seamless functionality.
- Connect properly – Follow manufacturer guidelines to ascertain the motor’s gear engages correctly with the blind mechanism.
- Test thoroughly – Activate the blinds to confirm smooth movement and proper response to remote or app commands.
- Inspect regularly – Check connections post-installation to ascertain everything remains secure and obstruction-free for continued energy-saving efficiency.
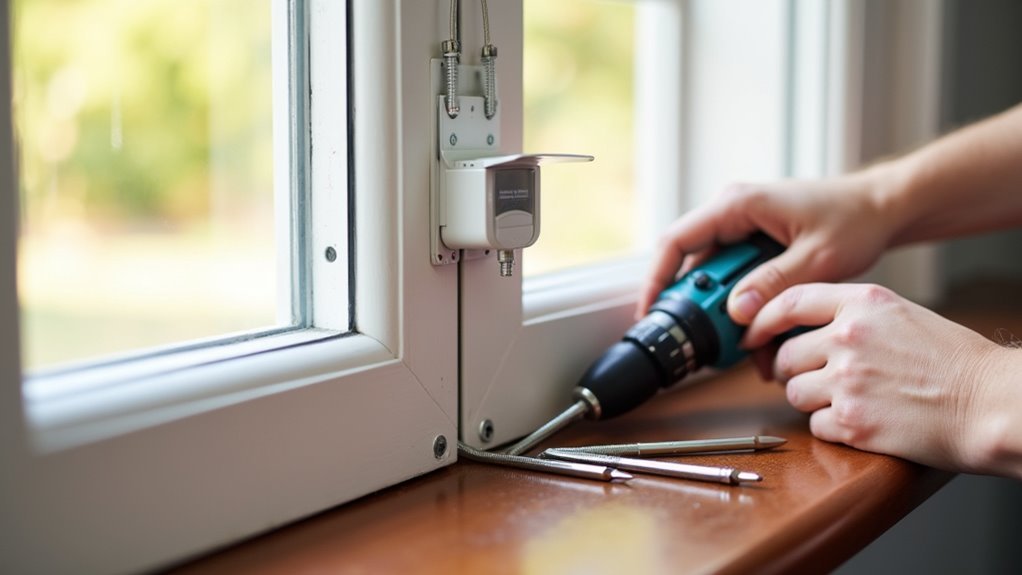
Connecting Power Sources for Motorized Operation
You’ll need to choose between battery-powered and hardwired options for your motorized blinds, with each offering distinct advantages for different installations.
Position your power source strategically to guarantee easy access for maintenance while meeting all electrical safety requirements and local building codes.
Whether you’re running 14/3 wire for hardwired systems or planning battery placement, proper positioning and compliance with safety standards will determine your installation’s long-term success.
Battery Vs Hardwired Options
When selecting motorized blinds for your home, the power source decision between battery-operated and hardwired systems greatly impacts both installation flexibility and long-term maintenance.
Battery options provide unmatched installation freedom since you won’t need access to electrical outlets or worry about wiring constraints. You can position them anywhere throughout your home.
Consider these key factors when choosing your power source:
- Battery systems use rechargeable lithium-ion technology lasting several months between charges.
- Hardwired solutions deliver continuous power without replacement concerns or depletion risks.
- Installation complexity varies – batteries allow DIY setup while hardwired requires professional electrical work.
- Window location matters – choose battery for hard-to-reach areas and hardwired for frequently used windows.
Your choice depends on convenience preferences and specific window requirements.
Electrical Safety Requirements
Before connecting any power sources for your motorized blinds, prioritize electrical safety to protect both yourself and your home’s electrical system.
Always disconnect power before beginning installation to prevent electrical shocks during setup. Your power connection must comply with local building codes and safety regulations to guarantee proper operation and avoid potential hazards.
Use 14/3 wire with ground for ideal power delivery and safety when wiring your motorized system.
Make sure the power source remains easily accessible for future maintenance and troubleshooting needs.
Given the complexity of electrical work, consider hiring a qualified electrician to execute your wiring plan.
They’ll guarantee correct installation, code compliance, and proper safety protocols, giving you peace of mind and reliable automated blind operation.
Power Source Positioning
Although electrical safety forms the foundation of your installation, strategic power source positioning determines how seamlessly your motorized blinds integrate into your home’s design.
You’ll need to install power sources within a few feet of each blind to minimize visible wiring runs and guarantee easy access for future maintenance.
Here’s your power positioning checklist:
- Install power sources before mounting blinds – This streamlines the process and allows temporary power connections for programming.
- Use 14/3 wire with ground – Guarantees compliance with local building codes and maintains safety standards.
- Plan quick disconnect options – Facilitates future programming and adjustments without rewiring.
- Position sources for minimal visible wiring – Maintains your home’s aesthetic while guaranteeing functionality.
Proper positioning guarantees your automated blinds operate reliably while preserving your interior design.
Programming Remote Controls and Setting Positions
After installing your energy-saving automated window blinds, you’ll need to program the remote controls to communicate effectively with the motor system.
First, activate the motor by setting the switch to position ‘1’. Follow the manufacturer’s instructions to pair your remote with the blinds by pressing specific buttons on both the motor and remote within the designated timeframe.
Next, set your blinds’ top and bottom positions. Adjust them to your desired height and hold the corresponding remote button until you hear a confirmation beep.
You can also create a favorite default position by moving the blinds to your preferred location and programming it according to the remote instructions.
Remember to regularly check your remote’s battery status to maintain seamless communication.
Integrating With Smart Home Systems and Voice Control
You’ll find that energy-saving automated window blinds work seamlessly with major smart home platforms like Apple HomeKit, Google Home, and Amazon Alexa.
Setting up voice commands through these systems lets you control your blinds hands-free while optimizing energy efficiency throughout your day.
The integration process requires connecting your blinds to a compatible smart hub, then configuring voice commands that’ll respond to your specific lighting and privacy needs.
Smart Hub Compatibility
Smart home integration transforms energy-saving automated window blinds from standalone devices into powerful components of your connected ecosystem.
Smart hub compatibility guarantees your blinds integrate seamlessly with existing home automation systems, enabling centralized control through platforms like Apple HomeKit, Google Home, and Amazon Alexa.
Your smart hub creates a bridge between your blinds and other connected devices, allowing for sophisticated automation scenarios.
You’ll enjoy remote control capabilities that let you adjust window coverings from anywhere, maintaining peak energy efficiency even when you’re away from home.
- Universal compatibility with major smart home platforms for flexible integration
- Remote access through smartphone apps from any location worldwide
- Synchronized operation of multiple blinds for whole-home light management
- Automated scheduling based on time, weather conditions, and energy-saving preferences
Voice Command Setup
Voice command functionality elevates your energy-saving automated window blinds to unprecedented convenience levels, letting you control natural light and temperature regulation without lifting a finger.
First, verify your blinds are compatible with major smart home systems like Amazon Alexa, Google Home, or Apple HomeKit. Download your blinds’ corresponding app and follow pairing instructions to integrate with your smart home hub seamlessly.
Use the app to assign specific voice commands such as “open blinds” or “close blinds” for hands-free control. Test these commands from various rooms and distances to confirm accurate, consistent responses. The system should respond reliably regardless of your position.
Regularly check for software updates on both your smart home devices and blinds app to maintain peak performance and access new functionality features.
Testing Operation and Calibrating Movement Settings
Here’s your testing checklist:
- Test all remote and app commands for proper response.
- Set precise top and bottom movement limits.
- Program convenient preset positions for different times.
- Verify smooth, unobstructed movement throughout the range.
If your blinds don’t respond as expected, check the power connections and confirm the motor’s properly aligned and unobstructed.
Troubleshooting Common Installation and Connection Issues
Even with careful installation, you’ll likely encounter a few hiccups when setting up your automated window blinds.
When blinds require troubleshooting due to unresponsiveness, check that power connections are secure and the motor’s installed correctly per manufacturer specifications.
If your blinds are stuck, reprogram the end positions and inspect for obstructions blocking movement.
App issues during the installation process can be resolved by restarting or reinstalling the application while verifying network connectivity.
Remote control pairing problems need careful attention to manufacturer instructions for proper synchronization.
To guarantee a smooth operation and prevent common issues, perform regular maintenance checks for misaligned brackets and low battery levels that affect performance.
Maintenance Tips for Long-Term Energy Savings
While your automated window blinds can deliver substantial energy savings immediately after installation, maintaining their peak performance requires consistent care and attention.
Proper maintenance guarantees your motorized blinds continue operating efficiently for years to come.
Essential Maintenance Steps
- Clean regularly – Use a damp cloth to remove dust and debris that can obstruct movement and reduce energy efficiency.
- Replace batteries annually – Check motorized blind batteries yearly to prevent excess energy consumption from low power conditions.
- Program strategically – Set blinds to follow the sun’s movement, maximizing natural light during day and minimizing heat loss at night.
- Utilize smart features – Activate scheduling and environmental sensors to automatically adjust based on temperature and light levels for peak energy savings.
Frequently Asked Questions
Can You Install Motorized Blinds Yourself?
Yes, you can install motorized blinds yourself. They come with user-friendly instructions and require basic household tools like a drill, screwdriver, and level. Installation typically takes 30-60 minutes.
How Do You Get Power to Motorized Blinds?
You’ll get power to motorized blinds through two methods: battery operation requiring periodic replacements in the motor’s compartment, or hardwiring using 14/3 wire with ground connected to your home’s electrical system.
What Are the Disadvantages of Motorized Blinds?
You’ll face higher upfront costs, battery dependency during outages, potential professional installation fees, smart home compatibility issues, and more complex maintenance compared to traditional manual blinds.
How Much Does It Cost to Install Motorized Blinds?
You’ll pay $100 to $500 per window for motorized blinds, plus $50 to $150 hourly for professional installation. Hardwired systems add $100 to $300 for electrical work, while custom options exceed $1,000 per window.


Leave a Reply