You don’t need to spend hundreds of dollars to create an effective garden automation system. Simple programmable timers, basic soil moisture sensors, and affordable microcontrollers like Arduino can transform your gardening routine without straining your wallet. The key lies in understanding which components deliver the most value for your specific needs. Before you start purchasing equipment, there’s a critical decision about your system’s foundation that’ll determine both your upfront costs and long-term success.
Understanding the Basics of Garden Automation on a Budget

While expensive smart garden systems might seem out of reach, you can start automating your garden with simple, affordable solutions that deliver impressive results.
Budget-friendly garden automation begins with programmable timers that schedule watering without costly technology. You’ll enhance efficiency while maintaining convenience through these basic systems.
Smart plant sensors monitoring soil moisture integrate into existing setups at low cost, enabling data-driven irrigation decisions.
DIY solar-powered drip irrigation systems reduce operational expenses while delivering targeted watering for specific plant needs.
Simple electronic pumps paired with basic relay systems automate water delivery without significant investment, effectively managing resources and ensuring ideal plant health.
You can explore affordable hydroponic systems under $150, allowing multiple plant cultivation while minimizing space requirements and maximizing automation potential for beginners.
Essential Components for DIY Smart Irrigation Systems
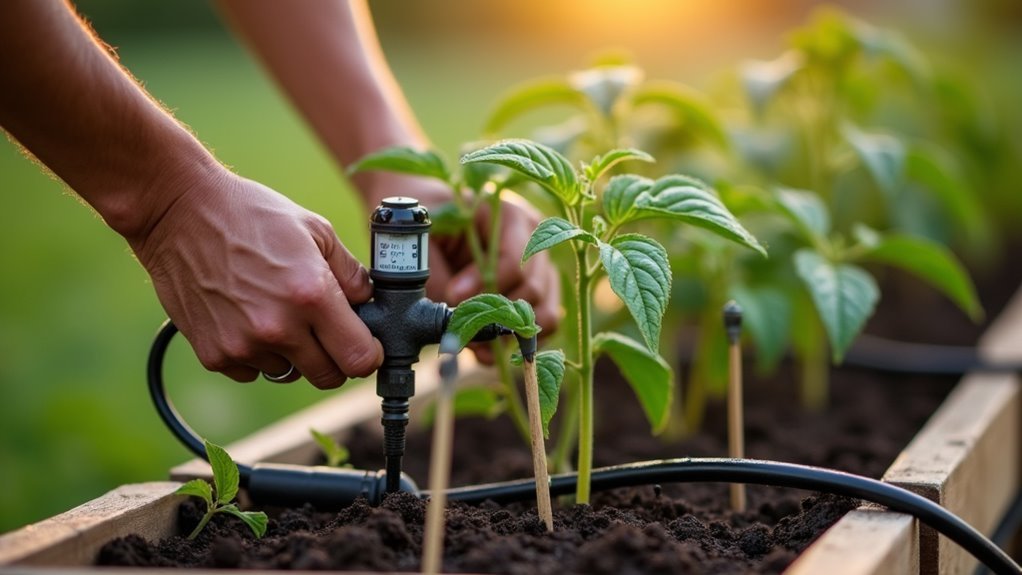
You’ll need two main categories of components to build your smart irrigation system: sensors and controllers that monitor conditions and make decisions, plus valves and pumps that actually move the water.
These components work together to create an automated watering system that responds to your garden’s specific needs.
Let’s break down what you’ll need in each category to get your DIY system up and running.
Sensors and Controllers
Since effective garden automation depends on reliable data collection and control mechanisms, you’ll need to understand the essential sensors and controllers that form the backbone of any DIY smart irrigation system.
Your automation setup requires these key sensors and control components:
- Soil moisture sensors – Monitor moisture levels and trigger irrigation when plants need water, preventing both overwatering and drought stress.
- Temperature and humidity sensors – Track environmental conditions to automate ventilation and adjust watering schedules based on weather changes.
- Microcontrollers (Arduino/Raspberry Pi) – Serve as affordable central hubs for integrating multiple sensors and controlling irrigation components.
- Programmable timers with solenoid valves – Enable precise watering schedule control while minimizing water waste.
- Float switches and relays – Monitor water levels and safely control higher voltage devices for enhanced system functionality.
Valves and Pumps
After setting up your sensors and controllers, you need reliable valves and pumps to actually move and control water flow throughout your garden.
One-inch brass solenoid valves provide efficient control with programmable timers for precise watering schedules. You’ll find budget-friendly pumps under $100, including submersible and inline options that work well with gravity-fed systems.
Ensure your valves and pumps match your garden’s water pressure and volume requirements to prevent failures.
Integrate float switches to monitor water levels and prevent overflow, boosting system reliability. PVC fittings work perfectly with your valves and pumps, creating customizable irrigation layouts that target specific garden areas efficiently.
This combination delivers professional automation results without breaking your budget.
Raspberry Pi Vs Arduino: Choosing the Right Microcontroller

When you’re selecting a microcontroller for your garden automation project, you’ll need to weigh the processing power differences between Raspberry Pi and Arduino against your specific requirements.
The programming languages vary considerably between these platforms, with Arduino offering simpler code while Raspberry Pi supports more complex programming environments.
Your budget and compatibility needs will ultimately determine which controller provides the best value for your smart irrigation goals.
Processing Power Comparison
While both microcontrollers can handle garden automation tasks, their processing capabilities differ dramatically in ways that’ll directly impact your project’s scope and functionality.
The Raspberry Pi delivers considerably more computational muscle with its quad-core CPU architecture, enabling you to run complex data analysis and host sophisticated web interfaces for monitoring your garden remotely.
In contrast, Arduino’s simpler processing power focuses on real-time control tasks without the overhead of a full operating system.
Here’s what this means for your garden automation project:
- Complex tasks: Raspberry Pi handles weather data analysis and predictive watering schedules
- Simple control: Arduino excels at basic sensor readings and pump operations
- Multitasking: Raspberry Pi runs multiple processes simultaneously
- Real-time response: Arduino provides immediate, precise timing control
- Programming flexibility: Raspberry Pi supports various languages including Python
Programming Language Differences
Since programming languages form the foundation of any automation project, understanding the coding differences between Raspberry Pi and Arduino will determine both your development experience and project outcomes.
Arduino uses C/C++, offering straightforward coding that’s perfect for beginners tackling garden automation projects. You’ll find its simple structure ideal for quick prototyping and direct sensor control.
Raspberry Pi utilizes Python as its primary language, providing more power for complex applications like image processing or web servers in your smart gardening systems. These programming language differences mean you’ll face a steeper learning curve with Raspberry Pi, but you’ll gain access to advanced capabilities.
Arduino’s simplicity gets basic automation running faster, while Python’s versatility handles sophisticated multi-tasking operations.
Cost and Compatibility
Beyond the coding considerations, your budget will heavily influence which microcontroller makes sense for your garden automation project.
Arduino’s lower cost makes it attractive for simple watering systems, while Raspberry Pi’s higher price comes with enhanced capabilities.
Here’s how cost and compatibility factor into your decision:
- Arduino boards run $10-$30, making them budget-friendly for basic automation
- Raspberry Pi costs $35-$55, but offers superior processing power and built-in Wi-Fi
- Arduino directly interfaces with most sensors, simplifying setup without additional circuits
- Raspberry Pi may require interface circuits for certain sensors, adding to project costs
- Arduino’s energy efficiency reduces long-term operational expenses
For straightforward garden tasks like soil moisture monitoring, Arduino’s compatibility with sensors and lower cost makes it ideal for budget-conscious gardeners.
Cost-Effective Sensors for Monitoring Soil and Weather Conditions

Although advanced monitoring systems can cost hundreds of dollars, you don’t need to drain your savings account to keep tabs on your garden’s essential signs. Cost-effective sensors make thorough garden monitoring accessible to everyone.
| Sensor Type | Price Range | Purpose |
|---|---|---|
| Capacitive Soil Moisture | $10 | Monitor soil water levels |
| DHT11 Temperature/Humidity | Under $5 | Track environmental conditions |
| Anemometer/Rain Gauge | $15 each | Measure wind and rainfall |
| Soil pH Monitor | Under $20 | Optimize soil quality |
You can even build a complete weather station using Arduino or Raspberry Pi microcontrollers for under $50. These DIY solutions provide extensive monitoring capabilities, automatically tracking everything from soil moisture to rainfall patterns, enabling smart irrigation decisions without expensive commercial systems.
Building Your Own Water Delivery System With Pumps and Valves
When building your own water delivery system, you’ll need to choose the right pump based on your garden’s size, water pressure requirements, and power source availability.
You’ll also want to compare valve types like brass solenoid valves for automated control versus manual ball valves for simpler applications.
Once you’ve selected these components, proper system assembly involves connecting pumps, valves, and PVC fittings in a configuration that delivers water efficiently to your plants.
Pump Selection Criteria
How do you choose the right pump to power your garden’s automated watering system? Establishing clear pump selection criteria helps you find the perfect balance between performance and budget.
Consider these essential factors when evaluating pumps:
- Flow rate requirements – Calculate your garden’s GPM needs based on size and plant density.
- Pump type compatibility – Choose submersible pumps for tanks/reservoirs or surface pumps for ponds/wells.
- Automation features – Look for adjustable flow rates and built-in timers for customized irrigation schedules.
- Valve compatibility – Guarantee seamless integration with solenoid valves for electronic control.
- Power source options – Compare solar-powered models for remote locations versus electric pumps requiring outlets.
Smart pump selection criteria focus on matching your garden’s specific watering demands while staying within budget constraints.
Valve Types Comparison
Your valve types comparison should also consider sizing requirements.
1-inch solenoid valves suit larger irrigation systems with higher flow rates, while ½-inch valves work well for smaller setups.
Don’t overlook manual valves like gate or ball valves—they’re budget-friendly backup options that provide essential control during maintenance, making your automation system more reliable and cost-effective.
System Assembly Setup
Here are essential automation ideas for your assembly:
- Install 1-inch brass solenoid valves connected to timers for scheduled watering.
- Create a PVC manifold system to distribute water across garden sections.
- Integrate soil moisture sensors to trigger automatic pump activation.
- Use appropriately rated fuses below your pump’s capacity for electrical protection.
- Avoid handling energized solar panels during installation for safety.
This setup guarantees efficient water distribution while maintaining cost-effectiveness and reliable performance throughout your growing season.
Programming and Configuring Your Automation Controller
Once you’ve selected your microcontroller platform like Arduino or Raspberry Pi, you’ll need to plunge into the programming phase that brings your garden automation system to life. Choose Python for Raspberry Pi or C++ for Arduino to write scripts defining sensor-triggered actions. Configure communication protocols like Wi-Fi or Bluetooth within your code for effective data transmission between components.
| Programming Element | Implementation |
|---|---|
| Language Choice | Python (Pi) or C++ (Arduino) |
| Sensor Integration | Libraries for moisture/temperature |
| Communication Setup | Wi-Fi/Bluetooth configuration |
| Action Scripts | If/then conditions for triggers |
| Testing Protocol | Component response verification |
Leverage online libraries and example code to streamline development. Your automation system should trigger specific actions—like activating pumps when soil moisture drops below thresholds. Test thoroughly to ascertain sensors correctly trigger desired responses.
Weatherproofing Electronics for Outdoor Garden Installations
While your garden automation controller operates flawlessly indoors, exposing electronics to outdoor elements requires strategic weatherproofing to prevent costly failures.
Weatherproofing electronics demands careful attention to protect your investment from moisture damage and environmental hazards.
Essential protection strategies include:
- Install watertight junction boxes – House sensitive components in sealed enclosures designed for outdoor use.
- Seal all electrical connections – Use waterproof plugs and secure sealing for high-voltage components.
- Apply conformal coatings – Protect circuit boards with specialized coatings against humidity and contaminants.
- Ensure proper ventilation – Prevent electronics from overheating during warmer months.
- Schedule regular maintenance – Check seals periodically and inspect for moisture infiltration.
These weatherproofing techniques will extend your automation system’s lifespan while maintaining reliable performance throughout changing seasons.
Solar Power Options for Off-Grid Garden Automation
Solar power transforms your off-grid garden into an energy-independent ecosystem that operates without relying on traditional electrical infrastructure. Solar power systems deliver the essential 5 volts DC output needed for microcontrollers and irrigation pumps, making them perfect for automated garden solutions.
| Component | Cost | Function |
|---|---|---|
| Solar Panel | $1 per watt | Energy generation |
| Charge Controller | $20-50 | Power management |
| Battery | $30-80 | Energy storage |
| Recycled Materials | $0-15 | Pump house construction |
You’ll markedly reduce electricity costs while creating sustainable irrigation solutions. The charge controller acts as your system’s brain, managing power distribution between panels, batteries, and loads. Using recycled materials for pump houses provides protection while minimizing expenses. These automated systems adjust to environmental conditions, enhancing efficiency and reducing water waste.
Creating Custom Timers and Scheduling Systems
Custom timers enable precise control over your garden’s watering schedule, transforming basic irrigation into an intelligent system that responds to your plants’ specific needs.
You can build these systems using affordable components and simple programming:
- Programmable microcontrollers like Arduino or Raspberry Pi let you create custom timers with specific schedules tailored to your garden’s requirements.
- Relay modules paired with microcontrollers automate high-voltage irrigation systems, controlling pumps and solenoid valves based on preset functions.
- Inexpensive digital timers plugged into existing outlets provide budget-friendly automation for pumps or sprinklers on daily or weekly schedules.
- Soil moisture sensors enhance scheduling by triggering irrigation only when predetermined dryness levels are reached.
- Free software platforms enable remote programming and monitoring, allowing real-time adjustments based on weather conditions.
Repurposing Household Items for Garden Automation Projects
Before you spend money on expensive automation equipment, look around your home for items that can be transformed into effective garden management tools.
Repurposing household items for garden automation projects offers creative solutions without breaking your budget.
Transform old plastic containers into drip irrigation systems by puncturing small holes in the bottom and burying them near plant roots.
Your unused smartphone becomes a monitoring station when equipped with gardening apps that track temperature and soil moisture.
Egg cartons work perfectly as biodegradable seed starters for indoor germination.
Create hydroponic systems using discarded PVC pipes by drilling holes for plant containers and adding water circulation.
Even kitchen timers can automate watering schedules when connected to solenoid valves.
These Smart Gardening products prove that effective automation doesn’t require expensive commercial equipment.
Connecting Multiple Garden Zones on a Single Budget System
You can maximize your automation budget by connecting multiple garden zones to a single controller system through strategic sensor placement and smart scheduling.
Start by distributing soil moisture sensors across different zones while configuring one programmable irrigation controller to manage all your solenoid valves simultaneously.
Set up sequential watering schedules that rotate through each zone based on individual moisture readings, ensuring every area gets proper attention without requiring separate control systems.
Zone-Based Sensor Distribution
While managing a single garden bed might seem straightforward, expanding your automation system to cover multiple zones doesn’t require breaking the bank or purchasing separate controllers for each area.
Zone-based sensor distribution lets you strategically place low-cost soil moisture sensors throughout different garden sections, creating targeted monitoring without the hefty price tag.
You can implement zone-based sensor distribution effectively by:
- Connecting multiple sensors to one Arduino or Raspberry Pi microcontroller
- Installing inexpensive solenoid valves for each irrigation zone
- Using simple relay modules to control individual watering lines
- Positioning sensors based on plant water requirements and soil conditions
- Programming automated responses based on real-time moisture readings
This approach guarantees each zone receives appropriate watering while maintaining centralized control and staying within budget constraints.
Shared Controller Configuration
The real magic happens when you connect all those distributed sensors to a single microcontroller that can manage your entire garden from one central point.
A shared controller configuration maximizes your investment by using one budget-friendly device to control multiple zones through relays or solenoid valves. You’ll manage water delivery across different garden areas on automated schedules based on real-time sensor readings.
Consider implementing a Raspberry Pi as your central hub to monitor moisture, light, and temperature across zones simultaneously.
You’ll reduce costs by using a single power supply and communication protocol like Wi-Fi or LoRa, minimizing complex wiring.
Source programmable timers and affordable sensors that integrate seamlessly within this shared framework, creating an efficient budget-friendly automation system that scales with your garden’s needs.
Sequential Watering Schedules
How can sequential watering schedules transform your single-controller setup into an all-inclusive irrigation powerhouse?
You’ll efficiently manage multiple garden zones using one irrigation system, minimizing water waste while ensuring ideal plant care. Sequential watering schedules let you set specific times and durations for each zone through programmable timers or smart controllers.
Here’s what you’ll gain:
- Automated zone control – Solenoid valves deliver precise water flow based on each plant’s unique needs.
- Cost-effective operation – Gravity-fed drip systems eliminate expensive pump requirements.
- Root-level efficiency – Water reaches plant roots directly, maximizing absorption.
- Smart integration – Compatible with existing home automation for smartphone control.
- Flexible scheduling – Customize watering patterns without significant investment.
You’ll create a thorough irrigation network that adapts to your garden’s diverse requirements.
Troubleshooting Common Issues in DIY Garden Automation
Even with careful planning and installation, DIY garden automation systems can develop problems that disrupt your carefully orchestrated watering schedules and sensor readings.
When troubleshooting these issues, start by examining connections for looseness or corrosion, as these electrical disruptions cause component malfunctions.
Test your sensors regularly for accuracy since environmental factors can create inconsistent readings—soil moisture sensors particularly need calibration and debris removal.
Verify your power supply meets all component requirements, as underpowered systems exhibit erratic behavior.
If automated watering isn’t activating, inspect timers and relays for proper programming and functionality.
For pump failures, check for clogs or tubing kinks while confirming the power source works correctly to maintain consistent water delivery throughout your garden automation system.
Expanding Your System With Additional Features Over Time
Once you’ve mastered your basic automation setup, you’ll naturally want to expand its capabilities without breaking your budget.
Building incrementally allows you to enhance functionality while spreading costs over time.
Here’s how you can strategically expand your system:
- Add smart garden sensor technology that connects to your smartphone for real-time monitoring of soil moisture, temperature, and plant health.
- Install programmable relays to automate additional tasks like lighting control and nutrient delivery systems.
- Integrate modular components that work seamlessly with your existing timer and pump setup.
- Incorporate cloud-based solutions and IoT devices for advanced analytics and remote management capabilities.
- Expand hydroponic systems with additional grow lights or enhanced nutrient delivery mechanisms.
This approach maximizes your investment while continuously improving garden performance.
Maintenance and Seasonal Adjustments for Year-Round Performance
While expanding your automation features brings exciting new capabilities, your investment only pays off when you maintain these systems properly throughout the year.
Regular maintenance involves cleaning sensors and checking connections to guarantee peak performance and extend equipment lifespan. You’ll need to adjust irrigation schedules seasonally based on weather changes and plant growth stages, preventing overwatering or underwatering that wastes resources and harms plants.
Proper sensor maintenance and seasonal irrigation adjustments prevent water waste while maximizing plant health and system longevity.
Install rain sensors to automatically disable watering during rainfall, conserving water and reducing costs.
Periodically calibrate soil moisture sensors for accurate readings, enabling precise irrigation adjustments based on actual soil conditions.
Use programmable timers to modify watering durations and frequencies throughout the year, adapting to varying seasonal water needs of different plants.
Frequently Asked Questions
What Is the Best Way to Automate Garden Watering?
You’ll get best results using programmable timers with 1-inch brass solenoid valves and moisture sensors. Smart systems that integrate weather data prevent overwatering while microcontrollers can manage multiple zones for larger gardens efficiently.
How Can I Water My Garden Cheaply?
You can water your garden cheaply by installing drip irrigation with PVC pipes, collecting rainwater in barrels, using timer-controlled hoses, and implementing DIY Arduino systems with soil moisture sensors.
What Is One Disadvantage of an Automatic Watering System?
You’ll risk overwatering your plants if the system doesn’t adjust for rainfall or soil moisture. This can create waterlogged soil conditions that damage roots and potentially kill your garden plants.
How to Make a Homemade Garden Watering System?
You’ll need a water reservoir, submersible pump, tubing, and digital timer. Connect the pump to your reservoir, run tubing to garden beds, and set automated watering schedules for efficient irrigation.


Leave a Reply