You’re facing a maze of Arduino components when building an air purifier control system, and choosing the wrong combination can waste both time and money. The market’s flooded with sensors promising accurate air quality readings, yet many deliver inconsistent data that’ll sabotage your entire project. Your success hinges on understanding which microcontroller truly handles real-time processing demands while managing power consumption effectively. There’s a specific sensor hierarchy that separates functional systems from failures.
Essential Components for Arduino Air Purifier Systems
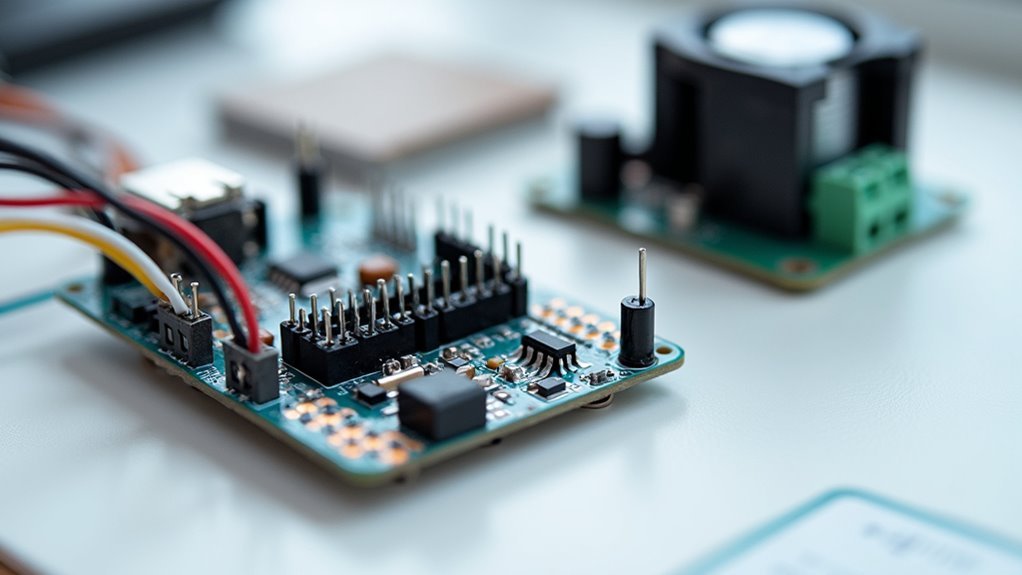
Building an Arduino-based air purifier requires carefully selecting components that work together to create an effective filtration system.
Smart component selection forms the foundation of any successful Arduino air purifier build, ensuring optimal filtration performance.
You’ll need a high-quality HEPA filter paired with a powerful fan delivering around 200 cfm for typical room coverage of 700 square feet. Choose a fan with 500 Pa static pressure capability to push air through dense filters effectively.
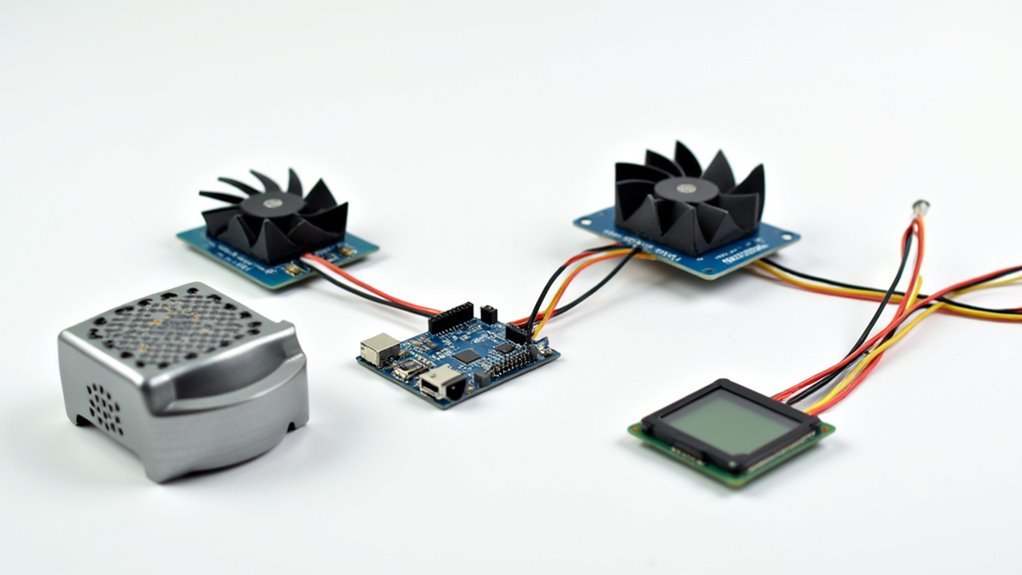
Your microcontroller options include the Arduino UNO or ESP32 for real-time monitoring and control.
Install an AQI sensor like the PMS7003 to measure particulate levels, plus a DHT11 or BME680 for temperature and humidity monitoring.
Add an OLED display to show real-time air quality metrics and system performance data.
This combination creates a responsive, data-driven purification system that adapts to changing environmental conditions.
Sensor Selection: MQ135 Vs BME680 Vs SHT21 Performance Comparison
When selecting sensors for your Arduino air purifier, you’ll face a critical decision between the MQ135, BME680, and SHT21 based on accuracy, functionality, and cost considerations.
The MQ135 offers basic CO2 detection at low cost but compromises accuracy due to environmental interference. You’ll need frequent calibration and compensation for temperature and humidity variations, making it less reliable for precise air quality monitoring.
The BME680 stands out as your best choice for extensive sensor selection. It combines temperature, humidity, air pressure, and gas resistance measurements, delivering superior accuracy and stability under varying conditions without constant recalibration.
The SHT21 provides excellent temperature and humidity readings but lacks gas detection capabilities, limiting its effectiveness for complete air quality monitoring systems.
Microcontroller Options: Arduino Nano 33 Iot Vs ESP32 Vs Wemos D1 Mini
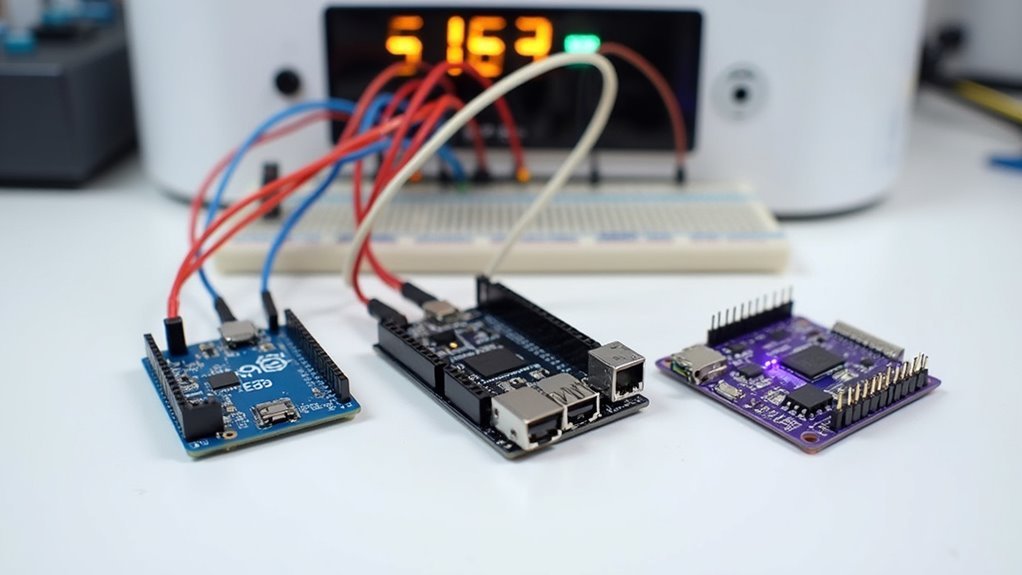
Your microcontroller choice determines both project complexity and budget requirements for your Arduino air purifier system. Each Arduino board offers distinct advantages depending on your experience level and project scope.
| Feature | Arduino Nano 33 IoT | ESP32 | Wemos D1 Mini |
|---|---|---|---|
| Price | Expensive | Moderate | Budget-friendly |
| Connectivity | Wi-Fi + Bluetooth | Wi-Fi + Bluetooth | Wi-Fi only |
| Best For | Complex projects | Advanced applications | Simple projects |
The Wemos D1 Mini excels for basic air purifier control with sufficient Wi-Fi capabilities at minimal cost. However, watch for poor-quality clones online. The ESP32 provides superior processing power and additional GPIO pins for complex applications. The Arduino Nano 33 IoT, while powerful, proves overcomplicated for simpler air purifier projects due to higher resource requirements.
PM2.5 Particle Detection Integration for Real-Time Air Quality Assessment
You’ll need to choose the right PM2.5 sensor for your Arduino air purifier, with options like the PMS7003 and Seeed GroveLaser PM2.5 offering laser scattering technology for accurate particle detection.
Your system must process this real-time data effectively to trigger purifier responses when concentrations exceed healthy thresholds.
The integration method you select will determine how smoothly your Arduino can read sensor values and convert them into actionable air quality assessments.
Sensor Selection Criteria
Since effective air purification depends on accurate pollution detection, you’ll need to select PM2.5 sensors that provide reliable real-time measurements for your Arduino control system.
Your sensor choice directly impacts air quality monitoring effectiveness and system responsiveness.
Consider these essential criteria when selecting PM2.5 sensors:
- Technology type – Choose laser scattering models like PMS7003 or SDS021 for superior accuracy over optical sensors.
- Measurement range – Verify sensors detect 0.3 to 10 micron particles with focus on 2.5 micron precision.
- Response time – Select sensors with sub-10-second detection capabilities for immediate air quality changes.
- Calibration requirements – Prioritize sensors with factory calibration and reference model compatibility for long-term accuracy.
Regular calibration against reference standards maintains measurement precision throughout your system’s operational life.
Real-Time Data Processing
After selecting the right PM2.5 sensor, your Arduino system must process incoming particle data continuously to maintain ideal air quality control.
Your PMS7003 sensor delivers real-time data every second, requiring efficient code to interpret concentration readings between 0-500 µg/m³. You’ll configure your Arduino to trigger automatic responses when PM2.5 levels exceed 35 µg/m³, instantly adjusting fan speeds and filtration intensity.
Your system processes this real-time data through analog-to-digital conversion, filtering noise and averaging multiple readings for accuracy.
You can display current measurements on an OLED screen while simultaneously logging data to SD cards or transmitting to cloud services.
This continuous monitoring enables your air purifier to respond dynamically to pollution spikes, ensuring peak indoor air quality through intelligent, data-driven purification control.
Arduino Integration Methods
When connecting your PMS7003 sensor to Arduino, you’ll establish communication through the sensor’s digital UART interface, which transmits precise particle concentration data directly to your microcontroller’s serial pins.
Your integration process requires careful attention to achieve accurate air quality monitoring:
- Wire the Sensor Module correctly – Connect VCC to 5V, GND to ground, and TX/RX pins to your Arduino’s digital pins for serial communication.
- Calibrate against known standards – Test your readings with reference-grade equipment to verify measurement reliability before deployment.
- Add complementary sensors – Integrate DHT11 temperature/humidity modules through analog inputs for thorough environmental monitoring.
- Configure data transmission – Set up cloud connectivity or local display options using LCD/OLED screens for real-time air quality visualization.
This systematic approach guarantees your PM2.5 detection system delivers dependable performance for indoor air quality assessment.
Wi-Fi Connectivity Setup for Remote Monitoring and Control
While traditional air purifiers operate as standalone units, adding Wi-Fi connectivity to your Arduino-based system transforms it into a smart device you can monitor and control from anywhere.
Transform your basic Arduino air purifier into a smart, remotely controllable device with simple Wi-Fi connectivity additions.
You’ll need an ESP32 or Wemos D1 mini for built-in Wi-Fi capabilities that enable remote functionality. Use Arduino IDE libraries like ESP8266WiFi or WiFi.h to connect your device to local networks and manage credentials.
Integrate your air quality sensor, such as a BME680 or MQ135, with the Wi-Fi module to transmit real-time data. Consider cloud platforms like Arduino Cloud or Blynk for data visualization and remote control capabilities.
You’ll access your purifier from any internet-connected device. Implement HTTPS requests and secure your network to protect transmitted data between your air purifier and remote devices.
Temperature and Humidity Sensor Configuration With DHT22 and BME280
Beyond networking capabilities, your Arduino air purifier needs accurate environmental sensors to make intelligent decisions about air quality management.
You’ll find two excellent options for measuring temperature and humidity in your system.
Here’s what you need to know about sensor selection:
- DHT22 delivers ±0.5°C temperature accuracy and ±2-5% humidity precision with simple single-wire communication protocol.
- BME280 provides extensive data including barometric pressure alongside temperature and humidity measurements for enhanced air quality assessment.
- Both sensors operate in -40°C to +80°C range giving you flexibility across different environmental conditions.
- BME280 offers superior multi-functionality with I2C/SPI protocols, making it ideal for advanced air quality monitoring systems.
Choose BME280 for extensive environmental data or DHT22 for straightforward temperature and humidity monitoring.
CO2 Monitoring Implementation Using MH-Z19 and Alternative Sensors
You’ll need to integrate a reliable CO2 sensor to monitor indoor air quality and trigger your purifier when levels exceed safe thresholds.
The MH-Z19 stands out as the top choice due to its NDIR technology and ±50 ppm accuracy, but you can also consider alternative sensors like the CCS811 for budget-conscious projects.
Let’s explore how to set up the MH-Z19 first, then examine other sensor options that might fit your specific requirements.
MH-Z19 Sensor Setup
When building an effective air purifier control system, the MH-Z19 CO2 sensor serves as an essential component for monitoring indoor air quality with its impressive 0-5000 ppm measurement range and ±50 ppm accuracy.
You’ll find the setup straightforward since it communicates through UART interface with Arduino or ESP32 microcontrollers.
Here’s your essential setup checklist:
- Power Requirements – Connect 5V supply guaranteeing 30 mA current availability during operation
- UART Connection – Wire TX/RX pins to your microcontroller’s serial interface for data communication
- Initial Calibration – Expose the mh-z19 to fresh outdoor air for baseline calibration accuracy
- Alternative Options – Consider MH-Z16 or K30 sensors if different price points or specifications better suit your air quality monitoring needs
Proper calibration guarantees reliable performance for your control system.
Alternative CO2 Sensors
While the MH-Z19 offers excellent precision for CO2 detection, several alternative sensors can effectively monitor air quality in your Arduino purifier system.
The CCS811 provides versatile CO2 monitoring with equivalent CO2 measurements ranging from 400 to 8192 ppm, making it suitable for most indoor environments.
You’ll find the SGP30 measures various volatile organic compounds through I2C digital output, though it doesn’t directly measure CO2 levels.
The BME680 delivers thorough environmental data including temperature, humidity, pressure, and gas resistance for air quality inference.
When selecting alternative sensors for your project, you should evaluate measurement range, accuracy requirements, response time, and compatibility with your existing Arduino setup to guarantee peak performance in your air purification control system.
Fan Control Systems and Static Pressure Requirements for HEPA Filtration
Most air purifier projects fail because builders underestimate the static pressure requirements needed to push air through HEPA filters effectively.
You’ll need approximately 500 Pa (50 mm H2O) of static pressure for proper HEPA filtration, which standard 12cm computer fans can’t deliver with their mere 1-5 mm H2O output.
Your fan control systems must account for these critical requirements:
- Choose centrifugal fans – Squirrel cage designs maintain airflow against HEPA resistance better than axial fans
- Calculate room-specific airflow – Target 200 cfm for 700 square feet of coverage
- Balance pressure and noise – Higher speeds increase static pressure but generate more noise
- Monitor pressure drop – Filter loading reduces airflow over time, requiring speed adjustments
Automated Purification Triggers Based on Air Quality Index Thresholds
Once you’ve configured your fan system to handle the necessary static pressure, the next step involves programming your Arduino to automatically respond to air quality changes.
You’ll want to set specific AQI thresholds that trigger your air purifier activation. Programming your system to start when AQI exceeds 150 protects sensitive individuals from unhealthy conditions.
Install PMS7003 sensors to monitor PM2.5 concentrations in real-time, automatically activating purification when levels surpass 35 µg/m³.
You can implement feedback loops that adjust fan speeds based on current air quality readings, enhancing efficiency while reducing energy consumption.
Add DHT11 sensors to monitor humidity and temperature, ensuring your air purifier operates under ideal conditions for maximum filter effectiveness.
Data Logging and API Development for Web-Based Visualization
After establishing automated purification triggers, you’ll need to implement data logging functionality that captures and stores your sensor readings for long-term analysis and web-based visualization.
Your data logging system should collect temperature, humidity, and air quality measurements at regular intervals. For effective API development, you’ll want to format this data in JSON, making it easily transmittable to web applications.
JSON-formatted sensor data enables seamless integration between your air purifier’s monitoring system and web-based analytics platforms.
Here’s what you’ll need for thorough data logging and visualization:
- Real-time data transmission using Flask or Node.js libraries for API development
- Cloud integration with platforms like ThingSpeak for remote access capabilities
- JSON formatting to guarantee seamless data parsing by web applications
- Secure authentication methods to protect your collected data from unauthorized access
This approach enables you to monitor your air purifier’s performance remotely through any internet-connected device.
Power Management and Energy Efficiency Optimization Strategies
You’ll want to maximize your air purifier’s efficiency by implementing strategic power management techniques that reduce energy consumption without compromising performance.
Start with configuring low power sleep modes on your microcontroller to minimize idle power draw.
Then integrate variable speed fan control using PWM to match airflow with actual air quality needs.
Finally, you can create smart scheduling systems that automatically adjust operation based on occupancy patterns and time-of-day requirements.
Low Power Sleep Modes
When your Arduino air purifier operates continuously, it consumes unnecessary power during idle periods.
Implementing low power sleep modes can slash energy consumption by up to 90% compared to full operation.
You can maximize energy efficiency by utilizing these sleep mode strategies:
- Deep Sleep Implementation – Use Arduino Nano 33 IoT or ESP32 boards that support customizable sleep modes, allowing your system to enter ultra-low power states during inactivity periods.
- Timer-Based Wake-ups – Configure timers and interrupts to wake your microcontroller at defined intervals for periodic sensor readings without continuous operation.
- Selective Component Control – Power down non-essential components like displays and communication modules when not actively needed.
- Frequency Reduction – Decrease sensor reading intervals during low-activity periods to extend battery life considerably.
Variable Speed Fan Control
Traditional fans operate at fixed speeds, wasting energy when full airflow isn’t necessary. However, variable speed fan control transforms your Arduino air purifier into an intelligent system that adjusts power consumption based on actual air quality demands.
You’ll achieve up to 50% energy savings by implementing Pulse Width Modulation (PWM), which reduces average power delivery without compromising performance.
Connect air quality sensors to create feedback mechanisms that dynamically adjust fan speeds based on real-time pollutant levels. You’re optimizing energy use while maintaining effective purification.
Consider upgrading to brushless DC motors, which consume 30-50% less energy than traditional AC motors. Smart control systems further enhance efficiency by scheduling fan operation during off-peak hours when air quality levels are acceptable.
Smart Scheduling Systems
Smart scheduling systems leverage real-time data and predictive algorithms to transform your Arduino air purifier from a reactive device into a proactive energy management solution that anticipates your needs while minimizing power consumption.
These intelligent systems enhance your energy usage through several key strategies:
- Automated Operation Timing – You’ll program your purifier to run during off-peak electricity hours, reducing energy costs while maintaining peak air quality throughout your daily routine.
- Threshold-Based Activation – Your system monitors pollutant levels continuously, activating only when air quality drops below predefined standards, conserving unnecessary energy consumption.
- Home Automation Integration – You can remotely adjust schedules and monitor performance through connected platforms, customizing operation based on real-time conditions.
- Performance Analytics – You’ll receive data insights indicating maintenance needs, extending device lifespan and enhancing overall efficiency.
Filter Replacement Monitoring Through Pressure Differential Measurement
Since filter efficiency directly impacts air quality and system performance, monitoring your HEPA filter’s condition through pressure differential measurement provides the most reliable method for determining when replacement becomes necessary.
Your filter replacement monitoring system works by measuring pressure drop across the filter using Arduino-compatible pressure sensors or a simple manometer setup.
As your HEPA filter captures particulates, it’ll exhibit a pressure differential of 50-300 Pa when saturated.
You can program your Arduino to continuously monitor these readings and trigger automated alerts when pressure thresholds are exceeded. This prevents reduced airflow and increased energy consumption that occurs with clogged filters.
Cost-Effective Component Sourcing and Quality Considerations
While building an effective Arduino air purifier doesn’t require breaking the bank, selecting quality components from reputable suppliers guarantees your system operates reliably for years.
Quality components from trusted suppliers ensure your Arduino air purifier delivers reliable performance without overspending on your DIY project.
Here’s how you’ll maximize value while maintaining quality:
- Source microcontrollers from trusted suppliers like Lolin or NodeMCU to avoid shipping delays and secure reliable performance, especially when ordering from European online shops.
- Choose multi-function sensors like the BME680, which provides temperature, humidity, air pressure, and gas resistance measurements for under $50, delivering exceptional cost-effective monitoring capabilities.
- Select budget-friendly filtration using Xiaomi’s acrylic cylindrical filters at approximately 930THB for effective air cleaning without premium pricing.
- Invest in efficient fans with minimum 40W power around 420THB, balancing performance and affordability while ensuring adequate airflow throughout your purifier system.
Programming Logic for Adaptive Air Quality Response Systems
Once you’ve assembled your Arduino air purifier hardware, you’ll need to program adaptive logic that automatically responds to changing air quality conditions in real-time. Your code should establish threshold values for pollutants like PM2.5 and CO2 that trigger air purifiers when Air Quality Index readings exceed safe levels.
Implement feedback loops where sensors continuously inform control decisions, enabling dynamic fan speed adjustments based on current conditions.
Incorporate time-based operations to run energy-efficient modes during low pollution periods while ramping up during peak hours. You’ll want continuous sensor monitoring that compares readings against predetermined thresholds, automatically activating or adjusting purification intensity.
Consider adding data logging capabilities to track air quality trends and system performance, helping you optimize your programming logic for maximum effectiveness over time.
Frequently Asked Questions
How to Make an Air Quality Sensor Using Arduino?
You’ll connect an MQ135 gas sensor and DHT11 temperature/humidity sensor to your Arduino. Wire the MQ135 to an analog pin, program thresholds for air quality levels, and display results on an OLED screen.
What Is Duinotech Arduino Compatible Air Quality Sensor With CO2 and Temperature?
You’ll find the Duinotech sensor measures CO2 levels from 400-5000 ppm plus temperature simultaneously. It’s Arduino-compatible with analog/digital interfaces, making it perfect for automated air purifier projects requiring real-time environmental monitoring.
Are Air Quality Sensors Worth It?
You’ll find air quality sensors extremely worthwhile since they provide real-time pollutant data, help you make informed health decisions, and cost little compared to preventing respiratory diseases from prolonged exposure.
How to Make an Air Quality Monitoring Device?
You’ll connect an MQ135 gas sensor to Arduino’s analog pin and DHT11 for temperature/humidity to a digital pin. Add an OLED display via I2C for real-time readings.


Leave a Reply