You’ve probably seen smart mirrors in sci-fi movies and wondered if you could build one yourself. The good news is that with an Arduino board and some basic components, you can create your own functional smart mirror without breaking the bank or needing advanced programming skills. These three beginner-friendly projects will transform an ordinary mirror into an interactive display that’ll make your daily routine more efficient and enjoyable.
Basic Weather and Time Display Mirror With LCD Screen
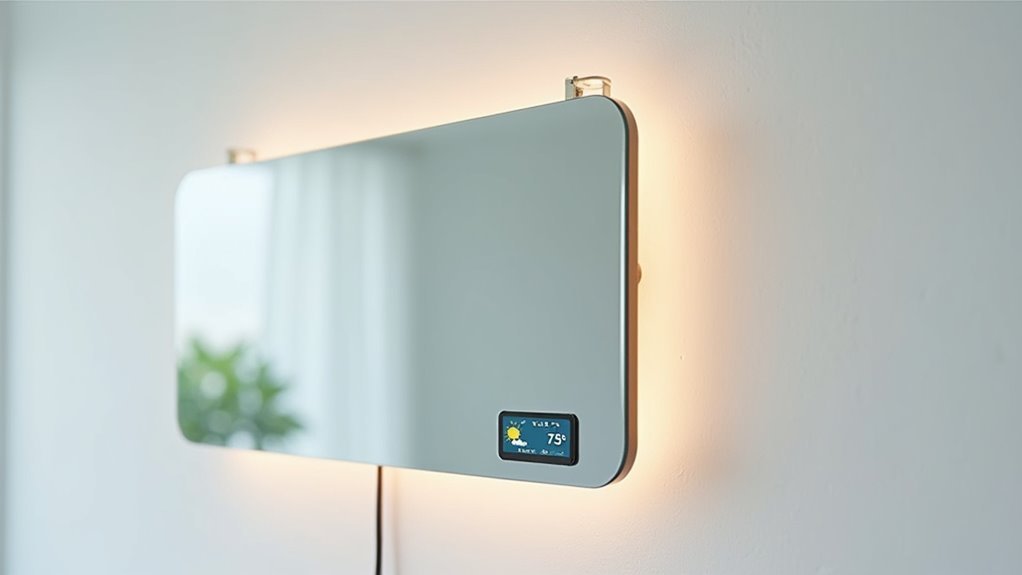
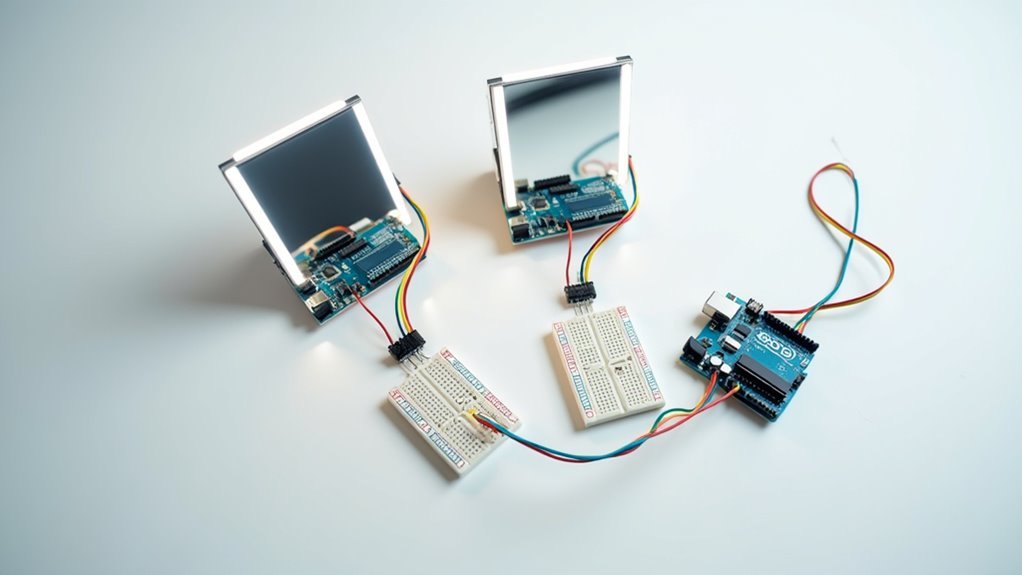
One of the most accessible entry points into smart mirror technology involves combining an Arduino board with an LCD screen and a two-way mirror to create a functional display that shows weather and time information.
You’ll position the LCD screen behind the two-way mirror, maintaining the mirror’s reflective properties while displaying essential data like temperature, humidity, and time.
Programming your Arduino through the Arduino IDE lets you customize the display layout and connect to a weather API for real-time updates.
Adding an RTC module guarantees accurate timekeeping during power outages. You’ll need a standard 5V power supply to run everything, which connects easily to any outlet or portable power bank, making your smart mirror both functional and beginner-friendly.
Voice-Activated Smart Mirror Using Arduino and Sensors
While basic weather and time displays provide excellent functionality, voice-activated smart mirrors take your project to the next level by incorporating natural language interaction capabilities. You’ll integrate voice recognition modules with Arduino to process spoken commands naturally. PIR sensor detects your presence, automatically activating the display when you approach.
| Component | Function | Enhancement |
|---|---|---|
| Voice Recognition Module | Natural language processing | Hands-free control |
| PIR Sensor | Motion detection | Auto-activation |
| Two-way Mirror | Reflective display surface | Seamless integration |
| LED Lighting | Ambient response | Personalized experience |
Open-source libraries enable extensive customization through additional modules. Your smart mirror becomes a thorough interface, responding to voice commands while maintaining traditional mirror functionality through the two-way mirror design.
Customizable Information Hub Mirror With Touch Controls
Touch-based interaction expands your smart mirror’s capabilities beyond voice commands, creating an extensive information hub that responds to direct physical contact.
Touch controls transform your smart mirror into an interactive information center that responds instantly to your fingertips.
You’ll integrate capacitive touch controls directly into your mirror’s surface, allowing intuitive navigation through weather updates, calendar events, and news headlines. Your Arduino board processes these interactions while Wi-Fi modules like ESP8266 provide live data updates from the internet.
The customizable nature means you can modify code and configuration settings to add specialized modules for reminders, to-do lists, and social media feeds.
You’ll maintain aesthetic appeal by discretely housing electronics behind the reflective surface while beautifully framing the finished product. This approach transforms your traditional mirror into a sophisticated smart device without compromising its primary reflective function.
Frequently Asked Questions
What Type of Two-Way Mirror Works Best for Arduino Smart Mirror Projects?
You’ll want acrylic two-way mirror sheets since they’re lightweight, shatter-resistant, and affordable. They offer 70-80% reflectivity with good light transmission, making them perfect for displaying your Arduino’s screen while maintaining clear mirror functionality.
How Much Does It Typically Cost to Build a Basic Arduino Smart Mirror?
You’ll spend around $150-300 for a basic setup. That includes an Arduino board, display screen, two-way mirror, frame materials, and basic sensors. Costs vary based on screen size and component quality you choose.
What Arduino Board Model Is Recommended for Beginner Smart Mirror Projects?
You’ll want an Arduino Uno R3 for your first smart mirror project. It’s affordable, well-documented, and has enough pins for basic features like displays, sensors, and LEDs without overwhelming complexity.
How Do You Properly Mount and Frame a DIY Arduino Smart Mirror?
You’ll need a two-way mirror, picture frame slightly larger than your monitor, and mounting brackets. Secure the Arduino behind the mirror, guarantee proper ventilation, and use adhesive strips for clean cable management throughout.
What Programming Experience Is Needed Before Starting an Arduino Smart Mirror Project?
You’ll need basic Arduino programming skills, including understanding variables, loops, and functions. Familiarity with C++ syntax helps, but you can learn while building. Start with simple LED projects first.


Leave a Reply