
You can transform your home into a voice-controlled smart space using Arduino. Connect a voice recognition module to your Arduino board, add relay modules for appliances, and program commands to control lights, fans, or other devices. Options range from simple speaker-dependent modules to advanced Wi-Fi integrated systems with ESP32 boards. Start with basic on/off commands, then expand to more complex automations. The journey from basic voice control to a fully automated home is simpler than you might think.
Setting Up Your Arduino Voice Command System
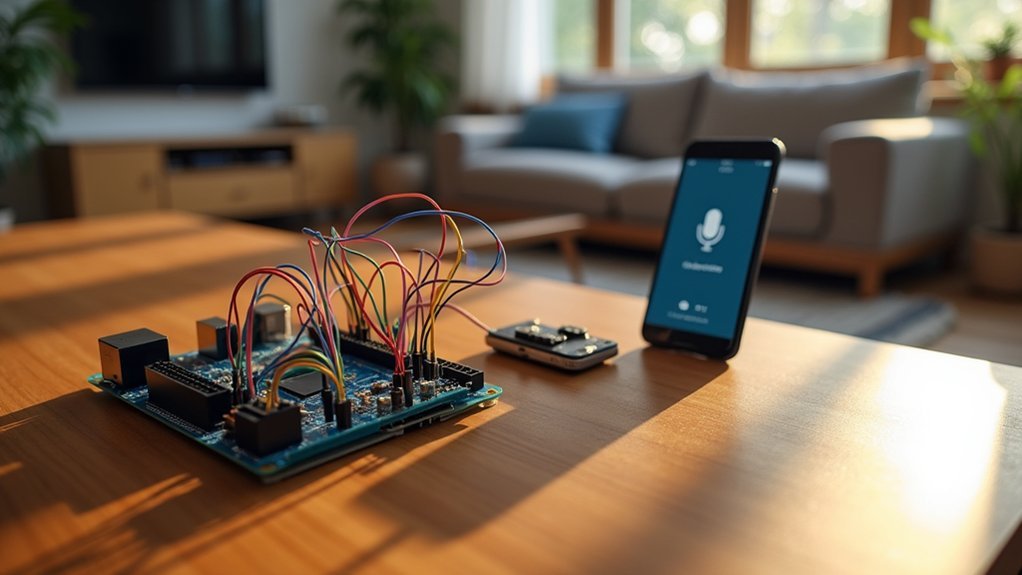
Before diving into the exciting world of voice-controlled home automation, you’ll need to properly set up your Arduino system.
Start by connecting your voice module: wire VCC to Arduino’s 5V pin, GND to Arduino’s ground, and connect RX/TX pins for serial communication (typically pins 2 and 3). Add optional LEDs with 220-ohm resistors for visual feedback.
Connect voice module to Arduino: VCC to 5V, GND to ground, RX/TX to pins 2-3. Optional LEDs with resistors provide visual feedback.
Next, download the official libraries for your voice module through Arduino IDE’s Library Manager. Import the necessary dependencies in your sketch and configure the serial pins to match your hardware connections. For optimal functionality, ensure you’ve included the required specific header files for implementing voice commands.
Keep the initialization parameters at default values for initial testing.
Once your hardware and software are ready, you’ll be prepared to move on to defining and training voice commands for your system.
Essential Hardware Components for Voice Control
Building a voice-controlled home system requires you’ll need specific hardware components to turn your Arduino into a responsive assistant.
Start with an Arduino UNO R3 board, which offers the perfect balance of processing power and pin availability for connecting your voice recognition module and output devices.
The voice recognition module operates at 5V logic level, which is compatible with Arduino Uno but requires additional circuitry when connecting to ESP8266 NodeMCU microcontrollers.
You’ll also want to contemplate adding a Bluetooth module like the HC-05 to extend your system’s range, allowing you to issue commands from anywhere in your home without being tethered to the control unit.
Essential Hardware Components for Voice Control
Success in Arduino voice control projects hinges on selecting the right combination of hardware components. You’ll need to choose between speaker-dependent or speaker-independent voice recognition modules, with most supporting up to 80 commands but only 7 active simultaneously.
For best results, consider these critical components:
- Voice Recognition Module – The heart of your system that processes spoken commands and converts them to digital signals your Arduino can understand. The Voice Recognition Module V3.1 operates within a voltage range 4.5-5.5V and draws approximately 40mA of current.
- Quality Microphone – Select one with appropriate sensitivity for your space and noise-reduction features if you’re in a noisy environment.
- Control Peripherals – Include relay modules for controlling high-voltage appliances, LEDs for visual feedback, and a stable power supply for consistent operation.
Don’t forget appropriate connection components like jumper wires and a breadboard for prototyping.
Arduino Board Selection
Selecting the right Arduino board forms the foundation of your voice-controlled home automation system. For beginners and intermediate makers, the Arduino Nano 33 BLE Sense stands out with its built-in microphone and powerful Cortex-M4 processor running at 64 MHz.
If you’re building battery-powered devices, consider the Nicla Voice with its ultra-low power consumption and on-device speech recognition.
Need to store voice commands or logs? The MKR ZERO offers onboard SD storage alongside enhanced audio features.
For more complex projects, ESP32-based boards deliver excellent wireless capabilities with sufficient processing power. For home automation applications requiring reliable connectivity, the Arduino GIGA R1 WiFi provides advanced IoT capabilities ideal for creating comprehensive voice-controlled smart home systems.
When choosing, prioritize:
- At least 64 MHz processor speed
- Minimum 256 KB RAM
- Compatible microphone support
- Strong community documentation
Wireless Communication Modules
While the Arduino board serves as the brain of your voice-controlled home system, wireless communication modules act as its voice and ears. These modules establish the critical link between your voice commands and the Arduino’s processing capabilities.
For your voice control project, consider these popular wireless options:
- Bluetooth Modules – HC-05 or HM-10 modules offer simple smartphone integration, with the latter providing energy-efficient BLE connectivity for battery-powered projects.
- Wi-Fi Modules – ESP8266 or ESP32 connect to your home network, enabling integration with smart assistants and cloud services for sophisticated control options.
- Dedicated Voice Recognition Modules – DFRobot Gravity provides offline processing without cloud dependency, improving response time and privacy while simplifying implementation. This module can be programmed with custom wake words for personalized activation triggers.
Most modules connect via serial communication pins and may require voltage level shifting for proper operation.
Programming Your Arduino for Speech Recognition
Once you’ve connected your voice recognition module, you’ll need to load the manufacturer’s recognition library through the Arduino IDE.
The library setup establishes serial communication between your Arduino and the voice module, enabling command processing through predefined functions.
You can then program your sketch to listen for specific voice commands and trigger corresponding actions when those words are recognized. The system allows you to create commands that control servo motors at various angles from 0 to 180 degrees using hex commands sent through serial communication.
Programming Your Arduino for Speech Recognition
After you’ve connected your voice recognition hardware, the next essential step involves programming your Arduino to process and respond to voice commands.
You’ll need to install the appropriate library for your module (Elechouse, uSpeech, or a manufacturer-specific library) through the Arduino IDE.
Here’s how to set up your voice command system:
- Initialize communication – Configure serial or I2C connection between your Arduino and the recognition module, typically using `begin()` functions with appropriate baud rates.
- Train commands – Define 20-30 max voice commands through code or serial interface, repeating each phrase several times to improve accuracy.
- Implement response logic – Create functions that execute when specific commands are recognized, and add error handling for unrecognized commands using state machines. Note that the EasyVR 3 Plus Shield is recommended for implementing speaker-independent commands in practical applications like home automation.
Serial Command Processing
Properly managing serial communication forms the backbone of any Arduino voice command system. Start by initializing communication with `Serial.begin(9600)` in your setup function, then continually check for incoming data using `Serial.available()` in your main loop.
When processing voice commands, store incoming bytes in a variable and implement a switch-case structure to trigger appropriate actions:
“`arduino
if (Serial.available()) {
command = Serial.read();
switch(command) {
case ‘A’: digitalWrite(ledPin, HIGH); break;
case ‘B’: digitalWrite(ledPin, LOW); break;
default: // handle unknown commands
}
}
“`
For reliable operation, consider implementing buffering strategies and timeout mechanisms.
Use `Serial.println()` statements strategically during development to debug command reception and verify your system responds correctly to voice inputs. For clearer communication with Processing, consider sending specific command strings with terminator characters to avoid confusion between debug messages and actual commands.
Recognition Library Setup
With your serial command structure established, you’ll need to integrate a specialized speech recognition library to interpret voice inputs. Download the library that’s compatible with your voice recognition hardware (like the Elechouse V3 module) and place it in your Arduino libraries folder.
After installation, verify integration by testing example sketches such as VR_sample_control_led.
Set up your recognition environment properly:
- Use the latest Arduino IDE for best compatibility
- Select the correct board and COM port before uploading code
- Configure your Serial Monitor at 115200 baud rate for command training
The library leverages built-in AI capabilities to recognize commands without internet connectivity, supporting approximately 40 different languages. Developed by industry leader Cyberon Corporation, the engine offers exceptional recognition regardless of the speaker’s accent or tone.
You’ll train the system with your specific voice commands before implementing your automation functionality.
Connecting Home Appliances to Your Voice Controller
Transforming your regular appliances into voice-controlled smart devices requires careful hardware selection and proper connection techniques.
Upgrading home devices to voice control demands strategic component choices and methodical wiring approaches.
You’ll need an Arduino board (Uno, Mega, or Nano) as your system’s brain and a HC-05 Bluetooth module to establish communication with your smartphone.
The most critical component is the relay module, which safely bridges the low-voltage Arduino circuits with high-voltage home appliances.
Connect your Arduino’s digital output pins to relay inputs, then wire your appliances to the relay outputs using appropriate holders.
Always prioritize safety by ensuring proper electrical ratings for your relays and using fuses or circuit breakers for protection.
For multiple appliances, use multi-channel relay boards.
Start with breadboards and jumper wires to test your connections before finalizing the installation.
This setup allows you to control appliances with simple voice commands through an Android application.
Troubleshooting Common Voice Recognition Issues

Even the most carefully designed voice control systems can encounter issues that prevent smooth operation. When your Arduino voice command system isn’t responding correctly, check these fundamental areas first: baud rate settings (typically 115200), proper pin connections (TX to pin 2, RX to pin 3), and power supply stability.
For persistent problems, try these targeted solutions:
- Communication Errors – Set Serial Monitor to “New Line,” use correct command syntax (like “vr” for status), and verify the module responds appropriately. Many users find that switching hardware pins from the default (0,1) to alternative pins like (2,3) resolves persistent communication issues.
- Recognition Failures – Retrain commands in a quiet environment, adjust microphone sensitivity, and guarantee stable power.
- Slow Response Time – Optimize your code, adjust baud rates, and manage system resources to reduce processing delays.
Most issues can be resolved through these systematic troubleshooting approaches.
Expanding Your System With Advanced Features
Once you’ve mastered the basics of Arduino voice control, your home automation system can evolve into something truly remarkable.
Consider integrating WiFi capabilities using ESP8266 or Arduino MKR WiFi 1010 boards to enable remote management through smartphone apps or web interfaces.
Seamlessly extend your Arduino voice control system beyond walls with WiFi integration, putting smart home power in your pocket.
Upgrade to dedicated voice recognition modules like EasyVR Shield for handling complex commands that trigger multiple actions simultaneously. Your system becomes more intuitive when you incorporate various sensors—temperature, humidity, motion—creating context-aware automation that responds to environmental conditions. These solutions can include smart air quality control systems that monitor pollutants and maintain healthy breathing environments automatically.
Enhance user experience with feedback systems including LCD displays showing real-time status and LED indicators signaling device states.
For scalability, adopt a modular design approach with networked Arduinos handling distributed control tasks. This allows your system to grow organically as you add new devices and functionalities to your voice-controlled smart home.
Frequently Asked Questions
Can Voice Commands Work Without Internet Connection?
Yes, you can use voice commands without internet. Offline voice recognition modules store commands locally on dedicated chips, processing your speech entirely on-device. They’re less versatile than cloud solutions but offer better privacy and reliability.
How Many Devices Can a Single Arduino Control Simultaneously?
You can control 13-20 devices simultaneously with a single Arduino, depending on your board model. Use I2C or multiplexers to expand beyond pin limitations. Consider power requirements when managing multiple devices simultaneously.
What’s the Maximum Voice Command Recognition Distance?
The maximum voice command recognition distance typically ranges from 3-15 feet depending on your microphone quality and environmental noise. You’ll get best results within 5 feet in a quiet room with minimal interference.
Is Voice Authentication Possible for Security Purposes?
Yes, voice authentication is technically possible for security purposes, but you’ll face limitations with Arduino’s processing power. You’d need additional hardware or cloud services to implement reliable speaker verification beyond simple command recognition.
Can Multiple Users Control the Same Arduino System?
Yes, you can have multiple users control one Arduino system by implementing a master-slave architecture or using wireless modules. You’ll need to program input prioritization and queue management to handle concurrent commands effectively.
In Summary
You’ve now built a fully functional voice-controlled home system with your Arduino. By mastering the hardware setup, programming essentials, and proper connections, you’ve created a smart home on a budget. Don’t stop here—troubleshoot any recognition issues and keep expanding with new features. Whether you’re controlling lights, temperature, or security devices, you’re well on your way to a completely voice-automated home.


Leave a Reply