
You’ve probably watched those sleek automated curtains glide open in luxury hotels and wondered if you could recreate that magic at home. The good news? You absolutely can, and it’s more straightforward than you’d expect. While the components might seem intimidating at first glance, the installation process follows a logical sequence that any DIY enthusiast can master. The key lies in understanding which steps can make or break your entire setup.
What You’ll Need: Essential Components and Tools
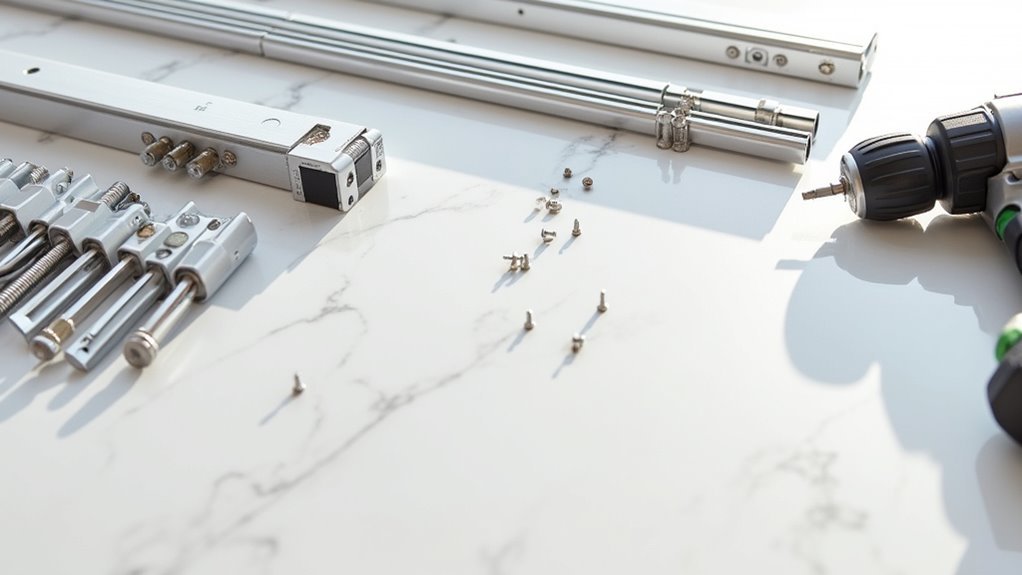
Several essential components and tools are required before you begin installing your home-automated curtain system. The essential components include a curtain track, j-rollers, motor, remote control, and debris cover for smooth operation.
You’ll also need an adjustable carrier to extend track length and guarantee proper j-roller fitting.
Your installation kit contains wall mounts, ceiling mounts, screws, and anchors for secure attachment. Gather these tools: power drill, screwdriver, measuring tape, level, and pencil for marking positions.
Most tracks attach with two screws per mounting bracket, though this varies by system.
Before starting, familiarize yourself with the remote control pairing process. This connects the remote to your motor, enabling the automation functionality that makes your curtains operate smoothly and efficiently.
Planning Your Installation: Measuring and Preparation
With your components and tools assembled, you’re ready to plan the precise installation of your automated curtain system. The next step involves measuring your window space accurately using a tape measure.
Determine the distance from ceiling to your desired curtain position, accounting for any obstructions or existing decor.
Measure ceiling-to-curtain distance carefully, considering any obstacles like light fixtures, molding, or decorative elements that might interfere with installation.
Before installation, prepare your track by opening the latches on either side to allow adjustments. Loosen the screws on the adjustable carrier, then extend the track to match your measured length before tightening them securely.
Plan your ceiling mount spacing strategically. Position end mounts 1-2 cm from the track ends, then space additional mounts approximately 50 cm apart for ideal support throughout the system’s length.
Setting Up the Track System

Once you’ve completed your measurements and preparation, begin installing the track system by first opening both latches on the sides of your track unit. This allows the track to adjust and extend to your predetermined measurements.
Next, loosen the screws on the adjustable carrier mechanism to enable track extension. Carefully move the carriage components to both ends, ensuring proper alignment with your window opening.
After extending the track to match your measured length, tighten the adjustable carrier screws firmly to lock the position. Close both latches securely to maintain the track’s stability.
Before proceeding with the next installation phase, double-check that your track is perfectly level and properly aligned with your desired mounting position. This verification step prevents future operational issues.
Extending the Track to Your Desired Length
Before you begin extending your track, measure the exact distance between your mounting points to determine the precise length needed. This guarantees your automated curtain system will fit your window or opening perfectly without gaps or overhang.
Start by opening the latches on both ends of the track. These latches control the extension mechanism and must be released before you can adjust the length.
Next, locate the adjustable carrier and loosen its screws to allow smooth movement during extension. Carefully extend the track to match your measured length.
Once you’ve reached the desired size, test the carriage by moving it to both ends, confirming it glides smoothly without obstruction.
Finally, tighten the adjustable carrier screws and close both end latches to lock your extension in place securely.
Installing the Debris Cover Protection
After securing your track at the proper length, you’ll need to protect it from dust and debris that could interfere with your curtain’s automated movement.
Start by measuring the desired length of your debris cover against the track. Cut the cover if necessary, ensuring you save any extra pieces for future installations.
Once you’ve cut the debris cover to size, snap it firmly into place along the track. Confirm that the installation aligns perfectly with your track’s length to achieve both a seamless appearance and ideal functionality.
This protection is essential for preventing dust accumulation that can disrupt your smart curtains’ operation.
Remember to regularly inspect the debris cover for misalignments or damage to maintain your home-automated curtains’ peak performance.
Choosing and Positioning Your Mounting Hardware
You’ll need to select the right ceiling mounts based on whether you’re installing single or double tracks, with smaller mounts supporting single tracks and larger ones handling double track systems.
Position your end mounts 1-2 cm from each track end to maximize stability during curtain operation.
Space your remaining mounts approximately 50 cm apart along the track’s length to guarantee adequate support throughout the installation.
Single Vs Double Mounts
When selecting mounting hardware for your automated curtains, you’ll face a fundamental choice between single and double mount systems that directly impacts both functionality and aesthetics.
Single mounts work perfectly for installations with one track, creating a streamlined appearance while requiring minimal space. They’re ideal for lighter fabrics and simpler setups.
Double mounts accommodate two tracks, letting you layer different fabrics or handle heavier curtains. You’ll need larger mounts for double setups to support the additional weight and guarantee each track operates independently without interference.
Regardless of your choice, position end mounts 1-2 cm from track ends for stability.
Space ceiling mounts 50 cm apart to prevent sagging. Always mark holes before drilling to guarantee accurate placement.
Proper Spacing Guidelines
Three critical measurements determine whether your automated curtain system will operate smoothly or struggle with alignment issues.
You’ll need to position your end mounts 1-2 cm from each track end to guarantee proper support and alignment. This positioning prevents the track from extending beyond its mounting points, which could cause stability problems.
Space your subsequent ceiling mounts approximately 50 cm apart throughout the track’s length. This spacing maintains stability and prevents sagging, especially important for automated systems that require smooth operation.
Remember that single tracks need smaller ceiling mounts, while double tracks require larger mounts to handle the additional weight.
Before drilling, accurately mark all mounting holes to guarantee precise installation and avoid costly misalignment. Properly secured mounts with appropriate screws prevent movement and assure your curtain system’s longevity.
End Mount Positioning
After determining your track length and mount spacing, position your end mounts with precision to create the foundation for smooth curtain operation.
Proper end mount positioning guarantees your automated curtains will glide effortlessly without binding or misalignment. Here’s how to position them correctly:
- Measure 1-2 cm from track ends – Position your end mounts within this range to confirm proper alignment and ideal functionality throughout the curtain’s travel path.
- Mark holes before drilling – Use a pencil to mark exact drilling locations, ensuring accurate placement that prevents costly mistakes and guarantees secure installation.
- Select appropriate mount size – Choose small mounts for single tracks and larger mounts for double track configurations to accommodate your specific curtain setup.
- Twist and tighten securely – Confirm mounts are completely twisted into place and firmly tightened to eliminate any movement during automated operation.
Securing Ceiling Mounts for Maximum Stability
You’ll need to select the right mount size for your curtain track’s weight and dimensions before beginning installation.
Position your first mounts 1-2 cm from each track end, then space additional mounts every 50 cm to prevent sagging.
Mark your drilling points accurately, use ceiling-appropriate anchors, and tighten screws firmly to guarantee your automated curtains operate smoothly for years.
Choosing Correct Mount Size
Two critical factors determine the success of your ceiling mount installation: selecting the appropriate mount size and positioning them correctly.
The mount size you choose directly impacts your track’s stability and longevity.
For single track installations, you’ll need small mounts that provide adequate support without overwhelming the system.
However, double track setups require larger, more robust mounts to handle the increased weight and stress from two curtain tracks operating simultaneously.
Here’s your mount sizing and positioning checklist:
- Single tracks – Use small ceiling mounts for ideal support
- Double tracks – Install larger mounts to handle extra weight
- End positioning – Place mounts 1-2 cm from track ends
- Spacing – Position subsequent mounts 50 cm apart for proper support
This systematic approach prevents sagging and guarantees smooth curtain operation.
Proper Spacing and Positioning
While proper mount sizing forms the foundation of your installation, precise positioning transforms your ceiling mounts into a rock-solid support system.
You’ll want to position your end ceiling mounts 1-2 cm from the track’s ends to guarantee stability and proper alignment. Space subsequent mounts approximately 50 cm apart to distribute weight evenly and prevent sagging.
Before drilling, mark your holes carefully to guarantee accurate placement and avoid unnecessary adjustments later.
Use a level throughout installation to keep mounts straight—this prevents operational issues with your smart curtains down the road.
Once everything’s positioned correctly, tighten all screws firmly to secure the mounts and provide maximum stability for your curtain track system.
Drilling and Securing Technique
Once you’ve marked your mount positions, selecting the correct drill bit becomes essential for creating secure anchor points. Choose a drill bit that matches your ceiling material – masonry bits for concrete or brick, standard bits for drywall.
Create clean holes at each marked position to accommodate your anchors properly.
Follow these steps for maximum stability:
- Drill precise holes using the appropriate bit size for your specific anchor type
- Insert anchors firmly into each hole, verifying they sit flush with the ceiling surface
- Twist ceiling mounts into position while threading screws through the anchor points
- Tighten screws completely but check alignment and level before final positioning
Double-check that your mounts are perfectly aligned before fully securing them. This prevents operational issues and guarantees smooth curtain movement.
Installing J-Rollers for Smooth Curtain Movement
After mounting your curtain track, you’ll need to install j-rollers that enable smooth curtain movement across the system.
First, count the required number of rollers, subtracting two for the carrier and fixed roller to maintain proper functionality. Position each j-roller with the curved side facing inward—this orientation facilitates seamless curtain movement along the track.
Snap the j-rollers into place firmly, ensuring they’re securely attached and can support your curtain fabric’s weight.
Space the rollers evenly along the track to maintain balance and prevent dragging or misalignment during operation.
Once installation’s complete, test the j-rollers by manually moving the curtain along the track. Confirm they glide smoothly without obstruction, ensuring your automated system will operate efficiently.
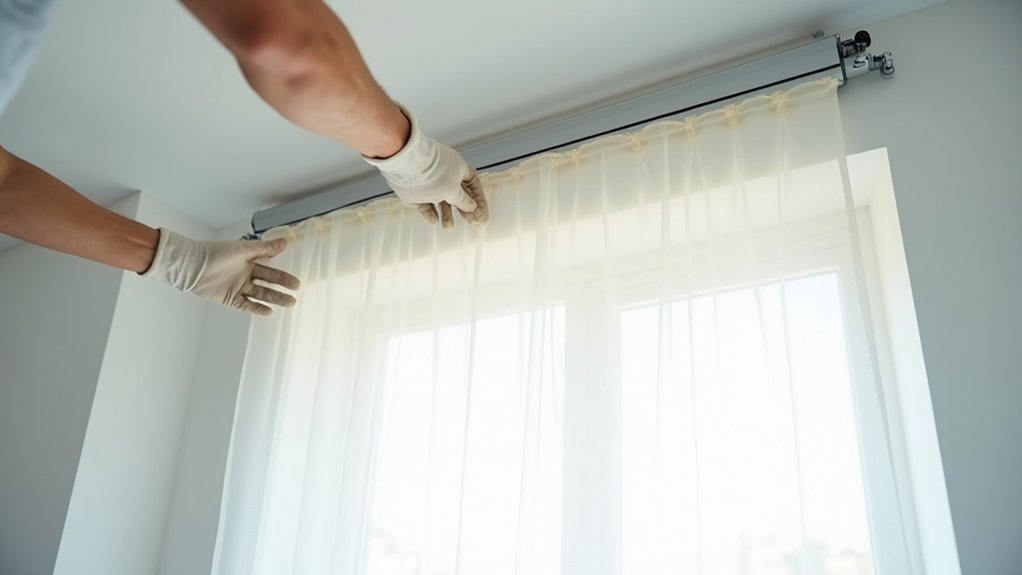
Attaching Your Fabric to the Track System
Three critical steps guarantee proper fabric attachment to your curtain track system.
You’ll need to follow these procedures carefully to confirm smooth operation of your automated curtains.
- Start with proper alignment – Attach your chosen fabric to the j-rollers, making sure the fabric’s edge aligns perfectly with the rollers for maximum security.
- Work systematically across the track – Begin the attachment process from one end and work toward the other end to maintain even tension distribution throughout.
- Secure the fabric properly – Snap the fabric into the j-rollers with the curve pointing inward to hold everything in place effectively.
- Test functionality – Check that fabric glides smoothly along the track, then test motor operation with your remote control.
Motor Installation and Positioning
With your fabric securely attached to the track system, you’re ready to install the motor that will power your automated curtains. Start by removing the last hook from your track to create insertion space. Gently insert the motor into the track’s end point, twisting until you hear a satisfying click that confirms secure placement.
| Installation Step | Action Required |
|---|---|
| Hook Removal | Remove last track hook |
| Motor Insertion | Insert at track endpoint |
| Securing | Twist until it clicks |
| Pairing | Hold button until red light |
| Verification | Check smooth movement |
Next, pair your motor with the remote by pressing and holding the motor button until the indicator light glows solid red. Verify the motor’s positioning allows unrestricted curtain movement. Always consult manufacturer instructions for specific settings.
Pairing Your Remote Control With the Motor
Establishing the connection between your remote control and motor requires precise timing and sequence.
Proper synchronization between your remote device and curtain motor demands careful attention to timing and procedural accuracy.
Before beginning the pairing process, verify your motor is properly installed and powered on by pressing the motor button until it illuminates.
Follow these steps to pair your remote:
- Activate pairing mode – Press and hold the motor button until the indicator light turns solid red
- Connect within 30 seconds – Press any button on your remote control to establish the connection with the motor
- Confirm successful pairing – Watch for the motor’s indicator light to flash, signaling the remote is linked
- Test functionality – Press the open and close buttons to guarantee your curtains respond correctly to commands
Testing Your Smart Curtain System
Now that you’ve paired your remote with the motor, you’ll need to test your smart curtain system to guarantee everything works properly.
Start by verifying the remote pairing process actually took hold, then check that the motor functions correctly when you send commands.
You’ll also want to run through movement testing procedures to confirm the curtains operate smoothly along their track.
Remote Pairing Process
The final step in your smart curtain installation requires pairing your remote control with the curtain motor to secure seamless operation.
Follow these steps to establish a reliable connection:
- Prepare the motor for pairing – Press and hold the motor button until the light turns solid red, indicating it’s ready to connect with your remote control.
- Position yourself strategically – Verify you’re within close range of the motor during the pairing process for successful connectivity.
- Wait for confirmation – After pressing the motor button, wait a few seconds until the remote’s indicator light responds, confirming successful pairing.
- Test functionality – Press the open and close buttons to verify your smart curtains operate correctly, completing your installation process.
Motor Function Verification
After completing the remote pairing process, you’ll need to thoroughly test your smart curtain system to guarantee peak performance.
Start by confirming the motor button pairing – press and hold it until the light turns solid red. Once paired, use your remote to open and close the curtains multiple times, verifying the motor responds smoothly without delays.
While testing, listen carefully for unusual sounds like grinding or clicking, which indicate potential motor or roller issues.
Check the track for obstructions that might impede movement and affect performance. If your curtains don’t operate as expected, revisit your installation.
Double-check that the motor and j-rollers are properly secured within the track system before proceeding with further troubleshooting steps.
Movement Testing Procedures
Once you’ve confirmed proper motor pairing, begin systematic movement testing by activating your remote’s open and close functions several times in succession. This thorough testing reveals potential issues before they become problems.
Your movement testing should include these essential steps:
- Smooth Operation Check – Watch curtains glide along the track without jerking, stuttering, or catching on any obstacles.
- Response Time Evaluation – Verify curtains fully open or close within seconds of pressing the remote button.
- J-Roller Inspection – Confirm rollers remain securely positioned and don’t shift during operation.
- Track Clearance Verification – Confirm the track stays free of debris that could interrupt movement.
If curtains don’t operate smoothly, double-check your motor installation and thoroughly clean the track of any blockages or debris.
Frequently Asked Questions
How to Install an Automatic Curtain?
You’ll measure and adjust your track length, install debris covers, mount ceiling brackets every 50cm, attach j-rollers facing inward, secure curtain fabric, then pair the remote with the motor.
How Do You Install Curtains Step by Step?
You’ll measure and adjust your track length, install the debris cover, mount ceiling brackets 50cm apart, attach j-rollers with curved sides inward, connect your fabric, then pair and install the motor.
Are Motorized Curtains Worth It?
You’ll find motorized curtains worth the investment if you value convenience and energy savings. They’ll reduce your energy costs by up to 25% while offering smart home integration, voice control, and enhanced privacy features.
What Is the Rule of Thumb for Curtains?
You should hang curtains 4-6 inches above the window frame and make them 1.5-3 times the window’s width. Extend your rod 3-6 inches beyond each side for ideal light and fullness.


Leave a Reply