You’re probably tired of juggling multiple remotes, searching through different streaming apps, and dealing with inconsistent audio levels every time you want to watch something. Building an automated media room eliminates these frustrations by creating a seamless entertainment experience that responds to your preferences without manual intervention. The key lies in understanding how each component works together to form a cohesive system that anticipates your needs.
Planning Your Automated Media Room Layout and Space Requirements
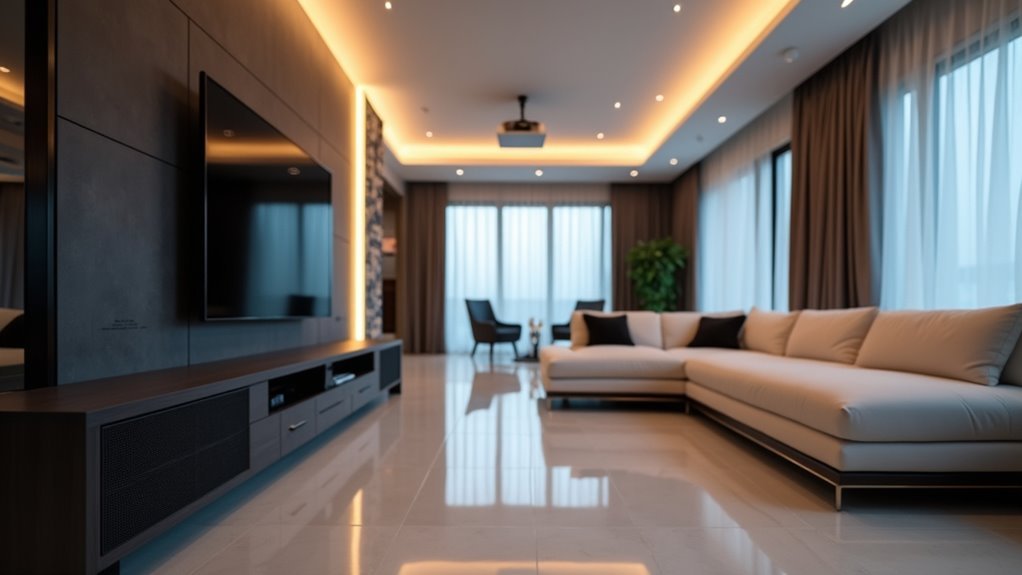
When designing your automated media room, you’ll need to start with the fundamentals of space and layout to create an experience that rivals commercial theaters.
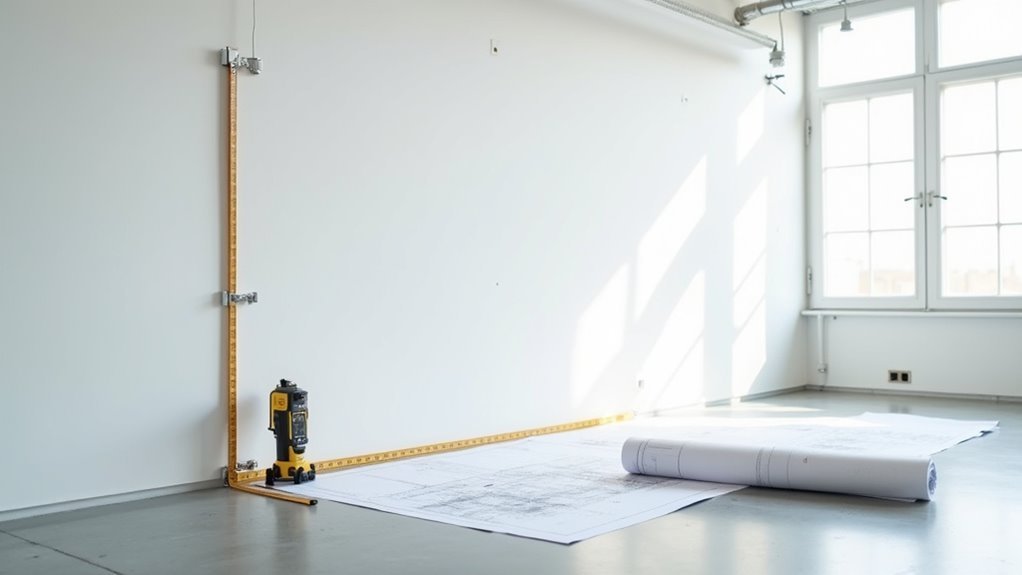
Your room size should measure at least 15 feet wide and 20 feet long to accommodate proper screen dimensions and seating arrangements. Position your main seating area, the “King’s Chair,” centrally for ideal viewing angles and sightlines.
Optimal media room dimensions start at 15×20 feet with centrally positioned seating for the ultimate viewing experience.
Ensure you’ve got a minimum ceiling height of 7 feet for projector placement and enhanced acoustics.
Install smart home automation systems for seamless lighting control and audio experience management. This technology lets you customize settings for different activities effortlessly.
Don’t overlook proper wiring and connectivity planning. Accessible power outlets and organized cable management solutions will minimize clutter while maintaining your media room’s sophisticated aesthetic.
Selecting the Right Hardware for Your Media Center Setup
You don’t need cutting-edge hardware to build an effective media center—older machines with 4th generation i5 processors and 4GB of RAM can handle 4K playback without breaking your budget.
Your storage strategy should prioritize capacity over speed, making high-capacity HDDs the smart choice despite their noise considerations in living spaces.
Understanding these minimum requirements and storage options will help you repurpose existing hardware or make cost-effective purchases for your automated media room.
Minimum System Requirements
Building a reliable media center starts with selecting hardware that can handle your entertainment needs without breaking the bank. You’ll need minimum system requirements of a 4th generation i5 CPU with 4GB RAM for smooth 4K video playback. Storage choices greatly impact your budget and performance—HDDs offer more capacity at lower costs than SSDs, though they’re noisier in living spaces.
| Component | Minimum Requirement |
|---|---|
| CPU | 4th gen Intel i5 |
| RAM | 4GB |
| Storage | HDD for capacity |
| Internet | Broadband connection |
Linux distros like Ubuntu LTS maximize older hardware efficiency while supporting essential media center software like Kodi and Radarr. Don’t forget that your reliable broadband internet connection remains vital for streaming and downloads.
Storage Configuration Options
Storage decisions form the backbone of any successful media center, directly impacting both your system’s performance and your wallet.
When evaluating storage configuration options, you’ll find HDDs offer superior value for large media libraries, delivering more terabytes per dollar than SSDs. A 2TB HDD can house approximately 500 HD movies, making it ideal for extensive collections.
Consider implementing a NAS solution for centralized access across all your devices. This setup streamlines media organization while enabling seamless streaming throughout your home.
However, factor in noise levels since HDDs can disrupt quiet environments. Position drives strategically or implement soundproofing measures to minimize disturbances.
Your media center’s storage architecture should balance capacity, cost-effectiveness, and accessibility to create a prime viewing experience.
Choosing the Operating System for Maximum Performance
While Windows might seem like the obvious choice for your automated media room, Linux distributions offer superior performance on older or budget hardware due to their minimal resource overhead and efficient system management.
You’ll find that Ubuntu LTS provides an ideal foundation for your home media setup, delivering excellent performance while maintaining long-term stability. Even older systems with 4th gen i5 processors and 4GB RAM can handle 4K playback effortlessly under Linux, making it perfect for streaming services integration.
Ubuntu LTS transforms aging hardware into reliable 4K-capable media centers, proving that performance doesn’t require expensive upgrades.
Don’t hesitate to experiment with different distributions to fine-tune your entertainment experience. Numerous online guides walk you through essential software installations and configurations specific to media centers.
This approach transforms budget hardware into powerful home media hubs without compromising performance or functionality.
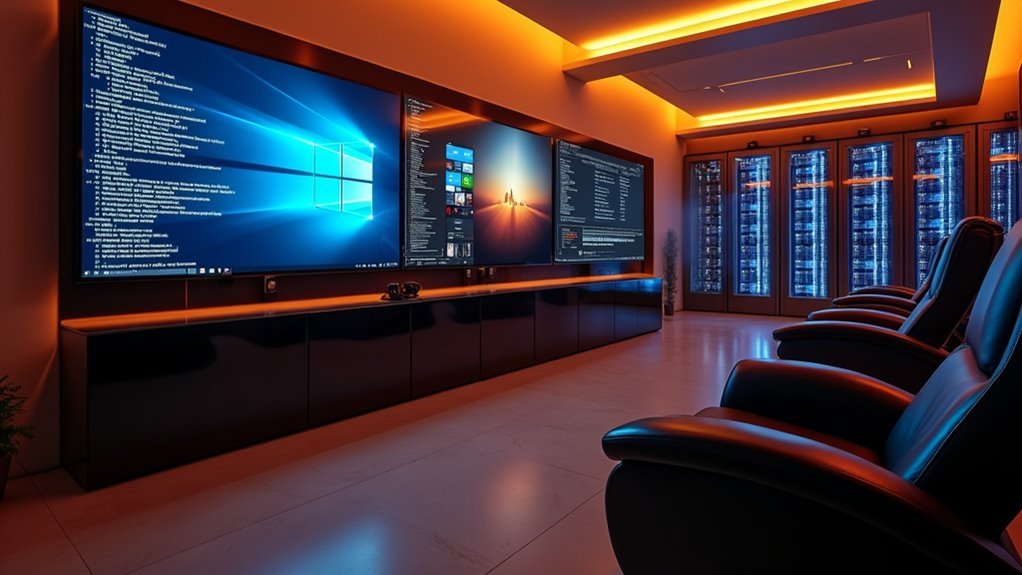
Essential Software Components for Media Automation
Once you’ve established your Linux foundation, you’ll need to install the core software suite that transforms your system into an automated media powerhouse. These applications work together seamlessly to create sophisticated home cinema setups that rival commercial streaming services.
| Software | Purpose | Integration Benefits |
|---|---|---|
| Jackett | Torrent indexing | Searches multiple sites simultaneously |
| Radarr | Movie automation | Manages film collection efficiently |
| Sonarr | TV series management | Automates show downloading |
| Kodi | Media playback | Customizable audio and video player |
You’ll want to configure these tools alongside a reliable VPN to protect your privacy. This Smart Home Automation approach guarantees continuous content availability while maintaining security. The combination creates an ecosystem that automatically acquires, organizes, and delivers content to enhance the viewing experience across all your devices.
Setting Up Your Network Infrastructure and Connectivity
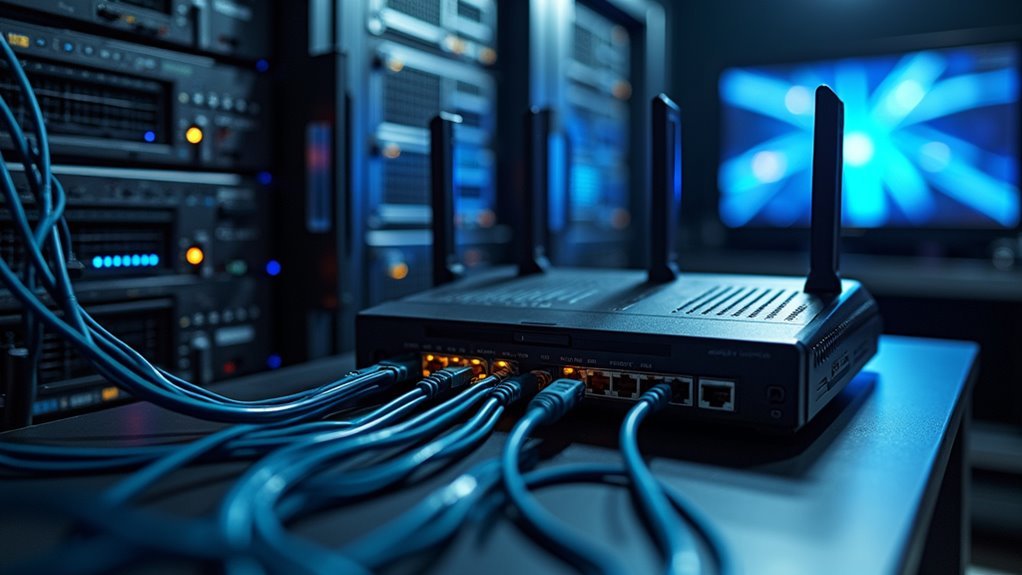
Your media automation system’s performance hinges on a robust network infrastructure that can handle simultaneous streaming, downloading, and device communication without bottlenecks.
Building a reliable foundation requires careful consideration of your connectivity components:
A solid media automation setup demands thoughtful selection of networking hardware to ensure flawless connectivity and performance.
- Install a high-speed router with Wi-Fi 6 technology to manage multiple devices simultaneously while reducing latency.
- Connect streaming boxes and gaming consoles via Ethernet cables for stable, interference-free performance on critical devices.
- Deploy a mesh Wi-Fi system to eliminate dead zones and maintain consistent signal strength throughout your media room.
- Add a network switch when multiple wired devices exceed your router’s port capacity without compromising speed.
- Update router firmware regularly to enhance security and optimize network performance for smooth media device operation.
This infrastructure guarantees seamless automation across all your connected entertainment components.
Configuring Audio and Video Equipment Integration
You’ll need to select an AV receiver that supports modern audio formats like Dolby Atmos to create truly immersive sound experiences throughout your media room.
Connect your video sources using high-quality HDMI cables to guarantee peak signal transmission between your 4K projector or TV and the receiver.
Implement a universal remote or smart home integration system to control all your devices from a single, streamlined interface.
AV Receiver Setup
The foundation of any automated media room lies in properly configuring your AV receiver, which acts as the central hub for all audio and video equipment integration.
Your audio system’s performance depends heavily on this setup, making proper speaker placement essential for ideal sound.
Follow these essential steps for success:
- Connect all components using high-quality HDMI cables for superior signal transfer
- Configure receiver settings to match your speakers and select appropriate audio formats like Dolby Atmos
- Use the room calibration feature to automatically adjust speaker levels, distances, and equalization
- Connect streaming devices, gaming consoles, and media players through the receiver for consolidated control
- Update firmware regularly to maintain compatibility with latest formats and enhance performance
Smart Home Integration
Once you’ve established your AV receiver as the central hub, integrating your audio and video equipment with smart home platforms transforms your media room into a truly automated entertainment system. Smart home integration with Amazon Alexa or Google Assistant provides seamless control over your entire setup through voice commands.
| Integration Type | Compatible Devices | Control Method | Benefits |
|---|---|---|---|
| HDMI-CEC | TVs, projectors, sound systems | Single remote | Unified device communication |
| Voice Control | All smart-enabled equipment | Voice commands | Hands-free operation |
| Automated Lighting Systems | Smart bulbs, dimmers | App/voice control | Perfect ambiance synchronization |
| Multi-room Audio | Sonos, wireless speakers | Zone-based control | Personalized listening experiences |
Smart remotes like Logitech Harmony Elite consolidate multiple controls, enabling one-touch activities. Your audio and visual components work together harmoniously, creating an effortless entertainment experience.
Installing and Positioning Display Screens and Projectors
While proper audio equipment forms the foundation of any media room, installing and positioning your display screens and projectors correctly determines whether you’ll achieve that coveted cinema-quality experience.
Your screen size should maximize wall dimensions with minimum requirements of 15 feet wide and 20 feet long for ideal viewing experience.
Key positioning considerations include:
- Position your projector according to manufacturer’s throw ratio specifications
- Mount screens at eye level with centers 42 inches from floor
- Use ceiling mounts for projectors to save space and eliminate viewing angles obstructions
- Select appropriate aspect ratios: 16:9 for standard content or 2.35:1 for cinematic experiences
- Plan wiring carefully to avoid blocking sightlines
These strategic decisions create the immersive environment your automated media room demands.
Designing the Perfect Sound System and Speaker Placement
You’ll need to select a surround sound system that matches your room’s size and layout, then position each speaker at precise angles and heights to create an immersive audio environment.
Strategic placement of your front, side, and subwoofer speakers determines whether you’ll experience crystal-clear dialogue and thunderous bass or muddy, unbalanced sound.
Once you’ve installed your speakers, you’ll calibrate the audio levels and timing to guarantee every seat in your media room delivers the perfect listening experience.
Surround Sound System Selection
Three key factors determine whether your automated media room delivers cinema-quality audio: the surround sound system’s capabilities, strategic speaker placement, and acoustic enhancement.
You’ll want to select a system supporting advanced formats like Dolby Atmos for three-dimensional sound placement that transforms your space into a true theater experience.
Here’s how to achieve ideal sound in your media room:
- Choose a surround sound system with Dolby Atmos compatibility for immersive audio
- Position front speakers at ear level flanking your screen
- Place surround speakers slightly above ear level for enveloping sound
- Install your subwoofer in the front corner for enhanced bass performance
- Add acoustic panels and sound-absorbing materials to minimize reflections
This configuration creates an immersive viewing experience that rivals commercial theaters.
Strategic Speaker Positioning
Proper speaker positioning transforms even basic audio equipment into a professional-grade sound system that delivers precise audio imaging and seamless surround effects.
Your strategic speaker positioning starts with front speakers at ear level, flanking the screen and angled toward your primary seating area for ideal sound delivery.
Position your center speaker directly above or below the display to anchor dialogue, while surround speakers should sit slightly behind your seating at 110-120 degrees from your listening position. This creates an immersive audio experience with proper soundstage depth.
For 7.1 systems, place rear surrounds slightly above ear level behind the listening area.
Experiment with subwoofer placement—corners often work well, but test multiple locations to find where bass response sounds most balanced throughout your room.
Audio Calibration Techniques
Once your speakers are positioned correctly, audio calibration becomes the critical next step that transforms good placement into exceptional sound quality.
You’ll need to fine-tune your system to achieve ideal performance across all seating positions.
- Use your AV receiver’s built-in calibration tool – These systems employ a microphone to analyze sound and automatically adjust speaker levels, distances, and equalization.
- Measure decibel levels with a sound meter app – Check audio balance from different seating positions to verify no seat is overly loud or quiet.
- Perform the subwoofer crawl technique – Place your subwoofer in the main seating position, then move around to find where bass response sounds most even.
- Install acoustic panels strategically – Add panels to walls and ceilings to absorb reflections and reduce echo.
- Test calibration settings regularly – Fine-tune as needed for consistent ideal sound quality.
Implementing Smart Lighting Controls and Ambient Settings
While traditional lighting switches limit your control to simple on-off functionality, smart lighting systems like Philips Hue and Lutron transform your media room into a customizable entertainment environment.
You’ll control brightness through mobile apps or voice commands, creating ideal ambient lighting for any viewing experience. Dimmable LED lights eliminate screen glare while maintaining comfortable visibility.
Integrate these systems with home automation to schedule automatic lighting changes before movies begin. Motion sensors add convenience by detecting your entrance and dimming lights when media starts.
Color-changing smart bulbs elevate your immersive home theater by synchronizing with on-screen action or music. You can create preset scenes for different content types, ensuring suitable ambiance whether you’re watching action films or documentaries.
This smart lighting integration transforms ordinary movie nights into engaging multimedia experiences.
Programming Universal Remote and Control Systems
You’ll need to establish a systematic approach when programming your universal remote to guarantee all devices communicate effectively within your automated media room.
Start by gathering every remote control from your TV, AV receiver, streaming devices, and other components, then follow your universal remote’s setup wizard to connect it to your Wi-Fi network.
The programming process involves inputting specific device codes and configuring integration methods that allow seamless control across all your entertainment equipment.
Remote Setup Process
Programming your universal remote starts with creating a thorough inventory of every device in your media room that requires control.
You’ll need to identify TVs, AV receivers, projectors, and streaming devices to guarantee device compatibility with your remote setup process.
Next, locate manufacturer codes through the provided list or online database.
Input these specific codes into your universal remote so it can communicate with each component effectively.
The remote setup process requires systematic testing:
- Turn each device on and off to verify basic functionality
- Test volume controls across all audio components
- Check input switching capabilities for seamless operation
- Program advanced features like channel surfing and menu navigation
- Integrate with smart home systems for voice control automation
Finally, maintain peak performance by regularly updating firmware and device codes as you acquire new equipment.
Device Integration Methods
Once you’ve completed the basic setup, integrating your devices requires choosing between manual code entry and automated learning methods. Your universal remote can connect to devices through specific codes found in user manuals or online databases.
However, modern remotes with learning capabilities offer a more efficient approach—they’ll “learn” commands directly from your existing remotes.
For thorough device integration in your automated media room, consider advanced control systems like Logitech Harmony. These systems seamlessly integrate with smart home devices and create customized activities that operate multiple components simultaneously with one button press.
Before proceeding, verify your chosen control systems are compatible with all devices—projectors, AV receivers, and streaming boxes. This compatibility check prevents functionality issues and guarantees smooth operation throughout your media room setup.
Optimizing Seating Arrangements and Room Acoustics
While technology drives your automated media room’s capabilities, the physical setup of seating and acoustics determines whether you’ll truly enjoy the experience.
Strategic seating arrangements and acoustic optimization work together to create an immersive environment that maximizes your investment.
Here’s how to optimize your media room’s physical elements:
- Position seating at screen eye level – Guarantees comfortable viewing angles and reduces neck strain during extended sessions.
- Install tiered seating – Eliminates head obstruction and improves sightlines for multiple viewers.
- Add sound-absorbing materials – Carpets, curtains, and acoustic panels reduce echo and enhance sound quality.
- Place speakers strategically – Position front speakers flanking the screen with surrounds at ear level.
- Test configurations thoroughly – Experiment with different setups to maximize acoustic performance and minimize sound leakage.
These foundations transform good technology into an exceptional viewing experience.
Establishing Automated Download and Content Management
Why manually hunt for content when your automated media room can find and organize everything for you?
You’ll need robust content management tools to streamline your setup. Start by implementing Jackett to index torrent sites, enabling automated searches directly from your media center.
Install Radarr for thorough media management of movie collections, automatically downloading based on your specified criteria like genre or release date.
Add Sonarr alongside Radarr for TV series management, keeping your library current with minimal intervention.
Always configure a VPN first to guarantee security and privacy during automated downloads.
Consider repurposing older hardware with Ubuntu LTS to run these applications efficiently, creating a dedicated server that handles all content management tasks seamlessly.
Testing System Performance and Fine-Tuning Settings
After setting up your automated download system, you’ll need to verify that everything performs at its finest under real-world conditions.
Testing system performance requires systematic evaluation of both audio and visual components to guarantee your media room delivers exceptional entertainment experiences.
Begin fine-tuning settings by addressing these critical areas:
- Measure seating distance to screen, targeting 1.5 to 2.5 times the screen width for ideal viewing comfort
- Use calibration tools to adjust projector brightness, contrast, and color balance for superior visual quality
- Test audio levels with reference tracks, balancing all speakers for ideal sound delivery
- Conduct room acoustics testing across various frequencies to identify problematic areas
- Schedule regular recalibration sessions, especially after equipment changes or room modifications
This methodical approach guarantees consistent, high-quality performance from your automated media system.
Maintenance Tips for Long-Term Automated Media Room Success
Once you’ve achieved ideal performance from your automated media room, establishing a proactive maintenance routine becomes essential for preserving that excellence over time.
Regular cleaning prevents dust accumulation on your equipment, screens, and speakers, ensuring peak performance and preventing overheating issues. Schedule firmware updates for all smart devices to maintain compatibility and enhance functionality.
Inspect cables and connections monthly for wear and damage while organizing them to prevent tangling and disconnections.
Test and recalibrate your audio and video settings quarterly, as environmental factors can affect your viewing experience over time.
Install a dedicated surge protector to shield your valuable equipment from power fluctuations, greatly extending component lifespan.
This systematic maintenance approach protects your investment while guaranteeing consistent, high-quality entertainment.
Frequently Asked Questions
What Permits or Building Codes Apply When Constructing a Dedicated Media Room?
You’ll need electrical permits for new wiring, potentially structural permits if removing walls, and must comply with fire codes for egress requirements. Local building departments have specific regulations for basement conversions and electrical work.
How Much Should I Budget for a Complete Automated Media Room Setup?
You’ll need $15,000-$100,000+ depending on room size and features. Basic setups start around $15,000, while high-end systems with premium projectors, surround sound, and smart automation can exceed $100,000 for luxury installations.
Can I Retrofit Automation Into My Existing Entertainment Room?
You can definitely retrofit automation into your existing entertainment room. You’ll need to assess current wiring, add smart hubs, upgrade components gradually, and potentially run new cables for ideal integration.
What Insurance Considerations Exist for Expensive Automated Media Room Equipment?
You’ll need specialized coverage for high-value electronics, including replacement cost protection, power surge coverage, and theft protection. Document everything with photos, receipts, and serial numbers for proper claims processing.
How Does Room Size Affect My Choice Between Projector and TV Displays?
You’ll want projectors for rooms over 12 feet wide since they create larger images cost-effectively. Choose TVs for smaller spaces under 10 feet where you’re sitting closer and need brighter displays.


Leave a Reply