You’re tired of fumbling for remotes when you want to adjust your surround sound, and you’ve considered buying an expensive voice-controlled system. But what if you could build your own for half the cost while customizing every feature to match your exact preferences? Creating a DIY voice-controlled surround sound system isn’t as complex as you might think, though there’s one essential component most people overlook that determines whether your project succeeds or becomes an expensive pile of frustration.
Understanding Voice-Controlled Audio Technology

When you speak to your surround sound system, you’re leveraging sophisticated voice-controlled audio technology that transforms spoken commands into precise device actions.
This technology integrates seamlessly with popular voice assistants like Amazon Alexa and Google Assistant, allowing you to manage playback and control audio devices through simple verbal instructions.
Voice control functionality requires compatible devices that support voice assistant integration. Systems like Sonos speakers exemplify this compatibility, enabling thorough audio management through spoken commands.
While surround speakers paired with main units like the Sonos Arc have muted microphones, you can still exercise voice control through the primary soundbar.
The effectiveness of voice commands depends heavily on speaker placement and your room’s acoustics, which directly influence recognition accuracy.
You’ll also appreciate the flexibility to switch between different voice assistants within your setup.
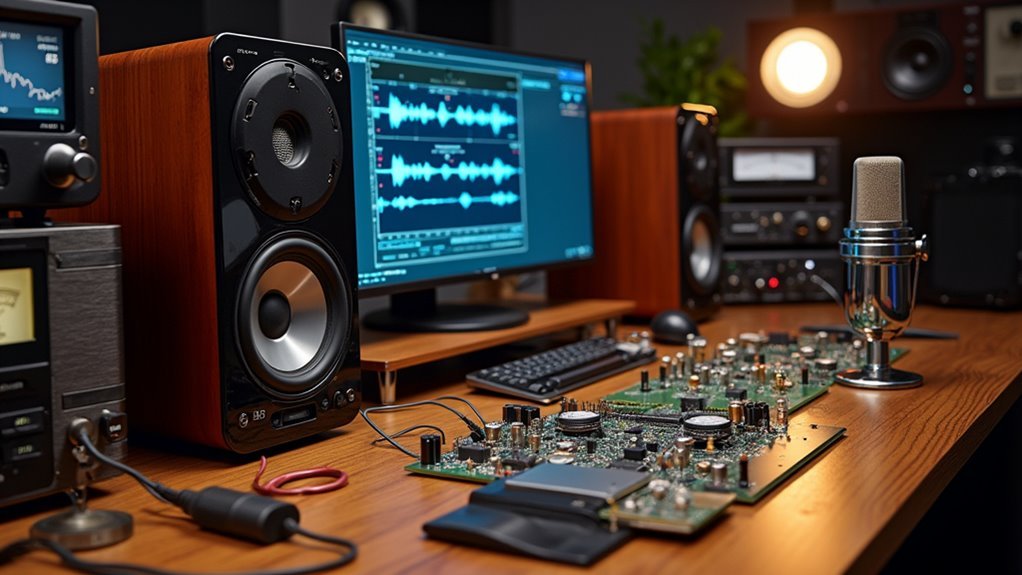
Essential Components for Your DIY System
Building your own voice-controlled surround sound system requires specific hardware components that work together to deliver immersive audio and seamless voice integration.
You’ll need an Atmos-compatible TV or AV receiver that supports necessary audio formats for cinematic experiences. Choose surround-sound speakers or a compatible soundbar like the Sonos Arc for high-quality audio delivery.
Ensure your TV includes HDMI ports with eARC support, enabling high-bitrate audio transmission from soundbars. Incorporate upward-firing drivers or in-ceiling speakers to create overhead sound illusions typical of Dolby Atmos systems.
A reliable Bluetooth module or smart home hub enables voice controlled functionality, allowing seamless command integration through platforms like Amazon Alexa or Google Assistant for complete hands-free operation.
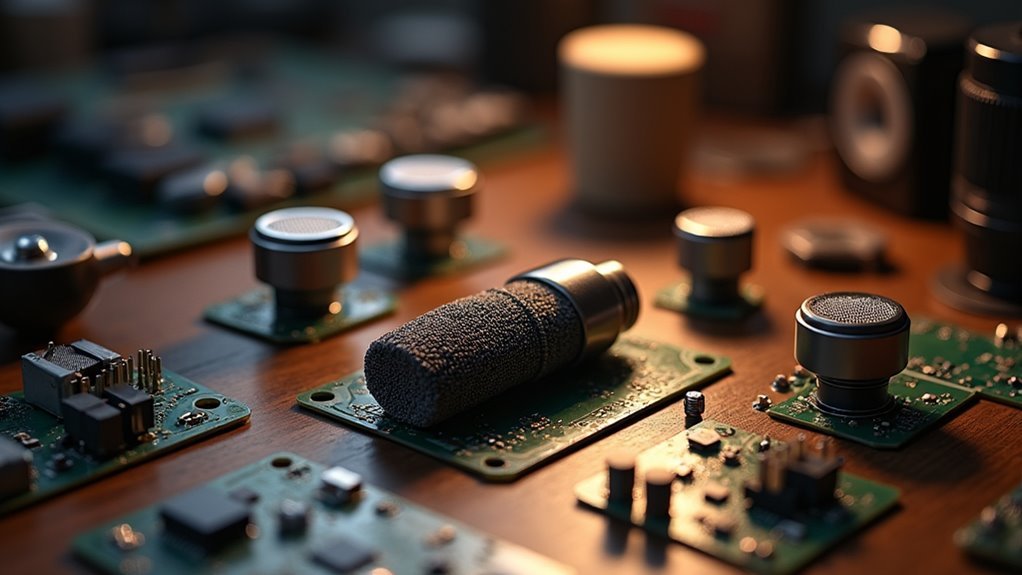
Selecting the Right Microphones and Speakers
While hardware compatibility forms the foundation of your system, selecting the right microphones and speakers will determine how effectively your voice commands are captured and how immersively your audio content is delivered.
Choose microphones with high sensitivity and low noise levels for clear voice recognition. Omnidirectional microphones work best since they’ll pick up commands from any angle in your room.
For speakers, prioritize models with upward-firing drivers to create that Dolby Atmos overhead effect you’re after. Verify compatibility with your existing soundbar or AV receiver, especially if it supports eARC.
Consider speakers with built-in voice assistants like Sonos or Amazon Echo models—they’ll seamlessly integrate and give you direct control over your entire surround sound system.
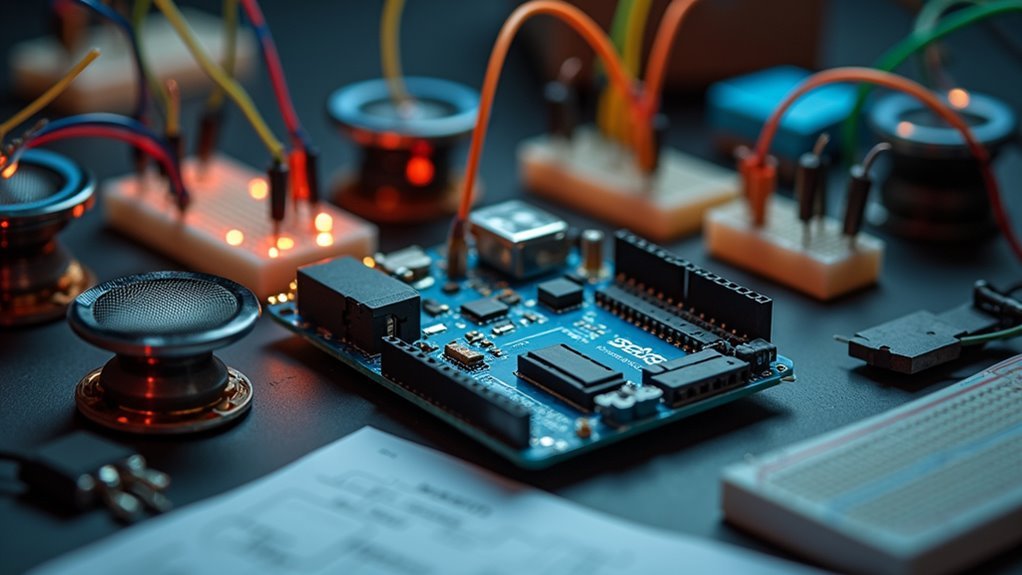
Voice Recognition Hardware Requirements
The heart of your voice-controlled surround sound system relies on specific hardware components that work together to capture, process, and execute your commands.
The foundation of voice-controlled audio automation depends on carefully selected hardware components working in perfect synchronization to deliver seamless command execution.
You’ll need an Arduino Uno as your main microcontroller to handle voice recognition processing. A Bluetooth module like the HC-05 enables wireless communication between your Android smartphone and the Arduino board. Your smartphone runs a compatible app that sends voice commands directly to the system.
A quality microphone captures your spoken instructions clearly for accurate voice recognition. Finally, you’ll require a 2-channel relay module that acts as an electromagnetic switch, controlling your audio components based on the processed commands.
These components form the foundation of your automated sound control system.
Setting Up Your Arduino-Based Control System
Five essential connections transform your Arduino Uno into a powerful voice-controlled hub for your surround sound system. You’ll connect your Arduino to a power source while utilizing its 14 digital I/O pins for relay control. The 2-Channel Relay Module acts as electromagnetic switches, enabling your Arduino to manage multiple audio devices simultaneously.
| Component | Function |
|---|---|
| Arduino Uno | Main control processor |
| 2-Channel Relay Module | Device switching control |
| HC-05 Bluetooth Module | Wireless communication |
| Power Source | System operation |
Install the Arduino IDE with RAKwireless Audio Library for programming voice recognition capabilities. The HC-05 Bluetooth module establishes wireless communication between your Android phone and Arduino. You’ll program voice recognition functionalities that work with Android’s voice recognizer, creating seamless automation through smartphone voice commands.
Wiring Connections and Circuit Assembly
You’ll start by establishing the core connections between your Arduino board and the essential components that make voice control possible. Connect your HC-05 Bluetooth module’s RX and TX pins to digital pins 2 and 3 on the Arduino, then wire the 2-channel relay module to control your speaker power distribution.
These connections form the foundation of your circuit assembly, so you’ll want to use a breadboard and jumper wires to guarantee stable, reliable connections throughout your system.
Arduino Board Connections
When establishing your voice-controlled surround sound system, proper Arduino board connections form the backbone of your entire circuit assembly.
These Arduino board connections enable seamless integration between your audio components and smart home automation network.
Follow these essential connection steps:
- Connect your Arduino Uno to a reliable power source using a USB cable or adapter that provides sufficient current for the entire circuit.
- Wire the 2-Channel Relay Module’s control pins directly to your Arduino’s digital I/O pins for precise device switching.
- Connect the HC-05 Bluetooth Module’s TX and RX pins to your Arduino’s corresponding communication pins for wireless smartphone connectivity.
- Use properly rated jumper wires to link relay modules with your surround sound appliances.
- Assemble everything on a breadboard for easy testing and modifications.
Bluetooth Module Wiring
Four critical wire connections transform your HC-05 Bluetooth module into a wireless communication hub for your voice-controlled surround sound system.
Start your Bluetooth module wiring by connecting the VCC pin to Arduino’s 5V pin for power supply. Next, wire the GND pin to Arduino’s ground to complete the power circuit.
Connect the HC-05’s TX pin to Arduino’s RX pin (pin 0) for data transmission from module to Arduino. Finally, wire the HC-05’s RX pin to Arduino’s TX pin (pin 1) for data reception from Arduino to module.
Use jumper wires to create secure connections on your breadboard, keeping wiring neat and organized. This systematic approach guarantees reliable wireless communication between your smartphone and the surround sound control system.
Relay Circuit Setup
Two essential relay connections establish the foundation for your voice-controlled surround sound switching system. Your relay circuit setup requires precise wiring between the Arduino and 2-channel relay module to enable seamless audio control.
Connect your components using these critical steps:
- Wire the relay’s control pins directly to your Arduino’s digital I/O pins for switching commands.
- Connect surround sound devices to the relay’s normally open (NO) and common (COM) terminals.
- Supply 5V power to energize the relay module properly.
- Link relay inputs to Arduino output pins for microcontroller state control.
- Upload test code that responds to voice commands from your Android application.
Test your relay circuit setup by sending simple on/off commands through the Bluetooth connection, verifying that your Arduino successfully triggers the relay switches.
Programming Voice Commands for Audio Control
Since voice-controlled surround sound systems rely on proper setup to function effectively, you’ll need to connect your voice assistant to your audio equipment through the appropriate app configuration.
For Amazon Alexa users, link the Sonos app to enable seamless voice control over playback functions. Commands like “Alexa, play music” or “Alexa, increase the volume” will control your surround speakers directly.
Google Assistant users can utilize commands such as “Hey Google, pause the audio” for effective playback management.
Position your surround speakers to enhance voice recognition—the speaker that best detects your command will respond accordingly.
Regularly update your voice assistant app settings to maintain compatibility and guarantee smooth functionality with your surround sound system for peak audio control performance.
Configuring Dolby Atmos Compatibility
When configuring Dolby Atmos compatibility with your voice-controlled surround sound system, you’ll need to verify that your TV or AV receiver supports HDMI eARC for transmitting the high-quality audio signals that Atmos requires.
Here’s what you’ll need to set up properly:
- Use upward-firing speakers or an Atmos-compatible soundbar like the Sonos Arc, which features 11 drivers for immersive overhead effects.
- Connect devices via HDMI to maintain audio signal integrity and enable seamless device communication.
- Verify streaming service support since not all platforms offer Dolby Atmos content—Apple Music and Tidal provide remastered Atmos tracks.
- Update firmware regularly to guarantee peak performance and compatibility with latest Dolby Atmos features.
- Test voice commands with Atmos-enabled content to confirm everything’s working correctly.
Installing Surround Speaker Positioning
You’ll need to position your surround speakers at ear level, placing them 90 to 110 degrees from your main listening spot and slightly behind you.
Keep them at least a few feet from walls to prevent sound reflections, and make certain they’re equidistant from your soundbar to maintain proper audio balance.
Once you’ve achieved ideal placement, you can integrate voice control commands to adjust individual speaker levels and sound modes without leaving your seat.
Optimal Speaker Placement
Achieving an immersive surround sound experience hinges on precise speaker placement that transforms your room into an acoustic sweet spot.
Your ideal speaker placement strategy should focus on creating dimensional audio that envelops you naturally. Position your surround speakers thoughtfully to maximize their impact:
- Place surround speakers at ear level, 90-110 degrees from your main listening position to create proper audio staging
- Maintain 3-6 feet distance between surround speakers and seating area to prevent overwhelming direct sound
- Mount wall speakers 1-2 feet above ear level when floor placement isn’t possible
- Angle upward-firing speakers to reflect sound off ceiling surfaces for enhanced height dimension
- Consider room acoustics and furniture placement since reflective surfaces enhance sound while soft furnishings absorb it
This strategic approach guarantees your voice-controlled system delivers theater-quality audio.
Voice Control Setup
Once your speakers are positioned correctly, integrating voice control requires strategic planning that balances audio enhancement with command recognition capabilities. Your voice control setup begins with selecting a compatible assistant like Amazon Alexa or Google Assistant, then downloading the appropriate app.
| Setup Component | Requirement | Consideration |
|---|---|---|
| Voice Assistant | Alexa/Google | App installation needed |
| Speaker Pairing | Compatible device | Sonos One for muted speakers |
| Microphone Access | Clear positioning | Best-hearing speaker responds |
Remember that surround speakers paired with soundbars have muted microphones, requiring additional compatible devices for voice commands. Enable voice features in your app settings and link music services for seamless playbook. Position speakers where they’ll clearly hear commands for ideal response accuracy.
Integrating Wireless Connectivity Options
Three primary wireless protocols—Wi-Fi, Bluetooth, and AirPlay 2—form the foundation of modern surround sound connectivity, eliminating the cable clutter that once defined home theater setups.
You’ll find that wireless connectivity transforms your audio experience through seamless integration.
Modern soundbars like the Sonos Arc showcase how wireless technology connects surround speakers without physical cables.
Here’s what you can achieve:
- Stream high-resolution Dolby Atmos content directly to compatible speakers
- Utilize HDMI eARC connections for enhanced audio quality and reduced latency
- Control your entire system through Amazon Alexa or Google Assistant voice commands
- Connect multiple speakers across different rooms for whole-home audio
- Automatically sync audio between your TV and wireless surround components
Your smart home integration becomes effortless when wireless protocols handle the heavy lifting.
Testing Voice Command Responsiveness
You’ll need to measure how quickly your surround sound system responds to voice commands by timing the delay between issuing a command and receiving a response.
Test command recognition accuracy by speaking clearly from different positions in your room and noting which speakers respond correctly to specific phrases.
Consider how environmental factors like background noise, room acoustics, and speaker placement affect your system’s ability to hear and process your voice commands effectively.
Response Time Measurement
When testing your voice-controlled surround sound system’s responsiveness, you’ll need to measure the time between issuing a command and its execution. Use a stopwatch to track response time accurately and identify potential issues affecting performance.
Several factors influence your system’s response time:
- Microphone placement – Position it within ideal range for clear voice detection.
- Background noise levels – Test in quiet and noisy environments to gauge impact.
- Command complexity – Simple requests like “volume up” respond faster than multi-step commands.
- Distance from speakers – Move closer or farther to determine effective operating range.
- Software updates – Keep firmware current for improved recognition speed.
Well-placed microphones typically respond within 1-2 seconds. Document your measurements to establish baseline performance and track improvements over time.
Command Recognition Accuracy
Beyond measuring response time, command recognition accuracy determines how effectively your surround sound system interprets what you’re saying.
Your speaker placement and room acoustics greatly impact how well the system hears and processes commands. When you’re using surround speakers with a soundbar, expect limited responsiveness since these speakers have muted microphones compared to standalone units.
The speaker detecting your voice most clearly will respond, creating variability in command recognition accuracy across your setup. You’ll notice different speakers responding depending on your position in the room.
To improve accuracy, speak clearly and use specific commands while regularly checking your device settings through the associated apps. Remember that multiple speakers can work together, but responsiveness varies based on positioning.
Environmental Interference Impact
Environmental factors can dramatically reduce your voice command accuracy, with background noise being the primary culprit. Your surround sound system’s environmental interference impact becomes evident when competing audio signals disrupt recognition.
Understanding these interference sources helps optimize your setup:
- Speaker placement – Position your primary voice-enabled device away from reflecting surfaces.
- Room acoustics – Hard surfaces create echoes that confuse voice processors.
- Furniture arrangement – Soft furnishings absorb sound while metal objects cause reflections.
- Background noise levels – Air conditioning, traffic, and household sounds mask your commands.
- Audio signal conflicts – Multiple devices responding simultaneously creates confusion.
Test your system in different scenarios to identify problem areas. Muted microphones on surround speakers during soundbar use can limit responsiveness in noisy environments.
Regular firmware updates improve interference filtering, enhancing your system’s ability to distinguish your voice from environmental noise.
Troubleshooting Common Setup Issues
Although voice-controlled surround sound systems offer impressive functionality, you’ll likely encounter setup challenges that require systematic troubleshooting.
Start by ensuring all speakers, including surround speakers, are properly connected and configured within the Sonos App. Remember that they’re part of your Home Theater setup, not individual devices.
Proper speaker configuration in the Sonos App treats surround speakers as Home Theater components, not standalone devices.
Mute the microphones on surround speakers when using them with a soundbar to prevent voice command confusion.
Check speaker placement carefully since the speaker that hears commands best will respond.
Verify your voice assistant is correctly linked to your Sonos system with necessary skills enabled.
Finally, consult Sonos support documentation for specific troubleshooting steps, as updates may affect functionality.
Optimizing Audio Quality and Performance
Once you’ve resolved setup issues, maximizing your system’s audio quality becomes the next critical step in achieving an exceptional surround sound experience.
Enhancing audio quality requires attention to several key factors that’ll transform your listening environment.
Consider these essential enhancement strategies:
- Position speakers at ear level and equidistant from your listening area to create a perfectly balanced sound field
- Add upward-firing speakers to enhance Dolby Atmos experiences with realistic overhead audio effects
- Use room correction software to calibrate your system based on your space’s unique acoustic properties
- Connect via HDMI eARC for high-quality audio transmission supporting advanced formats without fidelity loss
- Update firmware regularly for soundbars and speakers to maintain peak performance and format compatibility
These adjustments guarantee you’re getting maximum performance from your voice-controlled setup.
Expanding Your System With Smart Home Features
Your voice-controlled surround sound system becomes even more powerful when you integrate it with smart home technology beyond just audio optimization. You can control lighting, temperature, and other connected devices through the same voice commands that manage your audio.
Amazon Alexa and Google Assistant compatibility means you’ll issue commands to multiple systems from one interface, creating seamless automation throughout your home.
Devices like the Sonos Arc link with additional smart products, building a cohesive ecosystem that extends far beyond entertainment. You’ll adjust room lighting for movie nights, set the perfect temperature, and control audio levels simultaneously.
The Sonos App simplifies managing these integrations, letting you customize speaker configurations while coordinating with other smart devices for a truly connected home theater experience.
Frequently Asked Questions
Can I Make My Own Surround Sound System?
You can absolutely build your own surround sound system by selecting an Atmos-compatible AV receiver, combining traditional surround speakers with upward-firing drivers, and ensuring you’ve positioned everything correctly for ideal audio immersion.
How Does Fake Surround Sound Work?
You’ll experience fake surround sound through audio processing that manipulates timing and phase of stereo signals. Algorithms trick your brain into perceiving sounds from multiple directions, creating spatial audio illusion without additional speakers.
What Is the Difference Between a 5.1 and Surround Sound System?
You’re comparing two related concepts incorrectly. A 5.1 system IS a type of surround sound system with five speakers plus one subwoofer. Surround sound’s the broader category.
How to Make Switch Surround Sound?
You’ll access your AV receiver’s settings through the remote or on-screen menu, then select your desired surround sound format. Confirm your audio sources support the format and HDMI connections handle modern audio signals properly.


Leave a Reply