
You’re standing in your basement right now, aren’t you? Whether it’s finished or unfinished, that underground space represents one of your home’s most vulnerable entry points – and you probably haven’t given it the security attention it deserves. Most homeowners focus their camera systems on obvious areas like front doors and driveways, but savvy intruders know basements offer concealed access with minimal detection risk. There’s a systematic approach that’ll transform your basement into an impenetrable surveillance zone.
Assessing Your Basement Layout and Vulnerability Points
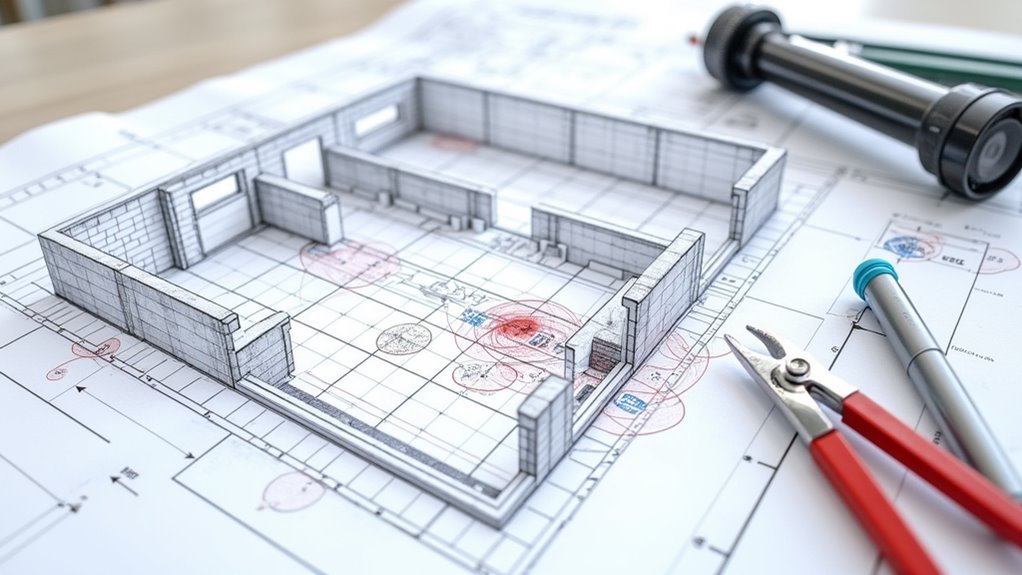
Before installing any security cameras, you’ll need to thoroughly examine your basement’s physical layout to identify where intruders might attempt entry or where they could move undetected.
Start by mapping all entry points including windows, doors, and bulkhead access that represent vulnerabilities. Focus on areas with poor visibility or inadequate lighting, as these create dangerous blind spots where unauthorized access might go unnoticed.
Map every basement entry point including windows, doors, and bulkhead access while identifying poorly lit areas that create dangerous blind spots for intruders.
Pay particular attention to storage areas containing valuables, since burglars typically target these locations. Identify potential hiding spots behind furniture or in dark corners where intruders could conceal themselves.
During your assessment, note the placement of electrical outlets and internet connections, as these factors will greatly influence your security camera installation strategy and determine ideal positioning for continuous power supply and connectivity.
Essential Camera Types for Basement Surveillance
Selecting the right camera types forms the foundation of an effective basement security system.
You’ll need to choose between fixed cameras for monitoring specific entry points and PTZ cameras that offer flexibility to cover larger spaces while tracking movement effectively.
For ideal basement surveillance, consider these essential camera types:
- Fixed cameras with wide viewing angles (180 degrees or more) to maximize coverage and minimize blind spots in confined spaces.
- Night vision cameras that capture clear footage in low-light conditions commonly found in basements.
- Outdoor-rated cameras with weatherproof housing for basements with windows or direct outdoor access.
Motion detection integration enhances your security by providing real-time alerts when movement occurs, ensuring you’re immediately notified of any basement activity.
Strategic Camera Placement Patterns for Maximum Coverage
Once you’ve chosen your camera types, positioning them strategically becomes your next priority for achieving complete basement surveillance.
Strategic placement using the Corner-to-Corner design maximizes your security camera systems’ effectiveness by positioning cameras at opposite corners, ensuring extensive coverage of the entire perimeter while eliminating potential blind spots.
You’ll want to implement the Inside Corner pattern where walls meet, as this captures activity in tight spaces with a 90-degree field of view.
Consider the Back-to-Back Pattern when your layout permits two cameras facing each other, creating overlapping surveillance zones.
Mount your cameras eight to ten feet high for ideal camera placement that deters tampering while providing broad visibility over entry points and common areas.
Regularly reassess your setup, accounting for furniture or storage that might obstruct views.
Optimal Mounting Heights and Positions
You’ll want to mount your basement cameras between 8 to 10 feet high to prevent tampering while maintaining clear views of the entire space.
This height gives you the best balance between deterring interference and capturing detailed footage of any activity below.
When positioning cameras in corners, you’ll maximize coverage while minimizing the number of devices needed to monitor your basement effectively.
Basement Height Considerations
When mounting security cameras in your basement, proper height placement becomes essential for achieving both effective surveillance and tamper resistance. The standard 8 to 10-foot mounting height provides ideal facial recognition while maintaining a thorough field of view throughout your basement space.
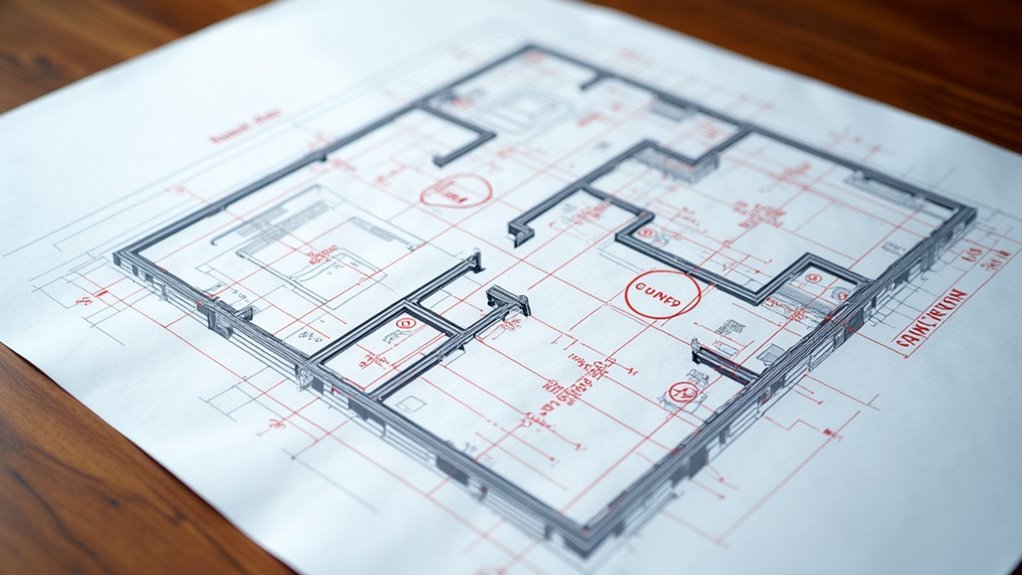
Your security camera system’s effectiveness depends on strategic positioning that considers your basement’s unique architecture. Create a camera placement diagram to identify key areas requiring coverage, ensuring adequate lighting supplements your surveillance setup.
Critical height considerations include:
- Corner-to-corner placement – Eliminates blind spots around your basement’s perimeter
- PTZ camera elevation – Mount higher for enhanced long-distance tracking capabilities
- Entry point coverage – Position cameras to capture clear footage of all access points
Regularly assess your camera stability and adjust angles to maintain effective surveillance coverage.
Corner Positioning Strategies
How can strategic corner positioning maximize your basement’s surveillance coverage while minimizing vulnerable blind spots? You’ll achieve excellent results by mounting cameras 8 to 10 feet high in corners, deterring tampering while capturing thorough views.
Implement the Inside Corner pattern using 3.6mm lenses to create 90-degree coverage that eliminates blind spots from adjacent walls. Your corner positioning strategies should include the Corner-to-Corner design for complete perimeter protection against unauthorized access.
Position cameras in unobstructed locations, avoiding interference from furniture or structural elements that compromise visibility. Proper camera angles guarantee your effective home security system captures every movement.
You must regularly inspect and adjust positioning after basement layout changes or furniture rearrangements to maintain surveillance efficiency throughout your space.
Wired Vs Wireless Systems for Basement Environments
Although basements present unique challenges for security camera installation, selecting the right system type can make the difference between reliable surveillance and frustrating connectivity issues.
Choosing the wrong camera system for your basement can turn security monitoring into a constant headache of connection problems.
You’ll need to weigh the trade-offs between wired and wireless systems based on your basement’s specific conditions.
When evaluating your options, consider these critical factors:
- Signal strength – Wireless systems may struggle with thick basement walls, requiring range extenders for peak performance.
- Power sources – Wired cameras need electrical outlets nearby, while wireless options depend on battery life or adapters.
- Installation complexity – Wireless offers flexible placement without drilling, but wired systems provide superior video quality through stable connections.
Your basement’s layout ultimately determines whether you’ll prioritize the reliability of wired systems or the convenience of wireless installation.
Power Source Planning and Electrical Requirements
Before installing your basement security cameras, you’ll need to evaluate your electrical infrastructure to confirm it can handle the additional power load. Each camera typically requires 5-10 watts, so consult a licensed electrician to assess circuit capacity and prevent overloading.
Consider Power over Ethernet (PoE) technology as your primary power source—it streamlines wiring and reduces additional power requirements during installation.
Plan outlet and PoE switch placement strategically to minimize cable lengths and prevent signal degradation. You’ll want surge protectors and uninterruptible power supplies to protect your cameras from power surges and outages, confirming continuous operation.
Verify all wiring and conduit work complies with local building codes. This prevents electrical hazards and confirms your installation meets safety regulations.
Proper electrical requirements planning now saves costly modifications later.
Dealing With Low Light and Night Vision Capabilities
Where traditional lighting fails in basement environments, infrared technology becomes your surveillance system’s most valuable asset.
When basements plunge into darkness, infrared technology transforms your security cameras into powerful night vision guardians.
Your security cameras’ night vision capabilities will deliver clear images even in complete darkness, typically covering 30-100 feet depending on your model. Most modern cameras combine low-light sensors with IR technology, ensuring your surveillance footage remains usable regardless of lighting conditions.
Consider these essential features for ideal basement monitoring:
- Smart IR Technology – Automatically adjusts LED intensity to prevent overexposure and washout
- Wide Dynamic Range (WDR) – Balances bright and dark areas within the same scene
- Regular Settings Testing – Optimize night vision performance through periodic adjustments
You’ll find that cameras with these capabilities handle basement lighting challenges effectively, maintaining consistent surveillance quality around the clock.
Managing Moisture and Environmental Challenges
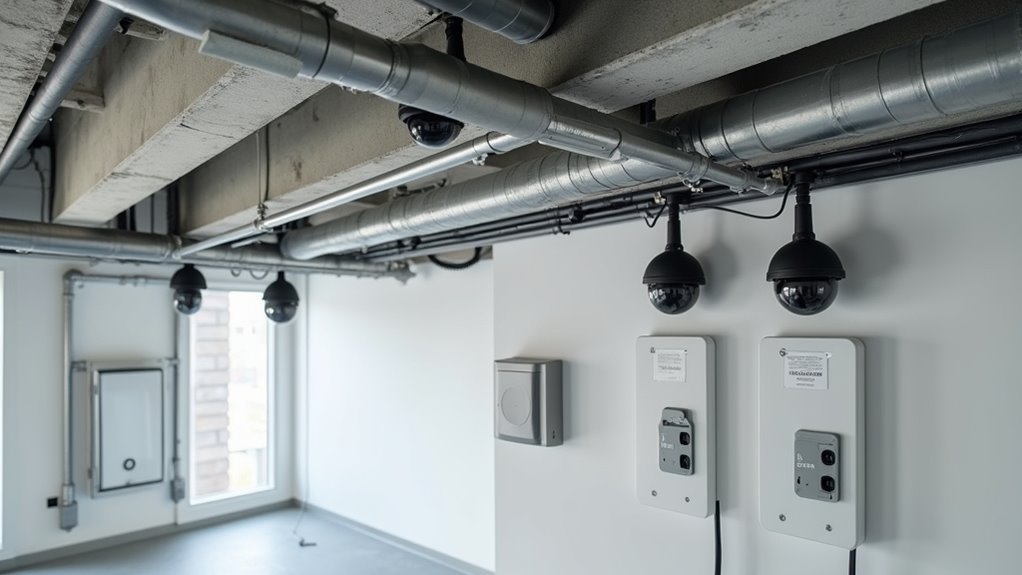
Beyond enhancing your cameras for basement lighting conditions, you’ll need to protect your surveillance equipment from moisture and humidity that naturally accumulate in below-ground spaces. Moisture-resistant cameras are crucial for preventing equipment damage and maintaining clear image quality. Install your cameras 8-10 feet above ground level to minimize flood exposure while maximizing coverage area.
| Component | Protection Method | Maintenance Frequency | Expected Benefit |
|---|---|---|---|
| Camera Housing | Moisture-resistant enclosures | Monthly inspection | Extended equipment life |
| Wiring | Outdoor-rated cables | Quarterly checks | Reliable signal transmission |
| Lens System | Regular cleaning protocol | Bi-weekly cleaning | Clear image capture |
| Ventilation | Humidity control systems | Continuous operation | Reduced condensation |
Proper humidity control through ventilation systems greatly reduces moisture accumulation. Your camera installation should include protective enclosures and regular maintenance schedules to guarantee peak performance in challenging basement environments.
Cable Routing and Wire Management Solutions
You’ll need to plan strategic cable pathways that keep your security camera wiring hidden and protected throughout your basement installation.
Running cables through walls, ceiling joists, or along baseboards prevents tampering while maintaining a clean appearance.
Proper wire protection methods like conduits and protective covers will safeguard your investment from moisture damage and physical wear over time.
Basement Cable Pathways
When installing basement security cameras, proper cable routing forms the backbone of a professional and functional system.
You’ll need to create a detailed diagram mapping pathways from your power source to each camera location before beginning installation and maintenance work. This planning phase guarantees you can secure your home efficiently while maintaining organization.
Consider these essential cable routing strategies:
- Wall and ceiling runs – Route cables through interior spaces to eliminate tripping hazards and maintain clean aesthetics.
- Protective conduits – Use covers in exposed areas to prevent damage and tampering attempts.
- Code compliance – Verify all electrical connections meet local building regulations for safety.
While wireless cameras offer convenience, wired systems provide reliable connections when you properly manage cable lengths and eliminate unnecessary slack that causes tangling.
Wire Protection Methods
How can you guarantee your basement security camera wiring withstands years of environmental exposure and potential interference? You’ll need proper wire protection strategies during your installation of security systems.
Use conduit or cable protection covers to safeguard wires from physical damage, moisture, and tampering. Route cables through walls or ceilings rather than across high-traffic areas where they’re vulnerable to damage.
Implement effective cable management by utilizing clips, raceways, and organized routing systems. Label each wire at both ends for easier identification during maintenance and troubleshooting.
Since basements present unique environmental challenges like humidity and temperature fluctuations, ascertain your wiring meets local electrical codes requiring specific insulation types for damp environments. These protection methods prevent costly repairs and maintain reliable camera functionality.
Integration With Existing Home Security Systems
Since most homeowners already have some form of security infrastructure in place, integrating your basement cameras with existing systems creates a unified surveillance network that’s more powerful than isolated components.
This integration allows you to monitor your home remotely through a single interface, streamlining your security management.
To achieve seamless integration with your home security cameras and security systems:
- Verify Protocol Compatibility – Confirm your basement cameras match your existing system’s wired or wireless specifications before installation.
- Leverage Home Automation Platforms – Connect cameras through SmartThings or Google Home for voice control and automated alerts.
- Maintain Current Firmware – Regularly update both camera and system software to preserve compatibility and security features.
You’ll access all feeds through one unified app, providing centralized control over your entire surveillance network.
Motion Detection Settings and Alert Configuration
With your basement cameras successfully connected to your home’s security network, configuring motion detection settings becomes the next step in creating an effective surveillance system.
You’ll need to adjust sensitivity levels to capture human movement while avoiding false alarms from pets or heating vents. Consider your basement’s specific layout when setting detection zones, ensuring ideal camera angle coverage without triggering unnecessary alerts.
Configure notifications to reach your smartphone or email immediately, enabling quick response to genuine threats. Schedule motion detection for hours when the basement’s unoccupied, reducing irrelevant alerts during active periods.
Set sensitivity high enough for security purposes but low enough to prevent environmental disturbances from overwhelming your system. Regularly review these settings as you rearrange furniture or storage, maintaining effective surveillance coverage.
Storage Solutions and Recording Equipment Placement
Once you’ve enhanced your motion detection settings, you’ll need to establish a secure foundation for your recording equipment and storage solutions.
Your basement’s recording equipment requires careful placement in a climate-controlled secure area to prevent moisture damage and temperature fluctuations that could compromise your system’s performance.
Protect your basement recording equipment from moisture and temperature extremes by choosing a climate-controlled, secure installation location.
Essential storage solutions include:
- Organized cable management – Use racks or cabinets to reduce clutter and eliminate trip hazards while ensuring easy maintenance access.
- Redundant backup systems – Implement multiple hard drives or cloud storage to protect recorded footage from hardware failures.
- Proper power protection – Connect your NVR storage to surge protectors and reliable power sources to guard against basement electrical fluctuations.
Plan your layout strategically, ensuring adequate ventilation around equipment to prevent overheating and maintain peak system performance.
Testing Camera Angles and Eliminating Blind Spots
Testing camera angles requires a methodical approach to guarantee thorough coverage throughout your basement space.
You’ll achieve ideal results by employing a corner-to-corner design that strategically places cameras in opposite corners for complete perimeter coverage. Mount your cameras at an ideal height of eight to ten feet, which deters tampering while providing a broad field of view essential for capturing clear footage.
Utilize back-to-back camera placement patterns to create 180-degree views that greatly reduce coverage gaps.
During installation, actively test each angle to confirm all critical areas like entry points and storage spaces remain unobstructed.
Don’t forget to regularly review recorded footage afterward—this helps you identify any overlooked blind spots and make timely adjustments to eliminate blind spots completely.
System Maintenance and Performance Optimization
After establishing ideal camera positioning, maintaining your basement security system’s peak performance requires consistent upkeep and strategic monitoring.
Regular maintenance guarantees prime functionality and extends your equipment’s lifespan.
Essential system optimization practices include:
- Lens Care – Clean camera lenses monthly to prevent dust accumulation that degrades video quality and compromises surveillance effectiveness in your basement environment.
- Software Updates – Schedule periodic firmware updates to protect against security vulnerabilities while accessing improved features that enhance overall system performance.
- Storage Management – Monitor recording capacity using video storage calculators, guaranteeing adequate space during peak activity periods to prevent critical footage loss.
Additionally, inspect wiring connections routinely for wear or damage that could disrupt power transmission.
Document all maintenance activities and performance metrics to identify recurring issues, enabling proactive enhancement of your basement security system’s reliability and effectiveness.
Frequently Asked Questions
How to Design a Security Camera Layout?
You’ll start by mapping your space and identifying entry points, then position cameras at 8-10 foot heights to eliminate blind spots. Use fixed cameras for broad coverage and PTZ models for detailed monitoring capabilities.
What’s the Difference Between a Surveillance Camera and a Security Camera?
You’ll find surveillance cameras focus on recording footage for later review, while security cameras actively deter crime with real-time alerts, motion detection, and live monitoring capabilities for immediate threat response.
Do You Have to Tell People You Have a Security Camera?
You’re typically required to notify people about security cameras, especially in private spaces. Check your local laws since requirements vary by jurisdiction. Posted signs usually satisfy notification obligations while deterring criminal activity effectively.
Where Not to Install Security Cameras?
You shouldn’t install cameras in bathrooms, on unstable surfaces like tree branches, in poorly lit areas, facing windows where glare occurs, or in high-traffic zones where they’ll be tampered with.


Leave a Reply