
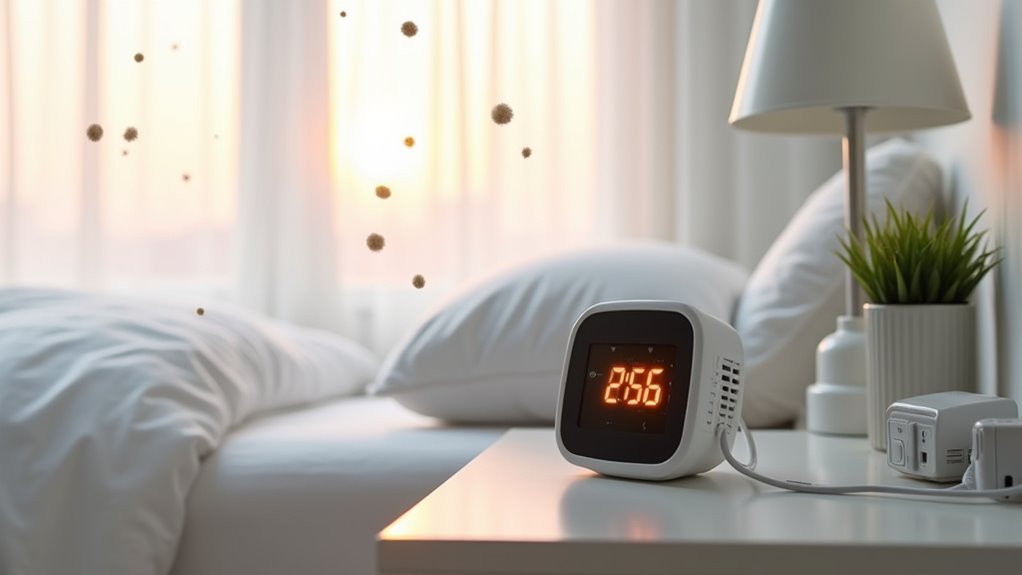
You’re spending a third of your life breathing bedroom air, yet you probably have no idea what’s actually in it. Poor indoor air quality can disrupt your sleep, trigger allergies, and leave you feeling groggy each morning. Setting up an air monitor in your bedroom takes just minutes, but the insights you’ll gain about CO2 levels, humidity, and pollutants during your sleep cycles might surprise you.
Understanding Bedroom-Specific Air Quality Risks

While you might assume your bedroom has clean air simply because it’s indoors, this private space actually harbors unique air quality risks that can greatly impact your sleep and health.
Your bedroom likely contains volatile organic compounds from scented candles, air fresheners, and cleaning products that release harmful chemicals into the air you breathe nightly.
Poor ventilation creates elevated carbon dioxide levels, disrupting your sleep patterns and reducing cognitive function the next day.
Moisture from nearby bathrooms or poorly sealed windows encourages mold growth, while dust mites and pollen accumulate in your bedding and carpets.
These allergens particularly threaten those with sensitivities.
Air quality monitors specifically designed for bedrooms help you identify and track these pollutants, ensuring you create the healthiest possible sleeping environment.
Choosing the Right Air Monitor for Your Bedroom
You’ll want to select an air monitor that tracks the specific pollutants most likely to disrupt your sleep and health in bedroom environments.
Focus on devices that measure CO2 levels, VOCs, humidity, and temperature, as these directly impact your sleep quality and respiratory health during nighttime hours.
Choose monitors like the Airthings Wave Plus or Wave Mini that detect bedroom-specific concerns such as poor ventilation and mold-promoting humidity levels.
Health-Based Monitor Selection
Since your bedroom air quality directly impacts your sleep and health, selecting a monitor that detects the right pollutants becomes essential for your well-being.
If you have respiratory conditions or allergies, prioritize an air quality monitor that includes mold detection and humidity monitoring capabilities. These factors greatly impact your symptoms and overall comfort during sleep.
For general health protection, focus on devices that detect particulate matter (PM) and volatile organic compounds (VOCs), as these common indoor pollutants directly affect sleep quality.
Look for monitors offering real-time alerts and data logging features to track trends over time. This helps you identify patterns connected to sleep disturbances or allergy flare-ups, enabling proactive adjustments to maintain ideal bedroom air quality.
Bedroom-Specific Pollutant Tracking
Beyond general health considerations, your bedroom presents unique monitoring challenges that require tracking specific pollutants common to sleeping spaces.
Focus on monitors that detect particulate matter (PM), carbon dioxide levels, and volatile organic compounds (VOCs) from furniture, carpeting, and cleaning products.
Humidity detection becomes essential since bedrooms often trap moisture from breathing and perspiration, creating conditions for mold growth that threaten respiratory health.
Your air quality monitoring system should provide real-time indicators, letting you spot sudden changes during sleep hours.
Choose devices with quiet operation to avoid sleep disruption while maintaining continuous monitoring.
An intuitive app interface helps you track overnight patterns and identify pollution sources specific to your bedroom environment, enabling targeted improvements for better sleep quality.
Essential Air Quality Parameters to Track While Sleeping
When you’re setting up your bedroom air monitor, you’ll want to focus on three critical parameters that directly impact your sleep and health.
CO2 levels can greatly disrupt your sleep cycles and morning alertness, while VOCs from household products can trigger respiratory irritation throughout the night.
Additionally, tracking humidity becomes essential since improper levels create the perfect breeding ground for mold and can worsen existing respiratory conditions.
CO2 Sleep Impact
While you sleep, CO2 levels in your bedroom can silently sabotage your rest quality and next-day performance. When concentrations rise above 1000 ppm due to poor ventilation, you’ll experience disrupted sleep patterns and wake up with decreased cognitive function.
Here’s what elevated CO2 does to your sleep:
- Creates feelings of fatigue and grogginess upon waking
- Increases drowsiness and reduces mental focus throughout the day
- Disrupts natural sleep cycles, preventing restorative rest
- Impairs overall air quality in your sleeping environment
You should maintain CO2 levels below 800 ppm for ideal sleep quality. An air monitor that tracks CO2 concentrations provides valuable insights into when you need improved ventilation and air circulation, helping you wake up refreshed and mentally sharp.
VOC Respiratory Effects
Volatile Organic Compounds (VOCs) lurking in your bedroom create a hidden threat to your respiratory system throughout the night.
These chemical emissions from paints, cleaners, and air fresheners irritate your throat and lungs while you sleep. You’re especially vulnerable if you have respiratory sensitivities or existing conditions.
Your air monitor should track VOC levels to identify when concentrations spike from household products.
Common sources include furniture off-gassing, scented candles, and cleaning residues that continue releasing volatile organic compounds hours after use.
When your monitor detects elevated readings, you’ll know to increase ventilation or remove offending products.
Tracking these invisible pollutants helps you maintain cleaner bedroom air, reducing nighttime respiratory irritation and improving your sleep quality for better overall health.
Humidity Mold Prevention
Excessive moisture in your bedroom creates the perfect breeding ground for mold, which releases spores that can trigger allergies and respiratory problems while you sleep.
Your air monitor should track humidity levels to prevent mold growth and maintain ideal sleeping conditions.
Keep these humidity monitoring essentials in mind:
- Maintain 30-50% humidity – This range notably reduces mold growth risk
- Set alerts for 60%+ levels – Mold spores thrive when humidity exceeds this threshold
- Monitor humidity and temperature together – Combined tracking provides thorough environmental control
- Check for early mold indicators – Regular monitoring helps catch problems before they worsen
When your monitor detects elevated humidity, you’ll receive timely alerts to increase ventilation or activate dehumidification.
This proactive approach reduces allergens and irritants, enhancing your sleep quality.
Optimal Placement Height for Bedroom Air Monitors
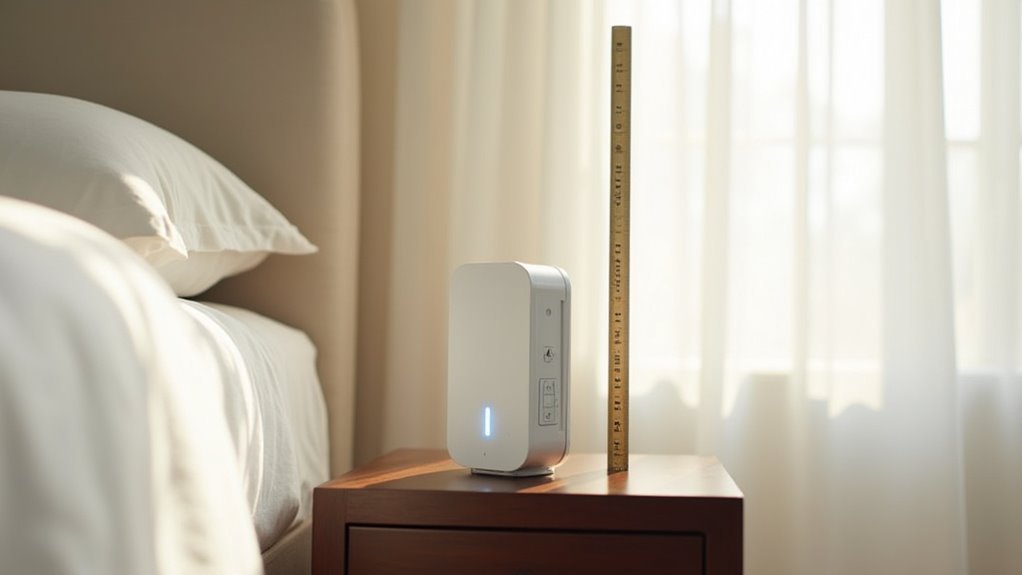
When you’re setting up an air monitor in your bedroom, positioning it at the right height is essential for getting accurate readings of the air you’ll actually breathe while sleeping. The ideal placement height for bedroom air monitors is typically 4 to 6 feet off the ground, which corresponds to your head level during sleep.
| Pollutant Type | Recommended Height | Placement Location |
|---|---|---|
| Formaldehyde (lighter gases) | Near ceiling | Wall-mounted high |
| General air quality | 4-6 feet | Nightstand level |
| Dust/particulates | 2-4 feet | Lower furniture |
| Mixed pollutants | 4-5 feet | Bedside table |
| VOCs | 5-6 feet | Mid-wall height |
You’ll capture the most relevant air quality data by avoiding corners and ensuring proper airflow around your monitor. Regularly adjust positioning to maintain ideal readings without obstructions.
Distance Requirements From Walls and Furniture
You’ll need to maintain proper clearance from walls and furniture to guarantee your air monitor captures accurate readings.
Place your device at least 3 feet away from walls and large furniture pieces that can obstruct natural airflow patterns in your bedroom.
This distance prevents interference that could skew your air quality measurements and gives you a true picture of the air you’re breathing.
Wall Clearance Guidelines
Proper spacing between your air monitor and surrounding surfaces directly impacts measurement accuracy. When you’re positioning your air quality monitor, maintaining adequate wall clearance prevents interference that can skew readings.
Follow these essential clearance guidelines:
- Maintain 12-inch minimum distance from walls to avoid surface interference affecting sensor accuracy.
- Keep monitors away from corners where restricted airflow creates measurement dead zones.
- Avoid enclosed spaces that limit natural air circulation patterns around the device.
- Ensure unobstructed pathways on all sides for proper air sample collection.
You’ll get the most reliable data when your monitor has breathing room. This spacing allows natural air currents to reach the sensors without obstruction.
Remember to periodically verify that furniture moves or room changes haven’t compromised your carefully planned clearance distances.
Furniture Interference Avoidance
While wall clearance forms the foundation of proper monitor placement, furniture creates additional obstacles that can considerably compromise your air quality readings. Large pieces like dressers, bookcases, and beds can disrupt natural airflow patterns, creating pockets of stagnant air that don’t represent your room’s true conditions.
| Furniture Type | Minimum Distance | Reason |
|---|---|---|
| Large dressers/armoires | 3+ feet | Blocks airflow circulation |
| Bookcases/shelving units | 3+ feet | Creates air stagnation zones |
| Beds (king/queen) | 3+ feet | Disrupts natural air movement |
| Desks with hutches | 3+ feet | Forms enclosed air pockets |
Your air quality monitor needs unobstructed access to circulating air. When furniture arrangements change, reassess your monitor’s position to maintain measurement accuracy and guarantee it’s detecting the air you’re actually breathing.
Avoiding Common Placement Mistakes
Even experienced users often make critical placement errors that compromise their air monitor’s accuracy and effectiveness.
Your air quality monitor needs proper positioning to deliver reliable readings that protect your health during sleep.
Avoid these common mistakes:
- Positioning near windows or doors – Drafts from outside air can skew your indoor readings and provide inaccurate data about your bedroom’s actual air quality.
- Placing too close to heat sources – Radiators, heaters, and heating vents create temperature fluctuations that affect humidity levels and distort overall measurements.
- Installing at wrong heights – Remember that heavier gases settle low while lighter pollutants rise, so head-level placement captures what you’re actually breathing.
- Ignoring furniture obstructions – Blocked airflow around your monitor creates stagnant pockets that don’t represent your room’s true air conditions.
Setting Up Your Device for Accurate Readings
Now that you’ve avoided the major placement pitfalls, you’ll need to configure your air quality monitor properly to guarantee it delivers reliable data.
Start by positioning it at head height where you sleep, since this accurately measures the air you’re breathing throughout the night.
Choose a monitor that tracks VOCs, humidity, and temperature – these metrics directly impact your sleep quality and comfort.
VOCs, humidity, and temperature readings provide the essential data you need to optimize your sleep environment and maintain bedroom comfort.
After setup, resist the urge to check readings immediately. Your device needs seven days to calibrate properly, especially for VOC and humidity measurements.
Once calibrated, monitor readings regularly and adjust your bedroom’s ventilation based on humidity levels. This prevents mold growth and maintains ideal air quality for better sleep.
Calibration Process and Initial Setup Steps
Once you’ve downloaded the app and removed the plastic battery tab, your air monitor will automatically begin its activation sequence.
The device needs a full seven days to complete its calibration process, during which it’ll establish baseline readings for VOCs, humidity, and temperature in your specific bedroom environment.
You won’t see accurate air quality data until this initial calibration period is complete, so patience is key for getting reliable measurements.
Initial Device Activation
Getting your bedroom air monitor up and running starts with removing the plastic tab from the battery compartment, which powers on the device immediately. This simple action completes your initial device activation and prepares your monitor for the setup process.
Follow these essential steps to get started:
- Remove the plastic battery tab to power on your device
- Download the Airthings Wave app and create your account
- Tap the “+” icon within the app interface
- Assign a descriptive name to your new monitor
Once you’ve completed these steps, your device will begin its seven-day calibration period.
During this time, you’ll see initial measurements for VOCs, humidity, and temperature, but complete historical data won’t be available until calibration finishes.
Seven Day Calibration
After you’ve powered on your device and completed the initial app setup, your bedroom air monitor enters a seven-day calibration period that’s crucial for accurate long-term monitoring.
During this critical phase, your device adjusts its sensors to measure VOCs, humidity, and temperature with precision.
Keep your monitor in a consistent location throughout the entire seven day calibration process. Moving it will disrupt the calibration and force you to restart the week-long process.
While calibrating, you’ll see preliminary data showing air quality as “good,” “fair,” or “poor,” giving you basic insights into your bedroom’s conditions.
Remember that reliable readings and historical data access won’t be available until the calibration completes.
Be patient—this process guarantees your monitor delivers trustworthy measurements.
Connecting Your Monitor to WiFi and Mobile Apps
The convenience of remote monitoring transforms your air quality device from a simple standalone unit into a connected smart home essential.
Setting up your indoor air quality monitor’s connectivity is straightforward and reveals powerful features.
Follow these steps to connect your monitor:
- Download the Airthings Wave app and create an account, following the on-screen setup prompts
- Power on your monitor and enable Bluetooth on your mobile device for seamless pairing
- Select your WiFi network in the app and enter your password for internet access
- Keep the app updated to access new features and guarantee peak performance
Once connected, you’ll gain access to real-time air quality metrics and historical trends.
The app becomes your gateway to understanding your bedroom’s air quality patterns remotely.
Establishing Baseline Measurements for Your Sleep Space
With your air quality monitor successfully connected and ready to go, you’ll want to capture accurate baseline data that reflects your bedroom’s unique air quality patterns.
Run your temperature and humidity sensor continuously for one full week to establish normal ranges. Track key metrics including VOC levels, CO2 concentrations, and humidity percentages throughout different times of day and night.
Pay attention to how activities affect readings—cleaning products, candles, or cooking can temporarily spike VOC levels.
Note patterns after closing doors for sleep versus keeping them open. Document when CO2 levels rise above 1,000 ppm, indicating poor ventilation that could disrupt sleep quality.
This baseline data becomes your reference point for identifying air quality issues and measuring improvement efforts.
Monitoring Air Quality Throughout Different Sleep Cycles
Once you’ve established your baseline readings, you’ll discover that air quality fluctuates dramatically as you move through different sleep stages.
Your smart air monitoring system will reveal patterns that directly correlate with your sleep cycles and bedroom conditions.
Track these critical measurements throughout the night:
- CO2 levels – Watch for spikes during deep sleep when your breathing slows and ventilation decreases.
- PM2.5 concentrations – Monitor particulate matter that can disrupt REM sleep and cause morning grogginess.
- Humidity fluctuations – Track moisture changes that affect comfort and mold growth risk.
- VOC emissions – Detect volatile organic compounds from bedding, furniture, or cleaning products.
Your smart air quality data will show distinct patterns during light sleep, deep sleep, and REM phases, helping you optimize your bedroom environment.
Interpreting Nighttime Air Quality Data
How do you make sense of the data streams flowing from your bedroom air monitor each morning?
Start by checking CO2 levels first – readings above 1,000 ppm suggest poor ventilation that’s disrupting your sleep and focus.
High CO2 levels above 1,000 ppm signal inadequate airflow that compromises both nighttime rest and daytime cognitive performance.
Next, examine VOC spikes that might indicate harmful chemicals from scented candles or cleaning products you’re using.
Your air quality monitor should show humidity staying between 30-50%; anything outside this range promotes mold growth or respiratory irritation.
Don’t ignore particulate matter readings, as PM levels often rise during nighttime due to stagnant air, potentially triggering allergies.
Track these patterns over time to identify trends, then take action by improving ventilation or removing pollutant sources for healthier sleep.
Adjusting Ventilation Based on Monitor Readings
When your bedroom air monitor reveals concerning readings, you’ll need to take immediate action to restore healthy air quality.
Your air quality monitor provides real-time data that guides specific ventilation adjustments.
Take these steps based on your readings:
- CO2 above 1000 ppm – Open windows immediately or turn on fans to increase fresh air circulation and prevent sleep disruption.
- Humidity exceeding 60% – Use dehumidifiers or increase ventilation to prevent mold growth in your sleeping space.
- High particulate matter levels – Deploy air purifiers or open windows to reduce airborne pollutants affecting your breathing.
- Elevated VOC readings – Activate exhaust fans or open windows to eliminate harmful indoor air pollution quickly.
These targeted responses guarantee you’re breathing cleaner air while sleeping.
Maintaining Your Bedroom Air Monitor for Long-term Use
Your bedroom air monitor’s accuracy and reliability depend entirely on consistent maintenance practices that preserve its sensors and extend its operational lifespan.
Start by replacing batteries approximately every three years, as models like the Airthings Wave require fresh power for continuous operation. Clean sensors regularly using a soft, dry cloth to remove dust buildup that compromises air quality readings. Avoid cleaning products that emit VOCs near your device.
Recalibrate periodically following manufacturer instructions, especially after relocating or environmental changes. This guarantees you can accurately check the air quality in your sleeping environment.
Position the monitor at head height for best measurement accuracy. Update firmware through the accompanying app to access new features and maintain smart home compatibility.
These maintaining your bedroom air monitor for long-term use practices assure reliable performance.
Frequently Asked Questions
Where Is the Best Place to Put an Air Quality Monitor?
You should place your air quality monitor at head height in a central bedroom location, away from walls, furniture, windows, doors, and heat sources to get accurate readings of the air you’ll breathe.
Do Cheap Air Quality Monitors Work?
Cheap air quality monitors work for basic awareness, but they’re often inaccurate and detect limited pollutants. You’ll get misleading data and slow response times that won’t reliably protect your health.
How Do You Monitor Air Quality in a Room?
You’ll place an air quality monitor at head height in your room to track PM levels, humidity, VOCs, and CO2. Check the data regularly and use historical trends to identify pollution sources.
Can Air Quality Monitors Detect Mold?
Air quality monitors can’t directly detect mold, but they’ll track humidity levels and particulate matter that indicate mold-friendly conditions. You’ll need specialized mold testing kits for accurate identification of actual mold presence.


Leave a Reply