
You’re probably excited to build your first smart mirror, but without proper guidance, you’ll likely encounter frustrating roadblocks that could derail your project entirely. The MagicMirror² framework offers incredible possibilities, yet many beginners make critical mistakes during setup that create hours of unnecessary troubleshooting. Before you plunge into coding custom modules or configuring your Raspberry Pi, there are specific foundational steps that’ll determine whether your mirror becomes an impressive centerpiece or an expensive disappointment.
Setting Up Your Raspberry Pi Development Environment
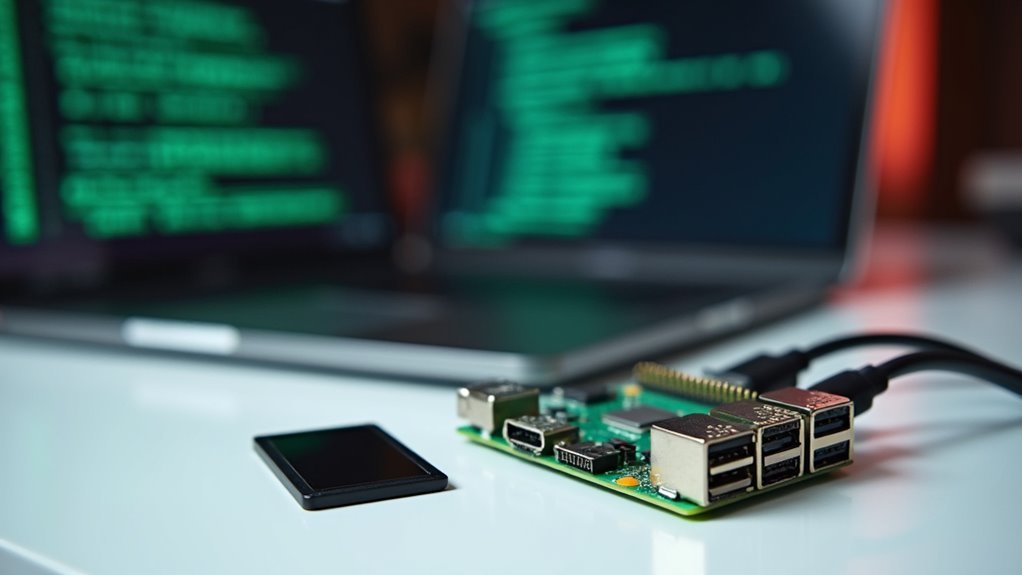
Before diving into mirror programming, you’ll need to establish a solid foundation by setting up your Raspberry Pi development environment. Start by formatting your micro SD card to FAT32 and installing the Raspberry Pi OS from the official website.
You’ll want to use a quality SD card to prevent performance issues and data loss that could derail your Smart Mirror project.
Connect your Raspberry Pi to a monitor, keyboard, and mouse for straightforward initial setup and configuration. Once booted, install necessary software and dependencies through terminal commands to streamline your development process.
Consider using tools like WinSCP for file transfers and Win32DiskImager for creating backups. This guarantees your Smart Mirror projects remain secure and easily accessible throughout development.
Understanding MagicMirror² Framework Architecture
Now that you’ve set up your Raspberry Pi development environment, you’ll need to grasp how MagicMirror²’s framework operates under the hood.
The system’s built on a modular architecture where each component talks to others through a well-defined communication structure.
Understanding these core system components and how they interact will make creating and customizing your own modules much easier.
Core System Components
When you’re diving into MagicMirror² development, you’ll find that the framework’s modular architecture serves as its foundation, making it incredibly flexible and user-friendly. Understanding the core system components helps you navigate development efficiently.
| Component | Purpose | File Type |
|---|---|---|
| Main Server | Handles core operations | JavaScript |
| Config.js | Manages module settings | Configuration |
| Electron Framework | Powers mirror interface | Application |
| Module Logic | Controls functionality | JavaScript |
| Module Styling | Defines appearance | CSS |
Each module in your mirror consists of distinct files that maintain separation of concerns. You’ll work with JavaScript files for logic, CSS for styling, and optional HTML for layout. The framework uses WebSocket communication to enable real-time updates, ensuring your modules display dynamic data seamlessly. This structure makes MagicMirror² development straightforward for beginners.
Module Communication Structure
Module communication in MagicMirror² operates through a sophisticated notification system that connects all components seamlessly.
You’ll interact with this system primarily through two essential methods: `sendNotification` and `receiveNotification`. These allow your modules to exchange data and respond to events dynamically.
When building modules, you’ll structure them with clear separation between front-end and back-end responsibilities. Your `module.js` file handles display logic, while `node_helper.js` manages server-side logic.
The main server coordinates everything, initializing modules and facilitating communication protocols. This well-defined message system guarantees smooth data exchange between components.
You can send notifications to trigger updates across different modules, creating responsive interactions. Understanding this module communication structure is vital for developing effective MagicMirror² applications that maintain clean, scalable code architecture.
Installing Essential Dependencies and Tools

Before you start coding your MagicMirror² modules, you’ll need to set up three critical components that’ll save you time and frustration later.
First, invest in a high-quality SD card since it’s the foundation of your Raspberry Pi’s performance and reliability.
Next, configure backup tools and install file transfer software to protect your work and streamline your development workflow.
Choose Quality SD Cards
The foundation of your MagicMirror project starts with selecting the right SD card—think of it as the bedrock where your entire digital mirror experience will live.
Quality SD cards directly impact your project’s success, so don’t cut corners here. For peak performance, choose Class 10 or UHS-1 cards with minimum 16GB capacity.
Stick with trusted brands like SanDisk or Samsung—they’re built for continuous read/write cycles your mirror will demand.
- Prevent heartbreak by backing up your SD card regularly using Win32DiskImager
- Avoid frustration from corrupted projects by investing in reputable brands
- Ensure compatibility by formatting to FAT32 before installation
Setup Backup Tools
Once you’ve secured your quality SD card, protecting your work becomes paramount—and that’s where backup tools enter the picture.
Start by installing Win32DiskImager to create complete system backups of your magic mirror Raspberry Pi setup. This guarantees you can restore everything if corruption occurs during development.
Next, set up WinSCP for seamless file transfers between your computer and Raspberry Pi, making backup management effortless.
Don’t just rely on one backup method. Regularly save your configuration files and custom scripts to prevent losing progress after updates.
Consider cloud storage or external drives for additional security layers. These backup tools form your safety net, letting you experiment confidently with your magic mirror project knowing you can always recover from mistakes or hardware failures.
Install File Transfer Software
Several essential file transfer tools will streamline your magic mirror development workflow and save you countless hours of frustration.
Once you’ve started working on your Raspberry Pi project, you’ll quickly realize how vital seamless file management becomes for efficient development.
Install WinSCP as your primary file transfer solution, enabling effortless editing and uploading between your computer and Raspberry Pi.
This Quick Start approach eliminates the tedious process of manually transferring files through USB drives or other cumbersome methods.
Essential tools you’ll need:
- WinSCP – Your lifeline for drag-and-drop file transfers that’ll make you wonder how you survived without it
- PuTTY SSH client – Remote terminal access that connects you instantly to your Pi
- Git repositories – Clone projects directly, saving precious time you’d waste days later troubleshooting manual installations
Creating Your First Custom Module

When you’re ready to build your first custom module in Mirror, begin by crafting a clear function signature that specifies your module’s name along with the exact data types for both inputs and outputs.
Next, you’ll need to provide input-output examples that accurately demonstrate your function’s expected behavior. These examples serve as essential guidance for the LLM when generating your code.
Input-output examples act as crucial blueprints, guiding the LLM to generate code that precisely matches your module’s intended functionality.
Use Mirror’s programming environment to automatically generate code based on your defined signature and examples. This streamlines the entire development process.
Once generated, test your module by running the code to verify it operates correctly and meets your requirements.
Finally, document your module’s functionality and usage instructions. This documentation helps other Mirror programming community members understand and reuse your work effectively.
Configuring Network Settings for Remote Access
You’ll need to establish secure SSH connections to remotely program your mirror from anywhere in your home or beyond.
Setting up proper SSH methods involves enabling the service on your Raspberry Pi and configuring authentication keys for passwordless access.
Port configuration becomes critical for security, as you’ll want to change default ports and implement firewall rules to protect your mirror from unauthorized access.
SSH Setup Methods
Remote access transforms your mirror project from a physical interaction device into a fully manageable system you can configure from anywhere in your home.
Setting up SSH access on your Raspberry Pi requires creating a blank file named “ssh” on the boot partition before powering up your device.
Once SSH is enabled, you’ll connect using terminal command `ssh pi@
Find your Pi’s IP address using `hostname -I` or checking your router’s device list.
Essential security steps include:
- Change the default password immediately – Don’t leave your system vulnerable to attacks
- Ensure network connectivity – Your Pi and control device must share the same network
- Set up port forwarding – Enable remote internet access when you’re away from home
You’ll gain complete control over your mirror’s functionality remotely.
Port Configuration Security
SSH access opens your mirror to remote management, but improper port configuration creates serious security vulnerabilities that attackers actively exploit.
You’ll need to open specific ports in your firewall settings—typically port 80 for HTTP and port 443 for HTTPS—while keeping unnecessary ports closed.
Don’t rely solely on default settings. Implement SSH key authentication instead of passwords alone, as this greatly reduces brute-force attack risks.
You should also establish a VPN connection for encrypted data transmission, adding another security layer to your remote access setup.
Monitor your network traffic and access logs regularly to detect unauthorized connection attempts.
Keep your router and network device firmware updated to patch known vulnerabilities that could compromise your mirror’s security.
Managing File Transfers With Winscp
When you’re working on mirror programming projects with a Raspberry Pi, transferring files between your computer and the device becomes essential for uploading code, downloading logs, and managing project assets.
WinSCP is your go-to open-source solution for secure file transfers using the SFTP protocol.
Setting up WinSCP couldn’t be simpler. Enter your Pi’s IP address, username (typically “pi”), and password in the login interface. Once connected, you’ll have seamless file management capabilities:
WinSCP setup is straightforward – just enter your Pi’s IP, username, and password to unlock seamless file management capabilities.
- Drag and drop files effortlessly between your computer and Pi
- Edit files directly on your Raspberry Pi without terminal commands
- Save connection settings for lightning-fast future access
You can rename, delete, and manipulate files through WinSCP’s intuitive interface, eliminating the frustration of complex command-line operations for basic file management tasks.
Implementing Player Movement and Camera Controls
Now that you’ve got your file transfer workflow sorted with WinSCP, it’s time to bring your mirror programming project to life with responsive player controls.
Start by using `Input.GetAxis` to capture horizontal and vertical movement inputs for smooth player control. Implement the `OnStartLocalPlayer` method in your `PlayerScript` to attach the main camera, creating a first-person perspective.
Rotate your player object using horizontal input for realistic turning movements, while translating position based on vertical input for forward and backward motion.
Create a `FloatingInfo` GameObject in your player prefab to display player names above characters for visual identification.
Test your movement functionality by hosting a server and running a client in Unity’s editor, ensuring seamless networked gameplay.
Synchronizing Data Across Multiple Clients
As your multiplayer game grows more complex, you’ll need to guarantee that critical data stays consistent across all connected clients. Mirror’s `SyncVar` attributes automatically synchronize essential variables like player names and colors, eliminating manual network calls.
Mirror’s SyncVar attributes eliminate the networking headaches that plague multiplayer development, automatically keeping critical player data synchronized across all connected clients.
When players perform actions, implement `Cmd` functions to execute commands on the server, ensuring all clients receive updates simultaneously.
Use `OnStartLocalPlayer` to attach client-specific elements like cameras and UI components, giving each player their unique perspective while maintaining synchronized gameplay data.
- Test relentlessly – Host servers and connect multiple clients to catch synchronization issues before they ruin your players’ experience
- Optimize ruthlessly – Only sync absolutely essential data to prevent network lag from destroying smooth gameplay
- Debug fearlessly – Watch real-time data flow to identify discrepancies that could break your multiplayer dreams
Troubleshooting Common Installation Issues
Even experienced developers encounter roadblocks when installing Mirror, but you can overcome most issues by addressing a few common culprits. First, verify your system meets Mirror’s minimum requirements for compatible hardware and software versions. Installation failures often stem from overlooked prerequisites.
| Issue | Solution |
|---|---|
| Permission errors | Run installation in administrator/elevated command prompt |
| Dependency conflicts | Uninstall or update conflicting existing installations |
| Process hangs | Check system requirements and restart installation |
| Configuration errors | Follow official documentation step-by-step without skipping |
When you encounter specific error messages, don’t panic. Community forums and troubleshooting guides contain solutions from experienced users who’ve faced identical problems. Carefully follow the official installation instructions, as misconfiguring settings or skipping steps creates unnecessary complications that you can easily avoid.
Building Your Physical Mirror Display
With your Mirror software properly installed and configured, you’re ready to construct the physical display that brings your smart mirror to life.
Transform your completed Mirror software setup into a stunning physical smart mirror display that seamlessly blends technology with everyday functionality.
Choose two-way glass or acrylic material for your mirror surface – these materials provide essential reflection while allowing your screen’s display to shine through. Your monitor doesn’t need to match the mirror size perfectly; you can use frames or decorative elements to cover unused areas.
For budget-conscious builders, consider these cost-effective approaches:
- Transform an old picture frame into your mirror housing with mirror-tinted film
- Apply film carefully – bubbles will dissipate over time, improving reflection quality
- Experiment with temporary setups to find ideal viewing angles before permanent installation
Place your monitor securely behind the mirror and guarantee solid connections to your Raspberry Pi for peak performance.
Frequently Asked Questions
Which Raspberry Pi for Smart Mirror?
You’ll want the Raspberry Pi 4 Model B with 4GB+ RAM for best performance. The Pi 3 Model B+ works well too. Avoid the Zero W unless you’re building something simple with minimal modules.
What Is a Magic Mirror Server?
A Magic Mirror server is your Raspberry Pi system running MagicMirror software that displays customizable information like weather, time, and news on a reflective surface, creating an interactive smart mirror you’ll control remotely.


Leave a Reply