You’re probably spending more time and money on garden watering than you realize. Every morning you drag out the hose, hand-water each plant, and watch your water bill climb higher each month. There’s a simple solution that costs less than $200 and requires zero technical expertise to install. This budget-friendly automation system will transform your daily watering routine, but first you need to understand why most gardeners choose the wrong approach.
Why Automated Watering Systems Save Money and Time
While many gardeners assume that automated watering systems require hefty upfront investments, these smart solutions actually deliver considerable savings on both your water bills and precious time.
You’ll reduce water consumption through drip irrigation technology that delivers water directly to plant roots, eliminating evaporation and runoff waste.
Timer-controlled systems provide consistent watering tailored to your plants’ specific needs, preventing costly overwatering or underwatering mistakes. Your watering schedule becomes foolproof, automatically adjusting during rainy periods to avoid unnecessary water usage. This precision considerably lowers monthly water bills while maintaining healthier plants.
You’ll save time by eliminating daily manual watering chores. Remote smartphone controls let you adjust schedules from anywhere, making garden maintenance effortless and efficient.
Essential Supplies for Budget-Friendly Irrigation Setup
You’ll need just a few basic components to create an effective budget irrigation system that won’t break the bank.
Most setups require no special tools and can be assembled using simple snap-together fittings that connect directly to your garden spigot.
Smart material choices like reusable drip tubing and multi-season timers will maximize your investment while keeping ongoing costs minimal.
Basic Component Requirements
Before diving into installation, gather these essential components that form the backbone of any budget-friendly irrigation system: a T connector for splitting water flow, an automatic timer for consistent scheduling, a pressure regulator to control water delivery, a complete drip irrigation kit, and flexible hose or poly tubing to distribute water throughout your garden.
You’ll also need plumbers tape and landscaping pins to create secure connections and properly anchor your tubing.
The pressure regulator slows water flow, ensuring efficient delivery through drip emitter lines while minimizing waste and evaporation. Your automatic timer enables consistent watering schedules that you can adjust based on your garden’s specific needs.
These basic supplies cost approximately $180 and cover up to 975 feet of tubing, requiring no plumbing skills for assembly.
Tool-Free Installation Options
Since most budget irrigation systems use push-fit connections and snap-together components, you can complete the entire installation using only your hands. This tool-free installation makes budget-friendly watering accessible to everyone, regardless of experience level.
Your drip irrigation kit comes with intuitive connectors that simply click together, while the automatic timer attaches directly to your faucet without tools.
Here’s what makes tool-free installation so appealing:
- No intimidating power tools – You’ll feel confident tackling this project without worrying about complicated equipment.
- Zero learning curve – The satisfaction of easy automation without technical expertise.
- Instant gratification – Complete your system in half a day and start enjoying consistent watering immediately.
This approach prioritizes water conservation while eliminating installation barriers that often prevent gardeners from upgrading their watering methods.
Cost-Effective Material Choices
Five essential components form the backbone of any budget-friendly irrigation system, and you can source them all at your local hardware store for under $100.
Your cost-effective material choices should include a T connector, automatic timer, pressure regulator, drip irrigation kit, and backflow preventer.
You’ll find half-inch poly tubing offers excellent flexibility while keeping costs low. An automatic timer for just $25 eliminates manual watering hassles.
The pressure regulator guarantees consistent water flow, while the backflow preventer protects your water source safely.
Don’t forget landscape pins to secure your tubing—they’re inexpensive yet vital for maintaining system organization.
These materials create an efficient, affordable irrigation setup that’ll serve your garden reliably.
Planning Your Garden Layout and Water Line Routes
Before you start digging trenches, you’ll need to map your garden’s dimensions and create a rough layout that shows where your water lines will run.
Plan your routes by considering water pressure requirements and the length of each run to guarantee every plant gets adequate irrigation.
Calculate your flow requirements by timing how long it takes to fill a 3 or 5-gallon bucket from your water source, which helps you determine if your system can handle the planned coverage area.
Map Garden Dimensions
When you’re ready to install a budget-friendly watering system, grab a measuring tape and start mapping your garden’s exact dimensions.
You’ll need accurate measurements to calculate total garden space and determine the most effective water line layout. Create a detailed diagram showing where existing plants are located and mark any structures that’ll affect your plan water line routes.
Here’s what you need to measure for ideal irrigation systems:
- Length and width – Calculate total square footage to feel confident about coverage.
- Distance from spigot to furthest plant – Confirm your water pressure reaches every corner.
- Location of underground utilities – Avoid costly mistakes that could ruin your project.
This mapping process helps you visualize the entire water line layout before breaking ground, saving time and money.
Design Water Routes
Three key factors determine your water route success: flow capacity, pressure consistency, and efficient coverage patterns.
When you design water routes, start by positioning your main irrigation tubing along the longest straight lines possible. This approach guarantees maximum water pressure reaches all areas while reducing installation costs.
Next, assess water source capacity by timing how long it takes to fill a 3-gallon bucket from your spigot. You’ll need this flow rate data to plan appropriate watering zones that won’t overtax your water supply.
Place secondary lines perpendicular to your main routes, creating a grid pattern that covers every plant area.
Minimize water waste by avoiding unnecessary curves and keeping runs as short as practical. This strategic planning creates an effective irrigation system that delivers consistent coverage without exceeding your budget constraints.
Calculate Flow Requirements
After establishing your water route design, you’ll need precise flow calculations to guarantee your system delivers adequate water without overwhelming your supply capacity.
Testing your water source capacity helps determine realistic automation for beginners. Time how long it takes to fill a 3 or 5-gallon bucket, then convert this to gallons per minute (GPM).
Your drip irrigation system should maintain these flow requirements:
- Never exceed 1 GPM per line – protecting your plants from drowning while maintaining steady pressure
- Plan for 0.62 gallons per square foot weekly – ensuring lush, healthy growth across your entire garden
- Match water demands to supply capacity – preventing system failures that could devastate your hard work
Calculate flow requirements by measuring total garden area and dividing weekly water needs by planned watering sessions to optimize watering efficiency.
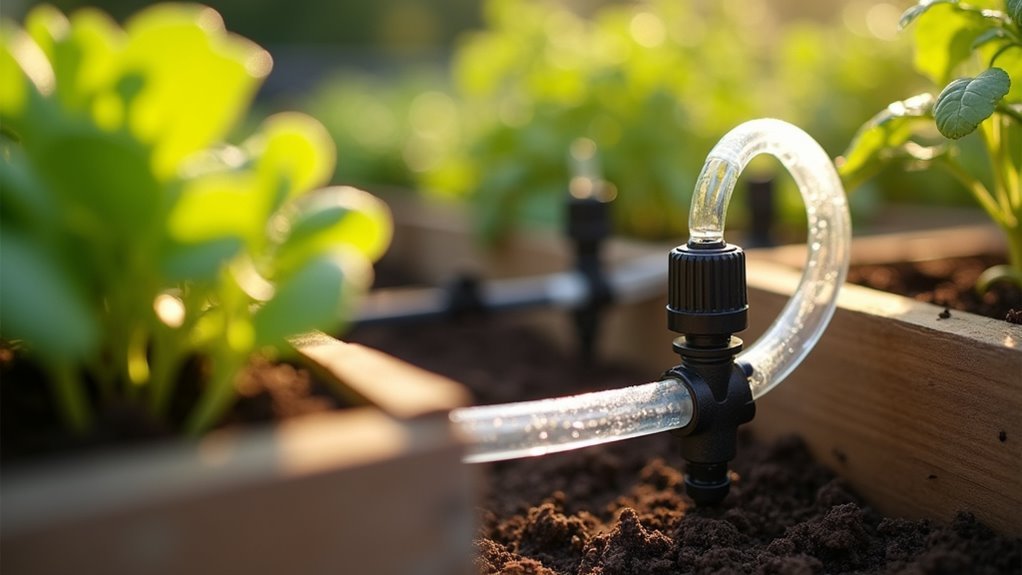
Step-by-Step Installation of Basic Drip Irrigation
Installing a basic drip irrigation system requires just five essential steps that’ll transform your garden watering from a daily chore into an automated process.
First, measure your required tubing length and lay it in sunlight before cutting to size. This makes handling easier when you install a basic drip irrigation setup.
Warming tubing in sunlight before cutting makes installation significantly easier and prevents kinks during setup.
Second, use T-fittings to split your main line, connecting a pressure reducer before attaching emitter lines for peak flow control.
Third, secure tubing with Y staples or landscape pins to prevent movement and guarantee even distribution.
Fourth, test connections by turning on water, checking for leaks while adjusting emitters to meet your plants’ water demands (typically 0-14 gallons hourly).
Finally, adding a timer is a great way to automate the watering completely. Drip irrigation kits often include smartphone-controlled options for ultimate convenience.
Connecting Timers and Pressure Regulators
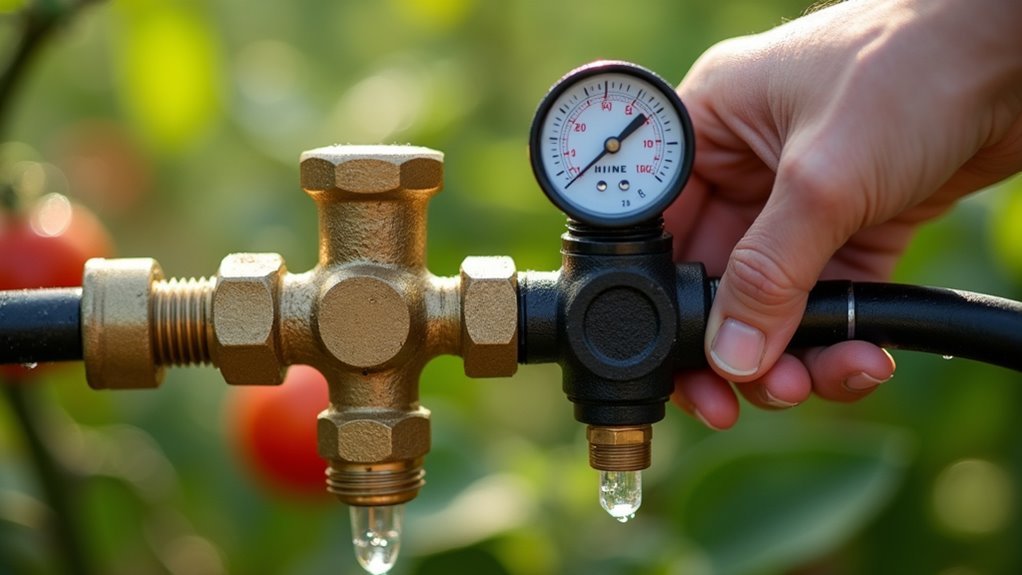
Why settle for manual watering when you can automate your entire drip irrigation system with just two key components?
First, connect your automatic timer directly to your water spigot using a T connector, applying plumber’s tape for a secure fit. Next, attach a pressure regulator to the timer’s output to control water flow and protect your drip lines.
Here’s what this automation brings you:
- Freedom from daily watering chores – no more forgetting or rushing home
- Consistent plant health – your garden gets exactly one inch weekly
- Smart control anywhere – Wi-Fi capabilities let you adjust watering frequency remotely
Set your desired watering frequency and duration, check the battery every six months, and enjoy your automated garden watering system that works while you sleep.
Setting Up Tubing and Emitters for Raised Beds
Three simple steps transform your raised bed into an efficient watering system using drip irrigation tubing and emitters.
First, measure and cut your half-inch main tubing after laying it in sunlight for easier handling. Use T-fittings to split the main line, creating efficient water distribution throughout your raised beds. Secure everything with landscaping pins or U-staples to prevent movement.
Lay half-inch tubing in sunlight before cutting, then use T-fittings and landscaping pins to create your distribution network.
Next, install emitters at each tubing line’s end, adjusting them between 0-14 gallons per hour based on what your plants need. Different crops require different water amounts, so adjust as needed for ideal growth.
Finally, test your system by turning on the water. Check for leaks and verify each emitter functions correctly before covering tubing with mulch for a finished look.
Programming Your Automatic Timer for Optimal Watering
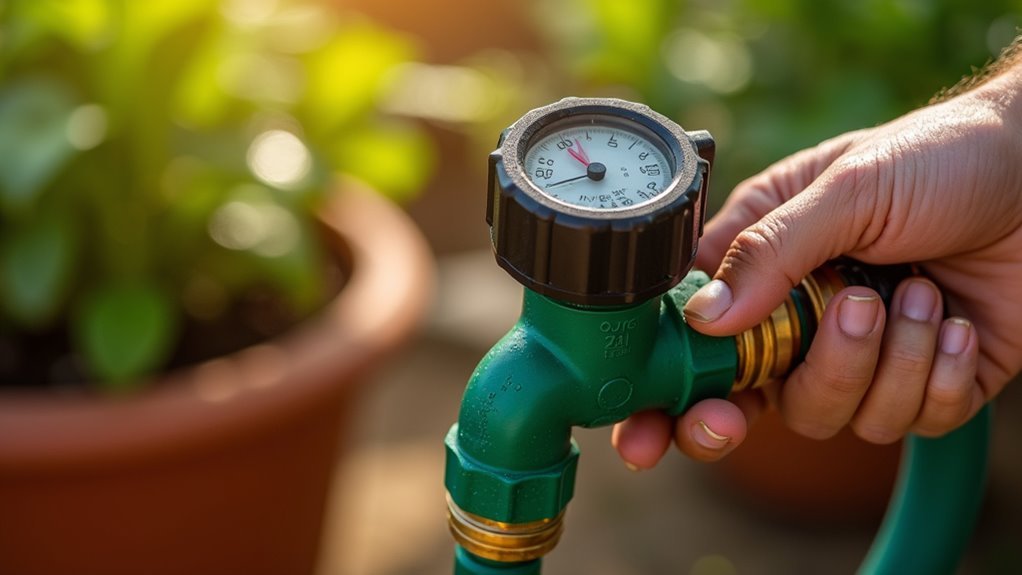
With your drip irrigation system properly installed and tested, programming an automatic timer removes the guesswork from watering schedules.
Set your automatic timer to activate between 4-5 a.m. when evaporation’s minimal and plants receive moisture before daily heat stress begins.
Programming success depends on three critical factors:
- Watering duration calculations – Most gardens need one inch of water per week, measurable with a simple rain gauge.
- Seasonal adaptability – You’ll adjust the timer frequently, increasing duration during peak heat and reducing it in cooler months.
- Plant monitoring vigilance – Watch for dehydration or overwatering signs to fine-tune your settings.
Remember to monitor plant health regularly and adapt to seasonal changes.
Check batteries every six months and run monthly system tests to prevent costly plant losses from timer malfunctions.
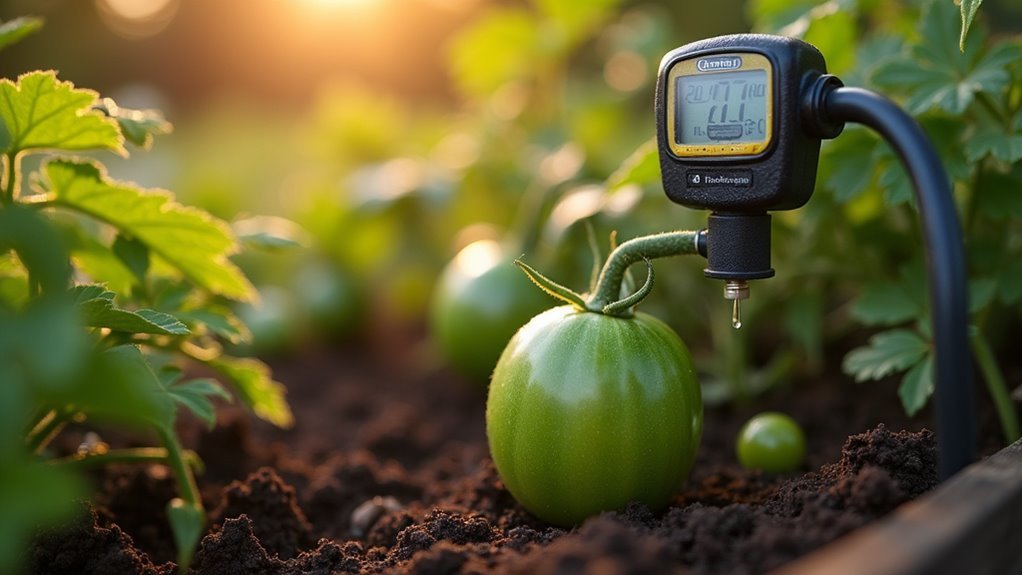
Calculating Water Requirements for Different Plants
You’ll need to determine how much water each type of plant in your garden requires to create an effective watering schedule.
Start by measuring rainfall with a rain gauge, then calculate whether your plants are getting their needed 1-2 inches per week or if you need to supplement with irrigation.
Once you’ve established these baseline requirements, you can adjust your timer schedules to deliver the right amount of water while avoiding waste and keeping costs down.
Plant Water Needs
Understanding your plants’ specific water requirements forms the foundation of efficient garden watering and helps you avoid both under-watering and wasteful over-watering.
Most gardens need about an inch of water per week, but different plants have unique needs. Leafy vegetables demand more moisture than drought-tolerant succulents and herbs.
Smart gardening means matching your system to plant water needs:
- Size up your plants – Calculate water requirements based on plant size, growth stage, and environmental conditions
- Customize your flow – Adjust drip irrigation systems between 0-14 gallons per hour flow rates for ideal delivery
- Watch for warning signs – Keep monitoring plant health through visual cues like wilting or browning leaves
You’ll save money and grow healthier plants by tailoring water delivery to each plant’s specific requirements.
Measuring Garden Rainfall
Once you know your plants’ water needs, tracking actual rainfall becomes essential for creating an efficient watering schedule.
Set up a rain gauge in your garden—even a simple container works perfectly for measuring garden rainfall each week. Most gardens need about one inch of water weekly, so you’ll use these readings to adjust your irrigation system accordingly.
Track your rainfall data over time to calibrate your automated irrigation system’s timer settings. This lets you reduce watering when nature provides adequate moisture and increase it during dry spells.
Consider each plant’s specific moisture requirements when calculating total water needs. During peak growing seasons, you’ll need more frequent monitoring, while cooler months require less attention to your watering schedule.
Timer Schedule Adjustments
Armed with your rainfall measurements, you can now fine-tune your timer settings to match each plant’s specific water requirements. Most gardens need about an inch of water weekly, but you’ll need to adjust your timer based on actual rainfall and individual water demands.
Here’s how to make effective timer schedule adjustments:
- Cut watering in half when you’ve received half an inch of natural rainfall – your plants will thank you for not drowning them.
- Set shorter, frequent cycles for newly planted seedlings (10-15 minutes daily) to help their delicate roots establish without stress.
- Double your watering frequency during scorching 90°F+ days to prevent your garden from becoming a crispy disappointment.
Always monitor your plants for wilting or browning leaves, then adjust your timer accordingly.
Troubleshooting Common Installation Issues
Even when you’ve carefully planned your budget drip irrigation system, installation hiccups can derail your watering goals and leave your plants struggling. Effective troubleshooting starts with regular maintenance checks.
Check for leaks at connections, as they waste water and indicate loose fittings needing plumber’s tape for secure seals. Monitor plant health closely for warning signs.
Wilting or browning leaves suggest insufficient water flow or faulty emitters, while yellowing leaves often signal overwatering. If you notice yellowing, adjust the timer settings or check for blockages in drip lines.
Dry, cracked soil surfaces require increased watering duration or frequency. Always test your system briefly after installation and periodically thereafter to verify proper pressure and flow reach all plants effectively.
Seasonal Adjustments and System Maintenance
After resolving installation problems, your budget drip irrigation system requires ongoing attention to perform efficiently throughout the year.
Seasonal adjustments become vital as weather patterns shift, demanding changes to watering frequency and duration based on temperature and rainfall levels.
Monthly maintenance guarantees your irrigation system operates without costly leaks or malfunctions that waste water and compromise plant health.
Here’s your essential maintenance checklist:
- Check timer batteries every six months – Don’t let dead batteries destroy your thriving garden when you’re away.
- Monitor rainfall with a gauge – Adjust schedules to avoid drowning your precious plants or leaving them desperately thirsty.
- Inspect for leaks monthly – Catch problems before they turn your water bill into a financial nightmare.
Regular maintenance protects your investment and keeps plants healthy year-round.
Monitoring Plant Health and System Performance
While proper maintenance keeps your system running, monitoring how your plants actually respond to watering reveals whether you’re achieving perfect results.
You’ll need to regularly observe your plants for signs of dehydration like wilting or browning leaves, which indicate increasing water demands. Check soil moisture by looking for dry, cracked surfaces that suggest your irrigation system isn’t providing sufficient coverage.
Use a rain gauge to measure weekly rainfall and adjust accordingly—most gardens need about an inch per week. Watch for yellowing leaves, as they often signal overwatering requiring reduced frequency.
Conduct monthly system checks to verify effective operation, adjusting settings based on seasonal changes and plant growth. This monitoring approach helps you fine-tune your automated watering for maximum plant health.
Winterizing Your Irrigation System
As temperatures drop and winter approaches, you’ll need to protect your irrigation system from freeze damage that could destroy months of careful setup and cost hundreds in repairs.
Proper winterizing prevents cracked pipes and broken components that’ll drain your wallet come spring.
Winterizing your irrigation system now saves you from expensive repairs and headaches when spring arrives.
Here’s your essential winterizing checklist:
- Drain everything completely – Turn off water supply and open all valves to eliminate trapped water that’ll expand when freezing.
- Wrap exposed pipes with insulation – Foam sleeves or weatherproof wrapping shields vulnerable components from harsh temperatures.
- Store delicate parts indoors – Remove drip lines, automatic timers, and batteries to prevent moisture damage.
Don’t skip spring maintenance either.
Inspect your irrigation system thoroughly for leaks and replace damaged components before restarting operations.
Upgrading Your Basic Setup Over Time
Once you’ve mastered your basic timer and drip irrigation setup, you’ll want to expand its capabilities to match your growing gardening expertise.
Smart controllers like the Orbit Beehive transform your system into a smartphone-controlled watering network that adjusts schedules based on weather and plant needs.
You can also extend your coverage by adding more hose lines and specialized emitters to reach new garden areas and accommodate different plant types.
Adding Smart Controllers
When you’re ready to take your basic irrigation system to the next level, smart controllers offer the perfect upgrade path that doesn’t require starting from scratch.
These devices seamlessly integrate into your existing irrigation setups, transforming manual watering into effortless automation.
Smart controllers like the Orbit Beehive Wi-Fi system let you manage watering schedules remotely through your smartphone. They automatically adjust based on weather conditions and can be customized for specific plant needs throughout different seasons.
Here’s what makes smart controllers a game-changer:
- Slash your water bill – Achieve up to 50% water savings compared to traditional timers
- Never worry about overwatering again – Rain sensors prevent waste during storms
- Control everything from anywhere – Manage your irrigation systems while traveling or at work
Expanding Coverage Areas
While smart controllers optimize your watering schedule, expanding your physical coverage area guarantees every corner of your garden receives proper hydration. You can easily expand coverage by adding drip lines or soaker hoses to reach new garden beds.
Use T connectors to split your main water line, creating branches that extend to different planting areas while maintaining adequate pressure.
Install additional timers to manage multiple zones effectively, ensuring each section receives appropriate water amounts. Before expanding, check your water source’s flow rate and pressure to support extended tubing and emitters properly.
After installation, measure water output at new connections and adjust emitters accordingly. Regular assessment of your system’s efficiency helps optimize plant health across your expanded coverage area through proper scheduling adjustments.
Cost Comparison: DIY Vs Professional Installation
Budget-conscious gardeners face a striking financial divide when choosing between DIY and professional installation. Your DIY irrigation setup costs approximately $180 using basic materials like PVC tubing and water timers, while professional installation ranges from $500 to $2,000.
This cost comparison reveals substantial long-term savings with DIY approaches.
Why DIY automation transforms your gardening experience:
- You’ll save thousands – No labor costs for installation or ongoing maintenance visits
- Complete customization freedom – Adjust your automated water system anytime without additional charges
- Faster results – Install in 3-5 hours versus waiting days for professionals
Your DIY irrigation delivers consistent watering while maintaining total control over design modifications.
Professional installations offer fixed designs that may not suit your specific garden layout, limiting future adaptability.
Frequently Asked Questions
What Is the Best Way to Automate Garden Watering?
You’ll achieve best results by installing a drip irrigation system with an automatic timer. Set it for early morning watering, add a pressure regulator for proper flow, and maintain it regularly for consistent performance.
What Is the Cheapest Way to Water Your Garden?
You’ll save money using soaker hoses for basic garden watering. They’re inexpensive, deliver water directly to soil, and require minimal setup. For automation, add a simple timer to control watering schedules efficiently.
How Do You Make a Simple Self-Watering System?
You’ll need a 5-gallon bucket filled with water connected to a soaker hose. Add a timer for automation and pressure regulator for consistent flow. Clean regularly to prevent clogs.
What Is the Easiest Drip Irrigation System to Use?
You’ll find basic drip irrigation kits easiest to use. They include timers, half-inch poly tubing, and emitters that connect directly to your spigot. No plumbing skills needed—just assemble and set automatic watering schedules.


Leave a Reply