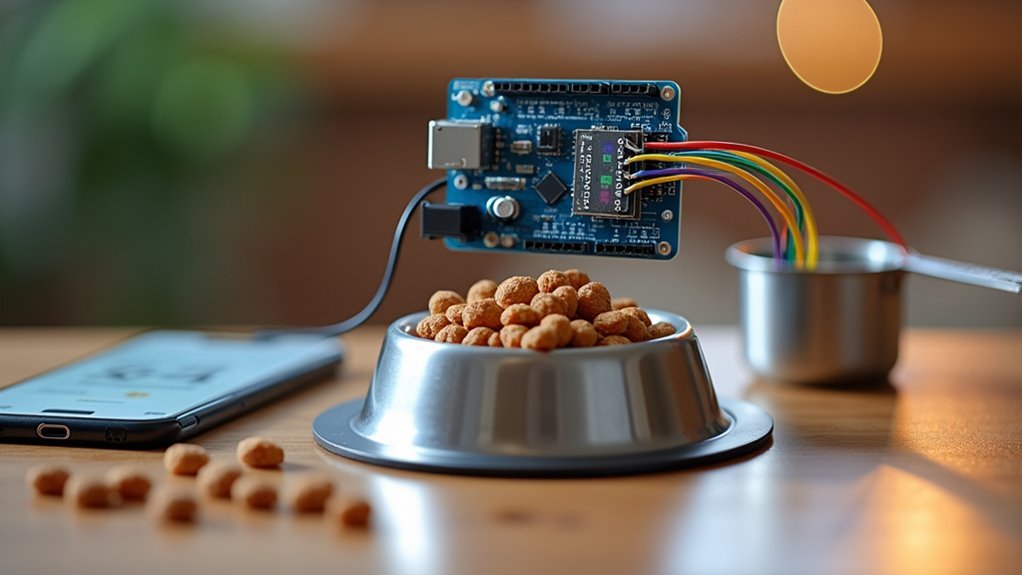
You’ve probably experienced the frustration of rushing home during lunch breaks just to feed your pet, or worse, realizing you’ve forgotten entirely. An Arduino-powered pet feeding system eliminates these daily stresses while offering something traditional feeders can’t: precision control over your pet’s diet. But before you dismiss this as another complicated tech project, consider how this surprisingly accessible solution addresses problems you didn’t even know existed.
Benefits of Automated Pet Feeding for Busy Pet Owners
When you’re juggling work deadlines, family commitments, and social obligations, maintaining a consistent feeding schedule for your pets can become a daily challenge.
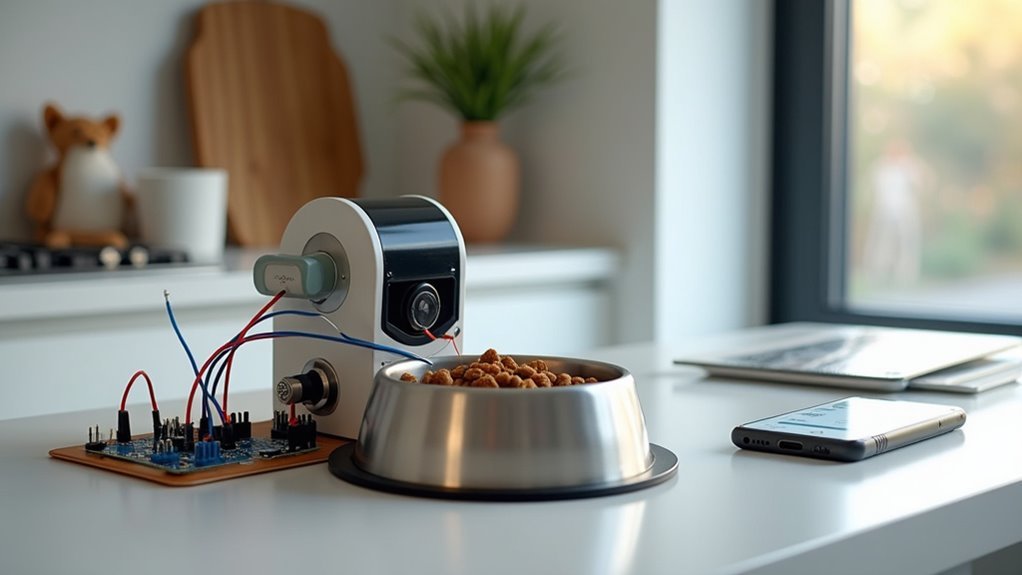
An automated cat feeder eliminates this stress by ensuring your pets receive meals at precise times, promoting healthy eating habits and reducing obesity risks. You can schedule multiple feedings throughout the day, accommodating different dietary needs for multiple pets in your household.
These systems offer programmable feeding times and adjustable portions, helping you manage portion control effectively without constant monitoring.
With user-friendly interfaces featuring LCD displays and rotary encoders, you’ll easily adjust schedules while focusing on other important tasks, knowing your pets won’t miss meals.
Essential Components and Materials for Arduino Pet Feeders
You’ll need to select the right Arduino board and supporting components to build a reliable automated feeding system.
Your servo motor choice will determine how smoothly and accurately the food dispensing mechanism operates.
The enclosure and housing materials you pick must protect all electronics while allowing easy access for maintenance and refilling.
Core Arduino Components
Building an Arduino-powered pet feeding system requires several key components that work together to create a reliable automated feeder.
You’ll need an Arduino board, such as the Uno or Nano, serving as your primary controller to manage inputs and execute feeding routines.
Essential components include a rotary encoder for programming feeding times and a 16×2 I2C LCD display for showing settings.
An RTC module like the DS3231 provides accurate timekeeping, ensuring your automatic pet feeder operates on schedule even during power outages.
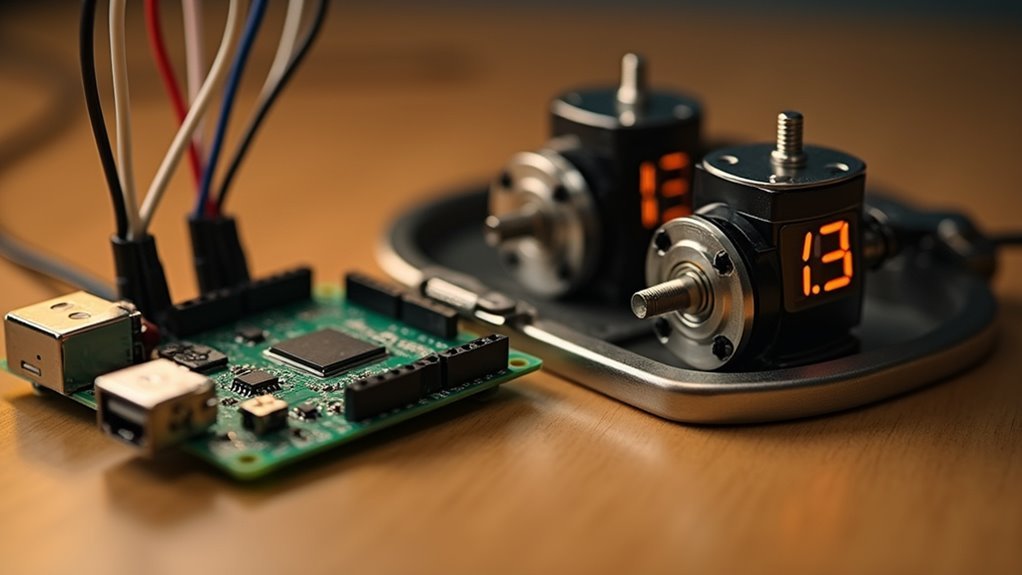
For the dispensing mechanism, you’ll choose between servo motors or stepper motors like the NEMA 17, depending on your desired torque and control precision.
These motors control the food release system with reliable accuracy.
Servo Motor Selection
Selecting the right servo motor determines how effectively your pet feeder dispenses food portions. For servo motor selection, you’ll want to take into account continuous rotation servos over standard RC servos. Continuous servos provide infinite rotation capability, making them perfect for auger-based dispensing mechanisms where you need consistent, adjustable food quantities.
Ensure your chosen motor delivers adequate torque—typically 5-10 kg.cm—to handle your pet’s food weight reliably.
Alternatively, stepper motors like the NEMA 17 offer precise incremental control over dispensing amounts, though they’ll require compatible drivers.
Pay attention to power requirements during servo motor selection. Standard servos operate at 5-6V, while stepper motors often need 12V supplies.
Choose components that align with your overall power setup for seamless integration.
Enclosure and Housing
While your servo motor handles the mechanical dispensing, the enclosure forms the structural backbone that protects your Arduino components and creates a professional-looking pet feeder. You’ll want to construct your main enclosure from MDF, which provides durability while allowing custom cutouts for the auger and control panel.
| Component | Material | Purpose |
|---|---|---|
| Main Structure | MDF Board | Sturdy base with custom cutouts |
| Control Panel | 3D-printed Facia | Houses LCD and controls professionally |
| Auger Housing | PVC T-piece Tubing | Smooth food movement mechanism |
Design your food hopper with a secure lid to prevent contamination and guarantee easy replacement. The 3D-printed facia neatly houses your LCD display, while PVC T-piece tubing creates an effective auger housing. Don’t forget incorporating a manual feed button for convenient immediate dispensing.
Building the Food Dispensing Mechanism and Auger System
You’ll need to focus on three critical aspects when building your pet feeder’s dispensing mechanism.
First, design your 3D-printed auger to fit snugly within the PVC T-piece pipe while maintaining smooth rotation for consistent food flow.
Next, you’ll integrate a modified continuous servo motor that provides precise rotational control, allowing you to dispense exact portions based on your pet’s dietary requirements.
Auger Design Considerations
Once you’ve established your feeding schedule and timing mechanisms, the auger system becomes the mechanical heart of your pet feeder, transforming electrical commands into precise food delivery.
Your auger design must balance efficiency with reliability, utilizing a continuous servo motor that provides infinite rotation for consistent food movement from hopper to bowl.
3D printing your auger components offers critical advantages: you’ll achieve precise customization tailored to your specific hopper dimensions and dispensing tube requirements.
The PVC T-piece housing provides essential structural support, enabling smooth rotation while directing food flow effectively.
Securing your servo to the auger base prevents operational vibrations that could disrupt feeding cycles.
Implementing gravity-assisted design principles enhances dispensing efficiency, reduces energy consumption, and guarantees consistent delivery performance throughout operation.
Servo Motor Integration
The continuous RC servo motor forms the driving force behind your automated feeding system, requiring precise integration with both your Arduino controller and the mechanical auger assembly. You’ll need to modify a standard servo motor for infinite rotation, enabling it to control food flow through the auger mechanism effectively. The servo motor connects directly to your Arduino through careful wiring, with the signal wire attached to a designated pin for proper communication.
| Component | Connection Point | Function |
|---|---|---|
| Signal Wire | Arduino Pin | Controls rotation direction/speed |
| Power Wire | 5V Rail | Provides motor power |
| Ground Wire | Arduino Ground | Completes electrical circuit |
| Servo Horn | Auger Shaft | Transfers rotational motion |
| Housing Mount | PVC Assembly | Secures motor position |
Programming the servo motor allows you to adjust feeding quantities based on user input and incorporate manual feed functionality.
Food Dispensing Control
Building upon your servo motor foundation, creating an effective food dispensing mechanism centers around constructing a reliable auger system that transforms rotational motion into controlled food delivery.
You’ll 3D-print the auger components to guarantee precise engineering tolerances that enhance your food dispenser’s reliability. The continuous servo motor modification enables infinite rotation, letting you control dispensing amounts through rotation duration adjustments.
Your PVC T-piece tubing houses the auger, providing structural stability while facilitating smooth food movement from hopper to outlet. The auger’s design prevents food blockage, guaranteeing consistent dispensing across different kibble types and sizes.
Integration with Arduino enables programmable feeding schedules, automatically dispensing food at predetermined times. This combination creates a dependable food dispenser that maintains ideal pet nutrition through precise, scheduled feeding routines.
Constructing the Feeder Enclosure and Housing
After completing your electronic circuit design, you’ll need to create a robust housing that protects all components while providing easy access for maintenance and user interaction.
You’ll construct your enclosure from MDF, which offers both durability and lightweight characteristics perfect for housing your feeder mechanism and electronics. Use a jigsaw to create precise cutouts for the auger system and control panel, ensuring proper component alignment.
Design a 3D printed facia to elegantly house your LCD display and control buttons, giving your project a professional appearance.
Elevate your project’s aesthetics with a custom 3D printed facia that professionally integrates your display and controls.
Make your food hopper easily replaceable and upgradable to accommodate various food types. Include a manual feed button in your design for immediate feeding convenience, allowing quick dispensing without reprogramming your system.
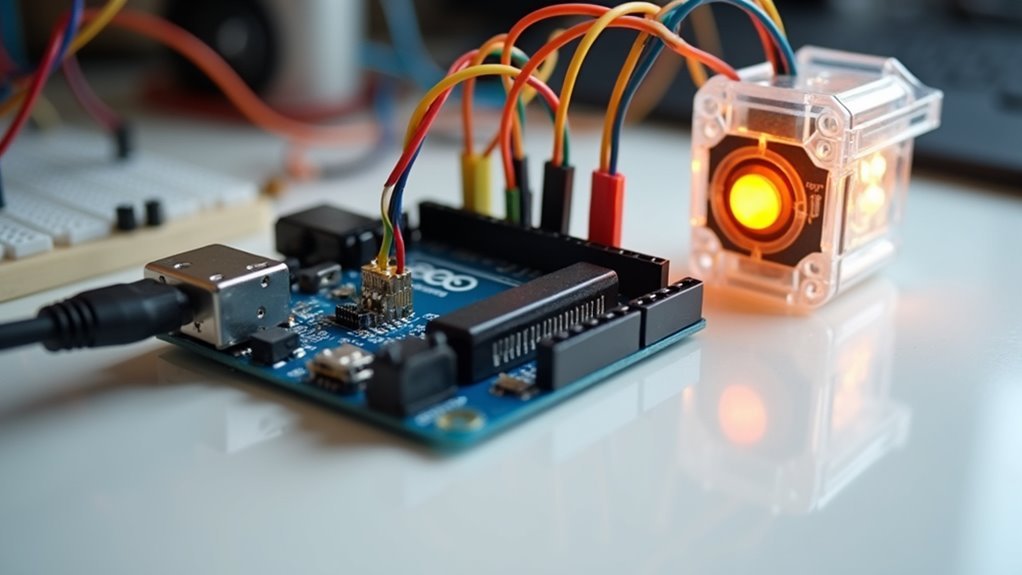
Arduino Hardware Setup and Wiring Connections
You’ll need to select the right components and understand their connections before assembling your pet feeding system.
Start by gathering an Arduino Uno, servo motor, 4×4 keypad, 16×2 I2C LCD, DS3231 RTC module, and a push button for your build.
Pay close attention to power requirements since your servo motor will draw more current than the other components combined.
Component Selection Guide
When selecting components for your Arduino-powered pet feeding system, you’ll need specific hardware that works seamlessly together to create a reliable automated feeder.
This component selection guide guarantees you choose the right parts for peak functionality.
Essential components include:
- Servo motor – Controls food dispensing mechanism with precise rotation control
- 4×4 matrix keypad – Enables user input for programming feeding schedules and times
- 16×2 I2C LCD display – Shows current time, date, and feeding settings clearly
- DS3231 RTC module – Provides accurate timekeeping for scheduled feeding operations
You’ll also need a push button for manual feeding override and an Arduino Uno as your main controller.
The DS3231 RTC module is particularly vital since it maintains accurate time even during power outages, guaranteeing your pet’s feeding schedule remains consistent.
Wiring Diagram Basics
Proper wiring forms the foundation of your Arduino-powered pet feeding system’s reliability and functionality. Understanding wiring diagram basics guarantees you’ll connect components correctly without damaging your hardware.
Connect your servo motor’s signal wire to pin 10 for food dispensing control. Wire the 4×4 matrix keypad’s rows and columns to pins 2 through 9, enabling time setting input. Your 16×2 I2C LCD connects via SDA to A4 and SCL to A5 for display output. The DS3231 RTC module shares the same I2C connections for accurate timekeeping.
Attach the manual feeding push button to pin A3. Following Arduino tutorials helps visualize these connections clearly. Double-check each connection before powering up to prevent short circuits or component failure.
Power Supply Requirements
Power supply selection directly impacts your pet feeding system’s performance and longevity. You’ll need multiple DC voltages to handle your Arduino’s diverse components effectively. Wall warts won’t cut it for this project’s demanding requirements.
Your system requires careful consideration of these power specifications:
- Multiple voltages: 3.3V, 5V, and 12V outputs for different components
- Current capacity: Continuous 5-watt load with 20-watt peak demands
- Motor compatibility: L298N driver struggles with NEMA 17’s 1.7A current draw
- Voltage conversion: 12V power supply with buck converter efficiently powers 5V components
Choose a robust power supply that handles peak loads without voltage drops.
Consider upgrading from the L298N to a more suitable stepper motor driver for better current handling. This foundation guarantees reliable feeding schedules your pets can depend on.
Programming the Feeding Schedule and Timer Functions
Since accurate timing forms the backbone of any automated feeding system, you’ll need to configure your Arduino’s programming to handle both scheduled and on-demand feeding functions.
Your code centers around the Real-Time Clock module, which maintains precise time tracking for your feeding schedule. You can program multiple meal times using a rotary encoder or keypad, adjusting hours and minutes to match your pet’s needs.
The timer function continuously compares current time against your programmed feeding times, automatically triggering the dispensing mechanism when intervals match.
You’ll also want to include manual override capabilities through a designated button for immediate feeding outside scheduled times. The system allows easy quantity adjustments, letting you customize portion sizes according to your pet’s specific dietary requirements.
Integrating LCD Display and User Interface Controls
You’ll connect your 16×2 I2C LCD display to show real-time feeding schedules and system status, giving you instant visual feedback on your pet’s feeding routine.
The rotary encoder becomes your primary navigation tool, letting you scroll through menu options and adjust time settings with simple turns and clicks.
Your manual feed button provides immediate control when you need to dispense food outside the scheduled times, ensuring your pet never misses a meal.
LCD Time Display Setup
When building an Arduino-powered pet feeding system, the LCD time display serves as the central interface between you and your automated feeder.
You’ll typically want to use a 16×2 I2C LCD display that connects seamlessly with your Arduino through the I2C communication protocol, reducing wiring complexity while maintaining clear visibility.
Your lcd display setup should include these essential components:
- Real-time clock data from an integrated RTC module for accurate timekeeping
- Programmable feeding schedules that you can easily modify
- User prompts for system adjustments and feeding quantity inputs
- Clear visibility of current time and next scheduled feeding
The I2C protocol enables efficient data transfer between your Arduino and display, while the RTC module guarantees your feeding schedules remain consistent and reliable for your pet’s health.
Rotary Encoder Programming Interface
Building upon your LCD display foundation, the rotary encoder transforms your pet feeding system into an intuitive programming interface that responds instantly to your input commands.
You’ll turn the encoder to increment or decrement feeding times and quantities effortlessly, while the LCD provides real-time feedback showing current time, scheduled feeds, and portions.
The flashing cursor feature clearly indicates which setting you’re actively adjusting, eliminating programming confusion.
Behind the scenes, an interrupt service routine captures your rotary encoder inputs efficiently without blocking Arduino operations.
You can swiftly switch between hour and minute adjustments, enabling precise schedule customization.
This combination creates a professional-grade interface that makes programming feeding schedules as simple as turning a dial.
Manual Feed Button Controls
While automated schedules handle routine feeding times, the manual feed button serves as your feeding system’s emergency override, letting you dispense food instantly whenever your pet needs an unscheduled meal.
Your manual feed button integrates seamlessly with the 16×2 I2C LCD display, creating an intuitive control system. When you press the button, real-time feedback appears on screen, confirming the dispensed amount and keeping you informed about every action.
Key advantages of the manual feed button include:
- Instant flexibility – Address unexpected hunger or special circumstances immediately
- LCD confirmation – Visual feedback shows exactly how much food you’ve dispensed
- Rotary encoder integration – Adjust manual portion sizes through simple navigation
- Emergency backup – Maintain feeding capabilities even when schedules need overriding
This combination guarantees you’re always in control of your pet’s feeding experience.
Real-Time Clock Module for Accurate Feeding Times
As you design your Arduino-powered pet feeding system, incorporating a Real-Time Clock (RTC) module becomes essential for maintaining consistent feeding schedules.
The DS3231 RTC module provides accurate timekeeping that operates in real time, ensuring your pets receive meals at precisely scheduled intervals every day.
Real-time accuracy ensures your pets never miss a meal, maintaining their health through perfectly timed feeding schedules.
You’ll appreciate the built-in coin cell battery that maintains time during power outages, preventing disruptions to your pet’s routine.
With typical accuracy within ±2 minutes per year, the DS3231 delivers reliable performance for precise feeding management.
The RTC module lets you program multiple feeding times, accommodating different dietary needs if you have several pets.
This implementation simplifies your Arduino code’s time management complexity, making feeding routine adjustments straightforward and efficient.
Servo Motor Vs Stepper Motor for Food Dispensing
When selecting the motor for your pet feeding system’s dispensing mechanism, you’ll face a critical choice between servo motors and stepper motors that directly impacts your project’s complexity and performance.
Servo motors offer simplicity with single-signal control, making them perfect for basic dispensing tasks. However, stepper motors provide superior precision through microstepping capabilities, enabling accurate portion control.
Consider these key differences:
- Control complexity: Servo motor requires minimal wiring versus stepper motor’s need for additional drivers.
- Precision: Stepper motor delivers microstepping accuracy while servo motor offers basic positioning.
- Power consumption: Servo motor consumes less power, especially important for battery-operated feeders.
- Motion range: Traditional servo motor limits to 180 degrees; continuous rotation servos and stepper motors offer unlimited rotation.
Choose based on your precision requirements and technical expertise.
Power Supply Solutions for Continuous Operation
Beyond motor selection, your pet feeding system’s reliability hinges on choosing the right power supply configuration for 24/7 operation. You’ll need stable DC voltages of 3.3V, 5V, and 12V to handle continuous 5-watt loads and 20-watt peaks during feeding cycles.
Wall warts won’t cut it for this demanding application. Instead, use a robust 12V power supply with buck converters for 5V components, preventing voltage drops that could disrupt feeding schedules.
| Power Component | Voltage Output | Application |
|---|---|---|
| Primary Supply | 12V | Motor power, charging |
| Buck Converter | 5V | Arduino, sensors |
| Linear Regulator | 3.3V | Wi-Fi modules |
| SLA Battery + Trickle Charger | 12V backup | Outage protection |
For backup power, sealed lead acid batteries with trickle chargers guarantee your pets won’t miss meals during outages.
3D Printing Custom Parts for Your Pet Feeder
While commercial pet feeders offer generic solutions, 3D printing transforms your Arduino-powered system into a perfectly customized feeding machine.
You’ll create components that perfectly match your pet’s specific needs while dramatically reducing costs and production time.
Key advantages of 3D printing custom parts for your pet feeder:
- Custom auger design – Engineer precise dispensing mechanisms that eliminate food blockages and accommodate different kibble sizes
- Personalized facia panels – Design attractive LCD housings and control interfaces that complement your home décor
- Food-specific adaptations – Create dispensing components optimized for wet food, treats, or specialty diets
- Complex geometries – Develop intricate internal mechanisms impossible with traditional manufacturing
Your pet food dispenser becomes uniquely yours, offering superior functionality while maintaining the flexibility to modify designs as your pet’s needs evolve.
Troubleshooting Common Issues and Code Limitations
Although your Arduino-powered pet feeding system can operate flawlessly for months, you’ll inevitably encounter hardware glitches and software bugs that disrupt your pet’s feeding schedule.
Troubleshooting begins with checking your rotary encoder connections when displayed numbers won’t increment properly. Code limitations often cause feeding times to activate unexpectedly, requiring you to review timer logic in the Arduino IDE carefully.
Start troubleshooting rotary encoder connections first, then examine timer logic code carefully when feeding schedules activate unexpectedly.
When your system can’t control the stepper motor consistently, verify your power supply’s stability since voltage fluctuations affect servo performance. Monitor how accurately your device tracks current time, as minor programming errors can throw off the entire schedule.
Regular debugging sessions help identify issues before they impact your pet’s routine, ensuring reliable automated feeding.
Upgrading Your System With Advanced Features
Once you’ve mastered the basic feeding system, you can transform it into a sophisticated pet care hub by incorporating advanced features that enhance functionality and convenience.
Upgrading your system with advanced features opens up possibilities for remote monitoring and precise control that’ll revolutionize your pet care routine.
Consider these essential upgrades:
- Wi-Fi connectivity – Integrate an ESP8266 module for smartphone control and remote feeding schedule adjustments
- Real-time clock (RTC) – Guarantee accurate feeding times with battery backup during power outages
- Stepper motor precision – Replace servo motors for better food portion control and dispensing accuracy
- LCD display and EEPROM storage – Add real-time status monitoring and permanent schedule memory
These enhancements create a professional-grade automated feeding solution that’s both reliable and user-friendly.
Testing and Calibrating Your Automatic Pet Feeder
After implementing these advanced features, you’ll need to verify your automatic pet feeder operates correctly through systematic testing and precise calibration. Begin by ensuring all components—Arduino, motors, and RTC module—are properly connected and powered before running initial setup.
Start calibrating the feeding mechanism by adjusting motor rotation settings to dispense your desired food quantity. Use a stopwatch to measure dispensing time, ensuring it aligns with your programmed schedule. Fine-tune based on your pet’s specific dietary needs.
| Test Component | Calibration Method | Expected Result |
|---|---|---|
| Motor Rotation | Adjust rotation duration | Precise food portions |
| Timing System | Verify RTC accuracy | Scheduled feeding times |
| Dispensing Rate | Measure output quantity | Consistent portions |
| System Reliability | Monitor multi-day operation | No missed feedings |
Regularly maintain the hopper and auger, checking for blockages that affect accuracy.
Frequently Asked Questions
How to Make a Pet Feeder With Arduino?
You’ll connect a servo motor to your Arduino for dispensing, add an RTC module for timing, use a rotary encoder for controls, install an LCD display, and program feeding schedules for automatic operation.
How Does a Smart Pet Feeder Work?
You program feeding times using the keypad, and the RTC module tracks time accurately. When it’s mealtime, the Arduino activates the motor to dispense food automatically into your pet’s bowl.
What Is the Function of a Pet Feeder?
A pet feeder’s function is to automatically dispense predetermined portions of food at scheduled times. You’ll benefit from consistent feeding routines that prevent overfeeding, maintain your pet’s health, and provide convenience when you’re busy.
What Are the Benefits of an Automatic Cat Feeder?
You’ll maintain consistent feeding schedules, control portion sizes to prevent obesity, and enjoy convenience when traveling. Your cat’s health improves through regular meals, while programmable features let you customize feeding times easily.


Leave a Reply