You’ve probably noticed those expensive air quality monitors in stores and wondered if there’s a cheaper way to track the air you’re breathing. Homemade air particle monitors offer exactly that solution—DIY devices that detect PM2.5 and PM10 particles using affordable sensors and microcontrollers. While they won’t match laboratory-grade precision, these budget-friendly alternatives can provide surprisingly accurate local air quality data. But building one that actually works requires understanding some key technical considerations.
Understanding Air Particle Monitoring Technology
While commercial air quality monitors can cost hundreds or thousands of dollars, you can build effective homemade air particle monitors using optical particle counting technology that rivals professional equipment.
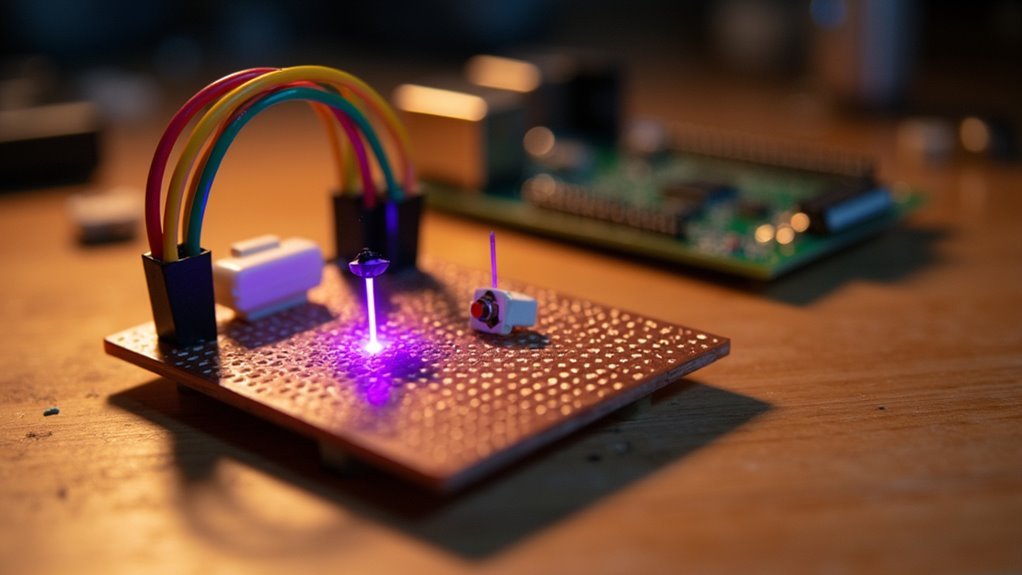
These DIY devices employ a laser and photodiode system that detects airborne particles like PM10 and PM2.5 through light scattering principles. When particles pass through the laser beam, they scatter light proportionally to their size, which the photodiode measures and converts into concentration readings.
Particles scatter laser light proportionally to their size, allowing photodiodes to measure and convert these signals into accurate concentration readings.
You’ll typically use off-the-shelf air quality sensors like the PMS5003, a reliable PM2.5 sensor that provides real-time particulate data.
These components make optical particle counting accessible to hobbyists and citizen scientists, enabling you to monitor your indoor air quality effectively while understanding the fundamental technology behind professional-grade monitoring equipment.
Essential Components for DIY Air Quality Sensors
Success in building your own air quality monitor depends on selecting the right combination of sensors and supporting components.
You’ll need several critical elements to create a functional system that accurately measures environmental conditions.
Your essential components include:
- Particulate Matter Sensor – Choose a PM2.5/PM10 sensor like the Honeywell HPM series or PMS5003 for accurate particle detection.
- Gas Detection – Install a VOC and CO2 sensor such as the AMS CCS811 or MH-Z19 for extensive monitoring.
- Environmental Monitoring – Add a temperature and humidity sensor like the DHT22 or Silicon Labs Si7021.
- Control System – Use a microcontroller (Arduino or Particle board) with breadboard, jumper wires, and power supply.
These components work together to create your complete air quality monitor.
PM2.5 and PM10 Particle Detection Methods
You’ll measure PM2.5 and PM10 particles using laser scattering detection, where a laser beam illuminates airborne particles and sensors detect the scattered light to determine particle size and concentration.
The intensity and angle of scattered light help your optical particle counter differentiate between PM2.5 and PM10 particles with remarkable precision.
Your sensor’s counting accuracy depends on proper calibration and understanding how different particle types interact with the laser beam.
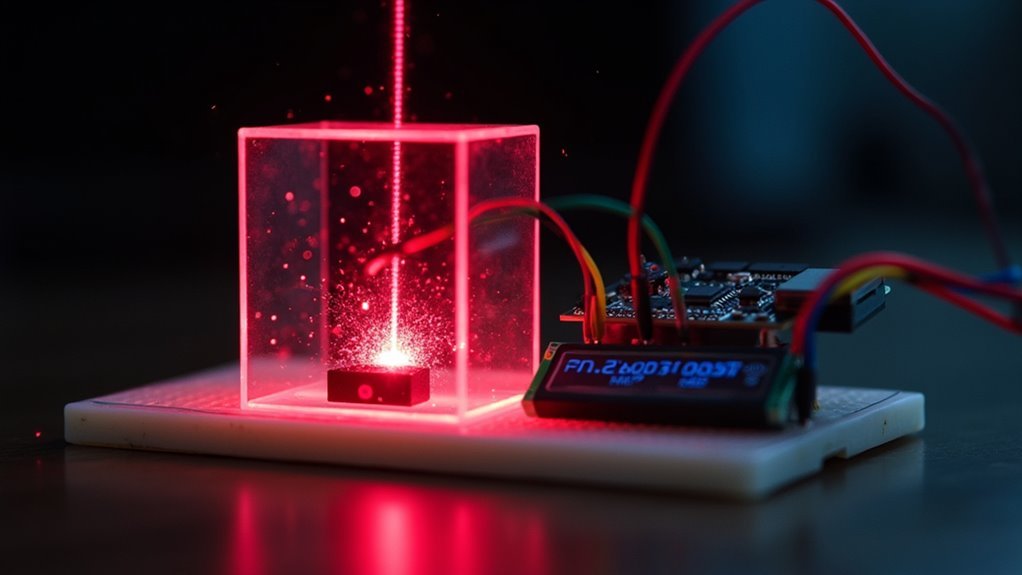
Laser Scattering Detection Principles
Precision drives the effectiveness of homemade air particle monitors, which rely on laser scattering detection principles to identify and measure PM2.5 and PM10 particles in real-time.
When you build these systems, you’re harnessing light scattering technology that detects particulate matter by measuring how particles interfere with laser beams.
Here’s how laser scattering detection principles work in your homemade monitor:
- Light emission – A laser shines through the air sample chamber
- Particle interaction – Particles scatter light as they pass through the beam
- Light detection – A photodiode positioned at 90 degrees captures scattered light
- Size calculation – Larger particles scatter more light, enabling size differentiation
You’ll need proper calibration against reference instruments to guarantee accuracy, as environmental factors can affect your readings.
Optical Counting Accuracy Methods
While laser scattering provides the foundation for particle detection, achieving reliable optical counting accuracy requires systematic calibration methods that confirm your homemade monitor delivers measurements comparable to professional-grade instruments.
You’ll need to calibrate against reference devices like the MetOne HHPC-6 to verify your photodiode accurately interprets scattered light intensity.
Optical counting methods depend on precise correlation between light scattering patterns and actual particle concentrations. Your calibration process should verify measurements across both PM2.5 and PM10 size ranges, as each requires different detection parameters.
High-quality optical particle counters achieve professional accuracy through rigorous calibration protocols.
When properly calibrated, your homemade device can provide reliable data for extensive air quality monitoring applications.
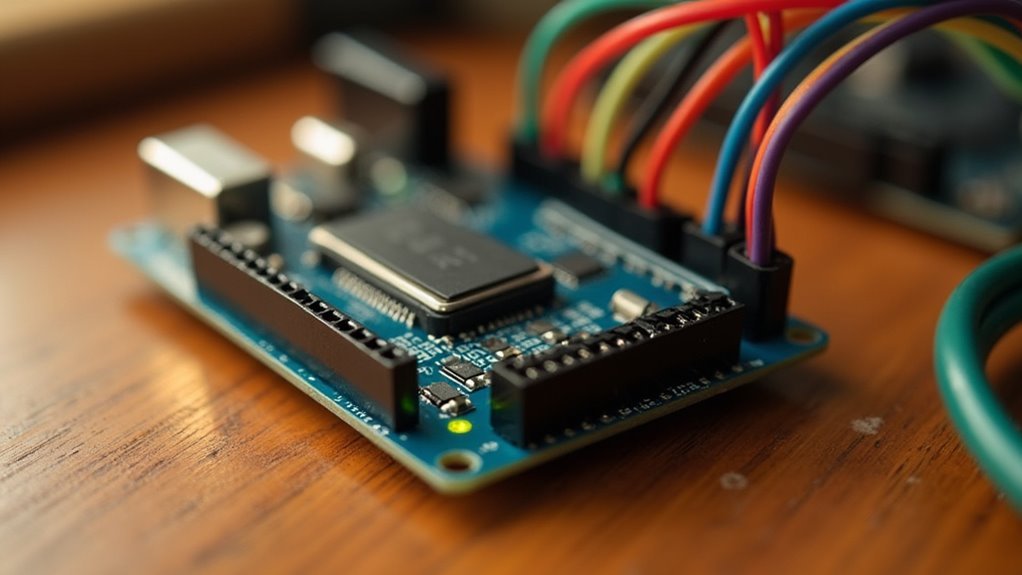
Arduino-Based Air Quality Monitor Systems
When building your own air particle monitor, Arduino-based systems offer an excellent balance of affordability and functionality. You can typically construct these monitors for $50-$100, making them perfect for hobbyists and educators.
Your system can track multiple air quality parameters using specialized sensors like the PMS5003 for PM2.5 measurement and the MH-Z19 for CO2 detection. A Nextion touch display provides real-time visualization of temperature, humidity, VOCs, and ozone levels.
Building your monitor involves:
- Soldering components onto the PCB
- Connecting sensors via serial and analog inputs
- Programming using Arduino software and specific sensor libraries
- Calibrating sensors for accurate readings
You’ll appreciate the high customization potential these systems offer while maintaining cost-effectiveness for thorough air quality monitoring.
Sensor Selection for Comprehensive Air Analysis
Choosing the right sensors determines how effectively your homemade air monitor can assess indoor air quality threats.
You’ll want to incorporate a Honeywell HPM series sensor for measuring PM2.5 and PM10 particulate matter concentrations. The AMS CCS811 sensor detects volatile organic compounds and CO2 levels, giving you thorough data on chemical pollutants.
For environmental conditions, include the Silicon Labs Si7021 sensor to measure temperature and humidity, which directly affect air quality readings.
Consider optical particle counting mechanisms like those in DIY MyPart models for accurate laser scattering measurements. Don’t forget specialized sensors like the MQ-131 for ozone detection.
Proper calibration is essential for accurate data collection, requiring specific setTimeToRead() and setR0() values to guarantee your sensor readings remain reliable and precise.
Circuit Design and Wiring Configurations
Once you’ve selected your sensors, you’ll need to establish proper connections between components like the Honeywell HPM series and AMS CCS811 sensors with your chosen microcontroller.
Your circuit design must address specific power supply requirements, as the CCS811 requires a 3.3V connection while ensuring all sensors receive adequate power without voltage conflicts.
You can use a solder-less breadboard to facilitate these connections, making it easier to wire power, ground, and signal lines according to your schematic diagram.
Component Connection Methods
Although creating a functional air particle monitor requires multiple sensors working in harmony, the success of your project hinges on proper circuit design and precise wiring configurations.
When implementing component connection methods for your DIY air quality monitor, you’ll need to establish reliable pathways between sensors and your microcontroller.
Here are four essential connection approaches:
- Breadboard Prototyping – Use solder-less breadboards for testing configurations before permanent assembly.
- Pin Mapping – Connect power (3.3V/5V), ground (GND), and communication pins (RX/TX) according to sensor specifications.
- Fritzing Diagrams – Follow visual wiring guides to guarantee accurate sensor integration and avoid connection errors.
- Signal Integrity – Maintain proper resistor values and secure connections to prevent malfunctions and inaccurate readings.
Careful attention to these methods guarantees peak performance from your homemade monitoring system.
Power Supply Requirements
When designing your homemade air particle monitor, you’ll need to establish a stable 5V power supply to secure reliable sensor operation. You can achieve this through a Mini USB connector or battery pack, depending on your device’s design. The power supply must deliver consistent voltage without fluctuations, especially for sensitive sensors like the PMS5003.
Your circuit configuration requires proper connections for VCC, ground (GND), and data pins (RX/TX) when integrating multiple sensors such as PM2.5 and CO2 detectors.
When assembling on solder-less breadboards, you’ll prevent common wiring mistakes by double-checking polarity connections. Once you’ve got all components in place, follow detailed wiring diagrams to guarantee each sensor receives appropriate power and maintains reliable data communication pathways with your microcontroller.
Programming Your Homemade Air Monitor
Programming your homemade air monitor becomes straightforward when you use the Arduino IDE and select the correct board and processor settings for your microcontroller, such as the Arduino Pro Mini. This programming process facilitates accurate air pollution detection through proper sensor integration.
Follow these essential steps for successful programming:
- Install sensor-specific libraries – Include libraries for each sensor like PMS5003 for PM2.5 and MH-Z19 for CO2 detection to guarantee proper communication.
- Implement SoftwareSerial library – This allows simultaneous communication with multiple sensors for real-time data collection from PM2.5 and VOC sensors.
- Configure user interface connection – Process sensor data and send it to displays like Nextion by updating variables and adjusting display attributes.
- Test and calibrate thoroughly – Verify accurate readings, especially for ozone sensors requiring specific calibration settings.
Calibration Techniques for Accurate Readings
You’ll need to establish a proper baseline for each sensor in your air monitor to guarantee it’s reading accurately from the start.
Compare your device’s readings against certified reference standards or professional-grade monitors to identify any drift or calibration errors.
Set up regular comparison sessions with known reference samples, particularly for particulate matter sensors like the PMS5003, which can shift over time due to environmental factors.
Sensor Baseline Establishment
Proper calibration forms the foundation of any reliable homemade air particle monitor, ensuring your sensors deliver accurate readings rather than misleading data.
Sensor baseline establishment requires exposing your devices to known reference conditions before deployment.
Here’s your calibration process:
- PMS5003 PM2.5 sensor – Expose to controlled particulate concentrations and adjust output accordingly for precise measurements.
- MH-Z19 CO2 sensor – Place in fresh air (400 ppm CO2) for the specified duration to establish accurate baseline readings.
- MP503/MQ-131 VOC/Ozone sensors – Configure setTimeToRead() and setR0() parameters using certified reference standards for peak performance.
- Routine maintenance – Schedule periodic calibration checks to compensate for sensor drift caused by environmental factors and extended usage.
Reference Standard Comparison
While establishing accurate baselines provides your sensors with initial calibration points, reference standard comparison validates their ongoing precision against professional-grade monitoring equipment.
You’ll need to compare your homemade monitor’s readings against high-end instruments like the MetOne HHPC-6 to guarantee accuracy. This calibration process involves exposing both your sensor and the reference device to identical air conditions, then adjusting your readings to match the professional standard.
You should perform these comparisons regularly since environmental factors can drift your sensor’s performance over time.
Use known concentrations of test aerosols during calibration sessions to fine-tune your device’s sensitivity. Document each comparison session, recording discrepancies and adjustments made. This creates a calibration history that’ll help you identify patterns and anticipate when future recalibrations might be necessary for maintaining measurement accuracy.
Display Options and User Interface Design
Several display options can transform your homemade air particle monitor from a basic data collector into an intuitive, user-friendly device.
When considering user interface design, you’ll want to focus on creating clear, accessible data visualization that enhances your understanding of air quality metrics.
Popular display options include:
- Touchscreen displays like the 2.8″ Nextion, offering interactive controls and real-time visualization of PM2.5, CO2, and VOC levels.
- Navigation hotspots that function as buttons, letting you switch between sensor readings and historical data views.
- Graphical elements such as gauges and charts that visually represent air quality trends.
- Customizable display attributes allowing you to adjust data presentation based on your specific monitoring needs.
Effective user interface design promotes engagement and makes air quality data accessible for hobbyists and educational purposes.
Case Construction and Assembly Process
Once you’ve finalized your display design, constructing a sturdy case becomes your next critical step in building a functional air particle monitor. You’ll typically use acrylic or 3D-printed materials for case construction, guaranteeing proper openings for displays and sensor ventilation.
The assembly process requires careful planning to avoid light interference with sensors while maintaining easy access to power connections and calibration points.
During assembly, you’ll solder components onto your PCB using a soldering iron, then secure everything within the case. Most monitors follow a modular approach, letting you integrate various sensors like PM2.5, CO2, and VOC detectors while keeping the design compact and portable.
Focus on proper wire management to prevent snagging and guarantee all components fit securely for reliable operation.
Cost Comparison With Commercial Air Monitors
Building your own air particle monitor offers remarkable financial advantages over purchasing commercial alternatives. When you examine the cost comparison between DIY and commercial options, the difference is staggering. Traditional monitoring stations range from $30,000 to $100,000, while your homemade version costs just $50 to $100.
Here’s what makes DIY monitors financially attractive:
- Affordable components – You’ll use off-the-shelf parts that won’t break your budget.
- Open source software – Free programming eliminates expensive licensing fees.
- Quick assembly – Only a few hours of work required for completion.
- Comparable performance – Your device tracks trends similarly to expensive sensors.
You’ll gain hands-on experience while creating an accessible solution that delivers reliable air quality monitoring without the hefty investment commercial options demand.
Real-World Applications and Use Cases
When you deploy your homemade air particle monitor in real-world settings, you’ll discover applications that extend far beyond simple air quality tracking. You can advocate for cleaner public transportation by documenting urban pollution levels, educate students through hands-on citizen science initiatives, and create community-wide monitoring networks with internet connectivity for real-time data sharing.
| Application | Setting | Impact |
|---|---|---|
| Community Advocacy | Urban Areas | Document pollution for policy changes |
| Educational Programs | Schools | Teach students about air quality science |
| Transportation Analysis | Transit Routes | Support cleaner public transport initiatives |
| Neighborhood Monitoring | Residential Areas | Track local PM10 and PM2.5 levels |
| Data Networks | Multiple Locations | Enable real-time community decision-making |
DIY monitors costing around $75 provide reliable measurements that correlate well with professional instruments, making widespread deployment feasible.
Troubleshooting Common Build Issues
When building your homemade air particle monitor, you’ll likely encounter two primary technical challenges that can derail your project’s success.
Sensor calibration problems often stem from skipping the manufacturer’s recommended calibration procedures, particularly with sensitive components like ozone sensors that drift over time.
Wiring connection errors represent the most frequent culprit behind non-functional devices, typically involving loose connections, incorrect resistor values, or mismatched pin assignments that prevent proper communication between your Arduino and sensors.
Sensor Calibration Problems
Although your homemade air particle monitor may physically assemble correctly, sensor calibration issues can derail your project’s accuracy from day one.
Proper sensor calibration guarantees reliable detection of pollutants including Volatile Organic Compounds and particulate matter.
Common calibration problems you’ll encounter include:
- Incorrect resistor values on PMS5003 sensors causing significant PM2.5 and PM10 reading errors
- Improper setTimeToRead() and setR0() settings on MQ-131 ozone sensors affecting detection accuracy
- Sensor drift over time requiring regular testing against known standards to maintain precision
- Orientation-related inaccuracies from improper installation contrary to manufacturer specifications
You’ll achieve consistent results by implementing a controlled test chamber environment for calibration procedures, allowing effective troubleshooting of performance issues.
Wiring Connection Errors
Even with perfect sensor calibration, faulty wiring connections can instantly transform your air particle monitor into an expensive paperweight. Wiring connection errors typically originate from incorrect resistor values, causing Arduino malfunctions and component failures.
You’ll want to follow your circuit diagram precisely—incorrect wiring prevents sensors from communicating with the microcontroller.
Pay special attention to RX and TX pins, as improper connections here disrupt serial communication between your Arduino and sensors. Use a multimeter to verify continuity and confirm proper power connections (3.3V or 5V) plus ground connections for each component.
If your monitor won’t power up or read data, examine all solder joints carefully. Cold solder joints and loose wires frequently interrupt circuits, rendering your carefully calibrated sensors useless.
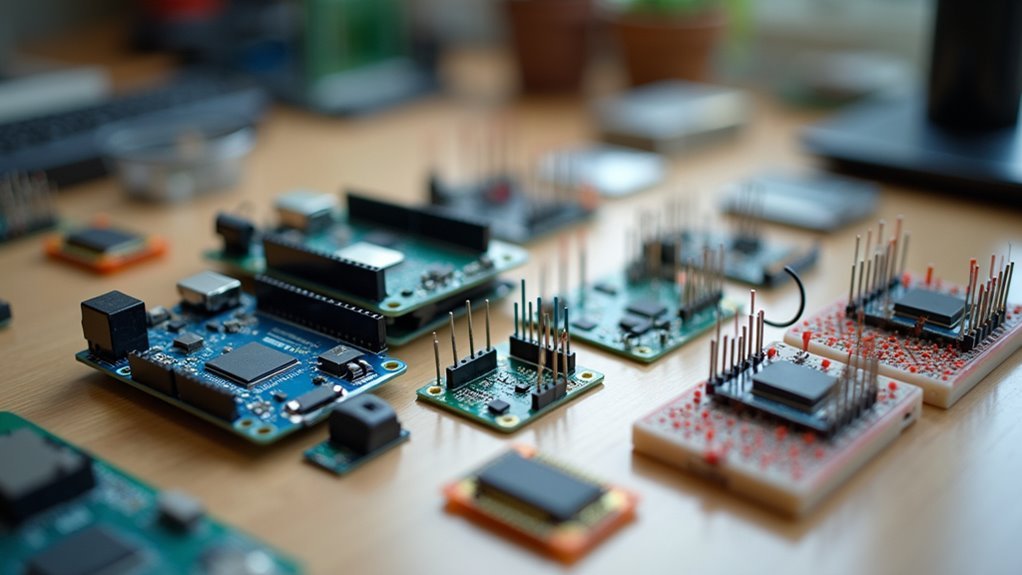
Community Projects and Open Source Resources
Since traditional air quality monitoring equipment costs upwards of $30,000, community projects have emerged to democratize environmental sensing through open-source designs and affordable components.
You can now build effective air particle monitors for $50-$100 using projects like CanAirIO and MyPart, which provide detailed guides and fabrication files.
These open-source resources enable you to:
- Measure PM2.5, VOCs, and CO2 levels in your local environment
- Access downloadable designs and modify them for specific needs
- Collaborate with other citizen scientists through online communities
- Share data findings to advocate for cleaner air policies
You’ll find these community projects foster innovation while making environmental monitoring accessible to everyone, regardless of technical background or budget constraints.
Frequently Asked Questions
How Can I Measure Air Quality in My Home?
You can build a DIY air quality monitor using Arduino boards with sensors like Honeywell HPM for PM2.5/PM10 and AMS CCS811 for VOC/CO2, then connect to data platforms for tracking.
How to Make a Homemade Air Pollution Detector?
You’ll need an Arduino microcontroller, PMS5003 sensor for particulates, CCS811 for CO2/VOC detection, and DHT22 for temperature/humidity. Solder components onto a PCB, connect to Arduino, then calibrate sensors through programming.
How to Make an Air Pollution Monitor?
You’ll need PM2.5, VOC, and CO2 sensors connected to an Arduino microcontroller. Solder components onto a PCB, program using Arduino IDE with sensor libraries, calibrate accurately, then integrate cloud services for real-time data tracking.
How to Detect Particles in the Air?
You’ll detect airborne particles using laser light scattering technology. A laser beam illuminates particles, which scatter light that’s captured by photodiodes. This optical method accurately measures particle concentrations and sizes in real-time.


Leave a Reply