You’ve probably worried about your pet’s feeding schedule when you’re stuck at work late or traveling unexpectedly. Smart feeding technology doesn’t require expensive commercial devices or complex programming skills to transform your pet’s mealtime routine. With basic components like Arduino microcontrollers, servo motors, and simple sensors, you can create a reliable automated system that guarantees your furry friend gets fed consistently. The setup process might surprise you with its simplicity.
Understanding Smart Pet Feeding Technology
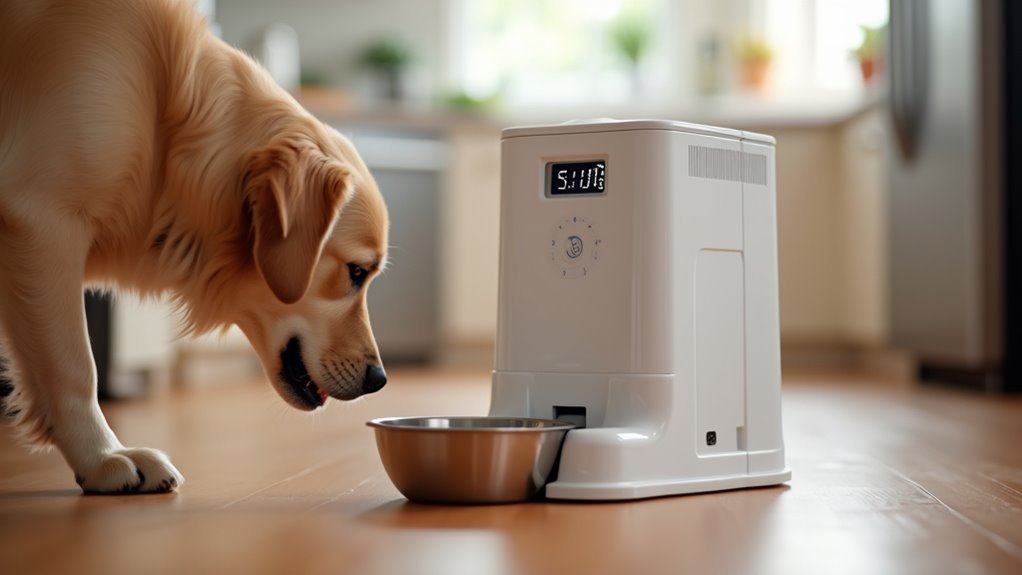
While traditional pet feeding relied on manual scooping and guesswork, smart pet feeding technology transforms how you care for your furry companions through precision and automation.
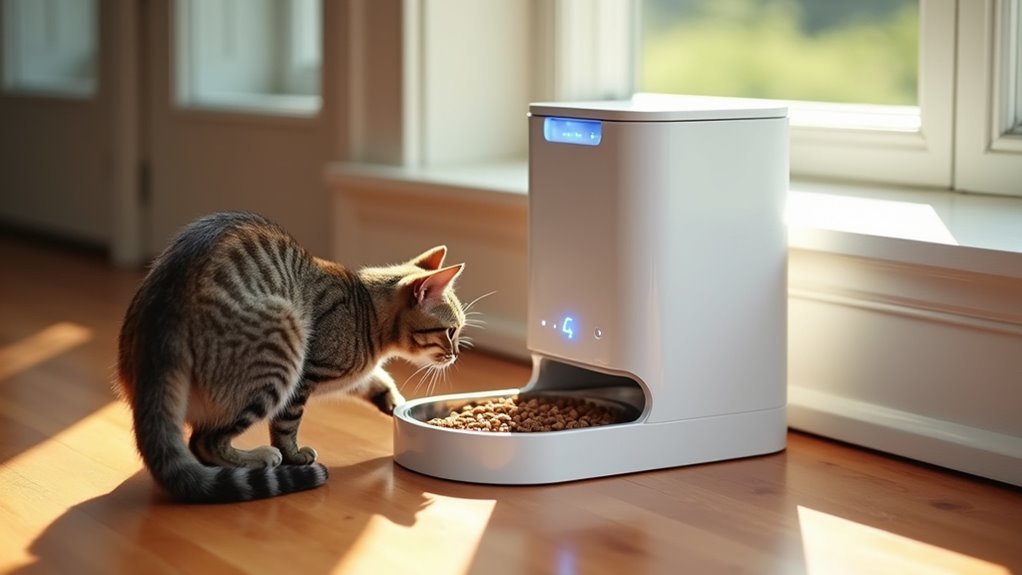
Smart feeders utilize mobile apps that let you schedule meals remotely and dispense exact portions tailored to your pet’s needs. These automatic feeders offer customizable settings for portion sizes and feeding intervals, directly supporting your pet’s health through consistent nutrition habits.
You’ll find these devices include food storage features that maintain freshness while preventing overfeeding.
Many models incorporate smart cameras for real-time monitoring and two-way communication, letting you check on your pet throughout the day. This technology greatly reduces your stress during busy periods, ensuring your pet receives reliable, consistent care even when you’re away.
Essential Components for DIY Automated Feeders
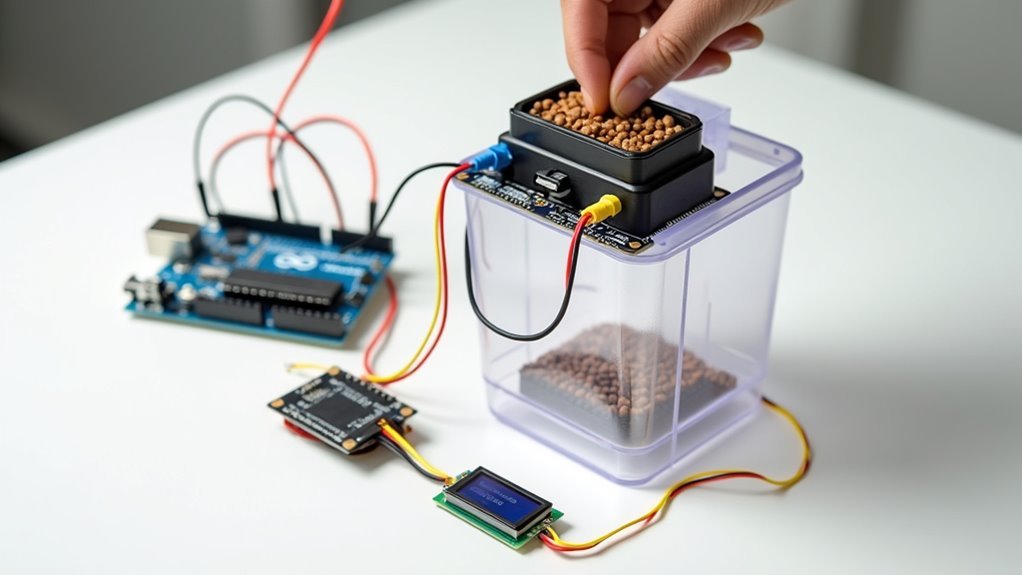
You’ll need just a few affordable components to build your own automated pet feeder that rivals expensive commercial options.
The core setup requires an Arduino UNO microcontroller ($18) paired with a micro servo motor ($4 for a 2-pack) that’ll control when and how much food gets dispensed.
Complete your build with basic jumper wires ($1), a suitable food container ($5), and some cardboard for the base structure, keeping your total project cost under $30.
Arduino and Servo Setup
When building a DIY automated pet feeder, the Arduino UNO microcontroller forms the brain of your system, offering reliable control at just $18. You’ll connect this Arduino to a micro servo motor that acts as your automatic feeder’s primary actuator, opening and closing the food container lid with precision.
| Component | Function |
|---|---|
| Arduino UNO | Controls feeding schedule and timing |
| Micro Servo Motor | Opens/closes food container lid |
| Jumper Wires (M to M) | Connects Arduino to servo motor |
| Food Container | Stores and dispenses pet food |
| Power Supply | Maintains consistent operation |
The servo motor’s affordable price point—around $4 for a 2-pack—makes this pet care solution incredibly budget-friendly. Simple jumper wires costing just $1 guarantee proper signal transmission between components, completing your automated feeding system.
Container and Wiring Basics
Building your automated feeder requires careful attention to both the food storage container and electrical connections that bring your project to life.
You’ll need a suitable food container that costs around $5 and accommodates your servo motor’s movement for opening and closing the dispensing mechanism. The container should align properly with your servo’s range of motion to guarantee reliable food delivery.
For wiring, you’ll use jumper wires (M to M) costing about $1 to establish essential connections between your Arduino and servo motor. These connections enable your microcontroller to send precise signals controlling the feeding schedule.
Cardboard construction materials, costing $0-1, provide an affordable framework for housing your components while keeping the overall design lightweight and easily customizable to your pet’s specific needs.
Arduino-Based Pet Feeder Setup and Wiring
Three essential components form the foundation of your Arduino-based pet feeder: an Arduino UNO microcontroller ($18), a micro servo from a 2-pack ($4), and male-to-male jumper wires ($1). This Arduino setup transforms into a reliable automated pet feeding system with proper wiring.
| Component | Function | Rotation |
|---|---|---|
| Arduino UNO | Controls timing | N/A |
| Micro Servo | Opens/closes lid | 175° |
| Jumper Wires | Connects circuit | N/A |
| Complete System | Dispenses food | Variable |
Follow the color-coded wiring diagram to connect your servo to the Arduino, ensuring the servo achieves approximately 175° rotation for effective lid operation. Once assembled, you’ll program your automated pet feeder to dispense meals at specific times—7 am, 2 pm, and 9 pm—creating consistent feeding schedules that keep your Pet Feeder running smoothly.
Programming Your Feeding Schedule Controller
You’ll need to upload pre-written code to your Arduino that controls when the servo motor opens and closes your pet’s food container.
Start by configuring specific feeding times like 7 am, 2 pm, and 9 pm in the code’s time variables to establish a consistent meal schedule.
Before finalizing your setup, test the servo’s 175° rotation manually using a servo tester to guarantee it dispenses food properly.
Arduino Code Setup
Programming your Arduino feeder requires uploading specific code that controls when and how your pet receives meals throughout the day. The provided code establishes your automatic pet feeder’s feeding schedules, starting at 7 am with subsequent intervals at 2 pm and 9 pm.
You’ll need to ascertain your Arduino connects properly to the servo motor, which must be calibrated to rotate approximately 175° for opening and closing the food container lid.
Before uploading code, use a servo tester to manually verify the servo’s rotation operates correctly. The code incorporates delay functions that create specific feeding intervals, activating the servo at designated times.
After programming, test your feeder by adding food and observing whether the servo correctly dispenses portions at scheduled times.
Feeding Time Configuration
Once your code uploads successfully, configuring your pet’s feeding schedule becomes the next step in creating a reliable automated system.
You’ll program your Arduino controller with specific time intervals – typically starting at 7 am, with additional feedings at 2 pm and 9 pm. Your automatic pet feeder relies on precise programming to activate the servo motor at designated times.
Before finalizing your feeding schedule, test the mechanism manually.
Verify that your servo motor rotates the full 175° needed to open and close the food container lid effectively. This guarantees proper food dispensing during each feeding cycle.
Remember to regularly check and adjust your programmed times and portions.
Your pet’s dietary requirements may change, so maintaining flexibility in your programming allows you to accommodate their evolving needs and preferences efficiently.
Schedule Testing Methods
How can you guarantee your automated feeding schedule functions reliably before trusting it with your pet’s daily meals?
Start by manually testing your servo motor’s rotation to achieve approximately 175° movement before connecting power. Use a servo tester if available to confirm smooth lid operation on your automatic feeder. Upload the Arduino code specifying feeding times at 7 am, 2 pm, and 9 pm through Arduino IDE.
| Testing Phase | Method | Expected Result |
|---|---|---|
| Hardware Check | Manual servo rotation | 175° movement |
| Servo Testing | Use servo tester tool | Smooth lid operation |
| Schedule Verification | Connect Arduino power | Activates at set times |
| Customization | Adjust code settings | Matches pet’s needs |
These schedule testing methods guarantee your feeder operates correctly before deployment.
Building the Physical Feeder Structure
Two main approaches will help you construct your automatic pet feeder’s physical structure.
First, you can create a budget-friendly version using a cardboard box. Cut a hole for the servo motor, which acts as the lid for your food container. This simple design makes pet feeders accessible to everyone wanting to automate feeding without major expenses.
Alternatively, use the provided STL files for 3D printing components. This method creates a more polished Smart Feeder with superior durability. You can glue or screw the base to a stand for stability.
Regardless of your chosen approach, secure the food container’s neck properly to prevent spills.
Select the appropriate servo horn from the plastic bag to guarantee ideal lid movement and refer to provided images for proper wiring guidance.
Servo Motor Installation and Configuration
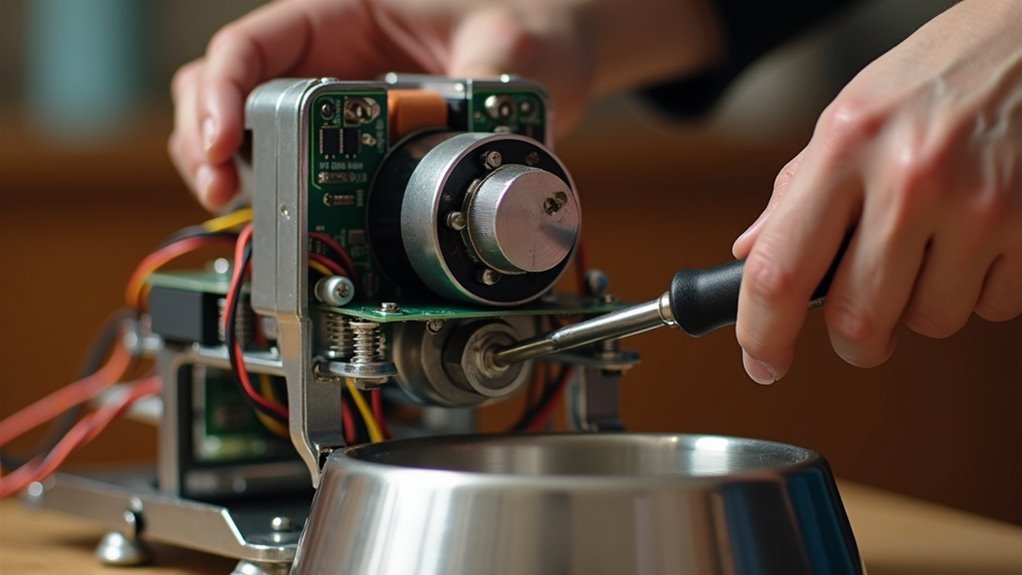
Now that you’ve built your feeder’s physical structure, you’ll need to install and configure the servo motor that controls the food dispensing mechanism.
Start by connecting the servo’s control wire to the designated Arduino pin and establishing a proper ground connection using jumper wires.
Once you’ve secured the wiring setup, you can program the motor to rotate approximately 175° for ideal lid operation and portion control.
Servo Wiring Setup
Before you can automate your pet’s feeding schedule, you’ll need to establish the critical connection between your servo motor and Arduino UNO. Start by gathering your jumper wires and following the color-coded diagram carefully. Connect the red wire to the 5V pin for power, the black or brown wire to ground, and the signal wire (usually orange or yellow) to a digital pin on your Arduino UNO.
Before making these connections, test your servo motor using a servo tester to confirm it rotates properly through its 175° range. This servo will control your food container’s lid mechanism.
Select the appropriate servo horn from the included plastic bag that best fits your food container design. Secure all connections firmly to prevent loose wires that could disrupt your automated feeding system’s operation.
Motor Programming Steps
Upload the servo control code to your Arduino UNO to establish the automated feeding schedule for your pet. The provided programming sets specific dispensing times at 7 am, 2 pm, and 9 pm, creating consistent meal intervals throughout the day.
Your servo motor will receive precise rotation commands through the Arduino, enabling controlled food portion releases from the pet feeder container.
Before finalizing the installation, test your complete setup by adding food and manually triggering the servo motor through the Arduino interface. This verification guarantees the mechanism dispenses correct portion sizes without jamming or mechanical issues.
Monitor the servo’s 175° rotation during testing to confirm smooth lid opening and closing. Once you’ve verified proper functionality, your automated pet feeder will reliably provide scheduled meals.
Creating Custom Portion Control Mechanisms
Three key technologies can transform how you control your pet’s meal portions: Arduino-based systems, servo-controlled dispensers, and smart sensors. Custom portion control mechanisms let you program specific feeding schedules tailored to your pet’s dietary requirements. Micro servos automate lid opening and closing, guaranteeing precise dispensing while reducing waste.
Smart sensors adjust portions based on your pet’s activity levels or weight, preventing overfeeding. Smart feeders with mobile apps provide convenient customization options. RFID technology enables personalized feeding by recognizing individual pets and dispensing appropriate portions.
| Technology | Function | Benefit |
|---|---|---|
| Arduino Systems | Program feeding schedules | Customized meal timing |
| Servo Motors | Control lid mechanisms | Precise portion dispensing |
| Weight Sensors | Monitor portion accuracy | Prevents overfeeding |
| RFID Tags | Identify individual pets | Personalized feeding |
| Mobile Apps | Remote control settings | Convenient management |
This guarantees your pets needs are met consistently.
Mobile App Integration for Remote Control
How convenient would it be to feed your pet while you’re stuck in traffic or away on vacation? Smart feeders with mobile app integration make this possible through seamless remote control functionality.
Smart feeders let you remotely control your pet’s meals from anywhere, whether you’re commuting or traveling.
You can adjust feeding schedules and portion sizes from anywhere using Wi-Fi connectivity and your smartphone. These apps send real-time notifications about feeding times and food levels, helping you maintain your pet’s diet and prevent overfeeding.
You’ll customize multiple meal times throughout the day to match your pet’s specific dietary needs.
Some smart feeders include two-way communication features, letting you speak to your pet during feeding time to reduce separation anxiety. This technology guarantees your pet receives personalized care even when you’re away.
Power Management and Battery Backup Options
While remote control features keep you connected to your pet’s feeding schedule, your smart feeder’s reliability depends on consistent power supply. Effective power management guarantees your pet never misses a meal, even during outages.
Most high-quality smart pet feeders include battery backup options that automatically activate when power fails. These rechargeable batteries typically last several days, giving you peace of mind during vacations or extended absences.
You’ll find power-saving modes in advanced models that reduce energy consumption while maintaining full functionality, helping lower your electricity costs.
Before purchasing, check power specifications to verify compatibility with your home’s electrical system. Understanding battery life helps you plan ideal usage and determine when backup power might be needed for your pet’s feeding routine.
Food Storage and Freshness Preservation
Beyond maintaining consistent power, your smart feeder’s food storage system directly impacts your pet’s health and meal quality.
Smart feeders incorporate vacuum sealing technology that prevents air exposure, stopping spoilage and nutrient loss before they start. You’ll appreciate the pestproof features that keep insects and rodents away from your pet’s meals, ensuring safe consumption every time.
Food storage monitoring alerts you when levels drop low or compartments become compromised, maintaining reliable feeding schedules.
Many devices include desiccant bags that absorb moisture, preserving dry food’s texture and quality over extended periods. Properly sealed compartments maintain flavor and nutritional integrity—essential for pets with specific dietary requirements.
This freshness preservation technology transforms how you manage your pet’s nutrition long-term.
Testing and Calibrating Your Automated System
Once you’ve assembled your automated feeding system, testing each component guarantees reliable operation before trusting it with your pet’s daily meals.
Start by manually rotating the servo motor to confirm it achieves approximately 175° without power, ensuring it’ll effectively open and close the food container lid. Use a servo tester if available to verify motor functionality before Arduino integration.
Upload the provided code to program your feeding schedule—typically 7 am, 2 pm, and 9 pm.
Focus on calibrating portion sizes to match your pet’s dietary requirements, adjusting the code for consistent dispensing.
Monitor initial runs closely, identifying any timing or portion control issues. Make adjustments based on your pet’s feeding habits and preferences for ideal system performance.
Safety Features and Pet-Proofing Your Device
After confirming your automated feeder operates correctly, you’ll need to implement vital safety features that protect both your pet and the device itself.
Start by choosing feeders constructed from durable, pet-safe materials that withstand chewing and scratching. Pet-proofing requires secure locking mechanisms to prevent clever pets from accessing food outside scheduled times.
Durable, pet-safe construction and secure locking mechanisms are essential to prevent determined pets from outsmarting their automated feeding schedules.
Select devices with spill-proof designs to minimize mess and maintain controlled feeding schedules.
Verify your chosen feeder has passed electrical safety testing to prevent short circuits or overheating. Built-in automatic shut-off functions and low food level alerts are essential for maintaining pet well-being while preventing device malfunctions.
These protective measures create a reliable feeding system that keeps your pet healthy and your equipment functioning properly for years.
Troubleshooting Common Setup Issues
While safety features form the foundation of a reliable feeding system, setup problems can still arise that prevent your automated feeder from working correctly. Start by checking all wired connections between your Arduino, servo motor, and power supply using the color-coded diagram.
If your servo motor isn’t rotating, verify the power supply provides adequate voltage and review your code for syntax errors.
- Watch for blockages in the food container that prevent smooth lid operation during scheduled feedings.
- Use a servo tester to manually verify motor functionality before full integration.
- Double-check that your feeding schedule settings in the Arduino code match your desired meal times.
Regular inspection of these components guarantees your pet’s automated meals run smoothly without interruption.
Expanding Your System With Additional Smart Features
Your basic automated pet feeder becomes exponentially more powerful when you integrate smart cameras, environmental sensors, and companion apps that transform simple meal dispensing into thorough pet monitoring.
Smart cameras enable real-time viewing and two-way communication, letting you check on and talk to your pet remotely.
Apps like PetKit enhance your automated pet feeder with scheduling, activity tracking, and dietary management features.
Temperature monitoring systems like Nest Thermostat alert you to environmental changes, ensuring your pet’s comfort.
IFTTT automates additional tasks, sending feeding notifications and playtime reminders.
Complete your system with smart hydration solutions like cordless fountains, guaranteeing fresh water access.
These integrations help you monitor your pets thoroughly while maintaining their health and happiness.
Frequently Asked Questions
How Much Does It Cost to Build a DIY Automated Pet Feeder?
You’ll spend $30-100 building a DIY automated pet feeder, depending on components you choose. Basic Arduino setups with servo motors cost less, while Raspberry Pi systems with cameras and smartphone connectivity push costs higher.
Will My Pet Accept Food From an Automated Feeder Initially?
Your pet might resist the automated feeder initially since it’s unfamiliar. You’ll need patience during the adjustment period. Start by placing treats near it, then gradually introduce scheduled feeding times until they’re comfortable.
Can Automated Feeders Work for Both Cats and Dogs Simultaneously?
You can use one automated feeder for both cats and dogs if they’re similar sizes and eat the same food. However, you’ll need separate feeders if they require different portion sizes or diets.
What Happens if My Internet Connection Goes Down During Feeding Time?
You’ll likely face feeding delays if your smart feeder relies on internet connectivity. Most quality automated feeders include offline backup modes or pre-programmed schedules, so your pets won’t miss meals during outages.
How Often Should I Clean and Maintain My Automated Feeding System?
You should clean your automated feeder weekly, removing food residue and washing bowls thoroughly. Monthly, you’ll want to check moving parts, replace batteries if needed, and inspect sensors for proper operation.


Leave a Reply