You’ve probably seen smart mirrors in movies or high-end hotels and wondered how they work. Creating your own Raspberry Pi mirror isn’t as complicated as you might think, but there’s more to it than simply placing a screen behind glass. The real challenge lies in selecting the right components and configuring the software to display exactly what you want. Before you start ordering parts, you’ll need to understand the fundamental principles that make these devices function.
How Smart Mirrors Work

While smart mirrors might seem like futuristic technology, they’re surprisingly straightforward devices that combine everyday materials with basic computing components.
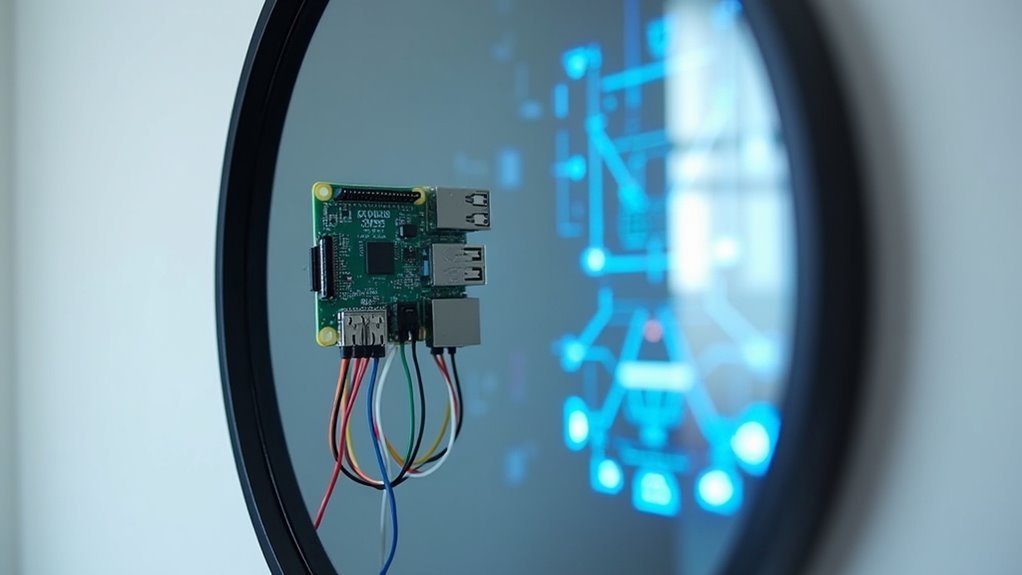
You’ll position a display screen behind a two-way mirror, creating a surface that shows your reflection while simultaneously displaying digital information like weather updates, time, and calendar events.
The core technology relies on a Raspberry Pi or similar computing device running specialized Magic Mirror software to manage and display content.
Smart mirrors use simple computing devices like Raspberry Pi with Magic Mirror software to control what information appears on your display.
Modern advances in display technology have introduced ultra-slim, low-voltage monitors that eliminate the need for bulky hardware.
You can customize your smart mirror with various modules, adding features like news feeds, reminders, and voice activation for enhanced interactivity and personalization based on your specific needs.
Essential Supplies and Components
Now that you understand how smart mirrors function, you’ll need to gather the right components to build your own. Your core hardware consists of a Raspberry Pi 3 Model A+, suitable power supply, and microSD card loaded with Raspberry Pi OS.
You’ll also need a portable slim 15.6-inch HDMI USB-C-powered monitor and an A3-sized acrylic sheet for the two-way mirror effect.
Essential mounting supplies include:
- Hardware components – M3 nylon bolts, nuts, and hexagon standoff pillars for secure assembly
- Assembly tools – Electric drill with 3mm bit, craft knife, and Phillips head screwdriver
- Additional materials – Double-sided foam tape and a separate computer for initial configuration
These components work together to create your functional smart mirror display system.
Tools Required for Assembly

Before assembling your smart mirror, you’ll need several precision tools to guarantee professional results. The tools required for this project assure clean cuts and secure assembly throughout the build process.
Professional precision tools are essential for achieving clean cuts and secure assembly in your smart mirror build project.
You’ll need an electric drill with a 3mm drill bit for creating mounting holes in acrylic and card layers. A craft knife paired with a metal ruler enables precise cutting of card sheets, delivering clean edges for your frame setup.
A small Phillips head screwdriver secures components together, particularly when attaching your Raspberry Pi and monitor to the frame.
For monitor disassembly, use a prying tool with heat application if needed to safely access display components. Optional 3D-printed drill bit alignment jigs enhance drilling precision, preventing misalignment and potential material damage during assembly.
Choosing the Right Raspberry Pi Model
With your tools assembled, selecting the appropriate Raspberry Pi model becomes your next critical decision for smart mirror performance.
Your choice directly impacts functionality, speed, and expandability of your finished project.
Consider these three popular Raspberry Pi options for your smart mirror build:
- Raspberry Pi 3 Model A+ – Compact design with 512MB RAM, perfect for basic smart mirror functions with low power consumption.
- Raspberry Pi 4 – Superior performance with 2GB-8GB RAM options, ideal if you’ll run multiple modules or complex applications.
- Raspberry Pi Zero W – Most budget-friendly and compact option, though less powerful and may need additional components.
Ensure your chosen model includes built-in Wi-Fi capability for simplified connectivity and remote management.
The Pi 4’s extra RAM makes it worthwhile for feature-rich mirrors.
Selecting Your Display Monitor

You’ll need to choose a display that fits your mirror’s dimensions while maintaining the sleek profile essential for this project.
A portable 15.6-inch monitor works perfectly for most builds, offering an ideal balance between screen real estate and compact design.
Make sure your chosen monitor supports USB-C power delivery, as this’ll simplify your wiring setup and reduce the number of cables running to your Raspberry Pi.
Monitor Size Considerations
Since your Raspberry Pi mirror’s effectiveness depends heavily on display quality and mounting feasibility, choosing the right monitor size becomes a critical decision in your build process.
You’ll want to balance visibility with practicality when selecting your display.
Consider these key factors when determining monitor size:
- Space constraints – Measure your intended installation area to guarantee the monitor fits comfortably behind your two-way mirror without protruding or creating mounting challenges.
- Viewing distance – A 15.6-inch display works well for bathroom or hallway installations where you’ll typically stand 2-3 feet away from the surface.
- Frame compatibility – Verify your chosen frame can accommodate the monitor’s dimensions while maintaining structural integrity and aesthetic appeal throughout your build.
USB-C Power Requirements
Power management becomes greatly easier when you choose a USB-C powered monitor for your Raspberry Pi mirror project. This setup eliminates the need for multiple adapters and reduces cable clutter markedly.
You’ll streamline your power supply configuration by selecting monitors that draw power through USB-C connections, which can often be powered directly from your Raspberry Pi or through a single power source.
Look for monitors with low power consumption ratings to maximize efficiency. USB-C powered displays typically consume less energy than traditional monitors, making them ideal for continuous operation.
This power efficiency also reduces heat generation, which is vital when your monitor’s mounted behind glass. The simplified USB-C power supply setup creates a cleaner installation with fewer cables to manage during assembly.
Configuring Your Raspberry Pi
Now that you’ve chosen your display monitor, you’ll need to set up your Raspberry Pi to power your smart mirror.
The configuration process involves two main stages: getting your system ready with the basic setup, then installing the specialized software that’ll transform your Pi into a smart mirror.
Let’s start with the initial system setup before moving on to the software installation process.
Initial System Setup
Before you can transform your Raspberry Pi into a smart mirror, you’ll need to establish a solid foundation through proper system configuration. Your micro SD card serves as the storage foundation for your operating system and project files.
Here’s your essential setup sequence:
- Format and Flash: Format your micro SD card to FAT32, then use Raspberry Pi Imager to flash the Raspberry Pi OS onto it for peak performance.
- Connect Hardware: Insert the card into your Pi and connect your monitor, keyboard, and mouse to complete the initial boot process.
- Configure Network and Time: Set up Wi-Fi connectivity through the desktop interface and configure your time zone using `sudo dpkg-reconfigure tzdata` in the terminal.
Reboot your system to finalize these configurations before proceeding with software installations.
Software Installation Process
With your system properly configured and network connectivity established, you’ll proceed to install the Magic Mirror software that transforms your Raspberry Pi into an interactive display. The software installation process begins by executing this command in your terminal: `bash -c $(curl -sL https://raw.githubusercontent.com/MichMich/MagicMirror/master/installers/raspberry.sh)`. This installer automatically handles all dependencies.
| Step | Action | Command |
|---|---|---|
| 1 | Flash OS | Use Raspberry Pi Imager |
| 2 | Connect peripherals | Monitor, keyboard, mouse |
| 3 | Configure Wi-Fi | Select Wi-Fi icon |
| 4 | Set timezone | `sudo dpkg-reconfigure tzdata` |
| 5 | Install Magic Mirror | Execute installer script |
After installation completes, customize your display by editing the `config/config.js` file, then reboot to apply changes.
Setting Up Remote Access via SSH
Since you’ll likely want to work on your Raspberry Pi mirror project from the comfort of your computer rather than being tethered to a separate keyboard and monitor, setting up SSH (Secure Shell) access becomes essential.
SSH transforms your Raspberry Pi into a wireless workstation, freeing you from physical connections while maintaining full development control.
Here’s how to establish remote access:
- Enable SSH – Run `sudo raspi-config`, navigate to “Interfacing Options,” and select “SSH.” Reboot your Pi afterward to apply changes.
- Find your Pi’s IP address – Use `hostname -I` on the Pi’s terminal or check your router’s connected devices list.
- Connect remotely – From your computer’s terminal, enter `ssh pi@
` and use the default password `raspberry` unless you’ve changed it.
Ensure both devices are on the same network for successful connection.
Disassembling Your Display
Now that you’ve established remote access to work comfortably on your project, you’ll need to prepare the display that will become your smart mirror.
To disassemble your display, start by carefully using a prying tool to separate the monitor from its housing. Apply heat if necessary to soften stubborn adhesive bonds.
Remove components systematically: bezel, rear housing, driver board, control board, and speakers. Keep everything organized to avoid losing small parts.
Instead of forcing plastic housing apart, drill small holes to prevent screen damage.
Place screws and components in labeled containers since different parts use various hardware sizes.
After completing the disassembly, inspect all components thoroughly. Verify your driver and control boards remain intact—they’re essential for your smart mirror’s proper functionality.
Creating the Mirror Housing
You’ll need to build a sturdy frame that houses both your monitor and mirror while providing proper ventilation for your Raspberry Pi.
Start by constructing an inner frame slightly larger than your monitor’s dimensions, using wood glue and clamps to create a secure structure.
Once your frame’s ready, you can focus on mounting techniques that’ll keep your mirror securely positioned while maintaining easy access to your monitor’s ports.
Frame Construction Methods
Three essential measurements will determine your mirror housing’s success: monitor width, height, and depth. Cut your acrylic two-way mirror slightly larger than the monitor dimensions to guarantee complete coverage.
Frame construction methods require precision and proper technique for professional results.
Follow these critical steps:
- Cut outer frame pieces with 45-degree angles at each end and secure them around the inner housing to sandwich the mirror properly.
- Apply painter’s tape along cutting lines when working with glass to minimize shattering and achieve cleaner edges.
- Use 3D brackets to firmly secure the mirror between frame and monitor, preventing movement or misalignment.
Secure the inner housing using wood glue and clamps, adding optional corner screws for extra stability.
Mirror Mounting Techniques
Four mounting techniques will transform your cut frame pieces into a professional mirror housing. First, measure your monitor size accurately and mark the mirror accordingly to prevent cutting errors that’ll reduce the mirror’s lifespan.
Apply painter’s tape along your marked cutting line to achieve clean edges and minimize shattering during the cutting process.
Next, construct your inner housing from wood by measuring and cutting pieces 1.5 inches larger than your monitor dimensions. Secure these pieces using wood glue and clamps for a sturdy foundation.
For the outer frame, cut four pieces with 45-degree angles at each end, creating a professional finish that sandwiches the mirror securely between the frame and monitor.
Finally, use 3D brackets to firmly secure the mirror within the frame, ensuring stability and protection from accidental damage during assembly.
Mounting Hardware Components
Once you’ve gathered all your materials, guaranteeing the hardware components properly becomes critical to creating a professional-looking smart mirror that’ll withstand daily use.
The mounting hardware components require careful attention to guarantee your smart mirrors function reliably for years.
Follow these essential steps for secure assembly:
- Secure the Raspberry Pi – Use M3 nylon bolts, nuts, and hexagon standoff pillars to mount your Raspberry Pi and display components, creating a stable and durable foundation.
- Attach the display – Apply double-sided VHB foam tape to mount your display to the black card, then cover the back with duct tape for protection and improved aesthetics.
- Align components precisely – Drill eight mounting holes through both acrylic and black card simultaneously to prevent scratches and guarantee perfect alignment.
Installing MagicMirror² Software
Now that you’ve mounted your hardware components, you’ll need to download and install the MagicMirror² software to bring your mirror to life.
You’ll start by running a simple installation script that handles most of the setup automatically.
Once the installation completes, you’ll configure the default modules to display essential information like time, weather, and news feeds.
Download and Install Software
The heart of your smart mirror project lies in the MagicMirror² software, which transforms your Raspberry Pi into an interactive display platform.
You’ll need to download and install this essential software to bring your mirror to life.
To get started with the installation process:
- Run the automated installer – Open your terminal and execute: `bash -c $(curl -sL https://raw.githubusercontent.com/MichMich/MagicMirror/master/installers/raspberry.sh)` to clone the repository and handle everything automatically.
- Wait for completion – The installation takes 10-30 minutes depending on your Pi’s performance and network speed.
- Test your setup – Navigate to the MagicMirror directory and run `npm run start` to launch the default interface.
You’re now ready to customize your smart mirror experience.
Configure Default Modules
With MagicMirror² successfully installed on your Raspberry Pi, you’ll find several default modules already configured and ready to display information. The default configuration includes essential Mirror modules like Clock, Calendar, Weather, and News Feed that create a functional smart mirror experience.
You can customize these modules by editing the `config/config.js` file. Each module offers specific positioning options to control where information appears on your display:
| Position | Location | Best For |
|---|---|---|
| top_bar | Full width top | Current time/date |
| top_left | Upper left corner | Weather info |
| top_right | Upper right corner | Calendar events |
You’re free to modify, remove, or reposition these Mirror modules according to your preferences, creating a personalized information display that suits your daily routine.
Customizing Display Modules
Once you’ve assembled your Raspberry Pi mirror’s hardware, you’ll want to tailor the display modules to match your specific needs and preferences.
Customizing your smart mirror’s interface involves modifying the `config/config.js` file, where you’ll adjust parameters like position, size, and module-specific settings.
Here’s how to personalize your display modules:
- Edit the config file to modify existing modules such as Clock, Weather, Calendar, and News Feed by changing their respective settings and display positions.
- Add new modules by downloading them into the modules folder and updating the configuration to specify their placement on your mirror.
- Integrate third-party modules from the community by following repository installation instructions and configuring API keys for real-time data features.
Programming Weather and Calendar Features
After customizing your display modules, programming weather and calendar features transforms your smart mirror into a dynamic information hub that keeps you informed about daily essentials.
Start by obtaining an API key from OpenWeatherMap to access current weather data. Use JavaScript and the Processing IDE to create a sketch that retrieves and formats this information, displaying temperature, conditions, and weather icons.
For calendar integration, connect to Google Calendar using OAuth 2.0 authentication to pull upcoming events directly to your mirror.
Modify the `config/config.js` file in Magic Mirror software to include both modules, setting update intervals and display positions.
Programming weather and calendar features requires regular testing through your Raspberry Pi’s terminal to guarantee error-free functionality and proper data updates.
Final Assembly and Testing
Programming your mirror’s software features sets the stage for bringing all physical components together into a functional smart mirror.
Now you’ll complete the final assembly and prepare for testing. Start by drilling through your clear acrylic, black card, and two-way mirror simultaneously to maintain perfect alignment and prevent surface scratches.
Next, secure your display to the mirror’s back using VHB double-sided foam tape to eliminate movement.
Follow these essential steps:
- Mount the frame and attach all mirror components securely
- Connect cables linking your Raspberry Pi to the display control board and power
- Install a heat sink on your Raspberry Pi for temperature management during extended use
Finally, test the smart mirror by launching Magic Mirror and verifying all modules display correctly behind the mirror.
Frequently Asked Questions
What Raspberry Pi Do I Need for a Magic Mirror?
You’ll need a Raspberry Pi 3 Model A+ for your magic mirror project. It provides sufficient processing power to run MagicMirror software efficiently while maintaining good performance for displaying modules and handling user interactions.
How Much Does a Raspberry Pi Smart Mirror Cost?
You’ll spend $150 to $300 building a Raspberry Pi smart mirror. Core components like the Pi ($25-35) and monitor ($100-150) form most costs, while materials and optional enhancements add another $50-100.
How to Make a Small Smart Mirror?
You’ll need a Raspberry Pi, portable monitor, two-way mirror, and mounting hardware. Install Raspberry Pi OS, set up MagicMirror software, customize your display modules, then mount everything behind the mirror.
How to Make an AI Mirror?
You’ll need a Raspberry Pi with camera, microphone, and display behind two-way glass. Install voice recognition software, implement machine learning algorithms, and connect to internet for real-time data updates and personalized interactions.


Leave a Reply