You’re tired of juggling multiple apps to control your smart devices, and you’re concerned about privacy when using commercial hubs. Building your own home automation system isn’t just about saving money—it’s about gaining complete control over your data and creating a system that works exactly how you want it. The process requires careful planning and the right components, but there’s a critical first decision that’ll determine everything else.
What Is Home Automation and Why Build Your Own Hub?

While smart homes once seemed like science fiction, home automation has become an accessible reality that lets you control lighting, heating, security systems, and appliances from a single central hub.
You can purchase off-the-shelf solutions, but building your own hub offers compelling advantages that make the DIY approach worthwhile.
Creating your own home automation system gives you complete control over customization, security, and costs.
You’ll avoid vendor lock-in while gaining flexibility to integrate various devices and protocols like Zigbee and Wi-Fi.
Unlike commercial systems that rely on cloud services, your DIY hub can operate offline, protecting your privacy and preventing unauthorized data access.
You’ll also save money by avoiding expensive proprietary systems and can expand gradually as your budget allows.
Planning Your Smart Home System Architecture
You’ll need to map out how your devices connect to each other and identify which communication protocols work best for your specific setup.
Start by selecting controller hardware that can handle your current devices while leaving room for future expansion.
Plan your network topology carefully, considering factors like signal range, device compatibility, and the physical layout of your home to guarantee reliable communication between all components.
Device Network Topology Design
Before diving into smart device purchases, designing your network topology sets the foundation for a reliable and scalable home automation system. Your device network topology design should center on a star configuration, where all smart home devices connect to your central hub. This approach simplifies troubleshooting and enhances communication efficiency.
Plan for multi-protocol support, incorporating both Zigbee and Wi-Fi capabilities to accommodate diverse devices. Implement a mesh network specifically for Zigbee devices, enabling them to relay messages and extend coverage throughout larger spaces.
Consider physical placement carefully, minimizing interference from walls and obstructions that weaken wireless signals.
Utilize network segmentation to isolate your DIY Home Automation devices from other network traffic, improving both security and performance while maintaining essential hub communication.
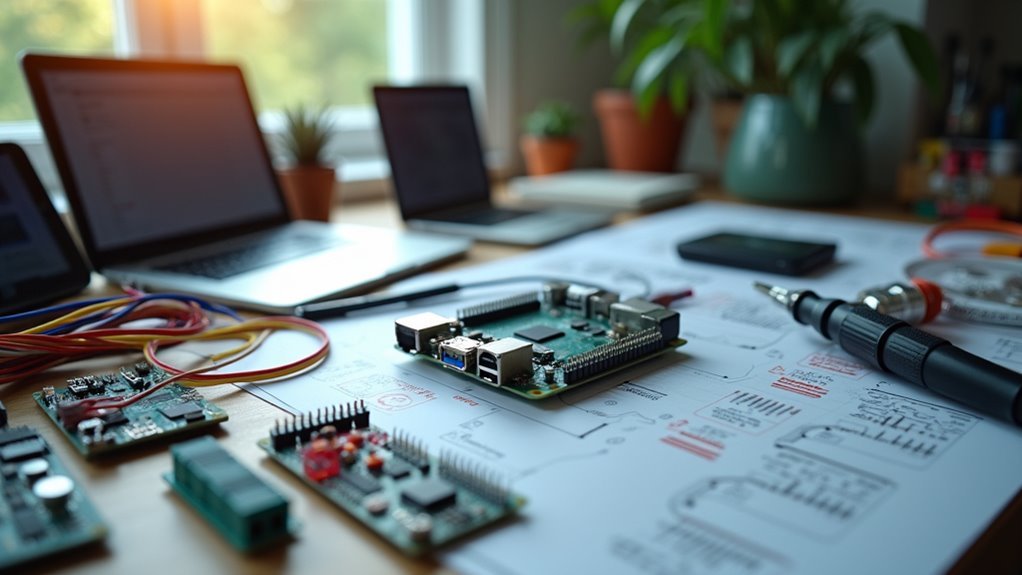
Controller Hardware Requirements Selection
Once you’ve established your network topology, selecting the right controller hardware becomes critical for your home automation hub’s performance and reliability.
Your Raspberry Pi 4 serves as the central brain, so you’ll need to choose components that guarantee stable operation and efficient processing.
Here are the essential hardware requirements:
- Memory Configuration: Select a Raspberry Pi 4 with at least 4GB RAM, though 8GB provides peak performance for handling multiple devices simultaneously.
- Storage Solution: Use an SSD instead of microSD cards to achieve faster read/write speeds and better reliability during frequent updates.
- Network Interface: Connect via wired Ethernet for maximum stability and reduced latency compared to Wi-Fi.
- Power and Connectivity: Install a robust power supply and USB Zigbee coordinator like ConBee II for seamless device integration.
Communication Protocol Strategy Planning
After securing your controller hardware, developing an extensive communication protocol strategy becomes your next priority for building a reliable smart home ecosystem. Your DIY Smart Home success depends heavily on choosing the right communication protocols. Wi-Fi and Zigbee dominate the smart home landscape due to their broad device compatibility and availability.
For Zigbee networks, you’ll need a coordinator like a USB stick with antenna to create mesh networking capabilities. This mesh design allows devices to relay signals, extending your communication range considerably.
| Protocol | Range | Power Usage | Mesh Support | Device Limit |
|---|---|---|---|---|
| Wi-Fi | High | High | No | Router-dependent |
| Zigbee | Medium | Low | Yes | 65,000+ |
| Z-Wave | Medium | Low | Yes | 232 |
| Thread | Medium | Low | Yes | 250+ |
| Bluetooth | Low | Very Low | Limited | 7-8 |
Consider interference from 2.4GHz devices and prioritize local control options for enhanced privacy and reliability in your communication protocol strategy planning.
Mapping Your Home Layout for Device Placement
When building an effective home automation system, you’ll need to create a thorough floor plan that serves as your blueprint for device placement. This visual guide guarantees ideal positioning of sensors, switches, and other smart devices throughout your space.
Use software like Visio or free alternatives to design your 2D home representation. Here’s your mapping process:
Digital floor planning tools streamline your smart home design process, creating precise layouts for optimal device positioning and future system modifications.
- Identify high-priority areas – Focus on living rooms, entryways, and frequently used spaces for maximum automation impact.
- Mark power sources and existing wiring – Confirm devices connect easily without interference from walls or furniture.
- Plan device accessibility – Position smart components where they’re reachable for maintenance.
- Document everything – Create a reference system for future troubleshooting and system expansions.
This detailed mapping foundation makes your home automation implementation smoother and more effective.
Identifying Devices and Appliances to Automate
You’ll find countless devices throughout your home that can benefit from automation, from basic lighting and climate control to kitchen appliances and entertainment systems.
Start by identifying which automation projects will have the biggest impact on your daily routine and energy consumption.
Focus on common household device types like smart switches, thermostats, and security cameras before expanding to more specialized appliances that require additional integration work.
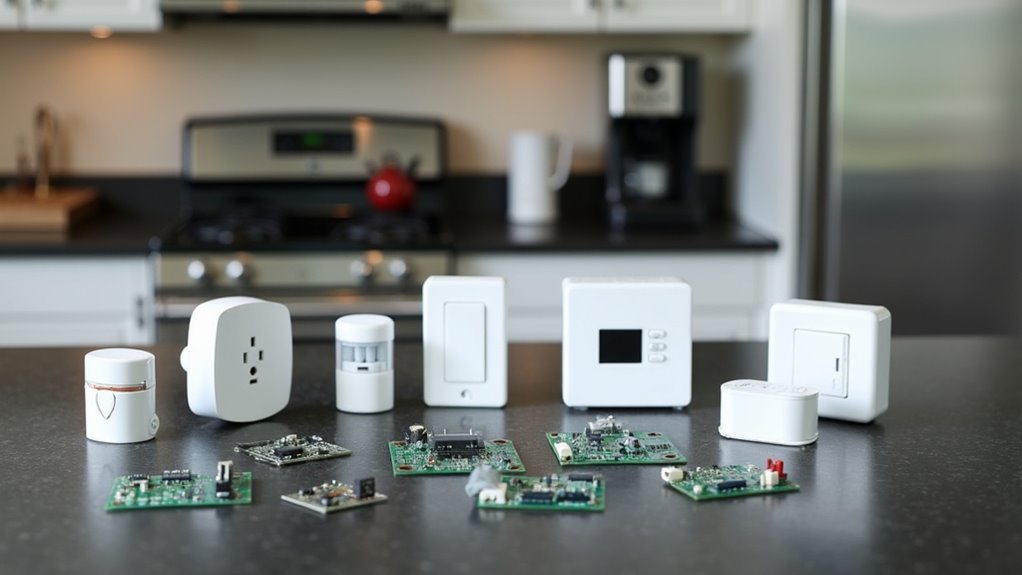
Common Household Device Types
Smart home automation transforms ordinary household items into intelligent, controllable devices that respond to your commands and preferences.
You’ll find countless opportunities throughout your home to implement automation solutions that enhance comfort, security, and energy efficiency.
The most common device types you can automate include:
- Lighting systems – Smart bulbs offer remote control, dimming capabilities, and color changes to create perfect ambiance.
- Climate control – Smart thermostats automatically adjust temperature based on occupancy and preferences for ideal comfort and energy savings.
- Security equipment – Smart locks, cameras, and motion sensors provide remote monitoring and instant alerts for unusual activity.
- Kitchen appliances – Smart ovens and refrigerators enable remote operation and monitoring.
Smart plugs make any traditional appliance controllable by converting standard outlets into automated power sources you can manage remotely.
Prioritizing Automation Projects
How do you determine which devices deserve your attention first in your home automation journey?
Start by prioritizing automation projects based on ease of implementation and immediate impact. Begin with simple devices like smart lights and electrical plugs before tackling complex systems like HVAC or security.
Consider your budget and DIY skill level when selecting projects. Don’t overextend yourself with complicated installations that exceed your capabilities.
Focus on devices that support common protocols like Zigbee or Wi-Fi to guarantee seamless integration with your existing smart home ecosystem.
Evaluate which areas you’re comfortable automating versus those that make you hesitant. Address any concerns early to create a more satisfying automation experience.
This strategic approach guarantees you’ll build momentum with successful projects while developing the confidence to tackle more advanced automation challenges.
Understanding Sensors and Monitoring Capabilities
Dozens of tiny sensors can transform your ordinary home into an intelligent, responsive environment that adapts to your daily routines and preferences.
These devices collect environmental data that becomes the foundation for automated responses throughout your living space.
Essential sensors you’ll want to incorporate include:
- PIR sensors for motion detection in hallways and rooms
- DHT11/DHT22 sensors for monitoring temperature and humidity levels
- Contact sensors for tracking door and window status
- CT sensors for measuring power consumption and production
Arduino and ESP8266 devices offer excellent flexibility for DIY sensor projects, integrating seamlessly with platforms like Home Assistant.
The key lies in transforming physical information into actionable data that triggers appropriate automation scenes, ensuring your devices respond intelligently to changing conditions.
Exploring Control Methods and Device Management
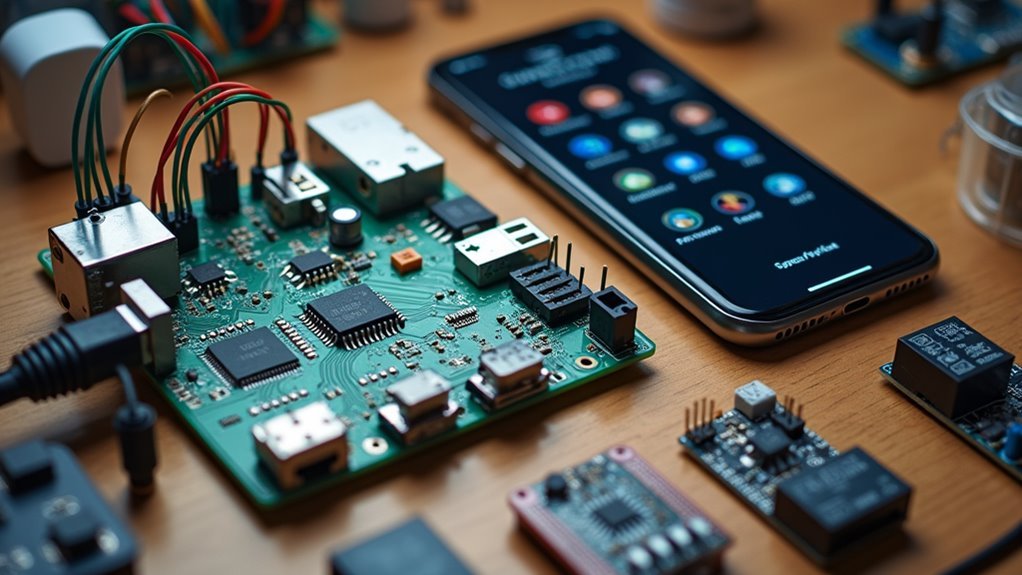
Once you’ve gathered environmental data through your sensor network, you’ll need reliable control methods to manage and communicate with your connected devices.
Consider Wi-Fi, Zigbee, and Bluetooth protocols to determine what works best for your specific setup. A Raspberry Pi serves as an excellent central controller, hosting your automation server locally without cloud dependencies.
Implement MQTT for efficient device communication, enabling real-time updates and commands throughout your system. Use relays to control electrical devices like lights and HVAC systems, automating tasks through user-defined triggers or schedules.
Home Assistant offers powerful device management features that let you group devices, create automation scenes, and monitor system performance.
This guarantees ideal user experience while maintaining complete control over your smart home ecosystem.
Safety Considerations for DIY Electrical Work
While building your home automation system can be exciting, working with electrical components requires serious attention to safety protocols.
These safety considerations aren’t optional—they’re vital for protecting yourself and your property.
Before starting any electrical work, follow these critical steps:
- Turn off power at the circuit breaker before beginning any electrical modifications or installations.
- Use properly rated tools that match the specific voltage and current requirements of your project.
- Secure all connections with proper insulation to prevent short circuits and fire hazards.
- Follow local electrical codes to guarantee your installation meets regulatory requirements.
If you’re uncertain about any aspect of your project, don’t hesitate to consult a licensed electrician.
Professional guidance can prevent dangerous mistakes that could compromise your safety.
Choosing Your Central Controller Hardware
After establishing proper safety protocols, you’ll need to select the central controller that serves as your home automation system’s brain. The Raspberry Pi 4 with 8GB RAM stands out as an excellent choice, offering powerful processing capabilities and compatibility with Home Assistant.
| Hardware Option | Best Use Case |
|---|---|
| Raspberry Pi 4 8GB | Budget-friendly, versatile setup |
| Mini PC | Enhanced performance needs |
| Regular PC | Maximum processing power |
For peak performance, replace the standard microSD card with an SSD to achieve faster read/write speeds and improved durability. Prioritize wired RJ45 connectivity over Wi-Fi for superior stability. Consider adding a USB Zigbee dongle to expand your compatible device range considerably.
Setting Up Raspberry Pi as Your Home Automation Brain
You’ll need specific hardware components to transform your Raspberry Pi into a powerful home automation controller.
The setup process involves preparing your hardware properly and installing the right software to manage your smart devices.
Let’s examine what hardware you’ll require and how to get Home Assistant running on your system.
Hardware Setup Requirements
Four essential components form the foundation of your Raspberry Pi home automation hub: the board itself, storage, power, and connectivity.
Getting your hardware running properly guarantees reliable automation performance.
Here’s what you’ll need:
- Raspberry Pi 4 with 8GB RAM – Provides excellent performance for handling multiple smart devices and complex automations.
- MicroSD card (minimum 16GB) – Stores your operating system and automation data with room for expansion.
- 5V/3A USB-C power supply – Delivers stable power to prevent system crashes during critical automation tasks.
- Ethernet cable or Wi-Fi connection – Guarantees reliable internet connectivity for device communication.
Consider adding a Zigbee or Z-Wave USB dongle to expand compatibility with various smart home protocols and devices.
Installing Home Assistant
With your hardware components ready, Home Assistant Operating System (HAOS) transforms your Raspberry Pi into a powerful automation brain.
Download the HAOS image and flash it onto your microSD card using Balena Etcher. Insert the card into your Raspberry Pi, connect an HDMI display, and plug in the power supply. The initial boot process takes several minutes, so be patient.
Once booted, access Home Assistant by directing to http://homeassistant.local:8123 in your web browser using the Pi’s IP address. Follow the setup instructions to create your account and configure your environment, including Wi-Fi connection if you’re not using Ethernet.
For best performance, consider upgrading to a Raspberry Pi 4 with 8GB RAM and an SSD installation for enhanced stability and responsiveness.
Selecting and Programming Smart Devices
When building your home automation system, selecting compatible devices forms the foundation of a reliable and efficient setup.
Compatible device selection establishes the cornerstone of any robust home automation system that delivers consistent, long-term performance.
You’ll want to prioritize smart devices that work seamlessly with Home Assistant and support local control, reducing your dependence on cloud services.
Here’s your essential checklist for programming and selecting devices:
- Verify protocol compatibility – Choose smart bulbs and plugs that support Zigbee or Wi-Fi protocols for smooth integration.
- Use MQTT messaging – Implement this lightweight protocol for efficient communication between devices and your hub.
- Flash open-source firmware – Install Tasmota or ESPHome on ESP-8266/ESP-32 based devices for enhanced customization.
- Maintain regular updates – Keep firmware current to improve security, fix bugs, and access new features.
This approach guarantees ideal performance and maximum control over your automation setup.
Communication Protocols and Network Setup
When setting up your home automation hub, you’ll need to decide between wireless and wired connections for your smart devices.
Wireless protocols like Zigbee, Wi-Fi, and Bluetooth offer flexibility and easier installation, while wired options provide more reliable connections but require running cables throughout your home.
Your choice will greatly impact how smoothly your devices integrate into a unified network and communicate with your central hub.
Wireless Vs Wired
Although both wireless and wired communication protocols can power your home automation hub, each approach offers distinct advantages that’ll shape your smart home’s performance and flexibility.
Wired connections like Ethernet deliver consistent performance with lower latency, making them perfect for critical Home Assistant operations. Meanwhile, wireless options provide installation flexibility without extensive wiring requirements.
Here’s what you should consider when choosing your setup:
- Zigbee devices excel in mesh networking, extending range through signal relaying.
- Wi-Fi offers convenience but may struggle with coverage in larger homes.
- Wired connections resist interference and provide rock-solid reliability.
- Hybrid approaches combine both protocols for peak performance.
You’ll often find that mixing wired infrastructure for core components with wireless Zigbee devices for sensors creates the most robust automation system.
Device Network Integration
Building a successful device network integration starts with selecting the right communication protocols that’ll form the backbone of your smart home ecosystem. Zigbee and Wi-Fi stand out as excellent choices, offering extensive device support and local control without cloud dependency.
Zigbee’s mesh network design creates robust connectivity, allowing devices to communicate even when some are beyond direct hub range. For Wi-Fi devices, implement a mesh system to guarantee stable coverage throughout larger homes where signal strength varies.
Integrate a USB Zigbee coordinator with your Raspberry Pi to enable seamless communication between Zigbee devices and your hub.
Prioritize devices compatible with open-source platforms like Home Assistant, which simplifies integration and expands automation possibilities without vendor lock-in, giving you complete control over your smart home network.
Building Enclosures for Custom Sensors
Since protecting your custom sensors from environmental damage extends their lifespan and maintains accurate readings, you’ll need to create robust enclosures that balance protection with functionality.
When designing enclosures for your custom sensors, follow these essential guidelines:
- Choose appropriate materials – Select plastic, wood, or 3D-printed components based on your environment’s demands and durability requirements.
- Size for all components – Account for wires, LEDs, and power supplies alongside the sensor to prevent overcrowding and connection issues.
- Ensure proper ventilation – Include air circulation features for temperature-sensitive sensors to prevent overheating and maintain measurement accuracy.
- Design for accessibility – Create easy access points for maintenance and sensor replacement without requiring complete disassembly.
Include mounting options like brackets or screw holes for secure installation on walls, ceilings, or furniture.
Creating Automation Scenes and Workflows
With your sensors properly housed and protected, you can now focus on making them work together intelligently through automation scenes and workflows.
These predefined configurations let multiple devices respond simultaneously to specific triggers, creating seamless experiences like dimming lights while adjusting your thermostat with one command.
You’ll want to incorporate conditional logic into your workflows, ensuring actions occur only when appropriate circumstances exist. For instance, outdoor lights should activate only when it’s dark and you’re home.
Home Assistant makes creating these automation scenes straightforward using YAML configurations, requiring minimal coding knowledge.
Schedule your scenes to activate at specific times—lights turning on at sunset or heating systems warming your home before arrival.
Integrate voice control for even greater convenience, allowing simple voice commands to trigger complex automation sequences.
Testing and Expanding Your Homemade System
Once you’ve established your automation scenes and workflows, testing becomes your critical next step to guarantee reliable system performance.
Testing your automation setup thoroughly ensures every component works seamlessly together before you rely on the system daily.
You’ll need a methodical approach when testing and expanding your system to avoid complications.
Follow this essential testing and expanding strategy:
- Test individual components – Verify each device functions properly before integrating them into your complete setup.
- Use Home Assistant’s monitoring tools – Identify network stability issues and device compatibility problems through built-in diagnostics.
- Add devices gradually – Introduce one device at a time while documenting performance and integration processes.
- Implement MQTT protocol – Enhance your network’s responsiveness and reliability for improved device communication.
Participate in community forums regularly to share experiences and gain valuable insights for optimizing your homemade automation system effectively.
Frequently Asked Questions
How Much Does It Cost to Build a Home Automation System?
You’ll spend $100-$2,000 building a home automation system. Basic setups with Raspberry Pi and smart plugs cost around $100, while extensive systems with multiple sensors, cameras, and integrated devices can reach $2,000 depending on complexity.
Do You Need a License for Home Automation?
You don’t need a license for personal home automation systems in most areas. However, you’ll need permits for electrical work and should check local regulations, especially for commercial distribution or municipal service connections.
Is Home Automation Profitable?
You’ll find home automation highly profitable with the market growing 27.1% annually. You can reduce energy costs by 30%, and products pay for themselves within years through savings, creating strong profit potential.
What Is the Best Platform for Home Automation?
You’ll find Home Assistant is the best platform for home automation. It’s open-source, supports local control for privacy, integrates with Zigbee and Z-Wave protocols, and offers extensive community support.


Leave a Reply