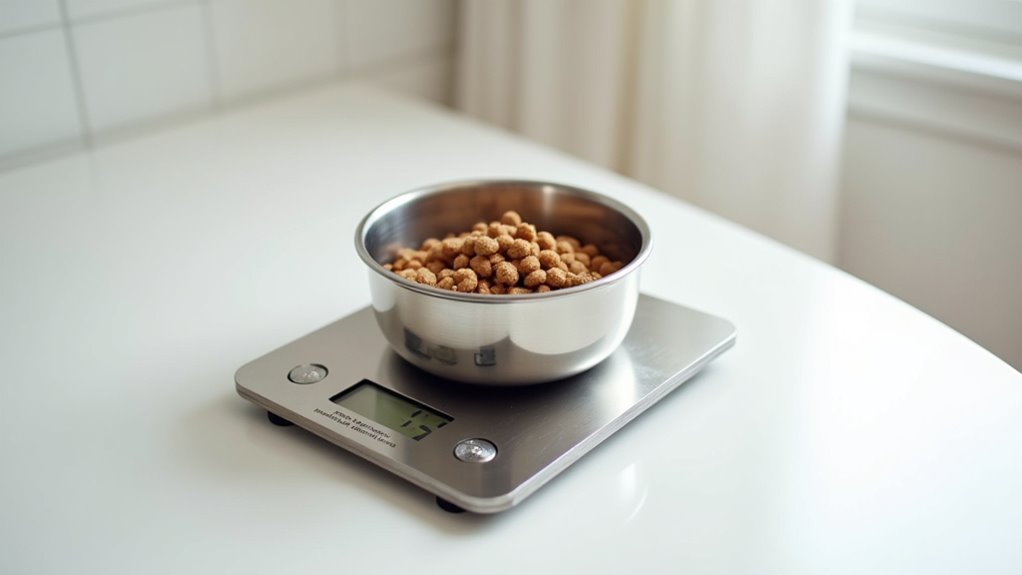
You’ve probably noticed your pet’s eating habits aren’t as predictable as you’d like – sometimes they barely touch their food, other times they devour everything in sight. Building your own pet bowl scale might seem complicated, but it’s actually a straightforward weekend project that’ll transform how you monitor your furry friend’s health. With just a few components and basic woodworking skills, you can create a system that reveals surprising patterns about your pet’s appetite and behavior you never knew existed.
Benefits of Monitoring Your Pet’s Food Intake
While many pet owners rely on guesswork when filling their furry friend’s bowl, monitoring your pet’s food intake provides essential health benefits that can extend their life and improve their well-being.
When you track how much dog food your pet consumes, you’re actively preventing obesity, which affects 56% of dogs nationwide. This monitoring helps you spot appetite changes that might signal health problems requiring veterinary care.
You’ll establish consistent feeding routines that prevent over or underfeeding while managing calories effectively.
This becomes significant if your pet has special dietary requirements recommended by your veterinarian. With precise measurements, you can make informed decisions about portions and maintain your pet’s ideal health through better nutritional management.
Essential Materials and Components for Your Scale
Building an accurate homemade pet bowl scale requires specific components that work together to measure your pet’s food intake reliably.
Creating a reliable pet bowl scale demands precise components that seamlessly integrate to accurately track your furry friend’s daily nutrition.
You’ll need a 10kg bar Load Cell as your primary weighing component, which accurately measures the weight of food or water in your dog bowls. The Sparkfun Load Cell Amplifier is essential for amplifying the Load Cell’s signals into readable data for your circuit.
For construction, use 1/2-inch MDF to create a durable yet lightweight frame that houses all electronics effectively.
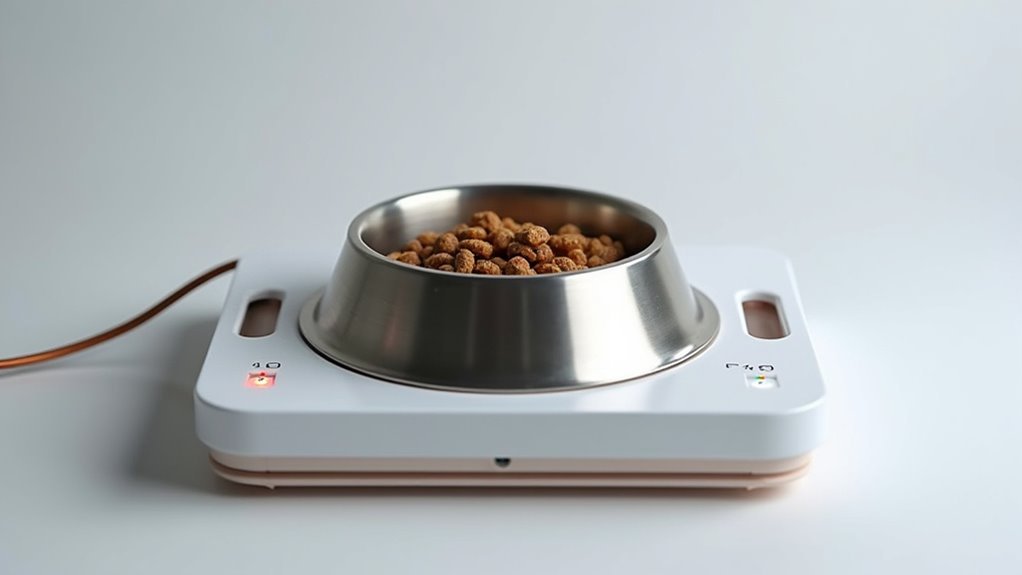
Install a waterproof lid featuring a water curtain design to shield sensitive components from spills and moisture damage.
Finally, incorporate a NodeMCU microcontroller to enable Wi-Fi connectivity, allowing real-time data transmission so you can monitor your pet’s feeding patterns remotely through wireless communication.
Choosing the Right Load Cell for Pet Bowl Applications
Three key factors determine whether your load cell will deliver accurate readings for your pet bowl scale project.
You’ll need to match the weight capacity to your pet’s needs, typically between 5kg to 10kg to handle food and water combined.
Consider these essential specifications:
- Weight capacity: A 10kg bar load cell offers excellent value and easy mounting for DIY applications
- Accuracy level: Look for 0.1% to 0.5% precision to track consumption changes reliably
- Environmental resistance: Choose moisture and corrosion-resistant models for kitchen environments
Don’t forget compatibility with your amplifier system.
Sparkfun’s Load Cell Amplifier works seamlessly with most standard load cells, enabling smooth integration into your monitoring setup for cloud data transmission and feeding analysis.
Microcontroller Selection and Programming Requirements
Once you’ve secured your load cell, selecting the right microcontroller becomes your next critical decision for creating a functional pet bowl scale. The NodeMCU stands out as an ideal microcontroller choice, offering built-in Wi-Fi capabilities for seamless cloud connectivity and data transmission.
| Programming Aspect | Requirement |
|---|---|
| Development Environment | Arduino IDE with basic coding knowledge |
| Sensor Integration | Load Cell Amplifier data conversion |
| Communication Protocol | MQTT for real-time feeding notifications |
| Error Management | Robust handling for sensor/connectivity issues |
You’ll need to program your microcontroller to read analog weight data from the Load Cell Amplifier and convert it into trackable digital values. Implementing MQTT protocol enables real-time updates on your pet’s feeding habits, while proper error handling guarantees reliable system operation despite potential malfunctions.
Designing the Wooden Base Structure
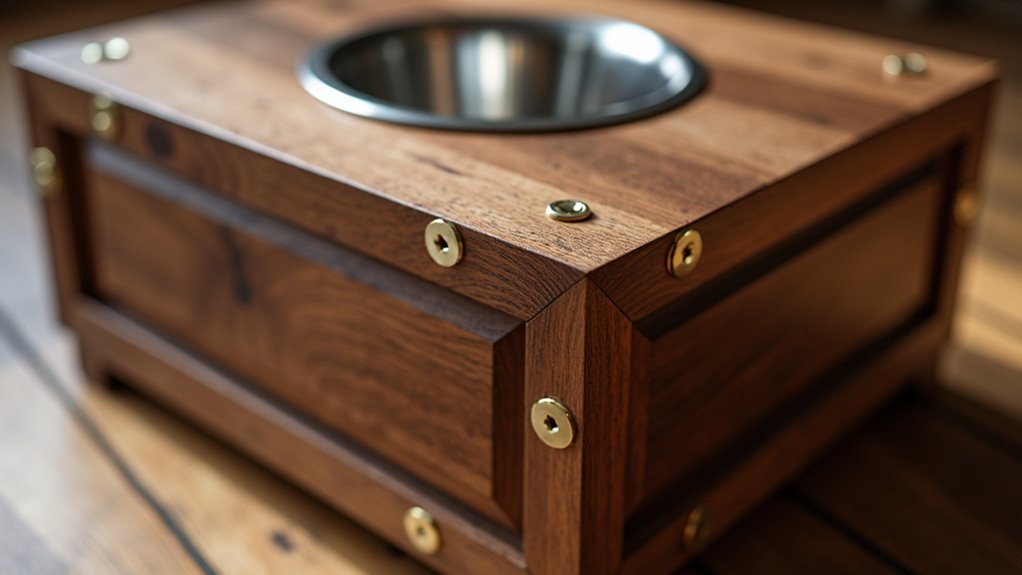
When designing your wooden base structure, you’ll want to start with 1/2-inch MDF as your primary material since it provides the perfect balance of durability and lightweight construction for housing your electronic components. This foundation will support your dog’s food monitoring system effectively.
Your design should incorporate these essential features:
Three critical elements ensure your wooden base performs reliably: spillage protection, organized cable management, and proper load cell mounting.
- Top plate with lip – Prevents water spillage into electronics when your dog drinks
- Diagonal cable channels – Creates neat access holes for USB or power cables
- Two-plate load cell configuration – Enables simple assembly and reliable weight measurements
After cutting your pieces, sand all edges thoroughly to eliminate splinters and create a professional appearance.
The smooth finish guarantees your dog’s safety while providing an attractive base that complements your feeding area’s aesthetics.
Cutting and Preparing MDF Components
You’ll need to select the right MDF sheet thickness and quality for your pet bowl scale’s structural requirements.
Once you’ve marked your measurements, use precision cutting techniques with a table saw or circular saw to guarantee clean, accurate cuts that fit your load cell and bowl dimensions perfectly.
After cutting, you must focus on proper edge finishing methods, including sanding and surface preparation, to create a professional-looking base that’s ready for assembly and painting.
MDF Sheet Selection
Building a reliable pet bowl scale starts with selecting the right MDF foundation, and choosing 1/2-inch thick sheets gives you the perfect balance between structural integrity and manageable weight. This thickness won’t compromise stability while keeping your finished scale easy to move and position.
When shopping for MDF sheets, you’ll want to prioritize quality and consistency. Here’s what to look for:
- Smooth surface texture – inspect for any warping or uneven areas that could affect accuracy
- Dense composition – avoid sheets with visible voids or loose fibers that weaken structural integrity
- Standard dimensions – verify measurements match your project plans to minimize waste
The right MDF sheets form the backbone of your pet monitoring system, so investing in quality materials upfront saves you headaches during assembly and guarantees long-term durability.
Precision Cutting Techniques
Since accurate measurements determine your scale’s functionality, start by marking all cut lines with a pencil and straight edge before making any cuts.
Use a compass to draw precise circles corresponding to your bowl sizes. These precision cutting techniques guarantee professional results.
For straight cuts, you’ll need a table saw or circular saw to cut MDF sheets to exact dimensions.
When creating circular holes for bowls, switch to a jigsaw with a fine-tooth blade to prevent splintering and achieve smooth edges.
Always secure your MDF firmly on a stable work surface using clamps. This prevents movement during cutting, enhancing both precision and safety.
After cutting all components, sand the edges with fine-grit sandpaper to remove rough spots and create smooth finishes before assembly.
Edge Finishing Methods
After completing your precision cuts, focus on creating professional-grade edges that’ll withstand daily use and moisture exposure. Your pet bowl scale’s durability depends heavily on proper edge treatment.
Start by sanding all cut edges using progressively finer grits:
- Begin with 80-grit sandpaper to remove rough spots and splinters
- Progress to 150-grit for smoothing the surface texture
- Finish with 220-grit sandpaper for a silky-smooth final touch
Apply edge banding to exposed MDF edges using a hot iron for seamless adhesion. This creates a moisture barrier that’s essential for pet feeding equipment.
Before painting, seal all edges with primer to prevent water absorption and guarantee strong paint adhesion. This preparation step greatly extends your scale’s lifespan in humid kitchen environments.
Installing the Load Cell and Mounting Hardware
You’ll need to position your 10kg load cell at the center of your MDF base to guarantee accurate weight readings from your pet’s feeding bowl.
Mount the load cell securely using the provided hardware, making sure it’s level and properly aligned with the bowl placement area above.
Follow the manufacturer’s torque specifications when tightening the mounting bolts to prevent damage while guaranteeing a stable connection.
Load Cell Positioning
Proper load cell positioning forms the foundation of your pet bowl scale’s accuracy and reliability.
You’ll need to center the load cell precisely under where your pet’s bowl will sit to prevent off-axis loading that causes inaccurate readings.
When positioning your load cell, focus on these critical elements:
- Secure mounting – Drill and counterbore mounting holes in your 1/2-inch MDF base to prevent the load cell from shifting during use.
- Flat surface alignment – Confirm your mounting surface is completely level and stable for consistent measurements.
- Bowl centering – Mark the exact center point where the bowl will rest to maintain proper weight distribution.
Double-check your alignment before finalizing the installation, as repositioning becomes difficult once everything’s secured.
Hardware Mounting Process
Three essential steps transform your load cell from a loose component into a functional weighing platform.
First, secure the load cell to your mounting plate using screws, positioning it evenly to guarantee accurate weight distribution across its surface.
Next, prepare your 1/2-inch MDF top plate by drilling mounting holes for the load cell. Make sure you counterbore these holes for flush mounting, preventing any protrusions that could interfere with your pet’s bowl. The MDF’s lip design prevents water spillage into the electronics below.
After mounting, connect the load cell wires to your amplifier following the specified wiring diagram for correct polarity.
Finally, test your assembly using a known weight to verify accuracy before completing installation.
Circuit Assembly and Wiring Connections
Before connecting any components, gather your load cell wires and strip approximately 5-6mm of insulation from each end using wire strippers.
You’ll need to create secure connections between your Load Cell and the amplifier to guarantee accurate weight readings for your pet bowl scale.
Once you’ve prepared the wires, attach them firmly to your Load Cell Amplifier according to the manufacturer’s wiring diagram.
Test each connection using a multimeter to verify you’re getting stable signal transmission.
Design your circuit layout carefully to prevent interference:
- Keep power wires separate from signal wires whenever possible
- Mount the Load Cell securely to your scale platform to eliminate movement
- Route wires away from potential electromagnetic interference sources
Finally, upload the appropriate firmware to your microcontroller to enable communication between components.
Waterproofing and Electronics Protection
Since pet bowls inevitably spill water and food particles around the feeding area, you’ll need to safeguard your electronics from moisture damage that could render your scale inoperable.
Design a waterproof enclosure with a lip on the top plate to prevent spillage from reaching your circuitry below. Create a water curtain barrier that shields sensitive components from direct moisture exposure during your pet’s feeding time.
Apply silicone caulk around all openings and joints in your enclosure to establish a watertight seal. Choose corrosion-resistant materials like coated metals or durable plastics for any exposed components near the water bowl area. These materials enhance your scale’s longevity against moisture.
Regularly inspect your enclosure for wear signs or water damage to maintain effective protection over time.
Calibrating Your Pet Bowl Scale System
Once you’ve completed the waterproofing, you’ll need to calibrate your pet bowl scale system to guarantee it provides accurate weight measurements.
Start by performing an initial setup that establishes a zero baseline with an empty bowl, then test the system using known weights to verify measurement accuracy.
This calibration process is essential because even small errors can greatly impact tracking your pet’s food intake and eating patterns over time.
Initial Scale Setup
When you’re ready to set up your homemade pet bowl scale, start by securely mounting the load cell to the base platform. Confirm it’s perfectly level and stable, as any tilting will compromise measurement accuracy. This foundation step determines your scale’s overall performance.
Next, connect the load cell wires to your amplifier following the manufacturer’s wiring diagram. Proper connections are essential for reliable signal transmission between components.
For ideal setup results:
- Use a known weight during initial testing to verify your connections work properly
- Check that all mounting hardware is tightened securely before proceeding
- Verify the load cell responds correctly to weight changes
After completing these steps, you’ll have a solid foundation ready for the calibration process, guaranteeing your pet feeding monitor delivers consistent, accurate measurements.
Weight Measurement Accuracy
With your scale’s hardware properly connected and mounted, calibration becomes your next priority for achieving precise weight measurements.
You’ll need known weights to calibrate your system, adjusting readings until they match actual weights within ±0.1 kg tolerance. Use a high-quality Load Cell Amplifier like Sparkfun’s model and follow their specific calibration guidelines for best results.
Place your load cell on a stable, level surface to prevent measurement errors from uneven weight distribution. This matters especially when monitoring your dogs bowls during feeding.
Recalibrate every few weeks or after environmental changes like temperature or humidity shifts, which affect sensor performance.
Document each calibration session, recording weights used and resulting readings. This tracking helps you adjust your process and maintain accuracy over time.
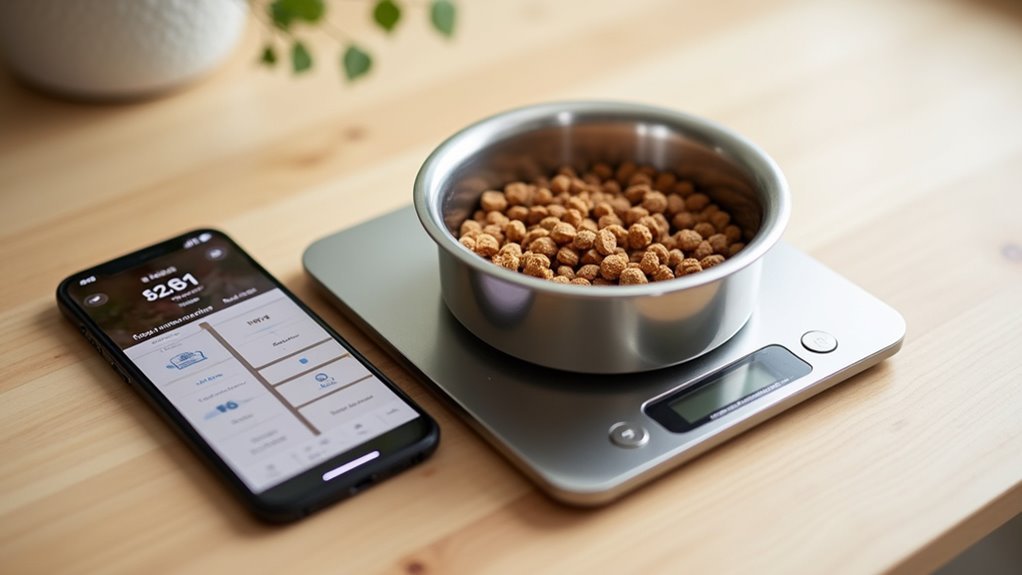
Setting Up Cloud Data Integration
Since your homemade pet bowl scale generates valuable weight data, you’ll want to transmit this information to the cloud for thorough tracking and analysis.
Configure your NodeMCU or similar microcontroller to connect the load cell to Wi-Fi, establishing seamless communication through MQTT protocol. This lightweight messaging system efficiently transfers weight readings to your chosen platform.
Select reliable cloud services like Google Firebase or AWS IoT to store and analyze your pet’s drinking patterns over time. These platforms offer:
Cloud platforms like Firebase and AWS IoT provide robust infrastructure for storing pet drinking data with built-in analytics capabilities.
- Real-time data storage with automatic synchronization
- Analytics tools for tracking drinking habits and trends
- Scalable infrastructure that grows with your monitoring needs
Implement timestamp notifications to alert you when refills occur or drinking activity happens.
Regularly test data transmission for reliability, ensuring weight readings accurately correspond with your pet’s actual drinking behaviors for ideal feeding monitoring.
Testing Weight Accuracy and Sensor Response
After establishing cloud connectivity for your pet bowl scale, you’ll need to verify that your load cell delivers accurate weight measurements.
Start by calibrating with known weights, applying incremental loads and recording outputs to check for consistent, linear response across your measurement range.
Mount your load cell securely on a flat, stable surface to minimize external influences that could affect readings.
Use a multimeter to measure output voltage at various weights, helping identify any discrepancies from your amplifier circuit.
Test weight accuracy systematically by comparing scale readings to actual known weights. The readings should correspond closely to expected values.
Plan to recalibrate your scale every few weeks to maintain precision and reliability, ensuring your pet’s feeding data remains trustworthy over time.
Finishing Touches and Safety Considerations
You’ll need to seal all electronic components completely to prevent water damage from food spills or cleaning.
Choose non-toxic sealants and paints since your pet will interact directly with the scale’s surfaces.
Create a stable platform with rounded edges and secure mounting to eliminate any safety hazards for your furry friend.
Sealing Electronic Components
When building your homemade pet bowl scale, protecting the electronic components from moisture becomes critical for both functionality and safety. Pet water spills and humidity can quickly damage sensitive circuits, so proper sealing electronic components is vital.
Here are key protection measures you’ll need to implement:
- Apply silicone caulk around all edges where electronic components meet the housing to create a watertight seal and prevent moisture infiltration.
- Use waterproof paint on MDF surfaces to enhance durability and prevent water absorption that could reach internal electronics.
- Install proper wire insulation on all connections to prevent short circuits and electrical hazards in your pet environment.
Regular inspection of these sealing measures maintains your scale’s long-term functionality and safety standards.
Non-Toxic Material Selection
Beyond protecting your electronics from moisture, the materials you choose for your pet bowl scale must prioritize your pet’s health and safety.
Select water-based paints and sealants as non-toxic finishes to minimize harmful chemical exposure. Choose food-grade silicone or BPA-free plastics for components contacting food or water, ensuring consumption safety.
Use untreated wood or wood treated with natural oils like hemp or coconut oil as barriers before applying paints. This prevents harmful substances from leaching into your pet’s environment.
Verify that adhesives and caulks are labeled non-toxic and pet-safe, since common adhesives emit dangerous fumes.
Regularly inspect your scale for wear and tear, replacing damaged components immediately to prevent toxin exposure and maintain safety standards.
Stable Scale Platform
A stable platform forms the foundation of your pet bowl scale’s accuracy and safety.
You’ll want to construct it from sturdy 1/2-inch MDF to prevent flexing under your pet’s weight and food portions. This material provides the reliability needed for consistent measurements, especially important for dogs of varying sizes.
Essential stability features include:
- Water-resistant finish – Apply paint or sealant to protect against spills and moisture damage
- Anti-slip protection – Install rubber feet or felt strips underneath to prevent sliding and floor scratches
- Reinforced joints – Add extra screws or brackets at vital connection points for enhanced durability
Regular inspections guarantee your stable scale platform remains functional.
Check for wear, damage, or loose components that could compromise accuracy. This maintenance keeps your feeding monitoring system dependable for tracking your pet’s dietary needs effectively.
Troubleshooting Common Scale Issues
Even the most carefully constructed homemade pet bowl scale can develop issues that affect its performance. When troubleshooting your pet’s feeding monitoring system, start with the fundamentals. Confirm your load cell’s properly calibrated, as incorrect settings lead to inaccurate weight readings that compromise monitoring accuracy. Check for mechanical obstructions or debris on the platform that interfere with measurements.
| Issue | Cause | Solution |
|---|---|---|
| Inaccurate readings | Poor calibration | Recalibrate load cell |
| Fluctuating measurements | Uneven surface | Place on stable, flat surface |
| System failures | Loose connections | Secure all electrical connections |
Verify all electrical connections remain secure and corrosion-free, as damaged wiring disrupts functionality and data transmission. If you’re experiencing fluctuating readings, relocate the scale to a flat, stable surface. Regular firmware updates for integrated components like NodeMCU confirm peak performance and system compatibility.
Frequently Asked Questions
How Do You Make a Dog Food Bowl Ant Proof?
Elevate your dog’s bowl 3-4 inches high and surround it with a water moat. Use stainless steel bowls, apply diatomaceous earth around the area, and clean regularly with vinegar solution.
Should Dog Water Bowl Be Bigger Than Food Bowl?
You should make your dog’s water bowl bigger than their food bowl. Dogs need constant access to fresh water for proper hydration, and larger bowls reduce refilling frequency while encouraging increased water consumption.
How to Make a Dog Bowl at Home?
Choose stainless steel or ceramic materials for safety. Measure your dog’s size to determine proper bowl dimensions. Cut a circular hole in wood for raised feeding. Add non-slip rubber feet and decorate with pet-safe paints.
What Material Is Best for a Dog Water Bowl?
You’ll find stainless steel works best for your dog’s water bowl. It’s durable, rust-resistant, and won’t harbor bacteria like plastic can. It’s also dishwasher-safe, making cleaning effortless for you.


Leave a Reply