
You’ll transform an ordinary mirror into a cutting-edge smart display that shows weather updates, calendar appointments, and news headlines—all while maintaining the sleek appearance of a regular mirror. This project doesn’t require advanced technical skills, though you’ll need patience and attention to detail during assembly. The most challenging part isn’t the coding or software installation; it’s achieving the perfect balance between functionality and that seamless, futuristic look you’re after.
Gathering Your Smart Mirror Components and Tools
Building a smart mirror requires careful preparation of both hardware components and construction tools before you begin assembly.
Proper preparation of hardware components and construction tools is essential before starting your smart mirror assembly project.
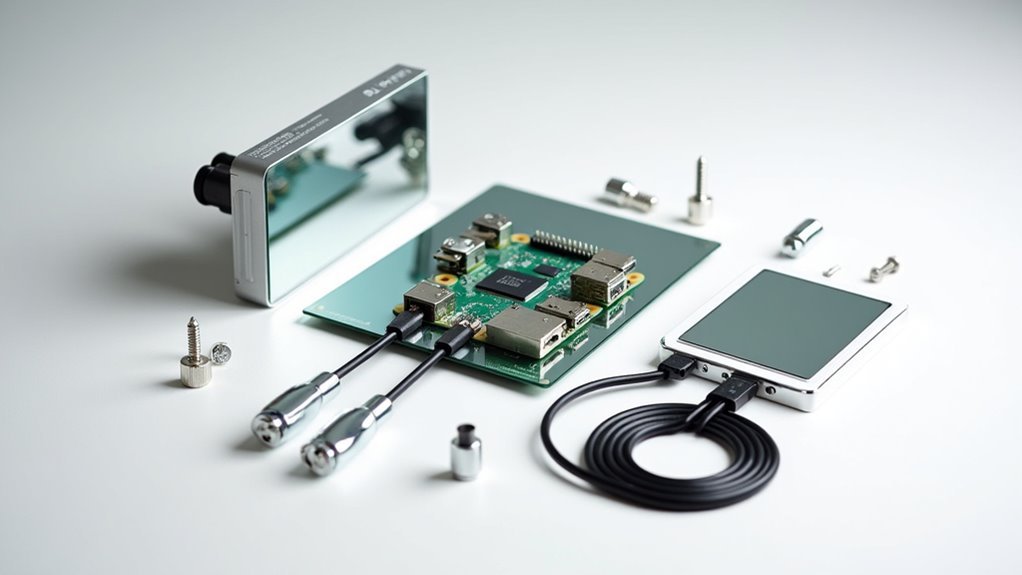
You’ll need an 18 x 24 picture frame as your foundation, paired with an Acer 1080p monitor for the display. The Raspberry Pi kit serves as your smart mirror’s brain, controlling all operations.
For the reflective surface, acquire an 18 x 24 two-way glass mirror, or choose acrylic mirror as a budget-friendly alternative.
Essential tools include a drill, saw, pocket hole jig, hot glue gun, and tape measure for precise construction.
Don’t forget supporting materials: wood screws, wood glue, super glue, and black acrylic paint for a professional finish.
Consider optional items like a 90-degree HDMI adapter for cleaner cable management and keep a secondary computer ready for Raspberry Pi setup.
Setting Up Your Raspberry Pi Operating System
You’ll need to install the Raspberry Pi operating system and configure remote access to power your smart mirror project.
Start by downloading the Raspberry Pi Imager from the official website and flash your chosen OS onto a microSD card, selecting the appropriate version like Raspberry Pi OS 32-bit for headless operation.
During the initial setup process, you’ll configure your hostname, username, password, and enable SSH access for seamless remote management over your network.
Initial OS Installation
Before transforming your Raspberry Pi into a functional mirror display, you need to establish a solid foundation with the operating system installation.
Start by downloading the Raspberry Pi Imager from the official website. This tool will help you install the operating system onto your microSD card efficiently.
Select Raspberry Pi OS (32-bit) for headless operation, ensuring you enable SSH during setup for remote access capabilities.
Insert your microSD card into your computer and use the imager to flash the OS—this process typically takes 10 to 30 minutes depending on your card’s speed.
Once flashing completes, safely eject the microSD card and insert it into your Raspberry Pi.
Power on the device and follow the on-screen instructions to configure your hostname, username, password, and Wi-Fi credentials.
Remote Access Configuration
After completing the initial OS installation, configuring remote access becomes your next priority for seamless mirror display development.
You’ll need to enable SSH access on your Raspberry Pi computer by creating an “ssh” file (without extension) in the boot partition of your SD card. This allows remote connections without requiring a physical monitor.
Next, establish network connectivity by creating a “wpa_supplicant.conf” file in the same boot partition. Include your country code, WiFi SSID, and password for automatic wireless connection.
Once your Pi boots, you can SSH into it using the default username and password (“pi” and “raspberry”). Remember to update your system immediately with `sudo apt update` and `sudo apt upgrade` for security.
- Create SSH file in boot partition for remote access
- Configure wireless settings through wpa_supplicant.conf file
- Connect via SSH client using default credentials
Installing the Magic Mirror Software Framework
Installing the Magic Mirror software framework involves several key steps that’ll transform your Raspberry Pi into a fully functional smart mirror.
Begin by downloading the repository from https://github.com/MichMich/MagicMirror and make sure Node.js and NPM are installed on your Raspberry Pi, as they’re essential for running the application.
After cloning the repository, navigate to the Magic Mirror directory in your terminal and run `npm install` to install all necessary dependencies.
Next, you’ll need to configure your setup by copying the sample configuration file using `cp config/config.js.sample config/config.js`, then modify it to customize module settings and display preferences.
Finally, set up autostart functionality with PM2 by running `pm2 start mm.sh`, making certain your Magic Mirror software launches automatically whenever your Raspberry Pi boots up.
Configuring Your Display Settings and Resolution
Once you’ve installed the Magic Mirror software, you’ll need to adjust your display settings to guarantee crisp visuals through your two-way mirror.
Navigate to the “Raspberry Pi Configuration” tool in the Preferences menu to modify your screen resolution and orientation. For smart mirror setups, 1920×1080 resolution delivers ideal clarity with high-definition monitors.
You can also configure settings through command line using `sudo raspi-config`, then selecting “Display Options.”
Confirm your HDMI connection works properly by adding `hdmi_force_hotplug=1` to the `/boot/config.txt` file, forcing your Raspberry Pi to use HDMI output.
- Access display settings through Preferences menu or `sudo raspi-config` command
- Set resolution to 1920×1080 for best visual quality
- Add HDMI force hotplug setting and reboot to apply changes
Building the Custom Frame Structure

Now you’ll create a sturdy frame structure that houses your mirror display components securely.
Start by cutting your plywood strips to the specified dimensions, then move on to assembling the frame using pocket holes for maximum strength.
You’ll finish the process by applying paint and adding functional elements like ventilation and cable management.
Cutting Wood Pieces
Creating the custom frame structure begins with precise measurements and cuts to confirm your mirror display fits perfectly.
Start by cutting four strips of 3/4-inch plywood for your frame components. You’ll need two long sides at 1.75 inches wide by 25.75 inches long, and two short sides at 1.5 inches wide by 18.25 inches long.
For ideal fitting, verify your short strips are at least 25 inches minimum length to accommodate the frame’s overall dimensions.
- Use a pocket hole jig to drill holes along the wood strip edges for secure assembly with pocket screws
- Apply black acrylic paint to all cutting wood pieces and allow complete drying before frame assembly
- Check measurements twice before cutting to confirm your frame dimensions are accurate
Assembling Frame Components
Gather your painted frame strips and pocket screws to begin the assembly process. When assembling frame components, start by connecting the longer strips to form your back frame structure. Insert pocket screws through the pre-drilled holes, ensuring corners remain perfectly square for secure stability.
| Component | Length | Purpose |
|---|---|---|
| Long strips | 25.75″ | Vertical supports |
| Short strips | 18.25″ | Horizontal supports |
| Pocket screws | Various | Assembly hardware |
Tighten each connection firmly but don’t overtighten, as this could split the plywood. Once your frame’s assembled, drill small holes for ventilation to prevent moisture buildup behind your mirror. Cut a small notch at the bottom edge for cable management if you’ll be adding LED lighting later.
Painting and Finishing
Before you can achieve a professional-looking smart mirror, you’ll need to paint your frame components with black acrylic paint to match your picture frame’s aesthetic. This painting step guarantees visual cohesion between all elements of your display.
Apply multiple coats for even coverage and a polished finish that’ll enhance your mirror’s overall appearance. Don’t rush this process—allow each coat to dry completely before adding the next one. Pay special attention to edges and corners, as these details contribute greatly to the professional look you’re aiming for.
- Complete drying: Let painted pieces dry fully before assembly to prevent smudging during construction
- Edge coverage: Paint all frame edges and corners for a finished, professional appearance
- Secure attachment: Use wood screws and glue for durable assembly once painting is complete
Preparing and Installing the Two-Way Mirror
When you’re ready to install your two-way mirror, you’ll need to select high-quality glass that reflects 70% of light while allowing 30% to pass through. Cut the two-way mirror to fit your frame’s exact dimensions, ensuring perfect alignment with the monitor behind it for a seamless appearance.
Before installation, thoroughly clean both sides to remove dust or smudges that could compromise the reflective quality and displayed information visibility.
Install the mirror using appropriate adhesives or mounting hardware to secure it firmly in place, preventing any shifting over time.
Finally, black out the mirror’s back with paint or specialized material. This enhancement boosts reflectivity and creates a polished, professional finish for your smart mirror setup.
Disassembling Your Monitor for Installation
Now you’ll need to carefully disassemble your monitor to access its internal components for the smart mirror build.
Start by removing the monitor’s stand and any screws securing the outer casing, keeping track of their locations for potential reassembly later.
You’ll then separate the housing components by gently prying apart the bezel from the rear casing, exposing the display panel and circuit boards inside.
Remove Stand and Screws
Make sure your monitor is completely unplugged before you begin the disassembly process.
Place your monitor face down on a soft surface to protect the screen from scratches during removal.
Locate the screws on the back of your monitor using a Phillips head screwdriver – you’ll typically find them near the stand attachment point and along the casing edges.
- Detach the stand carefully – Pull the stand away from the mounting bracket, gently wiggling if it’s tightly fitted.
- Remove all securing screws – Take out screws from the rear housing and bezel to access internal components.
- Handle internal components gently – Avoid damaging wiring or components that could affect your monitor’s functionality during disassembly.
Separate Housing Components
Once you’ve removed the stand and screws, you’ll need to carefully separate the housing components to access the LCD panel inside.
Use a prying tool to gently separate the bezel from the rear housing, working your way around the edges slowly. Don’t force anything apart – if you encounter resistance, heat may be needed to loosen adhesive holding the components together.
As you disassemble your monitor, keep all screws and parts organized for later reassembly.
Carefully disconnect any cables attached to the driver board and control board without pulling on the wires.
Once separated, verify you have all necessary components: bezel, rear housing, driver board, control board, and speakers. These parts are essential for proper installation behind your two-way mirror.
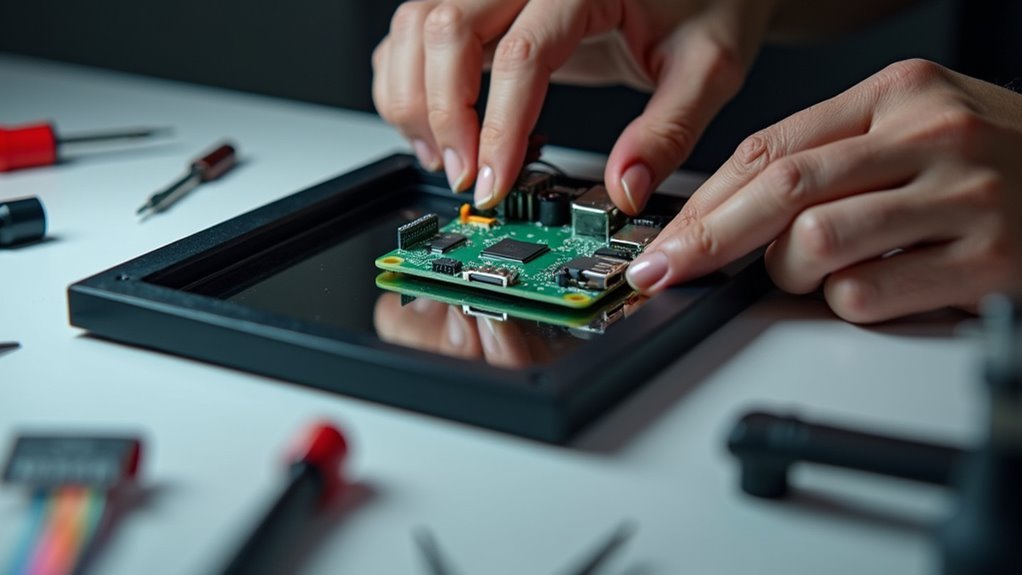
Mounting the Display Components Securely
Before you can create a functional mirror display, you’ll need to properly secure all components to prevent shifting or damage during use. Start by disassembling your monitor, removing the stand and screws to access the display components for secure mounting.
Use VHB double-sided foam tape to attach the display firmly to your black card, creating a strong bond that prevents movement.
Next, drill eight mounting holes through the clear acrylic, black card, and two-way mirror simultaneously. This guarantees proper alignment and prevents scratches.
Secure your Raspberry Pi and display components using nylon bolts, nuts, and hexagon standoff pillars for maximum stability without cracking.
- Use VHB tape for vibration-resistant adhesion between surfaces
- Drill all mounting holes simultaneously to maintain perfect component alignment
- Choose nylon hardware to prevent cracking delicate materials during assembly
Connecting the Raspberry Pi to Your Display
With your display components securely mounted, you’ll establish the connection between your Raspberry Pi and display using an HDMI cable. Connect the cable from your Raspberry Pi’s HDMI port directly to your monitor’s HDMI input.
Power on your Raspberry Pi and switch your monitor to the correct HDMI input channel.
Boot your Raspberry Pi first, then select the appropriate HDMI input on your monitor to establish the connection.
If you’re using a portable monitor with USB-C power, connect the power cable to your Raspberry Pi for combined power and display functionality.
Consider using a 90-degree HDMI adapter to reduce cable strain and improve accessibility behind your monitor.
After booting up your Raspberry Pi, verify the display’s recognized properly. You might need to adjust resolution settings in the Raspberry Pi configuration if the output doesn’t display correctly initially.
Customizing Your Smart Mirror Interface
Now that you’ve connected your Raspberry Pi to the display, you’ll want to personalize your Smart Mirror’s interface to match your preferences and needs.
You can select from various built-in modules like weather, calendar, and news feeds by editing the configuration file, which serves as the control center for your mirror’s layout and functionality.
Additionally, you’ll discover numerous third-party add-ons that can transform your basic mirror into a voice-activated smart hub with features like Spotify integration and custom notifications.
Module Selection Options
The Magic Mirror software’s greatest strength lies in its modular design, allowing you to transform a basic reflective surface into a personalized information hub.
With countless module selection options available, you can customize their interface to match your daily needs perfectly. Your smart mirror will look exactly how you envision it, whether you prefer minimal elegance or information-rich displays.
Essential modules include weather updates, calendars, and news feeds, while community-created third-party modules expand possibilities dramatically.
You’ll find options for Spotify integration, traffic updates, and personal reminders that enhance functionality beyond basic information display.
- Core modules: Weather, calendar, clock, and news provide essential daily information
- Third-party additions: Spotify playlists, traffic data, and smart home controls offer advanced features
- Customization freedom: Position modules anywhere using top_bar, top_left, or bottom_right placements
Configuration File Setup
Once you’ve selected your desired modules, you’ll need to modify the `config/config.js` file to bring your smart mirror vision to life.
This configuration file serves as your mirror’s control center, where you’ll customize display settings for each module’s position and appearance.
The default modules—Clock, Calendar, Weather, and News Feed—can be easily enabled or disabled through this file.
You’ll adjust parameters like position and image size by adding specific entries for each module you want to display.
If you’ve downloaded third-party modules, place them in the `modules` folder and reference them in your configuration file.
After making any changes to `config.js`, restart your Magic Mirror application to see your customizations reflected on the display.
Third-Party Add-Ons
While the default modules provide essential functionality, you’ll discover endless possibilities by exploring third-party add-ons that can transform your smart mirror into a truly personalized interface.
The Magic Mirror repository offers countless third-party modules that enhance your display with weather updates, news feeds, and calendar integrations.
Installing these modules is straightforward: download the files into your “modules” folder and modify your `config/config.js` file. Popular options include “NowPlayingOnSpotify” for music displays, MMM-Weather for detailed forecasts, and MMM-Remote-Control for web-based management.
- Browse the Magic Mirror wiki regularly for new module releases and installation guides
- Join Discord communities for troubleshooting support and configuration advice
- Experiment with different combinations to create your perfect interface
Adding Modules for Weather, Calendar, and News
After completing your Magic Mirror’s basic setup, you’ll want to enhance its functionality by adding modules that display real-time information like weather forecasts, calendar events, and news updates.
You’ll start by modifying the `config/config.js` file in your Magic Mirror directory. For weather integration, use the `MMM-Weather` module and obtain an OpenWeatherMap API key. Add this key along with your location to the configuration.
The calendar module `MMM-Calendar` requires creating a Google Calendar API key through Google Developer Console. For news feeds, implement `MMM-Articles` module by adding RSS feed URLs from your preferred sources to the configuration.
Once you’ve completed these module configurations, restart your application using `pm2 restart mm` to display your updates.
Routing Cables and Final Assembly
With your modules configured and displaying information, you’re ready to tackle the physical assembly that transforms your project into a polished Magic Mirror. Start by securing your Raspberry Pi to the monitor using double-sided tape or VHB tape to prevent movement during use.
Next, focus on routing cables neatly at the frame’s back using hot glue and velcro cable ties or zip-ties to maintain a tidy appearance and prevent tangling.
- Cut a small notch at the bottom of the frame for cable passage without compromising aesthetics
- Drill ventilation holes in the back frame to guarantee proper airflow and prevent overheating of electronic components
- Perform a thorough final assembly check to verify all connections are secure and functioning before closing the frame
Testing Your Smart Mirror Functionality
How effectively will your smart mirror perform once it’s fully assembled? Start by powering on your device by connecting the Raspberry Pi and monitor, ensuring all cables are securely attached and the system boots without issues.
Verify the Magic Mirror software installation by checking if the display outputs default modules like clock, weather, and calendar on screen. Test the responsiveness of added modules by interacting with voice commands for Alexa or Google Assistant to confirm they work seamlessly.
Confirm your Magic Mirror displays core modules correctly and voice assistant integration responds smoothly to commands.
Ensure two-way mirror reflects properly by checking information visibility in various lighting conditions, adjusting brightness settings as needed.
Conduct a performance check by reviewing load times for different modules and troubleshooting any slow response times or software configuration errors.
Personalizing Settings and Advanced Features
Once your smart mirror displays properly, you’ll want to customize it to match your specific needs and preferences. You can personalize your mirror by modifying the `config/config.js` file to adjust the display layout and customize the appearance of your interface.
The configuration file allows you to reposition modules, add new features, and remove unnecessary components. You can integrate third-party modules like weather displays, news feeds, or voice assistant capabilities such as Alexa or Google Home.
Additional hardware components like PIR sensors or microphones enable advanced features such as motion detection and voice commands.
Key personalization options include:
- Adjusting module positions within the configuration file for ideal viewing
- Installing community-created modules for enhanced functionality and new features
- Integrating voice assistant capabilities for hands-free control
Frequently Asked Questions
How to Make a Mirror at Home Easy?
You’ll need clean glass or acrylic, reflective spray paint, and a frame. Clean your surface thoroughly, apply the reflective coating evenly, let it dry completely, then mount it securely in your chosen frame.
How to Make a DIY 2 Way Mirror?
You’ll apply two-way mirror film to regular glass or buy pre-made two-way mirror glass. Mount it in a shadowbox frame, guarantee adequate lighting behind it, and install your electronics securely.
How to Make a DIY One-Way Mirror?
You’ll need a two-way mirror that reflects 70% of light while allowing some through. Mount it in a frame with a monitor behind, seal edges, and manage cables for your one-way mirror display.
How to Make a Small Smart Mirror?
You’ll need a Raspberry Pi, compact monitor, and two-way mirror. Install Magic Mirror software, mount the monitor behind the mirror, customize with weather and calendar modules, then add motion sensors for activation.


Leave a Reply