You’re about to transform an ordinary mirror into a sophisticated information hub that’ll revolutionize your daily routine. With the ESP32’s versatility and a carefully selected array of components, you can create a sleek device that displays weather forecasts, calendar events, and smart home controls right where you need them most. But before you start assembling hardware, there’s a critical decision that’ll determine whether your project succeeds or becomes an expensive mistake.
Essential Components and Hardware Requirements

When building an ESP32 mirror for your home information hub, you’ll need several key components to create a functional and visually appealing device.
The DFRobot ESP32 FireBeetle Development Board acts as your main controller, managing all connected sensors and displays. You’ll require a two-way mirror with approximately 70% reflection and 30% transparency, allowing your display to show through while maintaining mirror functionality.
For information display, an I2C 20×4 LCD module connects easily to your ESP32 and shows weather updates and system notifications. The DHT22 sensor provides accurate temperature and humidity readings for your smart mirror.
Add visual appeal with an analog RGB LED strip controlled through MOSFETs for customizable lighting effects. Finally, design a custom 3D-printed housing to securely contain all components while maintaining a professional appearance.
Understanding ESP32 Capabilities for Mirror Projects
You’ll find the ESP32’s built-in Wi-Fi and Bluetooth capabilities make it perfect for creating connected smart mirrors that can display real-time information and respond to remote commands.
The microcontroller’s I2C support lets you easily connect multiple sensors like temperature, light, and gesture detection modules while simultaneously controlling LED strips and displays.
Its compatibility with Arduino IDE means you can quickly program custom features and integrate web services to transform your mirror into a thorough home information hub.
ESP32 Hardware Features
The ESP32’s powerhouse design makes it an exceptional foundation for creating sophisticated smart mirror systems that can handle multiple demanding tasks simultaneously. You’ll harness dual-core processing power that effortlessly manages sensor data collection while maintaining responsive user interfaces. The built-in Wi-Fi and Bluetooth capabilities connect your mirror to smart home networks and enable remote data access.
| Feature | Capability | Mirror Application |
|---|---|---|
| Dual-Core CPU | Simultaneous processing | Real-time display updates |
| Wi-Fi/Bluetooth | Wireless connectivity | Smart home integration |
| Sensor Support | Temperature/humidity/gesture | Interactive controls |
| I2C Bus | Component integration | LCD displays |
| Arduino IDE | Easy programming | Custom features |
Your ESP32 supports various sensors including temperature, humidity, and gesture detection, creating truly interactive displays. The I2C bus allows seamless integration of LCD components for enhanced functionality, while Arduino IDE compatibility guarantees straightforward customization for your specific needs.
Programming and Integration
Building on these robust hardware capabilities, programming your ESP32-powered mirror becomes remarkably straightforward through modular code architecture and versatile integration options.
You’ll leverage the dual-core processing power to handle multiple tasks simultaneously, ensuring your mirror displays real-time weather data while processing touch inputs without performance hiccups.
Smart mirrors benefit tremendously from the ESP32’s integrated Wi-Fi and Bluetooth connectivity, allowing you to pull data from weather APIs, social media feeds, and calendar services.
You’ll implement modular programming using classes to organize different functionalities—gesture recognition, notification systems, and sensor readings—making code updates and maintenance effortless.
The I2C bus simplifies connecting sensors like DHT22 temperature modules and displays, while local data logging capabilities store user preferences and interaction history for truly personalized experiences.
Selecting the Right Display and Mirror Glass

Since your ESP32 mirror’s effectiveness depends heavily on the display and glass you choose, selecting components that work seamlessly together becomes critical for both functionality and aesthetics.
The right combination transforms your smart home information hub into a professional-looking fixture.
Consider these essential selection criteria:
- Display Selection: Choose a monitor or TV with remote control capabilities for seamless power management, avoiding visible buttons that disrupt the clean appearance.
- Mirror Glass Specifications: Opt for two-way mirror glass with 70% reflection and 30% transparency, using 4mm thickness for maximum durability and light transmission.
- Size Alignment: Confirm mirror glass dimensions match your display and any IR touch overlay precisely.
- Bezel Considerations: Select thin-bezel monitors to maximize visible display area through the mirror surface.
Building the Frame and Housing Structure
Once you’ve selected your display and mirror components, constructing a robust frame becomes your next essential step in creating a professional-grade information hub. You’ll need a frame width of at least 2.5 inches to effectively hide your monitor while ensuring structural integrity.
| Material | Width | Depth | Strength | Cost |
|---|---|---|---|---|
| Wood | 2.5-4″ | 2.5-5″ | Excellent | Medium |
| MDF | 2.5-4″ | 2.5-5″ | Very Good | Low |
| Plywood | 2.5-4″ | 2.5-5″ | Good | Low-Medium |
| Hardwood | 3-4″ | 3-5″ | Excellent | High |
| Pine | 2.5-3.5″ | 2.5-4″ | Good | Low |
When building your housing structure, use reinforced construction techniques with PVA glue and screws for durability. Paint the mirror’s back surface black to enhance reflective quality and improve appearance when your display’s off.
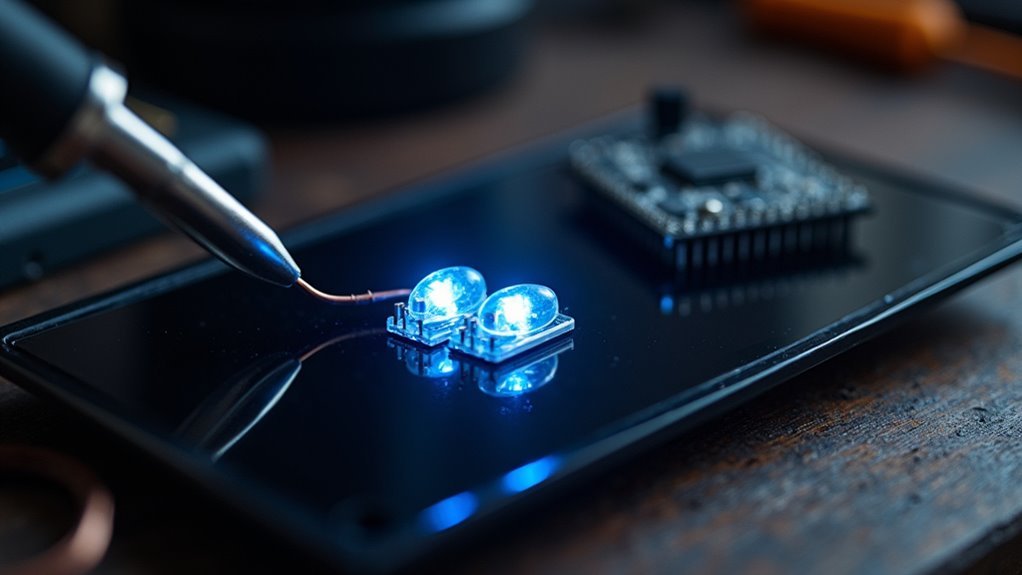
Wiring and Circuit Assembly

Now you’ll connect your ESP32 to all the components that’ll make your smart mirror functional.
Start with the power supply connections to guarantee stable operation, then wire your display and sensors using the proper GPIO pins and communication protocols.
This systematic approach prevents connection errors and creates a reliable foundation for your home information hub.
ESP32 Display Connections
While establishing the visual interface for your smart mirror requires careful attention to wiring protocols, you’ll find that connecting display components to the ESP32 follows straightforward I2C communication standards.
Your Development Board becomes a powerful home hub when you build one with proper display connections.
Connect your I2C 20×4 LCD module using these essential wiring steps:
- Wire the SDA pin of your LCD to GPIO 21 on the ESP32 for data transmission.
- Connect the SCL pin to GPIO 22 to establish the clock signal for I2C communication.
- Link the APDS9960 light sensor’s SDA and SCL pins to the same GPIO 21 and 22 respectively.
- Verify all components share common 3.3V power and GND connections for stable operation.
This smart home automation setup lets you keep track of information seamlessly.
Power Supply Wiring
Before you can bring your ESP32 smart mirror to life, you’ll need to establish a robust power supply foundation that guarantees consistent performance across all connected components.
Start by connecting your ESP32 development board to a stable 5V supply through a USB-C connection or regulated power adapter. Always connect the ESP32’s ground (GND) to your power supply’s ground, creating a common reference point for your entire circuit.
Verify that your power supply can deliver at least 1A to handle the ESP32 and any peripherals like LCD displays or sensors without voltage drops.
Before connecting external components, check their voltage and current requirements to prevent overloading the ESP32’s output capabilities.
Use appropriately gauged wires for power connections, choosing thicker wires for longer distances to minimize voltage loss and guarantee reliable operation.
Sensor Integration Setup
With your power foundation established, you’ll connect multiple sensors that transform your mirror into an intelligent information hub.
These components work together to create an interactive display that responds to your environment and gestures.
Here’s your sensor integration sequence:
- DHT22 Temperature Sensor – Connect the data pin to any digital GPIO, with VCC to 3.3V and GND to ground for climate monitoring.
- APDS9960 Light/Gesture Sensor – Wire SDA and SCL to GPIO 21 and 22 respectively, enabling gesture controls and ambient light detection.
- I2C 20×4 LCD Display – Use the same I2C pins as the APDS9960, ensuring you’ve set the correct I2C address in your code.
- RGB LED Strip – Connect the control wire to a PWM-capable GPIO pin with proper MOSFET switching for 12V operation.
Programming the ESP32 for Home Data Integration
Once you’ve assembled your ESP32 mirror hardware, you’ll need to program it for seamless home data integration using the Arduino IDE.
Start by adding the ESP32 board through the Preferences menu to begin developing your custom application.
You’ll integrate various data sources using specialized libraries. Use DHT libraries for temperature sensors and HTTP requests to fetch weather forecasts from APIs.
The ESP32’s I2C support simplifies connecting LCD displays and additional sensors without complex wiring.
Implement MQTT protocol through PubSubClient libraries to enable real-time communication with Home Assistant and other IoT platforms. This guarantees your mirror receives instant updates from your smart home ecosystem.
For historical tracking, write CSV files to the ESP32’s filesystem, creating local data logs for analyzing your home environment patterns over time.
Setting Up Wi-Fi Connectivity and Network Communication
Establishing reliable network connectivity forms the foundation of your ESP32 mirror’s smart home integration capabilities.
You’ll start by implementing Wi-Fi connectivity using the `WiFi.h` library, connecting to your network through `WiFi.begin(ssid, password)`. Monitor connection status with `WiFi.status()` in a loop until you achieve `WL_CONNECTED` status.
Your ESP32 supports multiple communication protocols for extensive network functionality:
- TCP/UDP protocols – Enable direct data exchange with other network devices and servers
- Web server capabilities – Host web interfaces using `WebServer.h` library for HTTP request handling
- MQTT integration – Implement lightweight messaging with `PubSubClient` library for real-time IoT communication
- Local network communication – Facilitate seamless data sharing between connected home devices
These networking features transform your mirror into a dynamic information hub.
Configuring Sensor Inputs and Environmental Monitoring
Building on your mirror’s network foundation, you’ll now integrate sensor inputs to create an all-inclusive environmental monitoring system.
Connect the DHT22 sensor to your ESP32 for accurate temperature and humidity readings, providing essential environmental data for your smart mirror.
Add the APDS9960 sensor to enable light detection and gesture controls, allowing your mirror to respond to user interactions and adjust brightness based on ambient conditions.
Display real-time data using an I2C 20×4 LCD module, giving users immediate feedback on home conditions.
Implement local data logging by storing sensor readings in CSV files, enabling you to track environmental changes over time.
Your ESP32’s Wi-Fi capabilities allow remote monitoring through platforms like Home Assistant, transforming your mirror into a comprehensive information hub that makes data-driven decisions accessible.
Creating the User Interface and Display Layout
Everything about your smart mirror’s success hinges on creating an intuitive user interface that seamlessly blends functionality with visual appeal.
Your smart mirror’s success depends entirely on crafting an intuitive interface that perfectly merges functionality with stunning visual design.
You’ll want to implement openHASP firmware to develop customizable layouts with interactive elements that respond naturally to user input.
Here’s your essential UI development roadmap:
- Integrate a 20×4 I2C LCD module to display real-time temperature, weather forecasts, and schedule information.
- Prioritize accessibility by positioning important information prominently and making LED color controls intuitive.
- Add APDS9960 gesture recognition to enable navigation through simple hand movements.
- Utilize modular programming structure for easy interface updates and feature additions.
This approach guarantees your mirror adapts to evolving user needs while maintaining clean, functional design principles.
Integrating Home Assistant and Smart Home Platforms
Once you’ve established your mirror’s interface foundation, connecting it to Home Assistant transforms your ESP32 project into a true smart home command center.
You’ll integrate your ESP32 using MQTT protocol, enabling real-time communication between your mirror and HA’s ecosystem. This connection allows your display to show live sensor data, weather updates, and device statuses instantly.
Install openHASP firmware on your ESP32 to create dynamic displays that respond to Home Assistant’s state changes.
You can configure IFTTT webhooks to trigger cross-platform automations, making your mirror interact with various smart devices seamlessly.
Leverage local weather APIs and other data sources while maintaining full Home Assistant integration.
This approach guarantees your information hub operates efficiently within your existing smart home infrastructure, providing centralized control and monitoring capabilities.
Adding Touch Controls and Gesture Recognition
User interaction elevates your ESP32 mirror from a passive display to an engaging smart home interface.
You’ll transform how you control your mirror by implementing both touch controls and gesture recognition, creating a futuristic experience that keeps your mirror surface pristine.
The APDS9960 sensor paired with your ESP32 enables contactless gesture control through simple hand movements.
For direct interaction, you can add capacitive touchscreen overlays or IR touch frames.
Here’s your implementation roadmap:
- Install APDS9960 sensor for gesture detection capabilities
- Implement modular coding structure with dedicated classes for input management
- Configure interrupt-based button handling for real-time responsiveness
- Combine touch and gesture inputs to eliminate physical buttons entirely
This dual-input approach guarantees prompt processing while maintaining your mirror’s clean aesthetic and enhanced user experience.
Power Management and Energy Efficiency
You’ll want to implement smart power management strategies to keep your ESP32 mirror running efficiently without draining unnecessary energy.
Start by configuring deep sleep modes for your ESP32 during inactive periods, controlling when your display powers on and off, and scheduling sensor readings to minimize continuous power draw.
These optimization techniques can extend your mirror’s lifespan while reducing electricity costs and heat generation.
ESP32 Sleep Modes
The ESP32’s sophisticated power management system transforms your smart mirror project from an energy-hungry device into an efficient information hub that can run for months on battery power.
You’ll have four distinct sleep modes at your disposal:
- Active Mode – Full operation when displaying information or processing user interactions
- Modem Sleep – Maintains Wi-Fi connectivity while consuming just 0.8 mA for periodic updates
- Light Sleep – Quick wake-ups with RAM and peripherals powered, using 0.15 mA
- Deep Sleep – Ultra-low 10 µA consumption for extended standby periods
Display Power Control
While your ESP32’s sleep modes handle the microcontroller’s power consumption, managing your display’s energy usage requires a more strategic approach since screens typically consume 80-90% of your smart mirror’s total power budget.
You’ll want to implement a relay module for safe high-voltage control, ensuring your display only receives power when needed. A motion sensor can automatically turn off the screen when nobody’s present, while a timed activation system powers on the display for preset durations when your light switch activates.
Monitor your power consumption data regularly to identify usage patterns and optimize efficiency. This strategic combination of hardware controls and smart automation will dramatically reduce your mirror’s energy footprint during inactive periods.
Sensor Scheduling Optimization
Since continuous sensor polling can drain your ESP32’s power reserves within hours, implementing a strategic scheduling system becomes essential for maintaining long-term operation.
You’ll dramatically extend battery life by configuring sensors to operate at specific intervals rather than continuously monitoring.
Here’s how you can optimize your sensor scheduling:
- Set interval-based readings – Configure sensors to collect data every 10 minutes instead of constant polling.
- Use deep sleep modes – Put your ESP32 into sleep mode consuming only 10 µA between sensor activities.
- Implement motion-triggered activation – Install motion sensors to wake other components only when someone’s present.
- Deploy lightweight protocols – Use MQTT to keep your ESP32 in low-power states while awaiting data requests.
This approach maintains data collection frequency while maximizing energy efficiency.
Mounting and Installation Considerations
After completing your ESP32 mirror build, you’ll need to carefully plan its installation to guarantee both functionality and safety.
Position your mirror at eye level, typically 5 to 6 feet off the ground, for ideal visibility and interaction. Select a secure wall mount or bracket that’ll support the mirror’s weight while providing easy access to power and data connections.
Proper mirror positioning at 5-6 feet height ensures optimal user interaction while maintaining secure mounting for safety and functionality.
Leave adequate spacing between the mirror and wall to accommodate wiring and ventilation for your ESP32 components. Consider nearby light sources to minimize glare and reflections that could interfere with display visibility.
Use a level during installation to verify your mirror’s straight – this contributes to both professional aesthetics and functional usability in your home information hub.
Customization Options and Advanced Features
The true power of your ESP32 mirror emerges through its extensive customization capabilities and advanced feature integration.
You’ll transform your basic mirror into a sophisticated home information hub that adapts to your specific needs and preferences.
Your customization options include:
- Dynamic Content Display – Program weather forecasts, reminders, and calendar events on your LCD screen with personalized layouts.
- Sensor Integration – Add DHT22 temperature sensors and APDS9960 modules for light detection and gesture control.
- Modular Development – Create custom classes for different functions, enabling easy feature additions and modifications.
- Smart Home Connectivity – Utilize IFTTT webhooks to connect with other devices for automated triggers and control.
The I2C 20×4 LCD module guarantees seamless communication between components, supporting complex interactions that make your mirror truly intelligent.
Frequently Asked Questions
What Is the Typical Lifespan of an ESP32 Smart Mirror?
You’ll typically get 3-5 years from your ESP32 smart mirror with normal use. The display’s backlight usually fails first, while the ESP32 microcontroller can last much longer with proper power management.
How Much Does It Cost to Build a Complete ESP32 Mirror?
You’ll spend around $150-300 building a complete ESP32 mirror. Costs include a two-way mirror ($50-100), display ($60-150), ESP32 board ($10-20), frame materials ($20-40), and miscellaneous components ($10-20).
Can ESP32 Mirrors Work Without Constant Internet Connectivity?
You can run ESP32 mirrors offline by storing data locally and using cached information. However, you’ll lose real-time updates for weather, news, and calendar syncing until connectivity returns.
Are There Any Privacy Concerns With ESP32 Mirror Data Collection?
You’ll face privacy risks if your ESP32 mirror collects personal data like voice recordings, camera feeds, or usage patterns. Make certain you’re controlling data storage, transmission, and access to protect your household information.
What Technical Skills Are Required to Successfully Build This Project?
You’ll need basic programming skills in C++ or Arduino IDE, understanding of electronics and GPIO pins, soldering abilities, woodworking for the frame, and troubleshooting patience for debugging connectivity issues.


Leave a Reply