You’ve probably watched your plants wilt while you’re away, wondering if there’s a smarter solution than asking neighbors to water them. Building your own ESP8266-powered irrigation system isn’t just about convenience—it’s about creating a responsive network that monitors soil conditions and responds instantly. But before you can achieve that seamless automation, you’ll need to understand which components work together and why most DIY attempts fail at the circuit design stage.
Understanding the ESP8266 Module and Its Capabilities
The foundation of any DIY smart plant watering system starts with selecting the right microcontroller, and the ESP8266 stands out as an exceptional choice for makers and hobbyists.
The ESP8266 microcontroller delivers unmatched versatility and connectivity, making it the ultimate foundation for any serious smart gardening project.
This low-cost Wi-Fi microchip brings full TCP/IP stack capabilities to your project, enabling seamless internet connectivity for remote monitoring and control.
Your ESP8266 board operates efficiently at 3.3V with impressive power management features.
It’ll consume just 70mA during active operation and drops to an ultra-low 10μA in deep sleep mode, making it perfect for battery-powered applications.
You’ll appreciate its versatile communication protocols including SPI, I2C, and UART for connecting various sensors like soil moisture detectors and water pumps.
Programming couldn’t be easier – you can use the familiar Arduino IDE with extensive library support for rapid development.
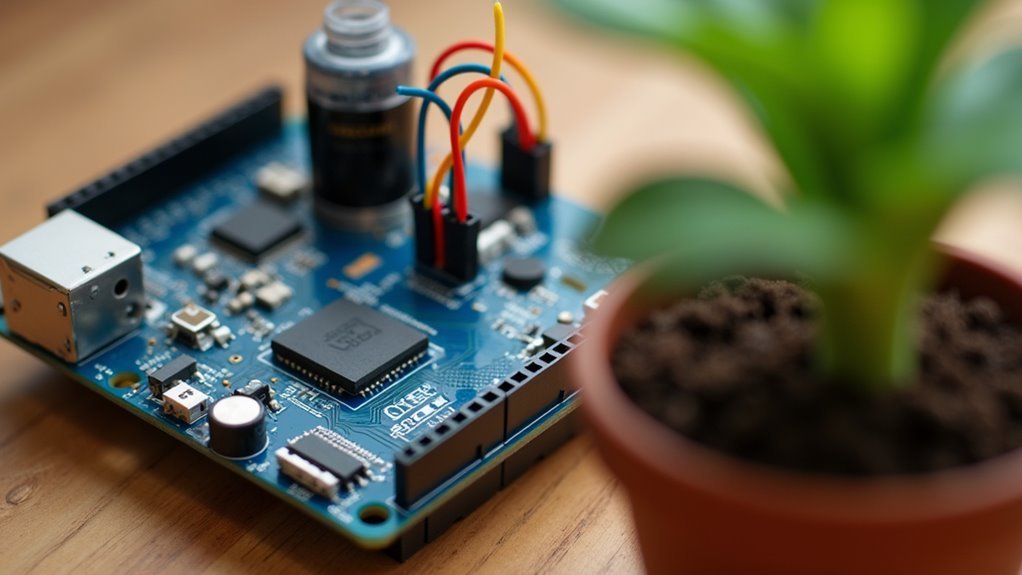
Essential Components and Materials Required
You’ll need several core electronic components to build your smart watering system, starting with the ESP8266 microcontroller that handles Wi-Fi connectivity and system control.
The soil moisture sensor and water pump form the heart of your automated watering mechanism, while a relay module bridges the gap between sensor readings and pump activation.
Beyond these essentials, you’ll also require additional hardware like a 12V power supply, transistor, and resistor to complete your functional setup.
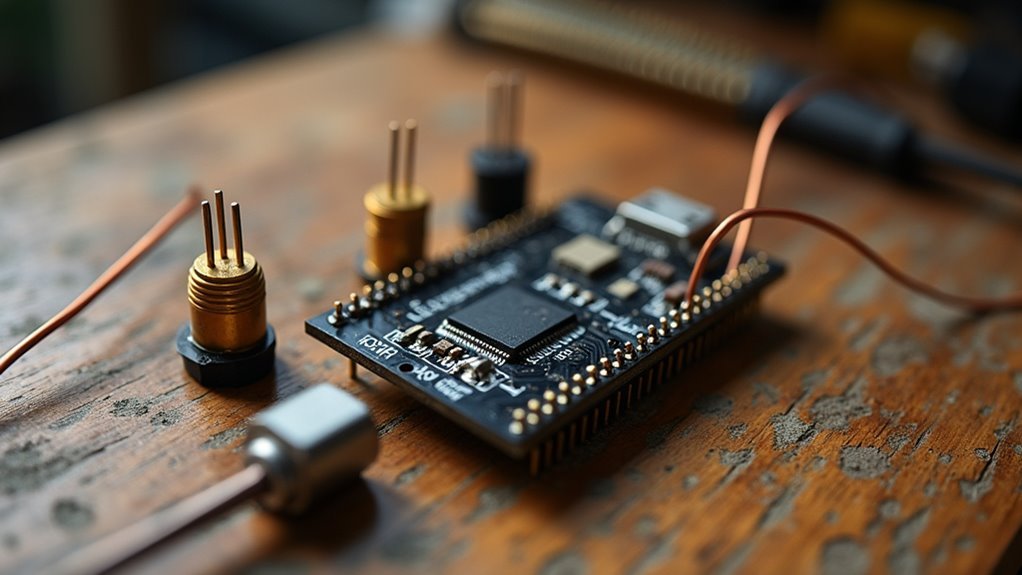
Core Electronic Components
Building your smart plant watering system starts with gathering the right electronic components that’ll form the backbone of your automated setup.
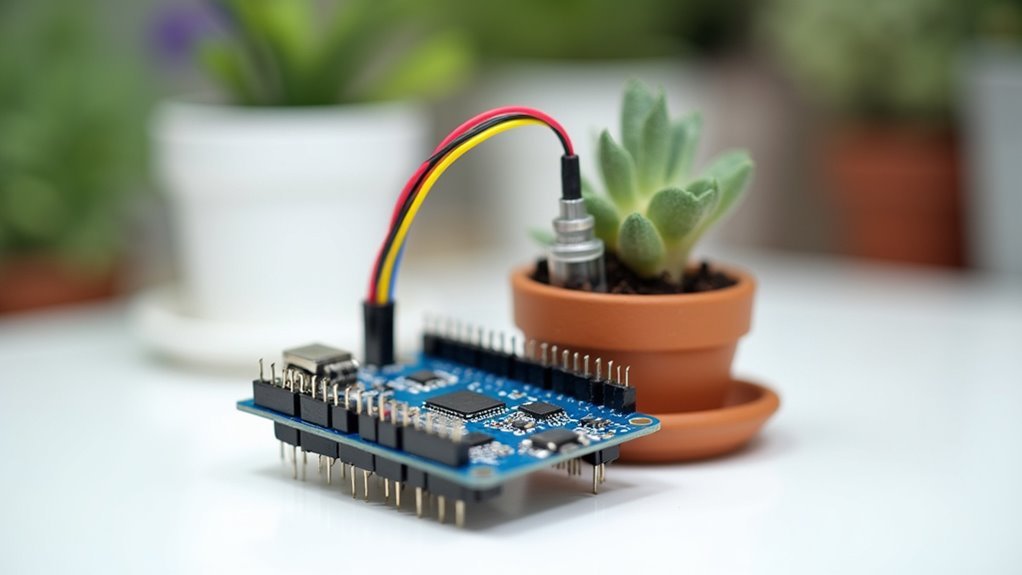
The ESP8266 microcontroller serves as your project’s brain, providing essential Wi-Fi connectivity for remote monitoring and control capabilities. You’ll need a soil moisture sensor using capacitive or resistive technology to detect moisture levels in your plant’s soil, determining when watering’s necessary.
A relay module acts as the vital switching mechanism, controlling power delivery to your water pump based on sensor readings. Your mini water pump should operate within 3-6V range to efficiently deliver water to your plants.
These core components work together seamlessly – the ESP8266 processes sensor data, triggers the relay when moisture drops below threshold levels, and activates the pump for automated watering cycles.
Additional Hardware Requirements
Beyond these core electronics, your project needs several supporting components to create a complete watering system. These additional hardware requirements include a 5V power supply to energize all components, jumper wires for establishing connections, and a breadboard for organizing your circuitry layout.
You’ll need a relay module to control your mini water pump’s operation based on soil moisture readings. This guarantees automated watering cycles run efficiently. Consider adding a toggle switch for manual pump control, allowing you to override automation when necessary.
Optional enhancements include an LCD display with I2C module for real-time moisture readings and pump status visibility.
You’ll also want tubing to connect your mini water pump to the plant container, plus a water reservoir to supply the irrigation system with adequate water capacity.
Soil Moisture Sensor Selection and Specifications
When building a smart plant watering system, selecting the right soil moisture sensor forms the foundation of your project’s accuracy and longevity.
You’ll encounter two main sensing technologies when choosing your soil moisture sensor.
Consider these key specifications when making your selection:
- Technology Type: Choose capacitive sensors over resistive ones for superior accuracy and corrosion resistance.
- Voltage Compatibility: Confirm 3.3V to 5V operational range for ESP8266 compatibility.
- Output Range: Look for analog output spanning 0-1023, where lower values indicate drier conditions.
- Response Time: Select sensors with quick response times (seconds rather than minutes) for ideal irrigation responsiveness.
Your soil moisture sensor should provide 0% to 100% measurement range, giving you clear hydration readings for precise watering control.
Water Pump and Relay Module Configuration
You’ll need to select a relay module that can handle your water pump’s voltage and current requirements while interfacing properly with your ESP8266’s GPIO pins.
Your pump’s power specifications determine whether you’ll need a 5V or 12V relay, and you must verify your power supply can deliver adequate current without overloading the system.
Proper wiring becomes critical since you’re dealing with both low-voltage control signals and higher-power pump circuits that could damage your components if connected incorrectly.
Relay Module Selection
Since your water pump requires reliable switching control, selecting the right relay module becomes critical for your smart watering system’s success.
You’ll need to match the relay module’s specifications to your pump’s voltage and current requirements to prevent system failures.
A 5V relay module works perfectly with ESP8266 GPIO pins, offering seamless integration.
Here’s what you should prioritize:
- Voltage compatibility – Choose a 5V relay module for direct ESP8266 control
- Optoisolator protection – Guarantees safe isolation between low and high voltage circuits
- Proper connections – Use GPIO pins for control, NO and COM terminals for pump power
- Flyback diode inclusion – Protects your ESP8266 from voltage spikes during relay switching
This configuration assures reliable pump operation while safeguarding your microcontroller.
Pump Power Requirements
Before connecting your water pump to the relay module, you must calculate the pump’s exact power requirements to prevent circuit damage and guarantee reliable operation.
Your water pump should operate within 3-6V, and you’ll need to match these specifications with your relay module’s capabilities. Choose a relay rated for 10A at 250V AC to handle most small water pumps safely.
You’ll control the pump using a 2N2222 NPN transistor connected to the relay’s coil, with a 5K resistor limiting base current.
Connect your pump to the relay’s normally open (NO) terminal so it activates only when triggered. Use a separate 12V power supply for the pump while sharing ground connections between your ESP8266 and pump circuit.
Proper pump power requirements calculation guarantees ideal system performance.
Wiring Safety Precautions
Proper wiring safety becomes paramount when configuring your water pump and relay module, as electrical hazards multiply when water and electricity operate in close proximity.
You’ll need to implement several critical safety measures for secure wiring:
- Power Supply Matching – Use a properly rated 12V power supply for your 12V pump to prevent overheating and component damage.
- Circuit Protection – Install a fuse in your wiring to safeguard against overcurrent situations that occur when pumps jam or malfunction.
- Waterproofing – Apply proper insulation and waterproofing techniques to all electrical connections, preventing short circuits and potential hazards.
- Environmental Protection – Place your relay module and exposed wiring in waterproof enclosures or dry areas to prevent moisture-induced electrical failures.
These precautions guarantee your system operates safely and reliably.
Circuit Design and Wiring Connections
When building your smart plant watering system, the circuit design centers around the ESP8266 NodeMCU as your main controller, which you’ll connect to several key components through specific wiring configurations.
Your circuit diagram should show the soil moisture sensor’s analog output connecting directly to the A0 pin, while powering it through the 3.3V output to prevent damage.
Connect your relay module to a GPIO pin using a transistor for proper pump activation. Wire your manual override button to another GPIO pin with a pull-down resistor for stable operation.
Most importantly, you’ll need separate power supplies – keep your ESP8266 on 3.3V while running your water pump on 12V, maintaining a common ground connection between both circuits for safety.
Setting Up EasyIoT Cloud Platform
Once you’ve completed your circuit wiring, you’ll need to establish cloud connectivity by setting up the EasyIoT Cloud Platform for remote monitoring and control of your irrigation system.
This platform enables you to track soil moisture levels and pump status from anywhere with internet access.
Follow these essential steps to configure EasyIoT Cloud:
- Register an account on the EasyIoT Cloud website to access their IoT services.
- Create a custom module type for your irrigation system using their module configuration tutorial.
- Add the ZMT_IRRIGATOR module to your project for seamless device-to-cloud communication.
- Configure API keys and permissions to enable secure data transmission between your ESP8266 and the cloud.
Test your connection by verifying that sensor readings appear correctly in the dashboard.
Programming the ESP8266 With Arduino IDE
With your EasyIoT Cloud Platform configured and ready for data transmission, you’ll now program your ESP8266 microcontroller using Arduino IDE to bring your smart irrigation system to life.
Begin by installing the ESP8266 board definitions through “File” > “Preferences” and adding the board URL to Additional Boards Manager URLs.
Next, install essential libraries including ESP8266WiFi and BlynkSimpleEsp8266 via the Library Manager.
Before uploading, input your Blynk authentication token, WiFi credentials, and password into the code template.
Select your specific ESP8266 board variant and correct port in Arduino IDE.
After uploading the programming code, monitor the Serial Monitor to verify successful connections and troubleshoot any setup issues.
Creating the Web Interface for Remote Control
After successfully programming your ESP8266, you’ll create a user-friendly web interface that enables remote monitoring and control of your plant watering system from any device on your network.
Transform your ESP8266 into a powerful remote plant care station accessible from any smartphone, tablet, or computer on your home network.
You’ll build this interface using the ESP8266WebServer library to handle HTTP requests and responses. The web page combines HTML and JavaScript to display real-time soil moisture data and provide pump controls.
Here’s what you’ll implement:
- HandleRoot() function – Serves the main web page with moisture displays and control buttons
- HandlePump() function – Processes pump activation/deactivation requests from user interactions
- Static IP configuration – Assigns a consistent network address for easy access
- Real-time polling – Updates moisture readings at regular intervals using JavaScript
Your plant watering system using this web interface will automatically refresh sensor data, ensuring you always see current conditions.
Configuring WiFi Connectivity and Network Settings
Before your ESP8266 can serve the web interface, you’ll need to establish a reliable WiFi connection that allows network access to your plant watering system.
Start by including the `ESP8266WiFi.h` library in your Arduino code, which provides essential WiFi management functions. Configure your network credentials using `WiFi.begin(ssid, password)` with your router’s SSID and password to initiate the connection process.
Monitor connection status using `WiFi.status()` to verify successful network establishment before proceeding. Implement a timeout mechanism that retries connection attempts if initial attempts fail, enhancing system reliability.
Ascertain your router operates on 2.4GHz frequency, as the ESP8266 doesn’t support 5GHz bands. This configuration enables remote access to your watering system’s web interface.
Calibrating Soil Moisture Sensor Readings
Now that your ESP8266 can communicate over the network, you’ll need accurate soil moisture readings to make informed watering decisions.
Calibrating your sensor guarantees reliable measurements by establishing proper baseline values for different moisture conditions.
Proper sensor calibration ensures your automated watering system makes accurate decisions based on reliable soil moisture data.
Follow these essential steps for accurate sensor calibration:
- Measure dry soil readings – Record sensor values in completely dry soil (typically 300-400 units)
- Test saturated conditions – Take readings in fully wet soil (usually 100-200 units)
- Apply linear transformation – Use calibration data in your code to map raw readings to meaningful moisture percentages
- Implement hysteresis – Add buffer zones in your code to prevent rapid pump cycling from minor reading fluctuations
Regular recalibration keeps your system accurate, especially when soil composition changes over time.
Testing the Automated Watering Functionality
With your soil moisture sensor properly calibrated, it’s time to verify that your automated watering system responds correctly to changing moisture conditions.
Place your sensor properly in the soil to guarantee accurate moisture readings. Watch your ESP8266’s response as moisture levels drop below your predefined threshold—the water pump should activate automatically.
Use the Blynk app to monitor real-time moisture data and confirm you’re receiving alerts when watering begins. Fine-tune your sensor’s sensitivity using the onboard potentiometer to enhance pump activation timing for your Smart Plant Watering system.
Conduct several test cycles by letting soil dry out naturally, then verify consistent pump activation at appropriate moisture levels.
Multiple trials guarantee your system reliably maintains ideal growing conditions.
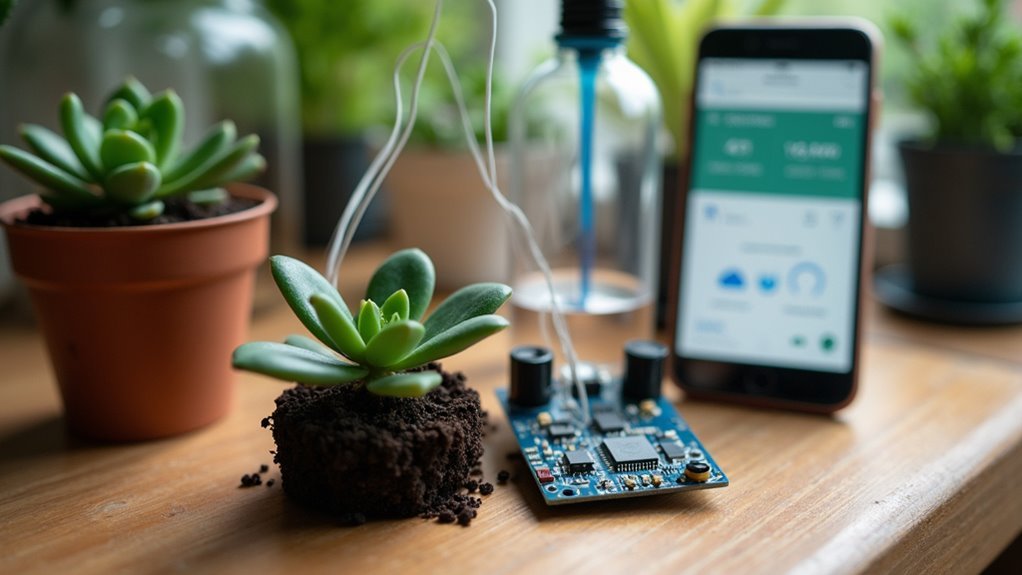
Mobile App Integration With Blynk Platform
You’ll transform your plant watering system into a smart, remotely controllable device by integrating it with the Blynk platform through a custom mobile app dashboard.
The Blynk dashboard setup requires creating data streams for soil moisture monitoring and pump control, then adding intuitive widgets like gauges and buttons for seamless interaction.
These real-time control features let you monitor your plant’s moisture levels and activate watering from anywhere with an internet connection.
Blynk Dashboard Setup
Creating a Blynk dashboard transforms your ESP8266 plant watering system into a smartphone-controlled smart device that you can monitor and operate from anywhere.
The Blynk app provides an intuitive interface for managing your automated watering system with real-time data visualization and remote control capabilities.
Follow these steps to configure your dashboard:
- Create your Blynk account using your email address and start a new project by selecting ESP8266 as your board type.
- Set up two data streams – one for moisture sensor readings and another for water pump control functionality.
- Add essential widgets including a button for manual pump control and a gauge for displaying soil moisture levels.
- Configure authentication by entering your unique Blynk token, Wi-Fi credentials, and uploading the code to your ESP8266.
Real-time Control Features
Once your dashboard is configured, the real-time control features bring your plant watering system to life through seamless mobile app integration.
Your Blynk interface provides instant access to critical system functions from anywhere. You’ll see live soil moisture readings through gauge widgets and monitor water pump status in real-time. Manual pump control buttons let you override automatic watering when needed, giving you complete system authority.
The notification system keeps you informed about moisture levels dropping below your set thresholds, ensuring timely intervention.
Remote access capabilities mean you can care for your plants while traveling or at work. Data streams update continuously, providing accurate feedback on system performance.
This smartphone integration transforms your ESP8266 watering system into a truly smart, responsive plant care solution.
Troubleshooting Common Hardware Issues
When your DIY smart plant watering system doesn’t work as expected, hardware problems are often the culprit behind frustrating malfunctions.
Effective troubleshooting requires systematic checking of each component to identify and resolve issues quickly.
Here’s how to diagnose common hardware problems:
- Check all connections – Verify that your ESP8266, soil moisture sensor, relay module, and water pump are securely wired according to your circuit diagram to prevent intermittent failures.
- Clean sensor probes – Remove dirt buildup and corrosion from your soil moisture sensor probes if readings seem inconsistent or inaccurate.
- Test relay operation – When your water pump won’t activate, confirm the relay module and NPN transistor are receiving proper control signals.
- Verify power supply – Ascertain voltage requirements are met for both components to avoid under-voltage malfunctions.
Power Supply Optimization and Battery Backup Options
Since reliable power delivery forms the backbone of any smart watering system, you’ll want to optimize your power supply configuration to guarantee consistent operation while planning for backup scenarios.
A 12V power supply works excellently, providing adequate voltage for your water pump while using a voltage regulator to step down power for the ESP8266’s 3.3V requirement.
Consider adding a rechargeable lithium-ion battery like an 18650 cell for backup power during outages. You’ll need a battery management system (BMS) to prevent overcharging and overheating.
For sustainable operation, integrate a solar panel with your battery setup to create an independent system. Enable low-power sleep mode on your ESP8266 to dramatically extend battery life by waking only when checking moisture levels.
Frequently Asked Questions
How to Make a Smart Plant Watering System?
You’ll need a microcontroller, soil moisture sensor, water pump, and relay module. Connect the sensor to measure soil moisture, program automated watering triggers, and add Wi-Fi connectivity for remote monitoring and control.
How to Connect a Water Pump to an ESP8266?
You’ll connect your water pump through a relay module controlled by a transistor. Wire the pump to the relay’s NO terminal, connect the transistor’s base to an ESP8266 GPIO pin, and make certain common grounding.
How to Make a Smart Irrigation System Using Iot?
You’ll assemble an ESP8266, soil moisture sensor, and relay-controlled pump. Program connectivity through Arduino IDE, configure cloud monitoring via EasyIoT, then access real-time data and remote control through smartphone apps.
How to Make a Smart Plant Monitoring System?
You’ll need sensors like soil moisture, temperature, and humidity modules connected to a microcontroller. Program it to collect data, send alerts, and display readings through a mobile app or web dashboard.


Leave a Reply