You’ve probably considered upgrading your home security, and maybe you’ve looked at those expensive smart locks online. But here’s what most people don’t realize—you can build your own fingerprint door lock system for a fraction of the cost. It’s not as complicated as you might think, though there are some critical steps that’ll make or break your entire setup. Miss just one of these components, and you’ll find yourself locked out of your own home.
Benefits of Fingerprint Door Lock Systems
When you’re considering upgrading your home security, fingerprint door lock systems offer compelling advantages that traditional locks simply can’t match.
You’ll eliminate the constant worry about lost or stolen keys since your fingerprint serves as your unique, uncopiable access credential. With storage capacity for up to 99 fingerprints, you can easily grant access to family members, trusted friends, or service providers without duplicating physical keys.
Your unique fingerprint replaces traditional keys, storing up to 99 users while eliminating theft and loss concerns forever.
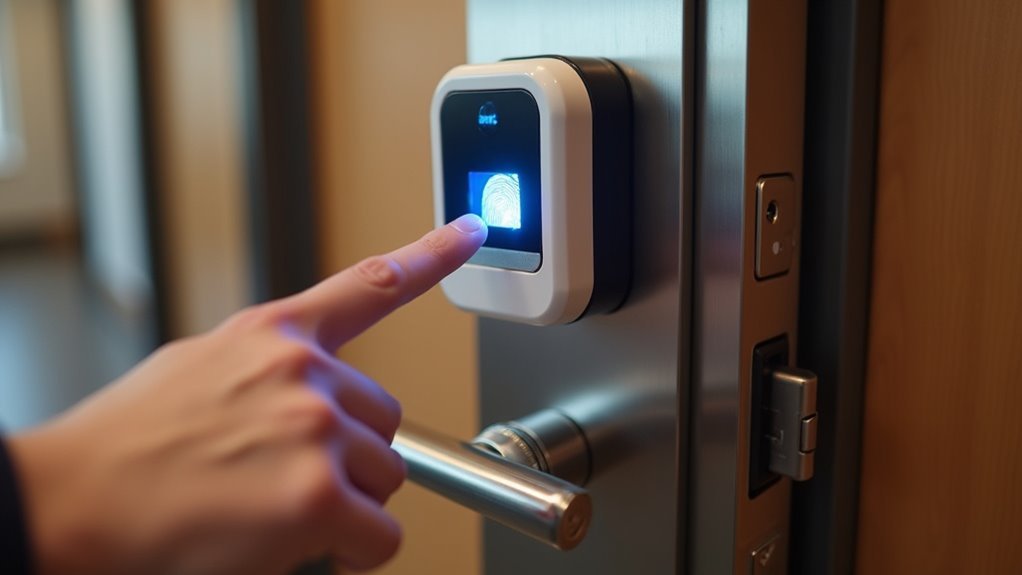
Your fingerprint door lock delivers lightning-fast recognition in under one second, making entry seamless and efficient.
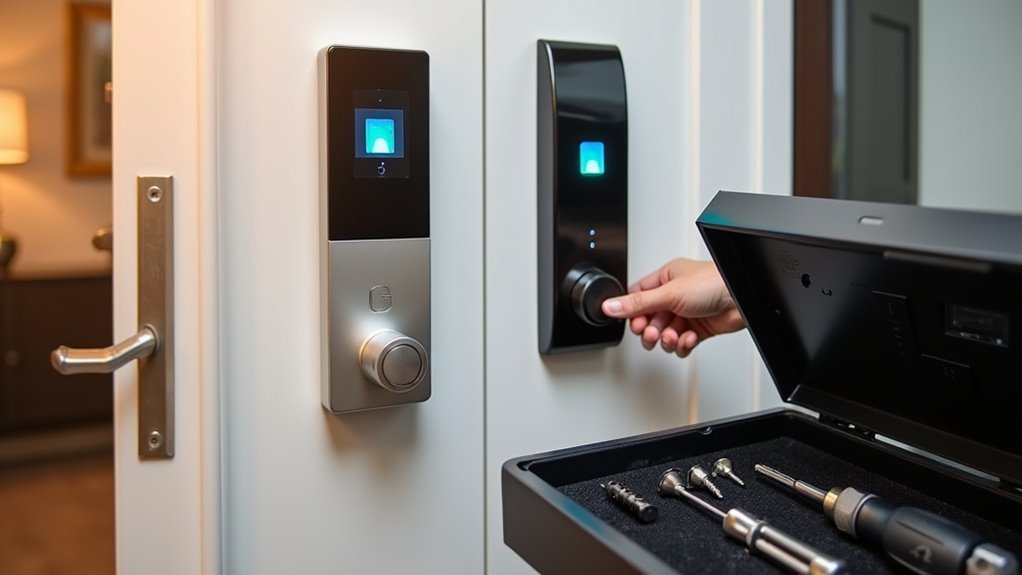
Advanced models like the R307 provide five distinct security levels, giving you customizable protection. You’ll also enjoy smart technology integration, enabling remote access management through smartphone apps for enhanced control and monitoring capabilities.
Required Hardware Components and Tools
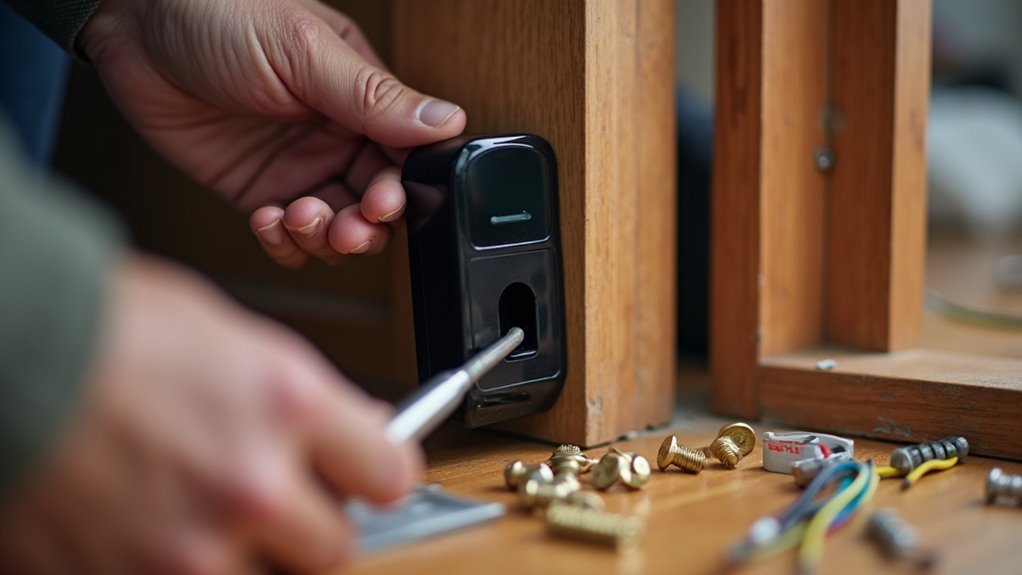
You’ll need several key electronic components to build your fingerprint door lock, starting with an Arduino UNO as the central control unit and a DFRobot R307 fingerprint sensor for biometric identification.
Your installation toolkit should include basic items like screwdrivers along with all necessary mounting hardware such as screws and brackets.
Don’t forget to secure a reliable power supply – the Digilent 60W PCIe 12V 5A unit works well for powering your Arduino and connected components throughout operation.
Essential Electronic Components
Building a functional fingerprint door lock requires several key electronic components that work together to create a secure access system.
You’ll need an Arduino UNO as your main microcontroller to coordinate all operations. The DFRobot Fingerprint Sensor (model R307) serves as your fingerprint reader, operating at 5V and storing up to 162 unique fingerprints for user access.
For the actual locking mechanism, you’ll use a Linear Solenoid (3 VDC) controlled through a relay module that connects to your Arduino. This solenoid activates when the system recognizes an authorized fingerprint.
A Digilent 60W PCIe 12V 5A Power Supply provides adequate power for all components in your system.
You’ll also need the Arduino IDE software to program your microcontroller, enabling communication between the fingerprint sensor and locking mechanism.
Installation Tools Required
Beyond the electronic components, several essential tools will make your fingerprint lock installation smooth and professional. You’ll need specific hardware to properly mount and secure your DIY system to the door frame.
| Tool | Purpose | Specifications |
|---|---|---|
| Screwdriver | Securing lock components | Phillips/flathead set |
| Drill | Creating mounting holes | Variable speed recommended |
| Power Supply | System operation | 12V 5A (60W capacity) |
| Relay Module | Solenoid control | Compatible with Arduino UNO |
The installation process requires careful preparation and proper tools. Your drill creates precise holes for the linear solenoid mounting, while screwdrivers secure all hardware connections. The power supply guarantees reliable operation of your fingerprint sensor and locking mechanism. Having quality tools prevents damage during installation and assures long-term functionality of your security system.
Power Supply Options
Power supply selection determines your fingerprint lock’s reliability and performance.
You’ll need to evaluate several power supply options for your DIY fingerprint door locks project. The Digilent 60W PCIe 12V 5A Power Supply provides excellent power delivery for your Arduino UNO and connected components.
Make sure your DFRobot Fingerprint Sensor receives proper 5V supply voltage for ideal fingerprint acquisition and processing. Your Linear Solenoid requires 3 VDC for reliable locking mechanism operation.
You’ll also need a Relay Module to control the solenoid through your Arduino, enabling efficient power management.
These smart locks require careful voltage distribution to maintain security features and component longevity. Proper power supply management guarantees consistent operation across all system components.
Software Applications and Setup Requirements
When you’re ready to bring your fingerprint door lock to life, you’ll need the Arduino IDE as your primary programming environment to write and upload code to your Arduino board. This essential software application enables you to create a smart door lock with advanced capabilities beyond basic RFID lock functionality.
Your setup requires these key software applications and configurations:
- Arduino IDE installation – Download and configure the development environment for coding your smart features.
- Serial communication setup – Establish data relay between your R307 fingerprint sensor and Arduino for processing.
- Library integration – Install fingerprint sensor libraries to handle the 162-fingerprint storage capacity and recognition algorithms.
- Relay module programming – Code the linear solenoid lock activation sequence for successful fingerprint matches with LED feedback indicators.
Choosing the Right Fingerprint Lock for Your Door
How do you select the perfect fingerprint lock that’ll seamlessly integrate with your door’s unique requirements?
Start by verifying compatibility with your existing door structure, considering thickness and lock dimensions during installation.
Research fingerprint door locks thoroughly by reading reviews to guarantee reliable performance and security standards. Look for models storing up to 99 fingerprints for multiple users.
Consider advanced features like Wi-Fi or Bluetooth connectivity for enhanced access control. Peak proof entry keypads and dedicated mobile apps provide remote access convenience.
Confirm your chosen sensor operates efficiently within -10°C to 40°C temperature ranges for consistent functionality across environmental conditions.
Prioritize models offering extensive security options while matching your specific door requirements and usage patterns for best performance.
Preparing Your Door for Installation
After selecting your ideal fingerprint lock, you’ll need to prepare your door properly to guarantee a smooth installation process.
Proper preparation guarantees your new security system functions correctly and maintains your door’s structural integrity.
Follow these essential preparation steps for installing door locks:
- Check compatibility by measuring your door’s dimensions and examining existing hardware specifications to guarantee proper fit with your chosen fingerprint lock system.
- Review the user manual carefully for specific drilling instructions, including precise locations and the recommended two-inch drilling depth for maximum installation.
- Remove all debris from drilled holes to create a clean surface that’ll accommodate the deadbolt and latch components properly.
- Verify component alignment before final installation to guarantee everything fits according to manufacturer guidelines.
Removing the Existing Lock System
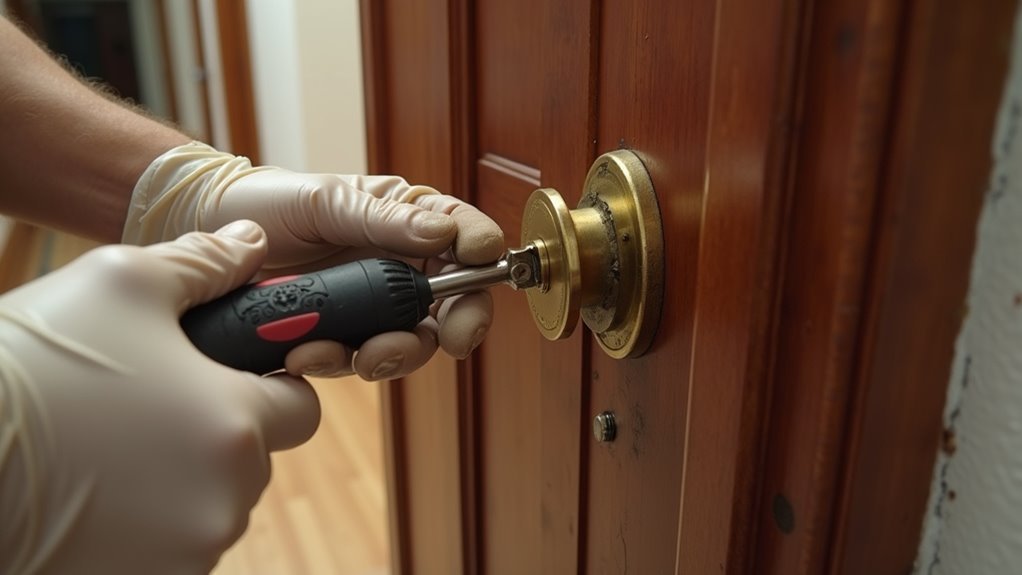
Before installing your new fingerprint lock, you’ll need to carefully remove your existing lock system without damaging the door or surrounding hardware. Start by inspecting your new lock to verify all components are present and confirm the lock includes all necessary installation materials.
| Step | Component | Action |
|---|---|---|
| 1 | Lock Body | Remove two screws with screwdriver |
| 2 | Latch Assembly | Unscrew two latch screws |
| 3 | Strike Plate | Detach from door frame |
| 4 | Door Surface | Clear debris and residue |
| 5 | Measurements | Note dimensions for new lock |
Gather your tools beforehand to streamline the process. After removing the existing lock system components, clean the door thoroughly and record the old lock’s configuration to confirm proper fitment of your new fingerprint system.
Installing the New Deadbolt and Latch
With your door properly cleaned and measured, you’re ready to install the new fingerprint lock’s mechanical components.
Before beginning, adjust your deadbolt to match your existing lock’s backset length—either 2-3/4 or 2-3/8 inches—ensuring proper alignment.
Follow these installation steps:
- Secure the deadbolt mechanism at the door’s edge using the provided screws, ensuring it sits flush with the surface.
- Install the latch assembly according to your user manual’s specifications for precise placement.
- Tighten all components firmly to prevent any movement or loosening over time.
- Test the deadbolt operation by engaging and disengaging the mechanism to confirm smooth functionality.
Always refer to your specific manual for detailed instructions, as components may vary between manufacturers.
Mounting the Exterior Fingerprint Scanner
You’ll need to determine the ideal height and position for your fingerprint scanner before securing it to the door.
Start by installing the mounting plate through the pre-drilled holes, making sure to thread the data cable through before attaching it with screws.
Once you’ve positioned everything correctly, you can establish the cable connections that’ll link your scanner to the internal lock mechanism.
Scanner Placement Positioning
Once you’ve selected your fingerprint door lock system, proper scanner placement becomes critical for both functionality and user experience.
Strategic scanner placement positioning guarantees your fingerprint scanner operates reliably while remaining accessible to all users.
Follow these essential positioning guidelines:
- Height placement: Mount the scanner 4-5 feet from ground level to accommodate most adults and teens comfortably.
- Weather protection: Install on door areas shielded from direct sunlight and heavy rain to prevent damage and maintain consistent performance.
- Surface preparation: Choose a flat mounting surface and secure firmly using included adhesive strips or screws for stable installation.
- Ergonomic positioning: Place the scanner near your door handle, allowing natural hand movement when accessing the lock for enhanced user convenience.
Mounting Plate Installation
After determining the ideal scanner position, properly installing the mounting plate forms the foundation for your entire fingerprint lock system. You’ll need to align the exterior fingerprint scanner with pre-drilled holes and make certain the mounting plate sits flush against your door surface.
| Step | Action | Key Point |
|---|---|---|
| 1 | Thread data cable | Pull through mounting plate first |
| 2 | Position plate | Align with pre-drilled holes |
| 3 | Check height | Install 4-5 feet from ground |
| 4 | Secure screws | Tighten to prevent movement |
| 5 | Verify alignment | Double-check scanner positioning |
Secure the mounting plate using provided screws, making certain of tight fastening to prevent misalignment during operation. Double-check your scanner’s alignment after installation to guarantee accurate fingerprint scanning functionality.
Cable Connection Setup
With your mounting plate secured, connecting the data cables requires careful routing and secure attachment points. Proper cable connection setup guarantees your fingerprint scanner operates reliably and maintains strong communication with the interior lock mechanism.
- Pull the data cable through the mounting plate before positioning the exterior scanner assembly to avoid connection issues later in the installation process.
- Position the exterior scanner at 4-5 feet height from the ground to accommodate most users while maintaining easy access to the cable connections.
- Use the included adhesive strip to temporarily hold the scanner in place, guaranteeing perfect alignment with your lock mechanism during the cable connection setup.
- Connect data cables from exterior assembly to interior lock mechanism, tightening all connections securely for peak performance.
Connecting the Interior Lock Assembly
Before you can secure the interior lock assembly, align it carefully with the mounting plate that’s already attached to your door. Make certain the data cable routes properly through the designated opening for connection.
Use the provided screws to attach the interior lock assembly firmly to the mounting plate, guaranteeing all components align correctly to prevent operational problems.
Check that wiring from the interior assembly has no twists or kinks—this guarantees smooth communication with exterior components like the fingerprint scanner or keypad.
Double-check the locking mechanism’s alignment with the deadbolt so it operates smoothly when engaged.
After installation, test the interior lock assembly by locking and releasing your door multiple times to confirm proper function before programming or app connection.
Power Source Setup and Battery Installation
You’ll need to select the right battery type for your fingerprint lock, typically requiring DC 5V power for ideal performance.
Next, you’ll wire the power connections securely according to the manufacturer’s specifications to prevent damage to the electronic components.
Finally, you’ll test the power supply to guarantee your lock receives consistent voltage and functions properly before completing the installation.
Battery Type Selection
Although fingerprint door locks may seem complex, their power requirements are surprisingly straightforward—most models run on either AA or 9V batteries that you can find at any local store.
You’ll want to choose batteries that enhance performance and battery life. Here’s what to take into account:
- High-quality alkaline or lithium batteries – These offer longer lifespans than standard batteries, reducing replacement frequency.
- Rechargeable options – Verify they meet your lock’s voltage requirements and can handle the power demands effectively.
- Regular monitoring – Check battery levels frequently since most smart locks provide low battery notifications through apps or indicator lights.
- Proper installation – Always follow manufacturer instructions for polarity to prevent damage and guarantee peak function.
The right battery choice prevents unexpected lockouts and maintains consistent performance.
Wiring Power Connections
Two critical voltage levels power your fingerprint door lock system: 5V for the sensor and 12V for the relay module. When wiring power connections, you’ll need to verify your power source meets these specific requirements for peak performance.
| Component | Voltage Required | Power Source Options |
|---|---|---|
| Fingerprint Sensor | 5V | USB adapter, step-down converter |
| Relay Module | 12V | Wall adapter, PCIe power supply |
| Battery Operation | Varies | 4 AA rechargeable batteries |
| Power Rating | 60W+ recommended | Digilent 60W PCIe 12V 5A |
| Wire Connections | Color-coded | Follow installation manual |
Always consult your lock’s installation manual for proper color-coded wire connections to prevent errors. For battery-powered systems, use high-quality rechargeable batteries and monitor levels regularly to maintain security functionality.
Testing Power Supply
After completing your power connections, proper testing validates that your fingerprint door lock receives adequate power for reliable operation.
You’ll need to verify that your Digilent 60W PCIe 12V 5A power supply delivers the correct voltage output before activating your system.
Follow these essential testing steps:
- Measure voltage output – Use a multimeter to check that your power supply produces the exact voltage specifications required by your lock’s manufacturer guidelines.
- Verify amperage capacity – Confirm your power supply can handle the lock’s current draw without voltage drops during peak operation.
- Test battery levels – For battery-powered models, check that high-quality rechargeable batteries maintain proper charge levels throughout testing.
- Monitor system stability – Run the lock through several cycles to ascertain consistent power delivery and prevent unexpected failures.
Network Connectivity and Wi-Fi Configuration
Before connecting your DIY fingerprint door lock to your home network, you’ll need to validate that the device supports your Wi-Fi frequency. Check the lock’s specifications to confirm compatibility with 2.4 GHz or 5 GHz networks. Proper network connectivity guarantees seamless integration with your smart home system.
Download the manufacturer’s mobile app to simplify the configuration process. Follow the in-app instructions to connect your lock to the network. Position the lock within your router’s range during setup to prevent connectivity problems. If signal strength is weak, consider installing a Wi-Fi extender.
Once connected, regularly check for firmware updates through the app to enhance security and performance. Secure your home network with strong passwords and encryption to protect your smart lock from unauthorized access attempts.
Programming User Fingerprints and Access Codes
Once you’ve established network connectivity, you’ll need to program authorized users into your fingerprint lock system. Programming user fingerprints requires careful attention to timing and proper sensor operation to guarantee reliable access control.
- Power on the fingerprint sensor and initiate registration mode through Arduino IDE or your lock’s dedicated app to begin the enrollment process.
- Scan each fingerprint within one second for successful registration, watching for the LED indicator to confirm the sensor’s readiness during scanning.
- Store up to 162 unique fingerprints in the DFRobot sensor’s internal memory, accommodating multiple household members and frequent visitors.
- Test each registered fingerprint by scanning again to verify recognition accuracy, then program temporary access codes through the app for guest access while maintaining permanent user control.
Testing Lock Functionality and Security Features
With your fingerprints successfully registered, testing becomes the critical step that separates a functional lock from a reliable security system.
Testing lock functionality requires extensive verification of every feature. First, check that your door seals tightly when closed, guaranteeing security and proper lock operation.
A properly sealed door forms the foundation of effective lock security and ensures all components function as intended.
Test the fingerprint scanner with multiple household members’ prints to confirm accurate recognition. Don’t stop there—verify all alternative access methods like keypad entry or mobile app control work correctly.
Monitor your smartphone app’s connectivity to guarantee seamless communication with the lock system. Finally, check for available firmware updates to enhance security features and patch potential vulnerabilities.
Thorough testing assures your DIY installation delivers both convenience and protection.
Troubleshooting Common Installation Issues
When your DIY fingerprint door lock isn’t working as expected, you’ll likely encounter one of three main categories of problems during installation.
Power source problems can prevent your components from functioning properly, while connectivity installation failures often stem from loose wiring or incorrect pin assignments.
Hardware compatibility issues may also arise when your Arduino, fingerprint sensor, relay module, or solenoid lock don’t interface correctly with each other.
Power Source Problems
Power issues rank among the most frustrating problems you’ll encounter during fingerprint door lock installation.
These power source problems can completely disable your smart locks, leaving you locked out or unable to program fingerprints properly.
Here’s how to address common power concerns:
- Position your lock within reasonable distance of power outlets, using quality extension cords when necessary to guarantee adequate electricity supply reaches your device.
- Choose high-quality rechargeable batteries for battery-operated models to avoid frequent replacements and maintain consistent performance during extended use periods.
- Monitor battery levels regularly since low power causes connectivity issues and fingerprint recognition malfunctions that’ll compromise your security.
- Verify proper wiring installation for hardwired units, confirming your lock receives sufficient power from your home’s electrical system.
Connectivity Installation Failures
Beyond power supply challenges, connectivity installation failures present another major obstacle that can derail your entire fingerprint door lock setup.
You’ll need to guarantee your smart lock stays within range of your WiFi router, as weak signals cause frequent connectivity issues in distant areas. Check that your smartphone connects to the same network as your lock—mismatched networks prevent successful pairing.
Low battery levels often trigger connectivity failures, so consider rechargeable batteries for better efficiency. Update your lock’s firmware through the mobile app, since outdated software creates compatibility problems.
If your lock requires electrical connections, consult the manufacturer’s wiring diagram carefully. Incorrect wiring causes both functionality and connectivity issues during installation.
Hardware Compatibility Issues
Hardware compatibility issues can completely halt your fingerprint door lock installation before you even begin mounting the device.
You’ll face significant setbacks if you don’t verify compatibility requirements beforehand.
Check these critical compatibility factors:
- Door structure dimensions – Measure your door thickness, backset distance, and hole sizes to guarantee the lock fits your specific door style and manufacturer specifications.
- Power requirements – Confirm whether your chosen model needs hardwired electrical connections or battery power, as this affects placement options and installation complexity.
- Existing hardware alignment – Verify that mounting plates, strike plates, and latch mechanisms align with your current door frame setup.
- Locking mechanism integration – Ascertain the fingerprint lock’s internal components work with your door’s existing deadbolt or handle hardware without requiring extensive modifications.
Frequently Asked Questions
How to Set Fingerprint Door Lock?
Install your fingerprint lock and connect it to power. Download the manufacturer’s app, then follow instructions to scan and register fingerprints from multiple angles. Test functionality and add trusted users’ fingerprints for complete setup.
What Are the Disadvantages of a Fingerprint Door Lock?
You’ll face higher costs, potential sensor failures from dirt or damage, slower response times, vulnerability to hacking, and performance issues in extreme temperatures or humidity conditions.
How to Program a Smart Door Lock?
Download the manufacturer’s mobile app and create an account. Follow setup instructions to connect your lock to Wi-Fi. Use the app to set access codes, add authorized users, adjust security settings, and test functionality.
How Do You Set up a Digital Door Lock?
You’ll remove your existing lock, install the mounting plate and deadbolt, connect the power source, then configure access codes or fingerprints through the app while testing functionality.
How Do You Set up a Fingerprint Padlock?
You’ll charge the padlock, download the manufacturer’s app, scan your finger multiple times for registration, add other users’ fingerprints, then test opening to guarantee it recognizes all authorized fingerprints correctly.


Leave a Reply