Building your own smart speaker assistant combines affordable hardware like Raspberry Pi or ESP32 with carefully selected audio components. You’ll need to choose the right microphone array for voice detection, quality speakers with proper enclosures, and compatible amplifiers. Flash ESPHome firmware to enable voice commands and integrate with Home Assistant for a complete ecosystem. Consider factors like speaker impedance, crossover circuits, and enclosure design for ideal sound. The following guide will transform you from curious DIYer to smart speaker craftsman.
Understanding the Core Components of DIY Smart Speakers
When diving into the world of DIY smart speakers, you’ll need to understand five essential component categories that work together to create a functional system.
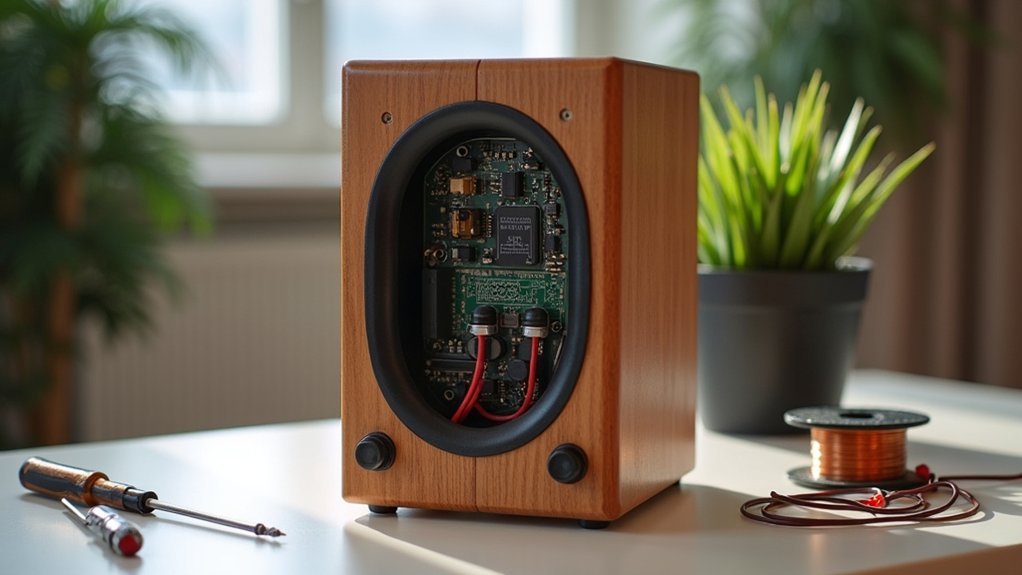
At the heart lies the processing unit, typically a Raspberry Pi Zero W or Pi 4, which handles voice recognition and language processing tasks. These SBCs require sufficient RAM (512MB-4GB) and microSD storage for the operating system and assistant software. Many DIY enthusiasts use boards like the RAKwireless WisCore that come with built-in Amazon Alexa Voice Service integration.
Your speaker’s sound quality depends on properly matched drivers, efficient Class D amplifiers like the PAM8403, and filtering components including capacitors and ferrite beads.
Power management components—batteries, protection circuits, and voltage regulators—ensure reliable operation. The enclosure isn’t just for protection; it greatly impacts acoustic performance.
Don’t underestimate power management and enclosure design—they’re critical partners in creating both stable performance and superior sound quality.
Finally, connectivity interfaces like Wi-Fi, Bluetooth, and physical controls complete your interactive smart speaker.
Selecting the Right Microphone and Audio Processing Hardware
You’ll need to choose between single microphones or microphone arrays, with arrays offering superior voice detection from multiple directions in your DIY speaker setup.
The ESP32 microcontroller provides impressive audio processing capabilities, including noise filtering and voice recognition, at an affordable price point.
When selecting your components, consider how the microphone sensitivity and ESP32’s processing power will work together to deliver clear audio performance in your specific home environment. For optimal voice capture in untreated indoor spaces, pencil condensers work effectively and can be incorporated into your DIY assistant design.
Microphone Array Options
Selecting the right microphone array for your DIY home speaker can dramatically impact audio quality and functionality. Different configurations offer unique advantages for voice recognition and sound capture in your smart speaker project.
- Line Array Setup – Position multiple microphones in a row to create directional pickup, perfect for isolating your voice commands in noisy living rooms.
- Baffled-Omni Configuration – Mount omnidirectional mics with acoustic baffles to reduce ambient noise while maintaining wide coverage across your space.
- ReSpeaker Lite Integration – Connect this 2-mic array directly to an ESP32S3 or Raspberry Pi for an easy-to-implement solution with built-in processing.
- Custom A/B Spaced Pair – Place two quality microphones (like Audio Technica 3032s) at specific distances to create stereo pickup with excellent noise reduction. Maintaining fixed mic distance is essential for effective noise cancellation through phase shift analysis in custom configurations.
ESP32 Audio Processing Capabilities
The ESP32 microcontroller serves as the beating heart of many DIY home speaker projects, offering impressive audio processing capabilities that rival dedicated sound processors.
With dual-core processors running at 240 MHz, you’ll have ample power for real-time audio filtering and noise reduction.
When selecting microphones, opt for digital MEMS with I2S output for direct connection to your ESP32.
Consider sensitivity and SNR based on your project’s voice recognition needs.
For peak performance, leverage the dual-core architecture by dedicating one core to audio processing and the other to I/O operations.
The I2S interface provides high-quality connections to external components, while built-in codec support enables on-chip audio compression.
Some variants like the ESP32-C5 feature a single-core 32-bit RISC-V CPU with speeds up to 240 MHz and include substantial RAM for audio buffering.
Employ fixed-point arithmetic and optimized DSP libraries to enhance speed while maintaining the ESP32’s efficient power consumption for battery-powered applications.
Speaker Selection and Sound Quality Considerations
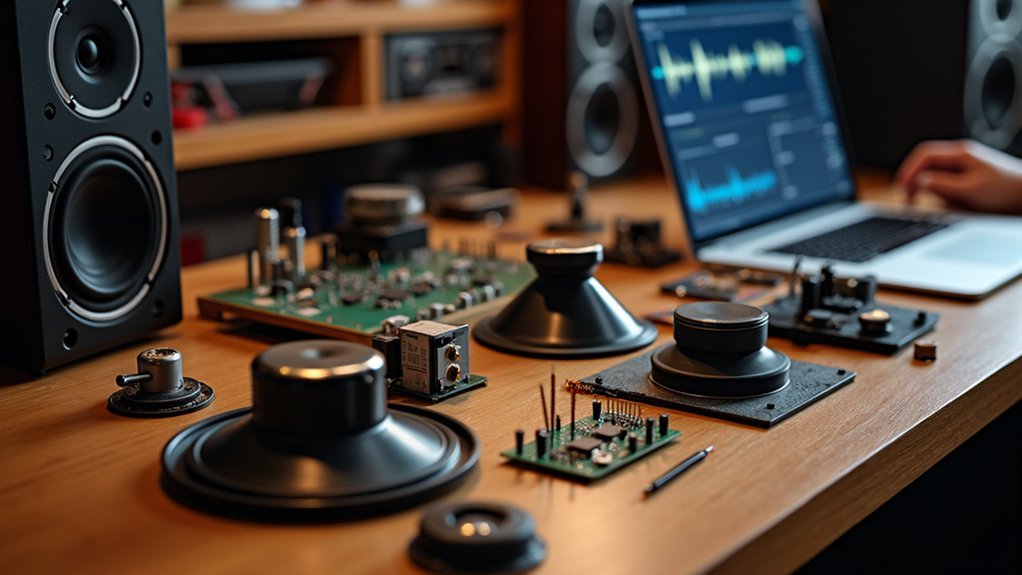
When selecting speakers for your DIY project, you’ll need to balance size constraints with desired audio performance characteristics.
Your choice should account for frequency response range, driver materials, and enclosure design that match your room’s acoustics and listening preferences.
Remember that proper impedance matching between your speakers and amplifier will guarantee superior sound quality and prevent system damage. Consider investing in models with quality crossover circuits to ensure balanced audio reproduction across all frequency ranges.
Speaker Selection and Sound Quality Considerations
Great speakers form the foundation of any DIY home audio system, making your selection process critical to achieving the sound quality you desire. When choosing speakers, prioritize frequency response range and flatness to guarantee accurate sound reproduction across the audio spectrum.
- Examine driver materials – Look for stiff materials like aluminum or carbon fiber that minimize distortion and provide cleaner sound with less unwanted resonance.
- Evaluate enclosure design – Seek cabinets with proper acoustic damping and rigidity to prevent muddiness and unwanted vibrations.
- Consider crossover quality – Guarantee seamless shift between drivers for cohesive sound reproduction.
- Check manufacturing consistency – Tight tolerances between units create better stereo imaging and a more immersive listening experience.
Consider how your room size and acoustics will affect overall performance, as larger spaces require more powerful speakers while smaller rooms may benefit from compact options with precise imaging.
Size vs. Audio Performance
Speaker size represents one of the most visible and impactful factors in your audio system’s performance capabilities. When building your DIY speaker, understand that larger drivers move more air, producing deeper bass frequencies that smaller speakers simply can’t match without distortion, especially at higher volumes. Consider adding a quality subwoofer to complement smaller speakers if you want to achieve fuller bass response without upgrading to larger main speakers.
| Speaker Size | Bass Response | Best Application |
|---|---|---|
| 4-6 inch | Limited | Bookshelf, desktop |
| 8-10 inch | Moderate | Small rooms, mid-field |
| 12-15+ inch | Extended | Large rooms, parties |
Your choice should align with your listening environment. While a 15-inch woofer delivers authoritative low-end in spacious rooms, it might overwhelm smaller spaces. Conversely, compact speakers offer portability and precise imaging but sacrifice low-frequency extension. Remember, driver quality and enclosure design are equally important—size alone doesn’t guarantee superior sound.
Powering Your DIY Assistant With ESPHOME and ESP32
Building a powerful voice assistant at home becomes remarkably straightforward with the combination of ESP32 and ESPHome. This dual-core microcontroller offers impressive processing power at 240MHz while maintaining low power consumption—perfect for a smart speaker that’s always listening.
Getting started requires just a few key steps:
- Connect your ESP32 to a stable 5V power supply via USB or dedicated power input.
- Flash ESPHome firmware using the Web Installer in a supported browser.
- Configure your device with simple YAML code for audio components and voice functions. ESPHome configurations are stored in YAML files that automatically generate custom firmware for your device.
- Link it to Home Assistant for seamless integration with your existing smart home setup.
Once connected, you’ll have a customizable assistant that’s completely under your control, without relying on cloud-based services.
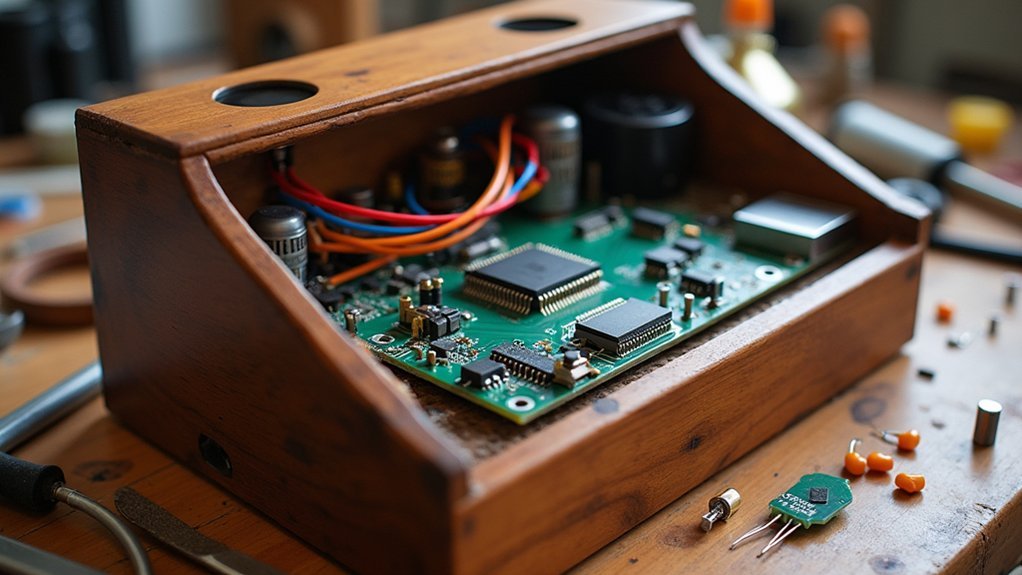
Designing and Printing the Perfect Enclosure

When designing your speaker enclosure, you’ll need to balance acoustic requirements with aesthetic appeal since the enclosure greatly affects sound quality and must complement your home décor.
Your enclosure’s shape, size, and material choices will determine bass response, resonance control, and overall sound signature while also defining its visual presence in your space.
Consider using 3D printing for custom parts that can achieve both the precise internal volume calculations your drivers require and the external design elements that match your personal style. Calculate your enclosure dimensions carefully, avoiding perfect cube dimensions which can create unwanted standing waves and resonances.
Subheading Discussion Points
Creating the ideal speaker enclosure involves five critical considerations that can make or break your DIY speaker project. When selecting materials, MDF provides the best balance of acoustic properties and workability, though hardwood can add aesthetic value to the front baffle.
Your enclosure’s internal volume must account for driver displacement while dimensions should account for driver size with minimum box width matching the driver diameter. Incorporating the Golden Ratio in your enclosure dimensions can effectively prevent unwanted standing waves and frequency reinforcement.
- Wood thickness of 3/4″ to 1″ – Guarantees structural integrity without excess weight
- Proper sealing with silicon – Prevents air leaks but requires complete drying before installing drivers
- Internal polyfill stuffing – Reduces standing waves and resonances for cleaner sound
- Finishing options from paint to veneer – Affects both appearance and acoustic properties
Always test finishes on scrap wood to avoid unwanted chemical reactions with your materials.
Form Follows Function
The perfect speaker enclosure balances form and function rather than merely housing drivers. When designing yours, avoid equal dimensions in all three axes to prevent standing waves. Aim for slightly different measurements while guaranteeing adequate internal volume for your drivers.
MDF and Baltic birch plywood make excellent cabinet materials, with 3/4-inch thickness recommended. You’ll want to add asymmetrical internal bracing to reduce panel vibrations and break up resonances.
Don’t overlook acoustic treatment—loosely packed damping material can simulate a larger enclosure, while tighter packing decreases effective volume. Round or chamfer your cabinet edges to reduce diffraction effects.
Remember to calculate space for crossovers and other components, and if you’re building a ported design, guarantee sufficient depth for proper port implementation. Proper planning with correct air volume calculations is essential for achieving optimal bass response in your speaker system.
Wiring and Assembly: Step-by-Step Guide
Proper wiring forms the backbone of any DIY speaker project, guaranteeing ideal sound quality and system longevity.
When connecting your home speaker, always identify the polarity—red for positive and black for negative—to maintain proper audio phasing.
Start by preparing your wires:
- Strip approximately 3/8-inch of insulation from each wire end, exposing the conductive strands beneath.
- Twist the exposed strands tightly to prevent stray pieces from causing short circuits.
- Connect to your speaker terminals by unscrewing the binding posts, inserting the prepared wire, and tightening securely.
- Organize your completed connections with cable ties or clips to prevent wire damage and maintain a clean installation.
Consider the appropriate wire gauge for your installation distance to minimize signal loss and ensure optimal power transfer.
Always test your connections before final assembly to verify everything works properly.
Setting Up Home Assistant Integration
While building your DIY speaker is rewarding on its own, integrating it with Home Assistant can transform your creation into a smart home powerhouse.
To add your speaker, navigate to Settings and click “Add Integration.” Follow the on-screen instructions to authenticate and configure your device.
If your speaker uses custom components, you’ll need to place files in the custom_components directory. For community integrations, consider installing HACS through SSH access.
Troubleshooting tip: If your speaker doesn’t appear after setup, clear your browser cache or check logs for errors. Most configuration can be done through the UI, but some cases require manual file edits.
Once integrated, assign your speaker to a specific area in your home for better organization within your dashboard. Don’t forget to add your integration to the configuration.yaml file if it requires manual loading rather than automatic discovery.
Configuring Voice Commands and Recognition
Configuring voice commands transforms your DIY speaker from a simple audio device into an interactive smart home controller.
You’ll need to set up wake words like “OK Nabu” that activate your assistant without physical touch, and guarantee your commands match the patterns defined in your system.
- Connect compatible microphones and speakers to your ESP32 or Raspberry Pi, testing the audio pathway before full deployment.
- Configure wake word detection through the ESPHome interface, watching for LED feedback during the listening state.
- Define command syntax that matches your Home Assistant device names (“Turn off the kitchen lights”).
- Implement local processing using Wyoming protocol or ESPHome to maintain privacy and reduce cloud dependence.
Understanding your location context enhances interaction, allowing your DIY assistant to provide location-aware responses when you ask questions like “Where am I?”
Adding Multi-Room Audio Capabilities
Expanding your DIY speaker project beyond a single room creates an immersive audio experience throughout your home.
You’ll need to decide between wireless or wired connections based on your setup preferences. WiFi systems offer flexibility, while wired configurations provide consistent audio quality across different spaces for high-fidelity sound.
Begin by mapping speaker placements in each room, then connect your source components to a multi-channel amplifier or central hub.
For wireless setups, verify your WiFi network can handle the bandwidth. For wired systems, run appropriate gauge speaker wire maintaining correct polarity.
Configure your control system to recognize separate zones, allowing independent volume and source selection per room.
You can group zones for synchronized playback during parties or separate them for personalized listening.
Consider starting with key rooms and expanding gradually to manage costs while building your whole-home audio system.
Troubleshooting and Performance Optimization
Even the most carefully built DIY speakers can develop issues over time that affect sound quality or functionality. When problems arise, start with the basics: check all connections, inspect wires for damage, and verify your audio source is functioning properly.
For more systematic troubleshooting:
- Swap the problematic speaker with a working one to determine if the issue is with the speaker itself or your system’s output.
- Use test tones at different frequencies to identify which specific driver (tweeter, mid-range, or woofer) might be failing.
- Remove speaker grilles and visually inspect drivers for physical damage or loose components.
- Employ a multimeter to check continuity and resistance in speaker wiring and components.
- Ensure all speaker connections have proper metal-to-metal contact to prevent signal loss and intermittent sound issues.
Regular maintenance and prompt attention to minor issues will extend your DIY speaker’s lifespan and maintain peak sound quality.
Frequently Asked Questions
How Can I Make My DIY Speaker Water-Resistant for Bathroom Use?
You’ll need waterproof components like treated drivers and sealed electronics. House everything in a waterproof case, seal openings with silicone, use corrosion-resistant wiring, and test in bathroom conditions before regular use.
Can I Run My DIY Assistant Completely Offline Without Internet Connectivity?
Yes, you can run your DIY assistant completely offline. Use Home Assistant with local voice assistants like Rhasspy or Mycroft, and connect devices through Zigbee or Wi-Fi for internet-independent control and automation.
What’s the Average Battery Life for Portable DIY Speakers?
You’ll typically get 4-8 hours from your portable DIY speaker on a standard battery. At moderate volume, expect around 5-6 hours from a 7Ah battery, though this varies with volume level and components used.
How Do I Integrate My DIY Speaker With Existing Commercial Smart Devices?
Use developer SDKs from Amazon and Google to connect your DIY speaker. Create accounts for API access, install necessary software on your Raspberry Pi, and connect to Wi-Fi to communicate with existing smart devices.
Can These DIY Speakers Work With Apple Homekit or Google Home?
You can integrate DIY speakers with HomeKit using AirPlay 2 adapters like Eve Play, or with Google Home via Chromecast Audio devices. Both require these bridge devices since DIY speakers lack native certification.
In Summary
You’ve now created your own smart speaker that’s both personalized and budget-friendly. By understanding the components, selecting quality hardware, and configuring the software properly, you’ve built something truly unique. Don’t stop here—continue tweaking and expanding your system as your needs change. The DIY approach gives you complete control over privacy, features, and aesthetics that commercial products simply can’t match.


Leave a Reply