You’re probably frustrated watching your expensive smart oven sit disconnected while your neighbor controls their entire kitchen from their phone. The truth is, most people skip the essential setup steps that make or break their connected kitchen experience. Your Wi-Fi network needs specific configurations, and your devices require particular security protocols to function reliably. Without proper preparation, you’ll face constant disconnections, security vulnerabilities, and wasted money on gadgets that don’t actually work together.
Essential Wi-Fi Requirements for Smart Kitchen Appliances
Before you can enjoy the convenience of smart kitchen appliances, you’ll need to confirm your home network meets specific technical requirements. Your Wi-Fi network must support either 2.4 GHz or 5 GHz bands, though most smart kitchen devices prefer 2.4 GHz for superior range and connectivity.
Smart kitchen appliances require Wi-Fi networks with 2.4 GHz or 5 GHz bands, with 2.4 GHz offering optimal range and connectivity performance.
You’ll need WPA2 security encryption to protect device communications and user data from potential threats.
Avoid browser registration networks during setup, as they often disrupt proper device connections. Disable MAC filtering on your router to prevent communication blocks between appliances.
Verify ports 443, 8080, and 123 remain open, and activate multicast routing for seamless device-to-device communication.
These network configurations create the foundation for reliable smart kitchen operations and efficient appliance performance throughout your home.
Understanding Home Connect App Setup and Registration
You’ll need to download the Home Connect app from either the Apple App Store or Google Play Store to begin connecting your smart kitchen appliances.
Creating an account requires only your name and email address, followed by confirming your registration through a verification link sent to your inbox.
Once you’ve signed in, the app will guide you through pairing your compatible appliances by activating their Connect features and following the specific installation steps for each device.
Download and Installation Process
Getting your kitchen gadgets connected to your home network starts with downloading the Home Connect app from either the Apple App Store or Google Play Store.
You’ll need to create a Home Connect account during the setup process using your name and email address.
After completing the registration, check your email inbox for a confirmation link. Click this link to finalize your account setup, then sign in to the app using your credentials.
Once you’re logged in, you can connect your kitchen appliances by activating the Connect feature directly on each device.
The app will guide you through the connection process, which may involve scanning a QR code or entering the e-number found on your appliance’s rating plate.
Make sure your smartphone stays connected to Wi-Fi throughout this process.
Account Creation Requirements
Account creation for the Home Connect app requires only basic information to get started. You’ll need to provide your name and email address during registration after downloading the app from the Apple App Store or Google Play Store. The account creation requirements are straightforward and designed for quick setup.
| Step | Requirement | Purpose |
|---|---|---|
| 1 | Name and email | Basic registration |
| 2 | Email confirmation | Account verification |
| 3 | Wi-Fi connection | Seamless operation |
| 4 | E-number location | Appliance integration |
| 5 | App sign-in | Connect appliances |
After entering your details, you’ll receive a confirmation link via email to complete registration. Once verified, you can sign in and connect your compatible household appliances. The Home Connect app may prompt you to locate the e-number on your appliance’s rating plate for successful integration.
Device Pairing Steps
Five essential steps will guide you through pairing your kitchen appliances with the Home Connect app after completing your account registration.
First, activate the Connect feature on your kitchen appliance using its control panel.
Second, make certain your smartphone’s connected to Wi-Fi before opening the app.
Third, navigate to the pairing section within the app to begin device discovery.
Fourth, scan the QR code located in your appliance’s Quick Start Guide or user manual to establish the connection.
Finally, enter your home Wi-Fi network password when prompted.
If you’re experiencing connection problems, verify your appliance supports 2.4 or 5 GHz Wi-Fi bands and double-check your password accuracy.
Once successfully paired, you’ll manage all connected appliances directly through the app interface.
Preparing Your Kitchen Network Infrastructure
Before you start connecting smart appliances, you’ll need to establish a robust network foundation in your kitchen.
Plan your power and connectivity requirements by identifying where you’ll place devices like smart refrigerators, connected coffee makers, and intelligent faucets.
Strategic network drop placement in high-traffic areas such as islands and coffee bars guarantees you’ll have reliable connections exactly where you need them.
Power and Connectivity Planning
When you’re designing your smart kitchen, strategic power and connectivity planning forms the backbone of a successful installation.
You’ll need to take into account multiple power options for your smart devices, including AC power for smart faucets and appliances to eliminate battery maintenance hassles. Install USB power outlets throughout your kitchen to support various gadgets that require charging and connectivity.
Plan for multiple network drops in high-traffic areas like kitchen islands and coffee bars where you’ll concentrate smart devices.
If you’re building new, incorporate conduit installation to allow future upgrades without major renovations.
Don’t overlook Wi-Fi performance issues—multiple devices can create network congestion. Think about installing a mesh Wi-Fi system to guarantee reliable coverage and speed throughout larger kitchen spaces.
Network Drop Placement
Beyond establishing power sources, you’ll want to map out exactly where your hardwired network connections will go. Strategic network drops placement guarantees your smart devices maintain reliable connectivity while reducing strain on your Wi-Fi network.
Focus on these key areas for ideal coverage:
- Kitchen islands – Install multiple network drops to support various smart appliances and devices in this high-traffic workspace.
- Coffee bars and beverage stations – Place connections near areas where you’ll likely cluster multiple connected gadgets.
- Major appliance zones – Position drops behind refrigerators, ranges, and other smart appliances for direct ethernet connections.
Consider installing conduit during new construction to easily add or relocate connections as technology evolves. This forward-thinking approach prevents future headaches while guaranteeing your Wi-Fi connectivity remains strong throughout your kitchen.
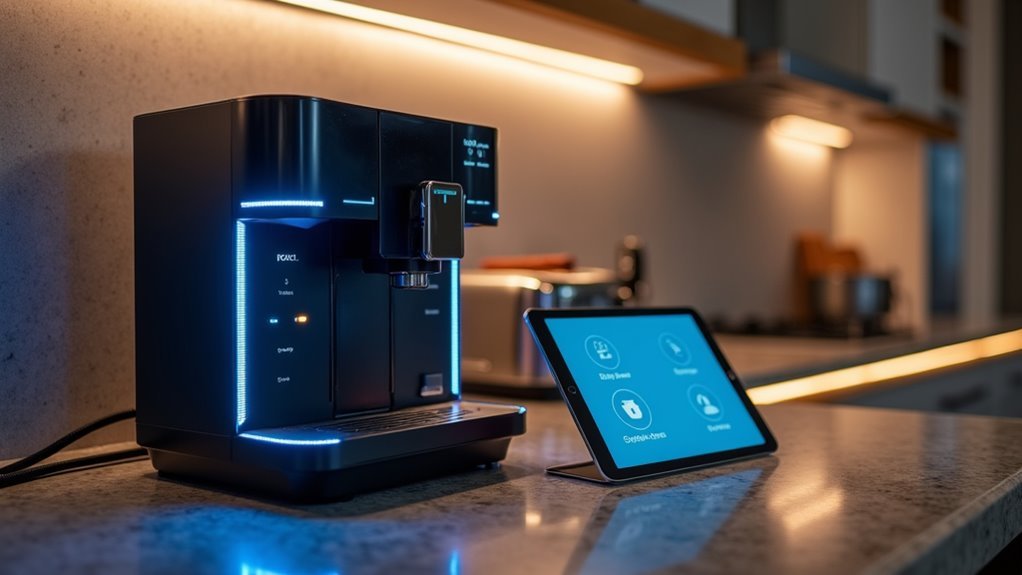
Connecting Smart Ovens and Cooktops to Wi-Fi
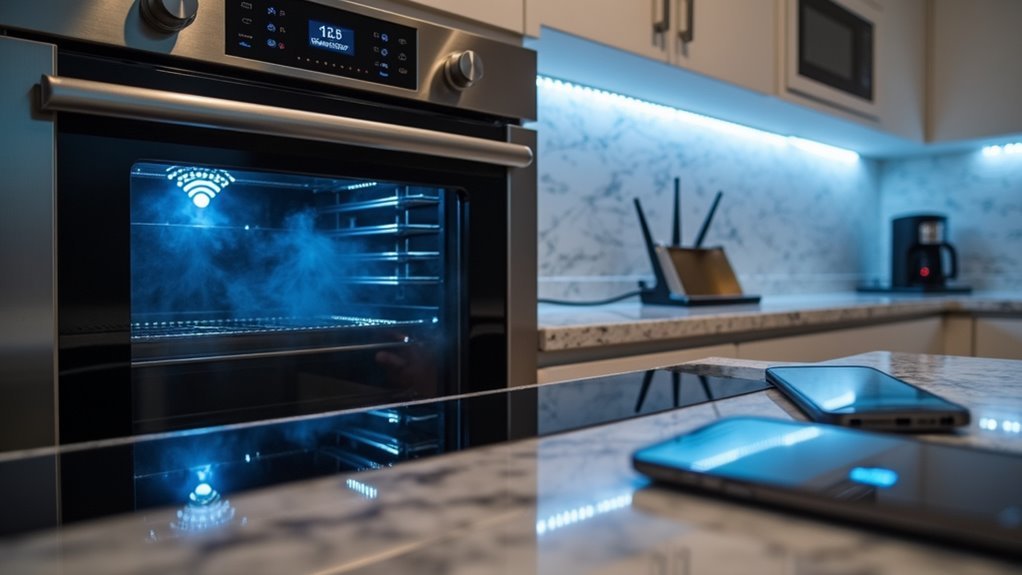
Two essential steps will get your smart oven or cooktop connected to your home network. First, you’ll enable the Wi-Fi feature through your appliance’s control panel by locating the Wi-Fi symbol in the settings menu. Next, you’ll download the corresponding mobile app like Home Connect to complete the setup process.
| Step | Action |
|---|---|
| 1 | Scan QR code from Quick Start Guide using your mobile app |
| 2 | Enter your home Wi-Fi password when prompted |
| 3 | Confirm appliance is within router range for stable connection |
Your smart appliance should be compatible with either 2.4 GHz or 5 GHz Wi-Fi bands. If connection issues arise, verify your Wi-Fi password accuracy, restart both the appliance and router, then consult the app’s troubleshooting section for error-specific solutions.
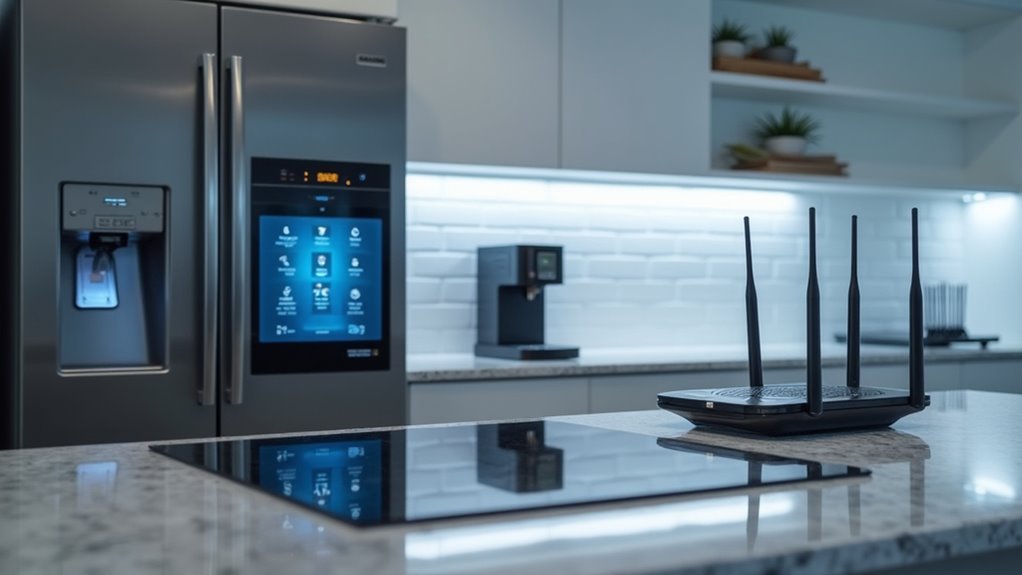
Integrating Refrigerators and Freezers With Home Networks
Smart refrigerators and freezers offer similar connectivity benefits but require a slightly different approach than ovens and cooktops.
While smart refrigerators and freezers share connectivity advantages with other appliances, their setup process differs from traditional cooking equipment.
These appliances use Wi-Fi connectivity to enable remote monitoring and control through your smartphone.
To connect your smart refrigerator or freezer:
- Locate the QR code or connect feature on your appliance to initiate pairing
- Download the Home Connect app or manufacturer’s dedicated app on your device
- Ensure compatibility with your home’s 2.4 GHz or 5 GHz Wi-Fi bands
Once connected, you’ll access features like temperature monitoring, food inventory management, and alerts for power outages or open doors.
Smart refrigerators benefit from regular firmware updates that enhance functionality and security, so check your app periodically for available updates to maintain ideal performance.
Setting Up Smart Dishwashers and Washing Machines
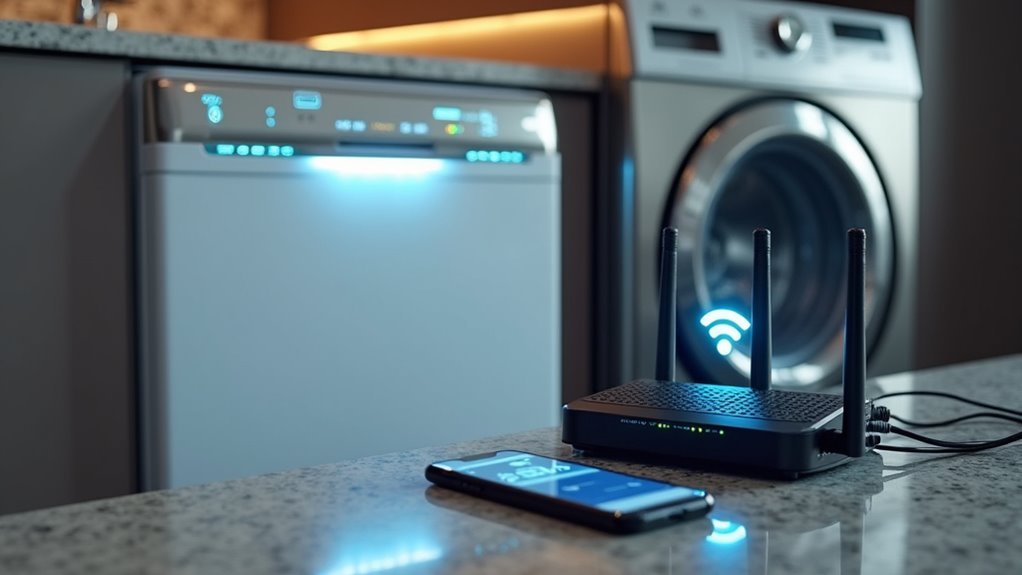
While dishwashers and washing machines operate differently from refrigerators, they follow a remarkably similar setup process for network connectivity.
You’ll need to verify your appliances are compatible with home appliances with Home Connect and have the Connect feature activated. Download the Home Connect app from your device’s app store, create an account, and follow the prompts to connect to your smart home network.
Use the QR code in your appliance’s Quick Start Guide or the connection guide within the app to start Wi-Fi pairing. Confirm your network operates on 2.4 GHz or 5 GHz bands with WPA2 encryption.
If you’re experiencing connection issues, double-check your Wi-Fi password, move closer to your router, and consult the app’s troubleshooting steps.
Configuring Coffee Machines and Small Appliances
Coffee machines and other small appliances bring convenience to your daily routine, but they require slightly different setup approaches compared to larger appliances.
These compact home appliances typically connect through either 2.4 or 5 GHz Wi-Fi bands, making Wi-Fi setup straightforward when you follow the manufacturer’s guidelines.
Most smart coffee machines need you to:
- Download the specific companion app and create an account
- Connect your device during setup by scanning QR codes or entering Wi-Fi credentials
- Confirm your machine stays within router range with WPA2-secured network protection
Some models offer Bluetooth connectivity as an alternative to Wi-Fi, enabling initial setup without internet access.
Once connected, you’ll customize brew strength, scheduling, and start times through the companion app, transforming your coffee-making experience into a seamlessly automated process.
Connecting Smart Faucets and Water Management Systems
Beyond small appliances, water management systems and smart faucets represent the next frontier in connected home technology.
You’ll need a non-switched under-counter AC outlet for models like KOHLER Setra and U by Moen to function properly. These home appliances connect via Wi-Fi, enabling remote control through mobile apps and voice activation for hands-free operation.
Setup involves following manufacturer instructions and connecting to your home network. Delta Trinsic VoiceIQ offers customizable voice commands and metered dispensing for precise water control.
Delta Trinsic VoiceIQ delivers precision water control through customizable voice commands and accurate metered dispensing capabilities.
Your mobile app becomes a central hub for monitoring usage patterns and managing settings remotely.
Smart faucets integrated with water management systems track consumption, helping you identify inefficiencies and potentially reduce utility bills through better resource management and automated monitoring capabilities.
Installing and Connecting Smart Range Hoods
When installing a smart range hood, you’ll transform your kitchen’s ventilation into a connected system that responds to cooking conditions automatically.
These devices connect to your home network via Wi-Fi and Bluetooth, enabling remote control through apps like Mi Home or We Home.
Follow these essential steps for successful setup:
- Power Requirements: Guarantee access to a non-switched under-counter outlet, as smart range hoods need consistent AC power to maintain network connectivity and automated features.
- Network Connection: Use your smartphone to connect the hood to Wi-Fi, taking advantage of multiple connectivity options for seamless integration.
- Setup Assistance: Consult the installation guides and scan QR codes in Quick Start Manuals to simplify the connection process.
Once connected, you’ll enjoy air quality sensors and automated fan controls that enhance ventilation efficiency.
Troubleshooting Common Connection Issues
Why won’t your smart kitchen gadget connect to your home network despite following all the setup instructions?
Start your troubleshooting by checking network compatibility. Most gadgets only connect to 2.4 GHz bands, not 5 GHz networks. Double-check your Wi-Fi password entry—incorrect passwords cause most connectivity failures.
Restart everything: your gadget, router, and smartphone. This refresh eliminates temporary glitches disrupting the connection process.
Examine your kitchen layout for physical obstacles between the device and router that weaken signal strength, particularly problematic in larger spaces.
Your gadget’s manual contains manufacturer-specific troubleshooting steps and error code explanations. The companion app often provides additional connectivity diagnostics.
These resources offer targeted solutions for your specific device model, helping identify whether you’re dealing with hardware issues or simple configuration problems.
Optimizing Router Performance for Kitchen Devices
You’ll need to strategically position your router and manage network bands to guarantee your smart kitchen appliances maintain strong, reliable connections.
Proper router placement in a central kitchen location minimizes dead zones, while effectively utilizing both 2.4 GHz and 5 GHz frequencies maximizes device performance.
These optimization techniques will eliminate connectivity frustrations and keep your kitchen gadgets running smoothly.
Router Placement Strategies
Strategic router placement can make or break your kitchen’s smart device connectivity. Position your router centrally in your home, 3-4 feet above ground and away from walls that block signals. Keep it distant from microwaves and cordless phones, which interfere with Wi-Fi performance, especially on 2.4 GHz frequencies.
For ideal coverage, consider these router placement strategies:
- Use dual-band routers supporting both 2.4 GHz (longer range) and 5 GHz frequencies.
- Install a mesh Wi-Fi system if thick walls separate your kitchen from the main router.
- Monitor signal strength regularly using Wi-Fi analyzer apps to identify dead zones.
If your kitchen’s in a remote area with connectivity issues, a mesh Wi-Fi system creates multiple access points, eliminating dead zones and ensuring consistent performance for all your smart appliances.
Network Band Management
While proper router placement establishes the foundation for connectivity, managing your network bands effectively determines whether your kitchen gadgets perform reliably or struggle with dropped connections.
For peak performance, connect your smart kitchen gadgets to the 2.4 GHz Wi-Fi band rather than 5 GHz. The 2.4 GHz band provides longer range and superior wall penetration, essential for kitchen environments with multiple appliances and obstacles.
Most smart kitchen gadgets exclusively require 2.4 GHz connectivity, so verify your router supports both bands.
Monitor Wi-Fi channel congestion using network analyzer apps to maintain stable connections. Crowded channels cause interference and dropped signals.
If multiple devices compete for bandwidth, consider upgrading to a mesh Wi-Fi system that distributes network load efficiently across your home, ensuring consistent connectivity for all your kitchen technology.
Creating Device Groups for Seamless Control
Most smart kitchen setups benefit dramatically when you organize your appliances into logical device groups rather than controlling each gadget individually. Grouped devices allow you to issue voice commands to multiple appliances simultaneously, transforming meal preparation into a streamlined experience.
Transform your chaotic kitchen into a unified command center by grouping smart appliances for seamless voice-controlled meal preparation.
Smart home ecosystems like Google Home and Amazon Alexa make creating custom groups effortless through their centralized apps. You can establish groups like “Morning Routine” to activate your coffee maker, oven, and lighting with one simple phrase.
Here’s how to maximize your grouping strategy:
- Use descriptive names like “Breakfast Setup” for better voice recognition
- Combine related appliances that work together during specific tasks
- Create automated routines that adjust temperatures and set timers across multiple devices simultaneously
Setting Up Automation and Smart Routines
Once you’ve organized your kitchen devices into logical groups, you can take control to the next level by programming automated routines that anticipate your daily cooking patterns. Smart routines transform your kitchen into an intelligent system that responds to your schedule and preferences.
Use the Home Connect app to schedule appliance actions like preheating your oven or starting your coffee maker at designated times. You’ll find automation becomes even more powerful when you explore IFTTT integration, linking different gadgets through custom triggers.
| Routine Name | Triggered Actions |
|---|---|
| Morning Prep | Coffee maker starts, lights brighten |
| Dinner Ready | Oven preheats, dishwasher preps |
| Clean Up | Dishwasher starts, lights dim |
| Weekend Brunch | Toaster activates, music plays |
| Late Night | All appliances turn off |
Regular updates guarantee your automation aligns with evolving cooking habits.
Maintaining Security and Privacy for Connected Appliances
As connected kitchen appliances become increasingly sophisticated, protecting them from cyber threats requires the same diligence you’d apply to securing any internet-connected device. Your smart refrigerator, oven, and other connected appliances can become entry points for hackers if left unprotected.
Smart kitchen appliances demand the same cybersecurity vigilance as any connected device to prevent hackers from exploiting these vulnerable entry points.
Essential security measures include:
- Network Protection – Secure your Wi-Fi with WPA2 encryption and consider creating a separate network exclusively for smart appliances.
- Regular Updates – Keep firmware current to patch vulnerabilities and maintain peak security performance.
- Access Control – Enable multi-factor authentication when available and regularly review privacy settings.
You’ll want to monitor what data your connected appliances collect and share with third parties.
Take control of privacy settings to limit unnecessary information sharing while maintaining the functionality you need from your smart kitchen ecosystem.
Frequently Asked Questions
How Do I Connect Appliances to Home Connect?
Download the Home Connect app and create an account. Verify your appliance has Home Connect activated, connect your phone to Wi-Fi, then follow the app’s guided instructions to pair your appliance.
What Brands Does Home Connect Work With?
You’ll find Home Connect works with Bosch, Siemens, Neff, Gaggenau, Miele, and Whirlpool. These partnerships let you control ovens, refrigerators, and dishwashers through the app, creating seamless smart kitchen automation.
Is Home Connect Free?
You’ll find Home Connect is completely free to download and use. You can connect compatible appliances, access remote control features, and explore partner services without any subscription fees or hidden charges whatsoever.
How Do I Add Users to Home Connect?
Open your Home Connect app, go to “My appliances,” select the appliance you’d like to share, then click “Manage” to send email invitations. Recipients need their own accounts to accept.


Leave a Reply