
You’ve probably experienced the frustration of motion detectors that trigger for every passing cloud or ignore actual intruders entirely. Most security systems fail because their detection zones aren’t properly configured from the start. Whether you’re dealing with false alarms from tree branches or missing genuine threats at your property’s vulnerable points, the solution lies in strategic zone optimization. These proven techniques will transform your unreliable system into a precision security network.
Strategic Camera Placement for Maximum Zone Coverage
When setting up motion detection zones, your camera placement strategy determines whether you’ll catch every important movement or miss critical security events.
Position your cameras at key entry points like doors and windows to detect movement immediately when someone approaches these vulnerable areas.
Strategic camera positioning at entry points ensures immediate detection when potential intruders approach your most vulnerable access areas.
Mount them 8 to 10 feet high for broad field coverage while avoiding obstructions from plants or furniture.
Use corner placement to maximize coverage of adjacent areas and eliminate blind spots for broader zone detection.
Direct cameras toward well-lit nighttime areas to enhance visibility and motion detection effectiveness.
Remember that ideal camera placement requires regular assessment—adjust angles and positions seasonally to account for changing foliage or new obstructions that could compromise your security coverage.
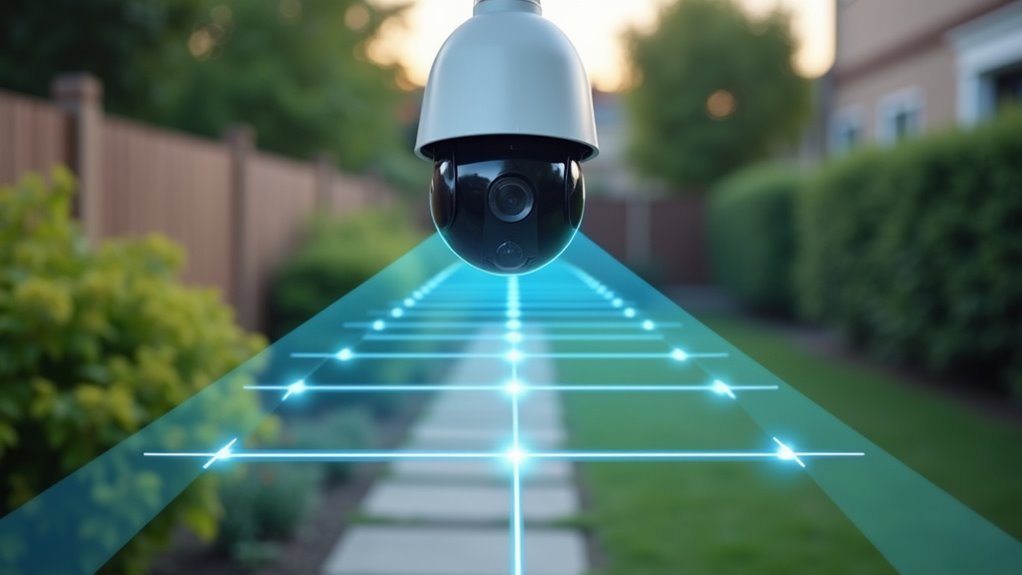
Defining Multiple Detection Zones Per Camera
You can maximize your camera’s effectiveness by setting up multiple detection zones that target specific areas where movement matters most.
Start by using color-coded zones to distinguish between high-priority areas like doorways and lower-priority spaces, then adjust each zone’s sensitivity settings independently.
This strategic approach lets you fine-tune detection accuracy while minimizing false alarms from irrelevant motion.
Strategic Zone Placement Planning
Since modern security cameras often allow you to create multiple detection zones within a single field of view, mastering strategic zone placement becomes essential for maximizing your surveillance effectiveness.
You’ll need to position each zone thoughtfully to capture the most critical areas while avoiding unnecessary alerts.
Focus your detection zones on high-traffic pathways and potential entry points where intruders are most likely to appear.
You’ll want to slightly overlap adjacent zones to eliminate detection gaps that could allow movement to slip through unnoticed.
- Prioritize entry points – Place zones over doors, windows, and gates where unauthorized access typically occurs
- Cover traffic patterns – Position zones along natural walking paths and corridors
- Use color coding – Assign different colors to distinguish between zone functions during setup
- Adjust individual sensitivity – Fine-tune each zone’s settings to minimize false alarms while maintaining detection accuracy
Sensitivity Threshold Configuration
While each detection zone serves a specific purpose, configuring the sensitivity thresholds for multiple zones requires a nuanced approach that balances extensive coverage with practical usability.
You’ll need to adjust sensitivity levels individually for each zone based on expected activity patterns. Set higher thresholds in low-traffic areas to prevent false alarms from minor movements like swaying branches or shadows.
Conversely, apply lower thresholds to critical zones where you can’t afford to miss any motion. Use different colors to visually distinguish between zones during setup, making configuration more intuitive.
Test each zone’s responsiveness by simulating movement within boundaries. Remember to save changes after configuring each zone and review settings periodically as environmental conditions change throughout seasons.
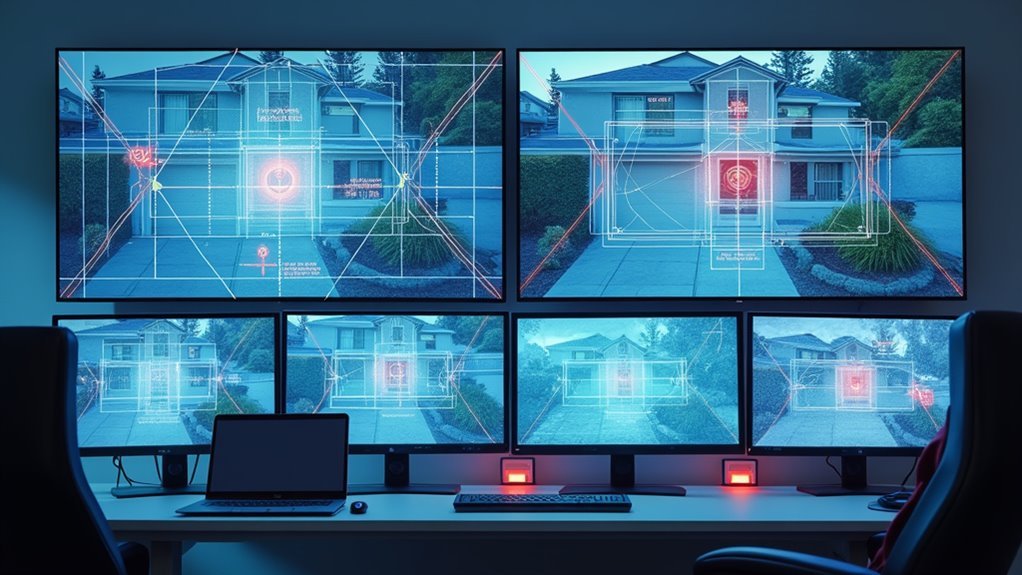
Color-Coded Zone Management
The color-coding system transforms complex multi-zone management into an intuitive visual experience, allowing you to assign distinct colors to each of your camera’s four available detection zones.
This approach eliminates confusion when managing multiple areas simultaneously, making color-coded zone management considerably more efficient.
You’ll find accessing zones straightforward by hovering over the top middle of the Zone GUI to select your desired color-coded zone.
Click and drag to position each zone mask precisely over target areas, ensuring you’re monitoring only relevant sections of your camera’s field of view.
- Assign unique colors to each detection zone for instant visual identification
- Adjust sensitivity and threshold levels independently for each colored zone
- Hover over the GUI’s top middle to quickly select and modify specific zones
- Regularly test zone positioning to optimize coverage and reduce false alarms
Adjusting Sensitivity Levels to Reduce False Alarms
You’ll need to find the sweet spot for sensitivity thresholds that catch real threats while ignoring harmless triggers like swaying branches or small animals.
Environmental conditions such as changing light patterns, wind, and weather can throw off your settings, so you must compensate for these factors when calibrating your system.
The key is applying zone-specific calibration methods that account for each area’s unique characteristics, whether it’s a high-traffic entrance or a quiet backyard corner.
Optimal Sensitivity Thresholds
Since motion sensors can trigger false alarms from passing cats, swaying branches, or shifting shadows, finding the right sensitivity threshold becomes essential for reliable security coverage.
You’ll need to balance detection accuracy with reliability through careful calibration. Start with a baseline sensitivity setting around 50-60% for general applications, then adjust based on your specific environment’s behavior during testing periods.
Test different thresholds while monitoring false alarm rates over several days.
Key optimization strategies include:
- Environmental testing – Evaluate how wind, foliage movement, and lighting changes affect sensor performance in your specific location
- Seasonal adjustments – Modify sensitivity settings when environmental conditions change throughout the year
- Multi-sensor confirmation – Deploy multiple sensors with varied sensitivity levels to verify motion detection from different angles
- Size-based filtering – Lower sensitivity to exclude smaller animals while maintaining human detection capabilities
Environmental Factor Compensation
While basic sensitivity adjustments provide a foundation for motion detection, environmental factors require dynamic compensation strategies that adapt to your surroundings’ unique characteristics.
You’ll need to implement environmental factor compensation by testing sensors during various weather conditions and times of day. Lower your detection sensitivity in windy areas where foliage creates false triggers, while increasing it during evening hours when security matters most.
Use Zone Motion Controllers to create customized sensitivity zones, particularly near trees or bushes prone to movement.
Consider upgrading to human presence sensors, which offer superior environmental factor compensation compared to traditional PIR detectors.
Test your settings during different conditions—rain, wind, and varying temperatures—to establish ideal thresholds that minimize false alarms while maintaining reliable detection of actual threats.
Zone-Specific Calibration Methods
After establishing baseline environmental compensation, zone-specific calibration methods allow you to fine-tune each detection area’s sensitivity levels independently.
You’ll want to adjust individual zone sensitivity to guarantee only significant movements trigger alarms, effectively filtering out small animals or environmental changes. Apply specific threshold settings alongside sensitivity adjustments to fine-tune responsiveness and reduce false positives during low-activity periods.
- Test calibrated zones in real-time by walking through them and observing system responses
- Implement timeouts using virtual motion sensors to prevent prolonged activation from minor movements
- Regularly review zone configurations based on seasonal environmental changes
- Make iterative adjustments based on false alarm frequency patterns
These motion detection settings promote peak accuracy while preventing unnecessary alerts in high-traffic or fluctuating environments.
Creating Activity Zones That Focus on Entry Points
When you’re setting up motion detection zones, your entry points deserve the most strategic attention because they’re where potential intruders will first trigger your system.
Position your activity zones directly over doors and windows to maximize detection while reducing false alerts from background movement.
Use your system’s editing interface to create custom-shaped zones that conform to your home’s architectural features. Set sensitivity levels higher for entry point zones compared to general areas, ensuring rapid response to movement in these critical locations.
Test and adjust zones regularly to accommodate seasonal changes like growing foliage or new furniture placement.
Combine entry point zones with dual sensor setups to improve accuracy and minimize false alarms from small animals or environmental factors.
Configuring Dual Sensor Confirmation Systems
You’ll want to position your dual sensors at different heights and angles to create overlapping detection fields that can distinguish between legitimate threats and false triggers.
Your timing logic should require both sensors to activate within a specific window—typically 2-3 seconds—to confirm actual movement rather than environmental interference.
This approach lets you set one sensor for immediate internal alerts while requiring dual confirmation for external alarms that might wake the neighborhood.
Sensor Placement Strategy
Although single motion sensors can trigger false alarms from pets or environmental factors, configuring dual sensor confirmation systems dramatically improves your security system’s accuracy.
Your sensor placement strategy should focus on creating overlapping detection zones where both sensors must activate simultaneously.
Mount sensors at different heights and angles to capture distinct movement patterns that confirm human presence rather than false triggers. This layered approach works exceptionally well with security cameras to verify actual threats.
- Position sensors to cover overlapping areas requiring both to detect movement before triggering external alarms
- Mount at varying heights and angles to capture different movement signatures and patterns
- Implement time-based confirmation rules where both sensors must activate within your defined timeframe
- Designate one sensor for internal alerts while using the second for external notifications
Timing Logic Rules
Proper timing logic forms the backbone of effective dual sensor confirmation systems. You’ll want to configure your sensors to require simultaneous activation within a specific timeframe before triggering external alarms. This approach considerably reduces false alarms while maintaining robust security coverage.
Set your internal alarms to activate with single sensor detection for immediate alerts, but establish higher thresholds for external responses. Test different activation timing delays to find the ideal balance between quick confirmation and security effectiveness.
Your Zone Motion Controller can create virtual sensors that combine outputs from both motion detectors, adding system flexibility. These timing logic rules guarantee both sensors confirm movement before escalating alerts.
Regularly review and adjust your calibration settings to accommodate environmental changes that might affect detection accuracy and response timing.
Setting Up Human Presence Detection Over Basic Motion
While basic motion sensors trigger on any movement—whether it’s a cat wandering through your living room or leaves blowing past a window—human presence detection takes a smarter approach by analyzing movement patterns and body heat signatures to distinguish actual people from other sources.
You’ll dramatically reduce false positives by upgrading to human presence sensors that can differentiate between humans and small animals.
When paired with a Zone Motion Controller, you’ll configure precise activity zones for accurate monitoring of designated areas.
- Fine-tune sensitivity settings to adapt to your specific environment and movement thresholds
- Use larger coverage area sensors to minimize device count while maintaining effective monitoring
- Integrate with Hubitat C-8 for seamless automation and advanced notification options
- Configure precise activity zones to eliminate unwanted detection areas
Optimizing Zone Shape and Size for Different Areas
Since motion detection zones determine what triggers your security system, customizing their shape and size becomes essential for eliminating unwanted alerts while maintaining thorough coverage.
You’ll want to create irregular shapes that closely match your area of interest, avoiding adjacent spaces like roads or sidewalks that cause unnecessary activations.
For wide open areas, use larger zones to maximize coverage, but make entry points smaller and more precise to reduce false alarms.
Drag corner points to create tailored configurations that won’t detect small animals or environmental movements.
Complex areas benefit from multiple motion detection zones with varying sensitivity settings for different activity levels.
Review and adjust your zones seasonally based on foliage changes and human activity patterns to maintain peak performance.
Implementing Time-Based Zone Activation Schedules
After enhancing your zone shapes and sizes, you’ll dramatically improve security efficiency by implementing time-based activation schedules that automatically enable motion detection only when you need it most.
Time-based activation schedules let you configure your Hubitat system so motion sensors only trigger alerts during specific hours—like nighttime or when you’re away from home. This targeted approach eliminates unnecessary notifications during busy daytime hours while maintaining protection when it matters.
- Configure nighttime-only detection to avoid alerts from normal household movement during active hours
- Set holiday scheduling to adapt detection times when hosting gatherings or during irregular occupancy patterns
- Test activation periods by simulating movement during both active and inactive timeframes to fine-tune sensitivity
- Review schedules seasonally to adjust timing based on changing routines and daylight hours for ideal coverage
Fine-Tuning Threshold Settings for Environmental Conditions
Smart scheduling maximizes your motion detection efficiency, but environmental factors can still trigger unwanted alerts even during active monitoring periods.
You’ll need to adjust sensitivity levels based on wind, rain, and lighting conditions to reduce false triggers from small animals or debris movement.
Configure your threshold settings to define the minimum motion level required for alerts. This filters out minor movements that don’t pose security risks.
Fine-tune motion thresholds to eliminate false alarms while ensuring genuine security threats still trigger your detection system.
Test these zones during different times and weather conditions to guarantee consistent effectiveness.
Enable delay or timeout features to prevent rapid repeated alerts from the same event. This is particularly useful in areas with fluctuating environmental factors.
Regularly review and adjust your threshold settings based on performance data to maintain peak detection accuracy throughout seasonal changes.
Testing and Calibrating Your Zone Configuration
Once you’ve configured your detection zones and threshold settings, you’ll need to conduct thorough testing to verify they’re working as intended.
Walk through your zones at different speeds and distances to confirm consistent activation. Start with lower sensitivity settings, then gradually increase until you achieve ideal detection without triggering false alarms from small animals or environmental factors.
Testing and calibrating your zones requires systematic monitoring:
- Document all testing results and adjustments to create a reference for future modifications
- Monitor activation timing between multiple sensors to confirm they’re capturing the same movement
- Test at various distances and speeds to confirm reliable detection across your entire coverage area
- Recalibrate seasonally when foliage growth or weather changes affect detection accuracy
Frequently Asked Questions
Where Is the Best Place to Put a Motion Detector?
You’ll want to mount your motion detector 7-10 feet high near entry points like doors and windows. Choose spots covering high-traffic areas and large open spaces while avoiding direct sunlight exposure.
What Is the Best Height for a Motion Sensor?
You’ll get ideal motion detection by mounting your sensor between 6 to 8 feet high. This height prevents false alarms from small animals while ensuring wide coverage and accurate human movement detection.
How Can I Improve My Ring Motion Detection?
You can improve your Ring motion detection by adjusting sensitivity settings, creating custom motion zones, enabling “People Only” mode, regularly updating settings seasonally, and testing coverage areas throughout different times.
Which Sensor Is Best for Motion Detection?
You’ll want PIR sensors for reliable body heat detection with low false positives. Human presence sensors offer higher accuracy by distinguishing actual human movement from pets or environmental factors, reducing unwanted alerts.


Leave a Reply