
You’ve probably walked into a dark room and wished the lights would magically turn on, or wondered if someone’s lurking around your property at night. Motion sensors can solve these everyday problems without breaking your budget or requiring advanced technical skills. These ten straightforward projects transform ordinary household items into intelligent detection systems that’ll make your home respond to movement automatically. The surprising versatility of these sensors means you can tackle security, convenience, and energy efficiency all at once.
DIY Ball-Based Vibration Motion Detector

One of the simplest vibration detectors you can build uses just a few basic components: thicker copper wire, a spring from an old pen, and an iron ball bearing.
Unlike PIR motion sensors that detect heat, this detector responds to physical vibrations through contact.
Start by soldering the ball bearing to one end of the spring, then attach copper wire to the other end. Create a circular loop at the wire’s end—this circle’s size directly affects the sensitivity of the sensor.
You’ll need hot glue to secure all components firmly in place.
Fine-tune your motion sensing device by shortening the spring or stabilizing its base.
Homemade Tilt Sensor for Motion Detection
You can build an effective tilt sensor using just a few basic components: two thick copper wires, a non-chromed copper tube, and an iron ball that fits snugly inside.
The construction process involves placing the ball in the tube, shaping one wire to contact the ball when tilted, and soldering the second wire around the tube for electrical connection.
You’ll find that adjusting the wire loop length on the first wire gives you precise control over the sensor’s sensitivity to tilt movements.
Basic Construction Components
When building a tilt sensor from scratch, gather two pieces of thick copper wire, a copper tube without chrome plating, and an iron ball that fits snugly inside the tube.
Unlike complex PIR sensors, this home motion detector uses simple materials you can easily source. Make sure the tube isn’t chromed since this interferes with soldering connections.
Start by removing insulation from both ends of your first copper wire. Shape one end into a small circle that’ll create reliable contact inside the tube. This contact point determines how sensitive your sensor becomes to movement.
Wrap the second wire around the tube’s exterior, then solder it securely for proper electrical connection.
Place the iron ball inside and seal one end to prevent it from falling out during operation.
Sensitivity Adjustment Methods
After assembling your basic tilt sensor, fine-tuning its sensitivity becomes crucial for reliable motion detection. You can adjust your tilt sensor’s responsiveness by shortening the spring or stabilizing its root to control the ball’s movement.
The copper wire circle size directly impacts sensitivity – larger circles provide greater detection range for motion detection applications. Proper tuning guarantees your tilt sensor responds accurately to movement without false triggers.
During construction, use thicker, harder copper wire to enhance durability and overall performance. The soldered ball-to-spring connection must be carefully shaped for effective operation.
Focus on achieving the desired sensitivity level through systematic adjustments. Test different spring lengths and wire circle sizes until you find the ideal configuration for your specific motion detection needs.
PIR Motion Sensor Alarm System With Arduino
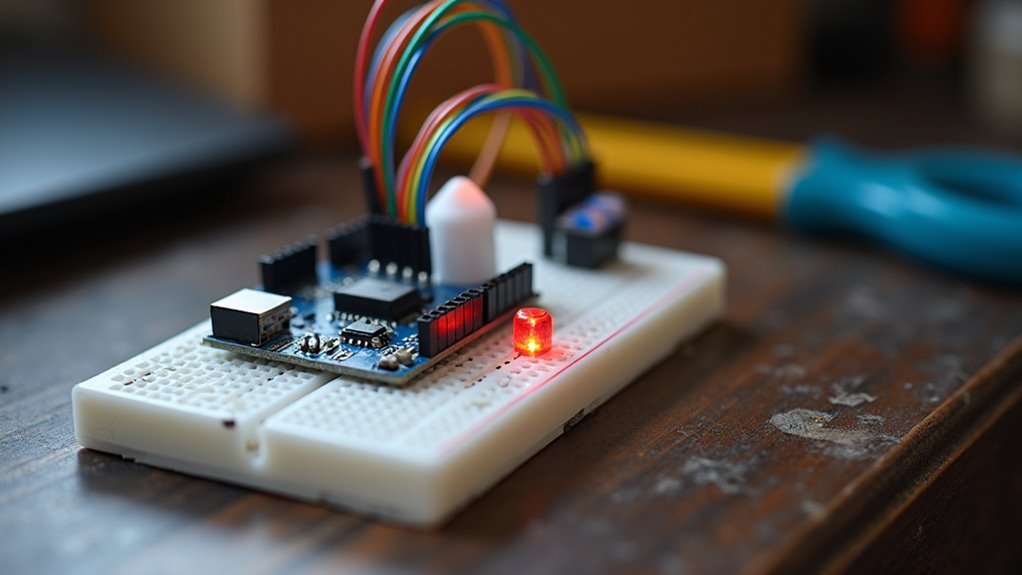
You’ll create a reliable home security system by connecting your HC-SR501 PIR sensor to an Arduino Uno and programming it to detect motion through infrared radiation changes.
The wiring setup requires connecting the sensor’s VCC to Arduino’s +5V, GND to ground, and OUT pin to digital pin 7 for motion detection signals.
Once you’ve programmed the motion detection code, you can enhance the system by adding a speaker to pin 9 that’ll sound an alarm whenever movement is detected.
Arduino PIR Wiring Setup
Three essential connections form the foundation of your Arduino PIR motion sensor alarm system. Connect the sensor’s GND pin to Arduino ground, VCC pin to +5V, and OUT pin to digital pin 7.
You’ll want to solder three pins from the PIR motion sensor onto a PCB for stable connections that guarantee reliable operation.
For your speaker setup, connect the positive terminal to pin 9 and negative terminal to ground. This configuration triggers alarm notifications when motion’s detected.
Make sure your wires are long enough to position the sensor effectively for maximum detection range.
Once you’ve completed the physical connections, use Arduino IDE to upload the provided sketch. This smart home security system will then actively monitor for movement and alert you accordingly.
Programming Motion Detection Code
Once your wiring’s complete, programming the motion detection code becomes straightforward with Arduino’s intuitive syntax.
You’ll start by defining your sensor output pin (digital pin 7) and speaker pin (pin 9) at the top of your sketch. Initialize the PIR sensor in your setup() function and set proper pin modes for input and output.
In your main loop, you’re going to put conditional statements that trigger when motion’s detected. Use digitalRead() to check the sensor’s state, then activate your alarm accordingly.
Add delay functions to control how long the alarm sounds after detection. The Serial Monitor helps debug your code by displaying detection messages.
Consider integrating with your home hub for remote notifications. Adjust sensitivity settings through code tweaks to minimize false alarms.
Automated Motion-Sensing Light Switch
While fumbling for light switches in dark hallways can be frustrating, an automated motion-sensing light switch eliminates this problem by detecting your presence and illuminating spaces instantly.
You’ll use a PIR motion sensor like the HC-SR501, which detects movement through infrared radiation changes. The system requires a microcontroller such as Arduino to manage timing controls, ensuring lights automatically turn off after periods of inactivity to conserve energy.
You can build this project for approximately $13 using readily available components including the PIR sensor, microcontroller, and basic wiring.
The HC-SR501 offers configurable settings for sensitivity and output duration, letting you customize performance. For maximum effectiveness, place your PIR sensor near entry points where it’ll reliably detect human presence and trigger your automated lighting system.
Motion-Activated Water Tap Controller

Motion detection technology extends beyond lighting control into water conservation applications, where a motion-activated water tap controller automatically manages water flow based on user presence.
You’ll find this system uses a PIR sensor connected to a DC electric valve that opens when detecting movement and closes after your programmed duration.
This controller’s particularly valuable in kitchens and bathrooms where you want minimal physical contact for better hygiene.
Installation connects the PIR sensor to your existing plumbing system with proper power supply integration.
Key customization options include:
- Flow rate adjustment – Control water pressure based on your specific needs
- Activation distance settings – Program detection range for ideal sensor response
- Timer duration control – Set automatic shutoff timing to prevent waste
You can adapt these controllers for household taps or public facilities.
Smart Motion-Sensing Ceiling Fan
When you’re looking to enhance comfort while reducing energy consumption, a smart motion-sensing ceiling fan automatically adjusts operation based on room occupancy. The system turns on when you enter the room and switches off when no movement’s detected, eliminating wasted energy from fans running in empty spaces.
You’ll need a PIR motion sensor like the HC-SR501, which offers adjustable sensitivity and timing settings for different room sizes and preferences.
For DIY projects, choose a DC fan since they’re more efficient and easier to control with microcontrollers than AC fans.
If you’re using AC-powered fans, follow proper safety precautions including appropriate relays and correct wiring.
You can enhance this system with smart home integration, enabling remote control and interaction with other devices like lighting or thermostats.
PIR-Based Intruder Alert System
Although home security systems can be expensive and complex, you can build an effective PIR-based intruder alert system using simple components like the HC-SR501 motion sensor and an Arduino microcontroller. This sensor detects infrared radiation from moving objects, instantly alerting you to potential intruders in your home.
Here’s what makes this system particularly effective:
- Strategic placement – Position your sensor near entry points like doors and windows to maximize detection capability and create an effective deterrent.
- Customizable settings – Adjust sensitivity levels and alarm duration through Arduino programming to suit your specific security needs.
- Remote monitoring – Add Wi-Fi connectivity for instant notifications to your smartphone, letting you monitor your property from anywhere.
Connect a speaker for audible alarms in low-activity areas.
Automatic Motion-Sensing Doorbell
Every day, countless visitors approach your front door unannounced, but an automatic motion-sensing doorbell guarantees you’ll never miss their arrival. This PIR-based system detects guests without manual activation, triggering customizable chimes or speakers when motion occurs. You’ll enjoy enhanced convenience and better accessibility in your home while maintaining awareness of all visitors.
The microcontroller integration allows you to adjust critical settings for peak performance:
| Component | Function | Benefit |
|---|---|---|
| PIR Sensor | Motion Detection | Automatic activation |
| Microcontroller | Settings Control | Customizable response |
| Speaker/Chime | Audio Alert | Clear notification |
| Power Supply | System Operation | Reliable functionality |
| Housing | Weather Protection | Durability outdoors |
You can modify chime duration and sensor sensitivity to match your specific needs. This cost-effective solution uses affordable components, making doorbell automation accessible for any homeowner seeking improved visitor notification systems.
Motion-Activated Door Opener Mechanism
Since accessibility and convenience drive modern home automation, a motion-activated door opener mechanism transforms any standard door into a hands-free entry system.
You’ll use a PIR motion sensor to detect approaching individuals, triggering a DC motor or actuator that opens the door automatically.
Position your motion sensor within 5-10 meters for ideal human movement detection. You can program the door’s open duration based on your preferences, typically ranging from seconds to several minutes for comfortable passage.
Essential components you’ll need:
- PIR motion sensor – Detects human presence within ideal range
- DC motor or actuator – Provides physical door-opening mechanism
- Safety features – Obstacle detection and manual override prevent accidents
Always include safety measures like obstacle detection and manual override capabilities to guarantee reliable, accident-free operation during daily use.
Outdoor Motion Sensor Floodlight Integration
You’ll want to set up a smart floodlight sensor like the HomeSeer HS-FLS100+ Z-Wave model to automatically trigger lighting when motion’s detected around your property’s entry points.
The integration process involves connecting your PIR sensor to your smart hub so you can program custom automation rules and receive instant notifications.
However, you’ll need to address weatherproofing challenges since outdoor PIR sensors must withstand rain, temperature fluctuations, and environmental factors that can cause false triggers.
Smart Floodlight Sensor Setup
When you’re ready to upgrade your outdoor security lighting, smart floodlight sensors offer the perfect blend of automation and reliability. The HomeSeer HS-FLS100+ Z-Wave Smart Floodlight Sensor detects motion and reports directly to your smart hub, enabling programmable floodlight operation that enhances both security and convenience.
Here are three effective setup approaches:
- Direct Z-Wave Integration – Connect the HS-FLS100+ to your smart hub for immediate motion detection and automated lighting responses.
- Smart Socket Solution – Wire traditional PIR LED lights to smart power sense sockets for remote control and automation capabilities.
- Enhanced Detection System – Pair reliable Bosch motion detectors with smart apps that trigger various responses through real-time power meter detection.
This integration provides flexible automation options while ensuring consistent outdoor performance over extended periods.
Weatherproof PIR Challenges
Three major obstacles plague outdoor PIR motion sensors: moisture infiltration, temperature fluctuations, and wind-triggered false alarms.
You’ll find that weatherproofing challenges can turn your outdoor motion detection into a frustrating experience with constant false alerts from rain and wind disturbances.
Aeotec actually recommends disabling motion sensor features for outdoor use due to these persistent weather-related issues.
However, you don’t have to abandon outdoor motion detection entirely. Bosch motion detectors have proven their reliability in outdoor conditions over many years, making them your best bet for consistent performance.
Alternatively, you can simplify your setup with battery-operated lux sensors that detect light levels without PIR complexities.
Smart floodlight sensors like the HomeSeer HS-FLS100+ offer another solution, integrating motion detection directly with lighting automation.
Frequently Asked Questions
How to Make a Motion Detecting Sensor?
You’ll connect a PIR sensor to an Arduino Uno by wiring VCC to +5V, GND to ground, and OUT to digital pin 7. Add an LED and speaker, then upload code to detect motion using infrared technology.
How to Make Homemade Sensors?
You’ll construct ball-based vibration detectors using thick copper wire, springs, and iron balls. Build tilt sensors with copper tubes housing iron balls. Adjust sensitivity by modifying spring length and secure components with soldering tools and hot glue.
How to Trick a Motion Sensor to Stay On?
You can trick a motion sensor by waving a flashlight beam across it, placing a small fan nearby for constant movement, or using the manual override setting if available.
How Do You Turn a Normal Light Into a Motion Sensor?
You’ll connect a PIR motion sensor to a microcontroller like Arduino, then program it to control your light’s power. Use a relay module for higher voltage lights and position the sensor strategically.


Leave a Reply