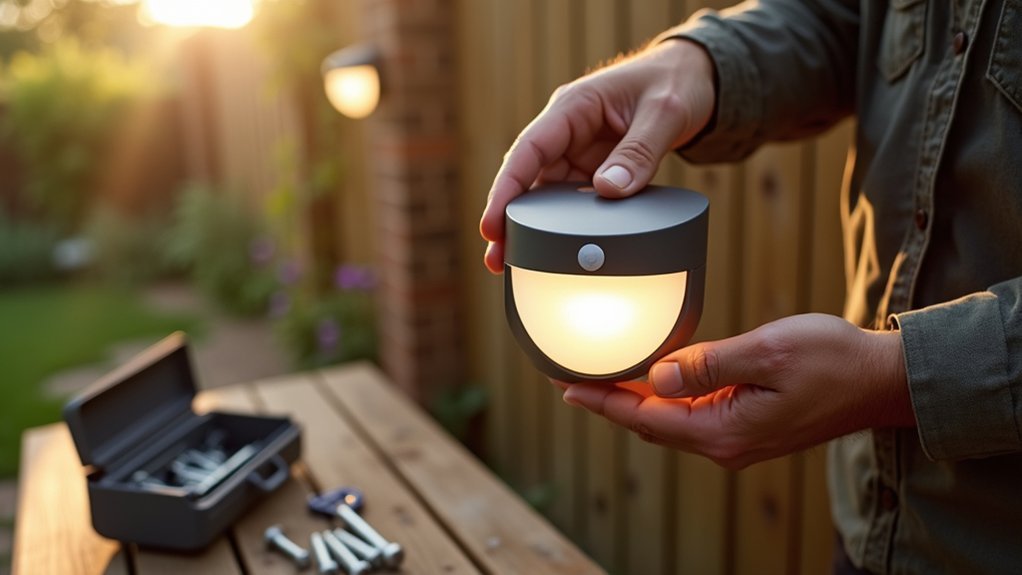
Installing motion sensor lights is simpler than you think. First, turn off power at the breaker and confirm with a voltage tester. Remove your old fixture, connect wires (black to black, white to white, green to ground), mount the new sensor at 8-10 feet high, and apply weatherproof sealant around the edges. Adjust sensitivity settings and test by walking through detection zones. The perfect combination of height, angle, and sensitivity settings will maximize your security coverage.
What You’ll Need: Tools and Materials Checklist
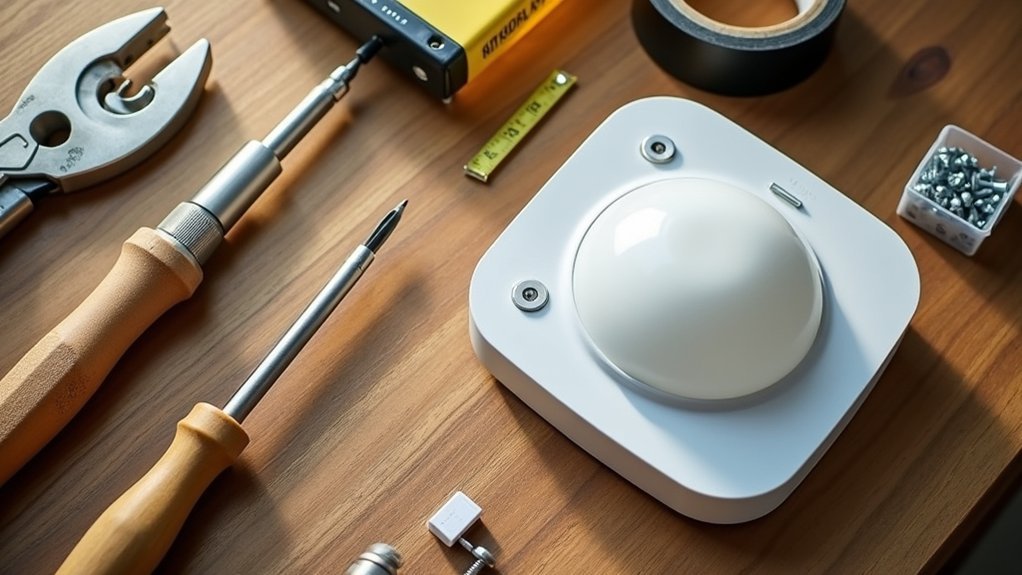
Five essential categories of items will guarantee your motion sensor light installation goes smoothly.
Start with electrical tools: wire cutters, terminal screwdriver, voltage tester, and electrical tape. Don’t forget your drill if mounting on tough surfaces.
Proper electrical tools are your first defense against installation headaches—never start the job without them.
For mounting, you’ll need brackets, screws, wire connectors, measuring tape, and a sturdy ladder.
Basic electrical supplies include neutral (white), hot (black), and ground wires, plus your fixture. Apply silicone caulk around junction boxes to prevent water damage during outdoor installations.
Safety gear is non-negotiable: wear goggles and gloves, use a stable ladder, and keep a flashlight handy for dim areas. Mark installation spots with a pencil.
Consider optional specialized tools like a knife for stripping wires, cable ripper, electrician’s pliers, level, and spare mounting hardware for different surfaces.
Safety First: Turning Off Power and Testing Circuits
Before you begin installing your motion sensor lights, turn off the circuit breaker that controls power to the installation area.
You’ll need a voltage tester to confirm the circuit is truly dead before touching any wires or electrical components.
Always keep safety equipment like insulated gloves and safety glasses nearby to protect yourself during the installation process. Working during daylight hours will significantly improve visibility and reduce the chance of installation mistakes.
Verify Circuit Power
Electricity poses serious safety hazards during any lighting installation. Before touching any wires, you must confirm your circuit is completely powered off. First, turn off the appropriate breaker at your electrical panel, then test the circuit using a non-contact voltage tester.
| Testing Step | Safety Action |
|---|---|
| Test known live outlet | Confirm tester works properly |
| Test work area fixtures | Verify no power present |
| Check all wire connections | Ascertain complete circuit isolation |
| Re-test after delays | Prevent accidental re-energizing |
Don’t rely solely on flipping switches—hidden connections or mislabeled breakers can leave dangerous live wires. Always test each wire at your installation point before proceeding. Using a motion sensor connected to your circuit provides automatic functionality once your installation is complete. If you detect any voltage during testing, return to the panel and try a different breaker until you’ve completely isolated power.
Essential Safety Equipment
Properly equipping yourself with the right safety gear forms the foundation of any electrical installation project.
Always wear insulated gloves rated specifically for electrical work to protect against shock hazards. Pair these with non-conductive footwear to prevent grounding your body during installation.
Don’t overlook eye protection—safety goggles shield your eyes from debris and unexpected sparks. Long-sleeve clothing made of flame-resistant material offers additional protection for your skin.
Keep a first-aid kit within reach for immediate response to minor injuries.
Remember that proper tools matter too—use insulated, purpose-built electrical tools and maintain a clean, uncluttered workspace. Always confirm circuit safety by using a voltage meter to verify power is completely off before beginning any work on electrical fixtures.
This combination of personal protective equipment and proper tools creates a safer environment for your motion sensor light installation project.
Choosing the Perfect Location for Maximum Coverage
To optimize your motion sensor’s effectiveness, you’ll need to carefully select its position based on your specific coverage needs.
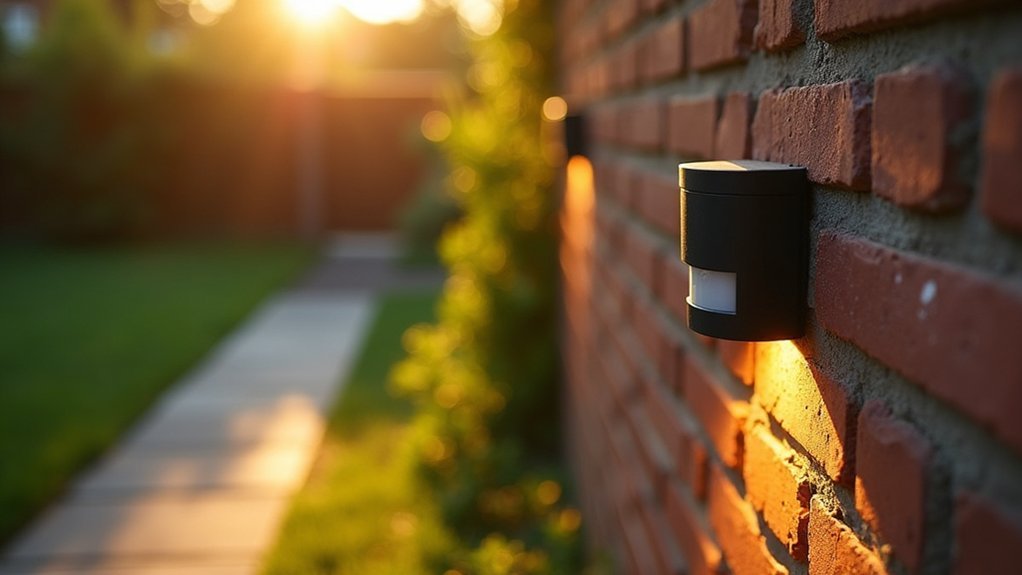
Mount indoor sensors 6-8 feet high on walls or in corners with unobstructed views of high-traffic areas, while outdoor sensors work best at 8-10 feet to capture wider spaces like driveways.
Consider environmental factors that might trigger false alarms, such as nearby light fixtures, moving foliage, or passing traffic, and adjust the angle downward to increase ground coverage while reducing unwanted activations. For maximum security coverage, place sensors in high traffic areas where potential intruders must pass through.
Strategic Placement Principles
Finding the ideal location for your motion sensor lights dramatically improves both security effectiveness and energy efficiency. Position sensors to cover key entry points like doors, windows, and gates while ensuring they’ve an unobstructed line of sight to maximize detection range.
Mount sensors away from busy roads and reflective surfaces to reduce false alarms. Avoid direct sunlight on the lens and place them to detect movement across rather than toward the field of view.
For optimal coverage, install sensors at corners to monitor multiple approach directions, and create overlapping zones to eliminate blind spots. Place your motion sensor lights high up to prevent tampering and ensure they cannot be easily disabled by intruders.
Keep the area free of tall objects that block detection, and position sensors above 6-8 feet to avoid pet-triggered alerts.
Integrate with existing security cameras and lighting systems for a thorough security solution.
Height and Angle Considerations
When installing motion sensor lights, the height and angle of placement serve as critical factors that determine detection accuracy and coverage area.
Mount your sensors between 8 and 10 feet above ground level for ideal performance. This height range minimizes false alarms from pets or vegetation while maximizing detection range. Different sensor technologies require varying heights for optimal performance based on their detection capabilities and sensitivity levels.
Avoid mounting below 6 feet, as this dramatically increases false triggers. Position sensors at approximately eave height on single-story homes for improved coverage.
Angle the sensor slightly downward to guarantee it detects human-sized targets without missing movement close to the installation point.
Consider your sensor’s detection angle (typically 90°-180°) when choosing placement. The right combination of height and angle helps you avoid common issues like environmental triggers, while guaranteeing thorough security coverage around your property.
Weather and Obstruction Factors
Weather and environmental factors greatly impact your motion sensor light’s effectiveness, requiring careful consideration during installation.
Mount sensors under eaves or covered areas to protect from rain and snow that can trigger false alarms or reduce detection range. Avoid positioning lights where condensation might form on lenses during high humidity.
Be strategic about obstructions. Trees, shrubs, vehicles, and structural elements create blind spots or cause unwanted activations when they move in the wind.
Don’t place sensors facing east or west where direct sunlight may interfere with detection.
Choose weatherproof sensors (IP65 rating or higher) with protective lens covers for long-term reliability.
Regularly trim vegetation near detection zones and adjust sensitivity settings to exclude areas prone to movement from non-target sources like wildlife or wind-blown objects. For optimal performance, install your motion sensor lights at 6 to 10 feet above ground level to ensure the best coverage and detection capability.
Removing Your Old Light Fixture Properly
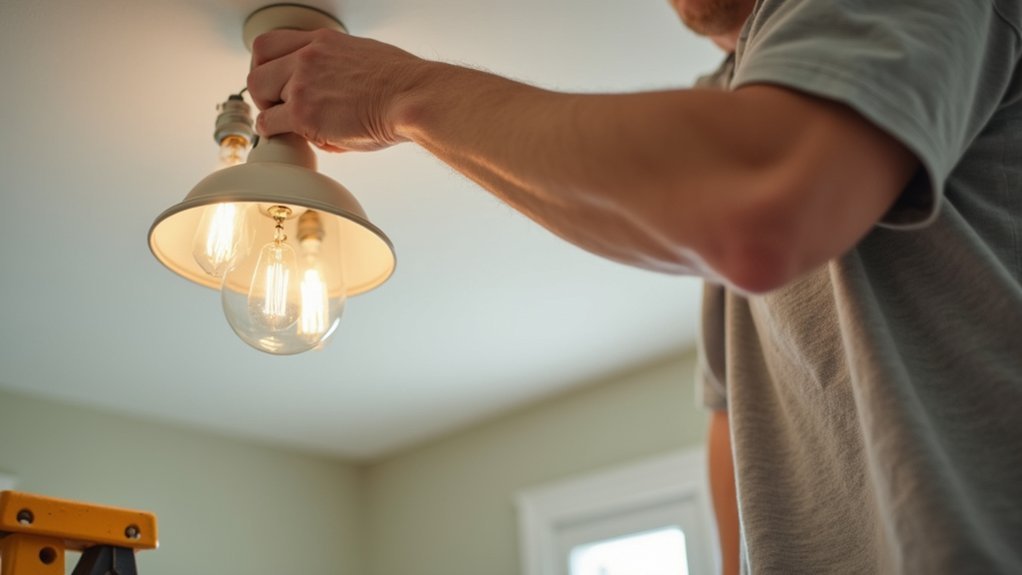
Before installing your new motion sensor light, you’ll need to safely remove the existing fixture. First, turn off power at the circuit breaker and verify with a voltage tester that electricity is completely off.
Remove any bulbs, then unscrew decorative caps and mounting hardware. Support the fixture with one hand while you work to prevent drops.
Once exposed, unscrew the wire nuts connecting your fixture to the house wiring, separating black (hot), white (neutral), and green/bare (ground) wires.
Carefully detach the fixture completely after all connections are undone. Inspect wires for damage and tuck them neatly into the electrical box.
Clean the mounting area thoroughly to guarantee your new motion sensor light will have a secure, proper connection.
Understanding the Wiring Color Codes and Connections
When installing your motion sensor light, you’ll need to understand the critical wire color codes that typically identify black or brown as hot, white or blue as neutral, and green as ground.
Proper identification of these wires prevents dangerous cross-connections and guarantees your motion sensor will function correctly once installed.
Always secure your connections with appropriate wire nuts, twisting the copper ends together tightly before capping and wrapping with electrical tape for an extra layer of protection. Some international products use brown, blue, and green stripe wiring colors which may differ from standard USA color codes.
Color Code Basics
Understanding electrical wire color codes is fundamental to installing motion sensor lights safely and correctly.
In standard residential systems, you’ll encounter three main wire types, each with distinct colors and functions.
Hot wires (black or red) carry current from your power source to the fixture. Black typically serves as the primary hot wire, while red often indicates a secondary hot wire in 240V circuits. Proper identification of these wires is crucial as it reduces downtime during installation and future maintenance.
Neutral wires (white or gray) complete the circuit by returning current to the source. These must never be confused with hot wires.
Ground wires (green, green with yellow stripes, or bare copper) provide a safety path for fault currents, protecting you from electrical shock.
Always verify wire function with a voltage tester, as older homes may not strictly follow current color standards.
Secure Connection Methods
Successfully installing your motion sensor lights depends on properly connecting the various colored wires in your electrical system.
Always turn off power at the breaker before starting and verify with a voltage tester.
Connect the black sensor wire to your home’s black hot wire using wire nuts. Join the white neutral wires together, and connect the bare/green ground wires for safety. If your sensor has a red wire, this connects to your light fixture.
Mount your sensor securely where it’ll detect the desired area. Twist wires tightly before capping with appropriately sized wire nuts. Any unused wires should be individually capped to prevent hazards.
After all connections are secure, restore power and test by walking through the detection zone. Set the timer to Test mode initially to check your motion sensor’s responsiveness. Adjust sensitivity and timing settings as needed for ideal performance.
Mounting Your Motion Sensor Light Securely
Proper mounting serves as the foundation for effective motion sensor light performance. Install your fixture six to ten feet above ground for ideal coverage, positioning it to monitor doorways, pathways, or driveways.
Choose a stable, flat surface and clean it thoroughly before installation. Use a level to mark mounting holes, then drill appropriate pilot holes. For masonry surfaces, insert plastic anchors for better grip.
Secure the mounting bracket with corrosion-resistant hardware, connecting wires before final attachment. Verify the fixture doesn’t wobble when fully tightened. Adjust the sensor angle using the swivel bracket to fine-tune coverage areas. After installation, you should restore power to the light fixture and test its functionality.
After installation, test by walking through detection zones. Make sensitivity adjustments to prevent false triggers from heat sources, sunlight, or unwanted movement.
Weatherproofing Your Outdoor Installation
When exposed to the elements, outdoor motion sensor lights need thorough weatherproofing to guarantee longevity and reliable operation. Choose fixtures with high IP ratings (IP65+) and look for “Outdoor Rated” or “Wet Location” labels on packaging.
During installation, apply silicone sealant to all gaps and use waterproof electrical tape on connections. Install gaskets between the fixture and mounting surface to prevent moisture intrusion. Route wiring through proper outdoor conduit, avoiding areas where water pools. Durable materials like corrosion-resistant aluminum provide superior weather protection for outdoor installations.
Seal all gaps with silicone, use waterproof tape, and install gaskets to shield connections from moisture penetration.
Seal all wire entry points with waterproof putty after installation and test with a light water spray to check for leaks.
For long-term protection, inspect seals biannually and clean lenses regularly. Replace weatherproofing materials every few years to maintain your light’s weather resistance.
Setting Detection Range and Sensitivity Controls
Fine-tuning your motion sensor’s detection range and sensitivity controls guarantees peak performance while minimizing false triggers. Start by mounting your sensor at the recommended height (6-10 feet) with the head angled slightly downward (5°-15°) to prevent water accumulation.
Begin with sensitivity set to the lowest level, then gradually increase until you achieve desired coverage. Most sensors offer up to 180° horizontal coverage with maximum range reaching 60-66 feet at high settings.
For ideal detection, position the sensor so motion crosses its field of view rather than approaching directly. Always use the test mode switch when making adjustments to immediately see the effects of your changes without waiting for the timer delay.
Test your settings by walking in expanding circles beneath the sensor. For specific applications, customize accordingly—higher sensitivity for driveways, moderate for entryways, and lower for areas with potential false triggers from animals or moving plants.
Programming Timer and Light Duration Settings
Programming your motion sensor’s timer and light duration settings allows you to customize how long lights remain illuminated after detecting movement. Most sensors offer durations from 30 seconds to 30 minutes, with various intervals in between.
To program a Leviton Decora sensor, press the designated section of the push pad for about 5 seconds to enter programming mode. The LED will flash to indicate available time options. Press the button multiple times to select your preferred duration, then hold until the LED glows solid to confirm. For Leviton’s VPT24 timer switch, you can choose between Standard mode programming for basic functionality or PRO mode for advanced features.
Programming your Leviton Decora sensor is straightforward—press the pad for 5 seconds, select your timing as the LED flashes, then hold to confirm.
Choose settings based on the area’s typical usage patterns—shorter times (2-5 minutes) work well for hallways, while longer durations suit outdoor security.
Testing different settings helps you balance convenience with energy savings and bulb longevity.
Walk-Testing and Fine-Tuning Your Motion Sensor
Once properly installed, walk-testing your motion sensor lights guarantees they provide reliable coverage and respond appropriately to movement. Begin testing by activating the test mode according to your manual—usually by pressing a specific button or sequence. Testing during daylight hours is particularly important to ensure your motion sensors function in all conditions.
| Testing Step | What to Look For | Troubleshooting |
|---|---|---|
| Daylight testing | Cover photocell or use test mode | If unresponsive, check manual for override |
| Walking patterns | Move at various angles and speeds | Adjust sensor position for dead zones |
| LED indicators | Red (sensitivity), yellow (microwave), green (PIR) | Blinking patterns indicate detection status |
| Coverage area | Complete field detection without gaps | Reposition sensor to eliminate blind spots |
| Sensitivity adjustment | Balance between security and false alarms | Fine-tune settings based on LED feedback |
After testing, verify your sensor returns to normal operation mode—most exit test mode automatically after approximately 10 minutes.
Frequently Asked Questions
Can I Install Motion Sensor Lights on a Sloped Ceiling?
Yes, you can install motion sensor lights on a sloped ceiling. You’ll need specialized fixtures designed for angled surfaces and adjustable sensor mounts to guarantee proper coverage and detection. Position them 8-10 feet high for best performance.
Will My Motion Sensor Light Detect Pets or Small Animals?
Most motion sensors will detect pets unless they’re pet-friendly models. You’ll need sensors with adjustable sensitivity or pet immunity features that ignore animals under a certain weight, typically 85 pounds, to prevent false triggers.
Can Motion Sensors Work Through Glass or Windows?
Most PIR motion sensors won’t work through glass as it blocks infrared heat. However, pixel-based sensors and microwave sensors can detect movement through windows. For reliable detection, you’ll need sensors specifically designed for this purpose.
How Do I Stop My Neighbor’s Lights From Triggering My Sensor?
You can stop neighbor’s lights from triggering your sensor by adjusting its sensitivity, installing physical barriers, repositioning it away from property lines, or upgrading to directional sensors with customizable detection zones. Communication with neighbors helps too.
Can I Connect Multiple Motion Sensor Lights to One Switch?
Yes, you can connect multiple motion sensor lights to one switch. Wire them in parallel, ensuring each sensor can handle the total load. This setup lets you control all lights simultaneously while maintaining individual motion detection capabilities.
In Summary
You’ve successfully installed your motion sensor lights! Now you’re enjoying enhanced security and convenience around your home. Remember to adjust your settings seasonally for peak performance, and periodically clean the sensor lens for continued reliability. If you encounter any issues, check the batteries or revisit your wiring connections. With minimal maintenance, your motion sensor lights will serve you well for years to come.


Leave a Reply