
You’ll transform your home automation dreams into reality with a Raspberry Pi command center that puts every smart device at your fingertips. Whether you’re controlling lights, monitoring security cameras, or adjusting your thermostat, this compact powerhouse becomes your home’s nerve center. The project seems straightforward, but there’s one critical decision that’ll make or break your entire setup – and it’s not what you’d expect.
Essential Hardware Components for Your Command Center

Building your Raspberry Pi command center starts with selecting the right hardware foundation.
You’ll need a Raspberry Pi 4 for peak performance, as it provides robust processing power and built-in WiFi capabilities essential for your setup. Choose a compatible screen with HDMI input—either a TV or computer monitor works well for displaying information clearly.
Don’t forget essential peripherals: a USB mouse and keyboard are necessary for initial configuration and software installation.
Consider adding an optional infrared touchscreen frame to enhance interactivity, making it easier for family members to engage with displayed content.
Finally, secure a stable wall mount suitable for your chosen screen, adjusted for portrait orientation. This guarantees your command center display is safely and properly installed.
Choosing the Right Display and Mounting Options
Three key factors will determine your command center’s effectiveness: display size, resolution, and mounting strategy.
You’ll want a screen with HDMI input compatibility—TVs and computer monitors work perfectly with your Raspberry Pi 4, which handles high-resolution displays smoothly.
Choose an adjustable wall mount that supports portrait orientation, especially if you’re planning calendar displays. This positioning maximizes visibility and creates a sleek, professional appearance.
Mount your display securely to wall studs for stability, using washers to level it properly if needed.
When building a frame around your display, select materials that provide easy access to monitor controls and your Raspberry Pi.
You’ll appreciate this accessibility during maintenance and future adjustments to your command center setup.
Raspberry Pi Initial Setup and Configuration
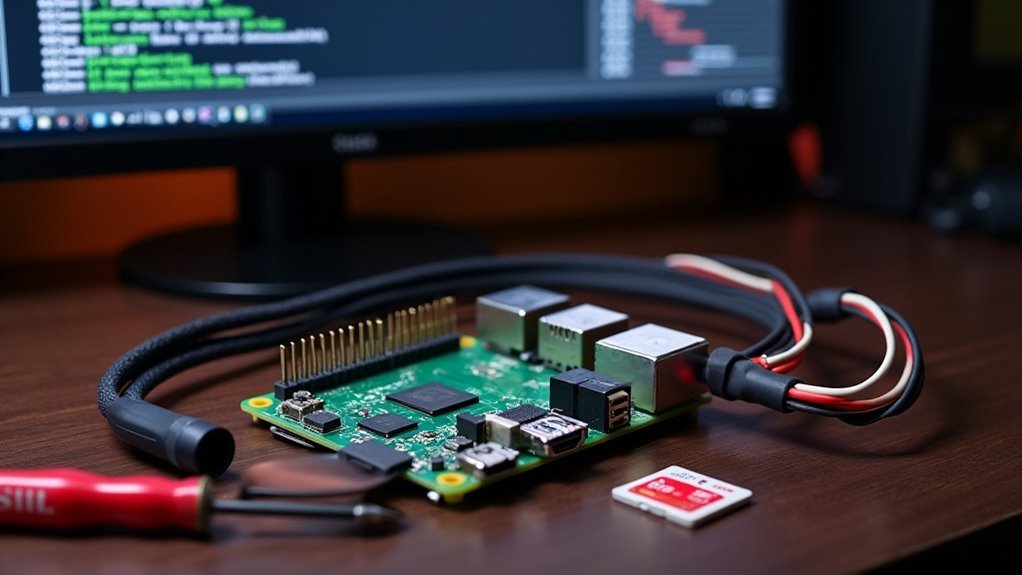
Before you can transform your Raspberry Pi into a powerful home command center, you’ll need to gather the essential hardware components and prepare them for installation.
Start with a Raspberry Pi 4 (4GB RAM recommended), a high-quality 32GB or larger microSD card, a reliable power supply, and an Ethernet cable for stable network connectivity.
Once you’ve assembled these components, you’ll be ready to flash the operating system and configure your Pi for ideal performance as your home’s central control hub.
Hardware Requirements and Preparation
Setting up your Raspberry Pi Home Command Center requires four essential components: a Raspberry Pi 4 or 3, a micro SD card with at least 8GB of storage, an HDMI-compatible monitor, and a stable wired Ethernet connection.
You’ll need these components working together to create an effective command center that can access online calendars and web services reliably.
Before starting your project, gather these essential components:
- Raspberry Pi 4 or 3 – Your main computing device
- Micro SD card (8GB minimum) – Primary storage for the operating system
- HDMI-compatible monitor – Display for your command center interface
- Wired Ethernet connection – Guarantees stable internet connectivity
Download Raspberry Pi Imager to install Raspbian on your micro SD card. This tool simplifies the installation process and guarantees proper formatting for peak performance.
Operating System Installation Process
Four key steps will transform your Raspberry Pi into a functional home command center, starting with the operating system installation.
Download the Raspberry Pi Imager from the official website and select your preferred operating system image—Raspberry Pi OS Lite or Home Assistant OS work excellently for command centers.
Insert your microSD card (32GB minimum recommended) and write the image using the Imager, then safely eject it.
Next, insert the prepared card into your Raspberry Pi and connect it to a reliable power source with wired Ethernet for stability.
Power on and wait for the boot process to complete.
Access your Pi via SSH using its IP address from your router’s client list, then configure your username, password, and location while updating system packages.
Installing Home Assistant Operating System
The foundation of your Raspberry Pi command center begins with flashing the Home Assistant Operating System onto a micro SD card using the official Raspberry Pi Imager.
You’ll want a 32GB or larger card for peak performance. Once flashed, insert the SD card into your Raspberry Pi and establish a wired Ethernet connection for reliable network access during setup.
After powering on, wait a few minutes for the system to boot and configure itself. Then navigate to http://homeassistant:8123 in your web browser to begin setup.
- Create your admin account with username and password
- Set accurate server location for sun timing features
- Let Home Assistant automatically scan for smart devices
- Manually add any integrations for undetected devices
Connecting to Your Wireless Network
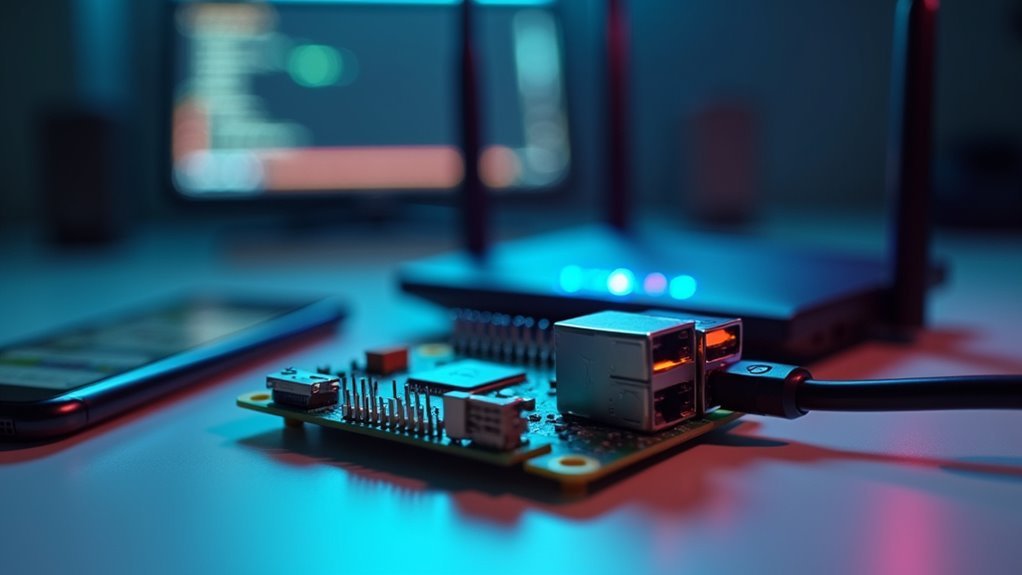
While Ethernet provides stable connectivity during initial setup, shifting to wireless networking gives your Raspberry Pi command center the flexibility to operate from any location in your home.
Wireless connectivity transforms your Raspberry Pi from a desk-bound device into a truly mobile command center with unlimited placement possibilities.
You’ll need to configure your wireless network connection next. If you’re using the desktop interface, navigate to the Wi-Fi icon and select your network from the available list. Enter your password when prompted.
For headless setups, you’ll need to edit the `wpa_supplicant.conf` file on your SD card before booting.
Ensure your Raspberry Pi has adequate Wi-Fi capability—models Pi 3B and later include built-in wireless, while earlier versions require a compatible USB adapter.
Position your device within good range of your router for ideal performance.
Setting Up Calendar Synchronization
Once your Raspberry Pi connects to your wireless network, you’ll want to integrate calendar synchronization to transform it into a true family command center.
Your Raspberry Pi-based system can effectively manage multiple family schedules by using Google Calendar as your primary hub while keeping Outlook as your authoritative work calendar source.
- Use Microsoft Flow templates or sync tools to automatically transfer specific Outlook categories to Google Calendar for real-time updates
- Perform a one-time archival sync to integrate all existing calendar entries into your Google Calendar system
- Monitor Google Calendar’s ICS file size limitations that may impact synchronization of larger calendar entries
- Enable family members to access current event information through the centralized display
This configuration guarantees seamless calendar management across all household members.
Configuring Weather and News Integrations
After establishing your calendar synchronization, you’ll enhance your command center’s functionality by integrating real-time weather and news feeds that keep your family informed throughout the day.
Configure weather integrations on your Raspberry Pi using APIs like OpenWeatherMap or WeatherAPI, which deliver current conditions based on your location. Set up news feeds by utilizing RSS from your preferred sources, displaying headlines directly on your screen.
Ensure your Raspberry Pi has internet connectivity and install necessary libraries like Python’s `requests` for data fetching.
Use JavaScript or Python scripts to extract and format information, customizing how data appears on your dashboard. Automate refresh intervals every 10-15 minutes to maintain current, relevant information for your household’s daily needs.
Creating Custom Dashboard Layouts
With your weather and news data flowing seamlessly into your Raspberry Pi, you’ll want to organize this information into a visually appealing and functional dashboard layout.
Home Assistant’s Lovelace dashboard system gives you complete control to customize your interface according to your specific needs and preferences.
You can easily modify the default layout by dragging and dropping cards, resizing them, and rearranging their order to prioritize your most important information.
The system supports various card types including calendar views, weather updates, and device controls that display glanceable information effectively.
- Drag and drop cards to reorganize your dashboard layout intuitively
- Apply custom themes using YAML configuration for enhanced visual appeal
- Install community-contributed cards to extend functionality beyond standard options
- Create responsive layouts that adapt to different screen sizes and viewing angles
Adding Smart Device Controls
While your dashboard provides excellent information display, the real power of your Raspberry Pi command center emerges when you integrate smart device controls directly into the interface.
Install Home Assistant to enable extensive smart home integrations supporting lights, thermostats, and security systems. Connect your Pi to your network so Home Assistant can automatically discover compatible devices.
Transform your Raspberry Pi into a comprehensive smart home hub by installing Home Assistant for seamless device integration and automatic discovery.
Add integrations for specific brands like Philips Hue, Z-Wave, or Zigbee through the interface. Customize your Lovelace dashboard with visual cards for easy device access and management. You’ll control everything from a single screen.
Create powerful automations by setting up rules within Home Assistant. Program lights to turn off when motion stops or adjust thermostats based on your family’s schedule for seamless home automation.
Wall Mounting Your Display Screen
Three critical factors determine the success of your wall-mounted command center: proper mount selection, secure installation, and accessible component placement.
Your wall display requires a mount that supports both your screen’s weight and portrait orientation capabilities. Always anchor the mount to wall studs for maximum stability and support.
- Choose a mount rated for your screen’s specific size and weight requirements
- Use washers and spacers to achieve a perfectly level, flush wall display appearance
- Anchor the bottom frame directly to the wall for additional security against shifting
- Plan cable routing and component access before finalizing the mounting position
You’ll want to maintain easy access to monitor controls and your Raspberry Pi after installation.
Proper planning guarantees your command center remains both functional and visually appealing.
Installing Touchscreen Functionality
Adding touchscreen functionality transforms your wall-mounted display from a passive monitor into an interactive command center that responds directly to your touch.
You’ll need an infrared touchscreen frame that fits over your existing display to activate touch capabilities.
Connect the touchscreen’s USB interface to your Raspberry Pi, which will register touch inputs as mouse events.
Install the specific driver software for your touchscreen model to guarantee proper recognition.
Configure your Pi’s settings to calibrate touch responsiveness and optimize the user experience.
After installation, test the touchscreen functionality by running a simple script that confirms touch events register correctly.
This verification step guarantees your interactive display works seamlessly before integrating it into your home automation system.
Building and Attaching the Frame
You’ll need to construct a sturdy frame that houses your touchscreen display while maintaining easy access to all components.
Cut your molding pieces slightly longer than needed to guarantee proper fits, then finish them with black latex paint for a professional appearance.
Mount the frame securely to wall studs in portrait orientation, anchoring both the wall bracket and the bottom frame directly to the wall for maximum stability.
Frame Construction Techniques
Once you’ve gathered your materials, begin cutting the frame pieces slightly longer than your measurements to avoid costly waste and confirm each joint fits snugly together.
These frame construction techniques confirm your wall mounted Raspberry Pi Zero command center looks professional and functions reliably.
Apply glue strategically to attach individual pieces to your main structure, but leave corners unglued for easy access to your Pi’s internal components.
This approach allows future maintenance without dismantling the entire frame.
Consider these essential finishing touches:
- Install decorative molding around frame edges for a polished, professional appearance
- Mount your screen securely to the wall before constructing the frame structure
- Attach the bottom frame piece directly to the wall for maximum stability
- Test component accessibility before final assembly
Secure Wall Mounting
Proper wall mounting forms the foundation of your command center’s stability and longevity.
You’ll need to select a wall mount that’s rated for your display’s weight and size, ensuring it accommodates portrait orientation if required.
For secure wall mounting, drill directly into wall studs using appropriate anchors and screws rather than relying on drywall alone. Use washers to level your screen during installation, checking alignment before tightening everything down permanently.
Once mounted, construct a decorative frame around the display using molding for a polished appearance while preserving access to monitor controls and your Raspberry Pi.
Reinforce the entire setup by attaching the frame’s bottom section directly to the wall for maximum stability.
Power Management and Scheduling
While your Raspberry Pi home command center provides incredible functionality, implementing smart power management guarantees it operates efficiently without unnecessary energy waste.
Smart power management transforms your Raspberry Pi from an energy-draining device into an efficiently optimized home automation powerhouse.
You’ll reduce electricity costs and extend your hardware’s lifespan by scheduling automatic shutdowns during inactive hours.
Set up cron jobs to automate on/off schedules, ensuring your device runs only when needed.
Enable built-in power management features that adjust CPU frequency and disable unused peripherals during idle periods.
- Schedule automated power cycling using cron for specific operating hours
- Enable CPU frequency scaling and peripheral management for idle optimization
- Install smart power strips for programmable power scheduling and reliability
- Monitor consumption with tools like nmon or htop to identify optimization opportunities
Regular monitoring helps you fine-tune your power management strategy for maximum efficiency.
Troubleshooting Common Setup Issues
When building your Raspberry Pi home command center, you’ll likely encounter a few common setup hurdles that can derail your project.
The most frequent issues include SD card corruption from power problems, display connection troubles that leave you staring at a blank screen, and WiFi configuration errors that prevent your device from connecting to the internet.
Let’s tackle these problems head-on so you can get your command center running smoothly.
SD Card Corruption
SD card corruption stands as one of the most frustrating obstacles you’ll encounter when setting up your Raspberry Pi home command center.
Power glitches, improper shutdowns, and low-quality SD cards can wreak havoc on your system, causing data loss and instability that’ll derail your project.
You can protect your investment and sanity by taking proactive measures:
- Use high-quality SD cards from reputable brands and format them properly before installation
- Create regular backups using Win32 Disk Imager or Raspberry Pi Imager for quick recovery
- Mount your SD card as read-only to reduce write cycles and extend its lifespan
- Install a UPS to prevent sudden power loss that causes corruption
These simple steps will keep your command center running smoothly.
Display Connection Problems
Display connection problems can stop your Raspberry Pi command center project dead in its tracks, often manifesting as blank screens, flickering displays, or complete signal loss.
Start by checking that your HDMI cable is securely connected between the Raspberry Pi and display. Verify your monitor’s powered on and set to the correct input source, as many displays have multiple input options requiring manual selection.
Ensure your Raspberry Pi’s receiving adequate power through a proper 5V, 3A power supply, as under-voltage issues frequently cause display problems.
If you’re using a touchscreen, confirm the necessary drivers are installed and the display’s recognized.
Access the Raspberry Pi configuration settings to adjust HDMI output modes if you’re experiencing resolution issues or misaligned displays.
WiFi Configuration Errors
Although wireless connectivity forms the backbone of most home command center setups, WiFi configuration errors can quickly derail your Raspberry Pi project with frustrating connection failures and intermittent dropouts.
These configuration issues often stem from incorrect credentials, special characters in passwords, or network interface problems that’ll prevent your command center from accessing essential online services.
- Double-check your WiFi credentials (SSID and password) for accuracy and consider testing with a simpler password to eliminate special character conflicts
- Use `iwconfig` in the terminal to verify your WiFi interface detection and configuration status
- Restart both your router and Raspberry Pi to refresh network settings and clear temporary glitches
- Establish a temporary wired Ethernet connection to confirm device functionality before continuing WiFi troubleshooting
Frequently Asked Questions
How Do I Set up a Home Command Center?
You’ll gather essential supplies like a screen, Raspberry Pi 4, and peripherals. Connect everything, install software like DakBoard, mount the screen securely, customize content with calendars and weather, then add optional enhancements.
Can Chatgpt Write Code for Raspberry Pi?
Yes, ChatGPT can write Python code for your Raspberry Pi projects. You’ll get GPIO control scripts, sensor interface code, Flask web servers, library installation guides, and debugging help for home automation systems.
How Do I Start My Raspberry Pi in Command Line?
You’ll boot your Pi into command line by running `sudo raspi-config`, selecting Boot Options, then Console Autologin. Reboot afterward. Alternatively, press `Ctrl + Alt + F1` while running to access terminal.
Why Is Raspberry Pi Not Used in Industry?
You’ll find Raspberry Pi isn’t used industrially because it lacks durability for harsh environments, has limited real-time processing, presents security vulnerabilities, and can’t scale effectively for demanding industrial applications.


Leave a Reply