You’re paying more for electricity than necessary, and your home’s energy consumption remains a mystery until that monthly bill arrives. A Raspberry Pi can transform this frustrating cycle by giving you real-time visibility into exactly where your watts are going. With basic hardware components and straightforward setup procedures, you’ll gain the power to monitor, analyze, and automatically control your home’s energy usage—but first, you need to understand what makes an effective energy monitoring system tick.
Understanding Home Energy Monitoring Fundamentals
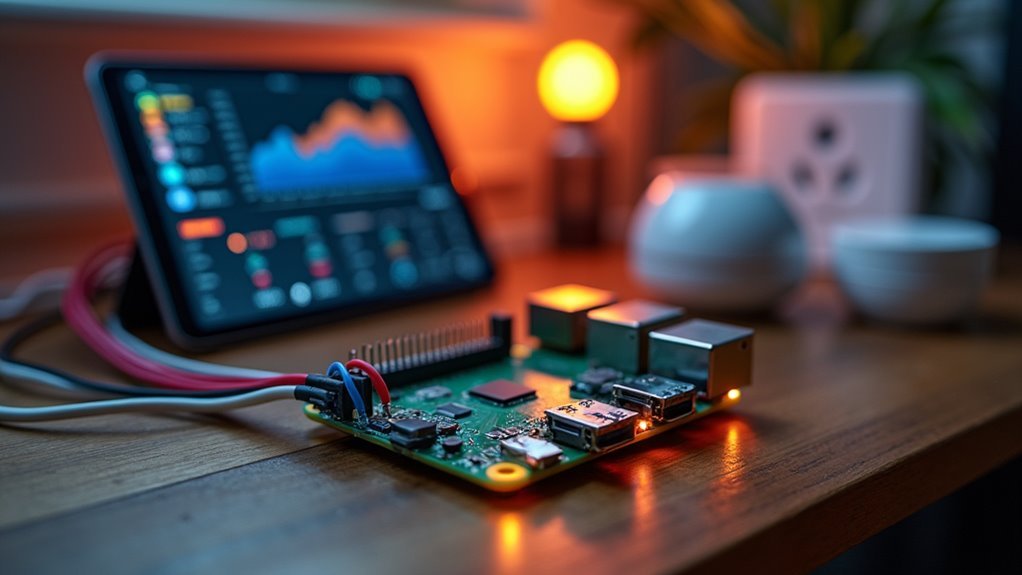
While traditional energy bills only show monthly totals, home energy monitoring transforms how you understand your electricity consumption by providing real-time data and detailed usage patterns.
You’ll gain immediate insights into which appliances consume the most power and when your usage peaks throughout the day.
With a Raspberry Pi home automation system, you can create a centralized hub that collects data from smart meters and connected devices.
This setup displays energy information on your local network, making consumption tracking accessible from any device in your home.
You’ll identify costly appliances quickly and make informed decisions about energy efficiency improvements.
Real-time monitoring enables you to adjust usage habits immediately, potentially reducing monthly costs while optimizing your household’s overall energy performance.
Essential Components for Your Raspberry Pi Energy Controller
You’ll need specific hardware components to build an effective Raspberry Pi energy controller that can monitor and manage your home’s power consumption.
Your setup requires core processing hardware, reliable communication modules for data transmission, and robust power management components to handle electrical loads safely.
Let’s examine each category to understand what you’ll need for a successful energy control system.
Core Hardware Requirements
Building a reliable home energy control system starts with selecting the right hardware components that’ll work seamlessly together. Your Raspberry Pi Model 2 or 4 provides the computational backbone, offering sufficient processing power and GPIO pins for connecting multiple components simultaneously.
| Component | Purpose |
|---|---|
| 433MHz Transmitter/Receiver | Wireless communication with smart devices |
| Relay Channel Modules | Control electrical appliances remotely |
| Jumper Cables | Connect Raspberry Pi to relay modules |
| Breadboard & Soldering Kit | Build and test circuitry safely |
The 433MHz wireless pair enables communication with smart sockets and relay modules throughout your home. Relay boards connect directly to your Pi’s GPIO pins, allowing precise control over electrical appliances. Quality jumper cables guarantee stable connections, while a breadboard facilitates safe prototyping before permanent installation.
Communication Module Selection
Selecting the right communication module determines how effectively your Raspberry Pi energy controller will interact with smart devices throughout your home. A 433MHz transmitter/receiver pair stands out as the best choice for wireless communication with your energy monitoring system.
These modules offer exceptional value, combining affordability with widespread availability for DIY automation projects.
When choosing your communication module, prioritize range and signal reliability. Adding an external antenna dramatically improves transmission distance and signal quality.
Connect the receiver carefully to your Raspberry Pi’s GPIO pins, using appropriate resistors to prevent damage and guarantee accurate data capture.
Leverage Python’s RPi.GPIO library for seamless integration. This approach simplifies programming your smart devices to transmit and receive energy consumption data wirelessly throughout your home automation network.
Power Management Components
Strategic component selection forms the foundation of any successful Raspberry Pi energy controller, determining both system reliability and operational efficiency.
You’ll need a Raspberry Pi Model 4 as your central processing unit, providing peak performance for managing power operations throughout your home.
A relay channel module board enables safe switching of electrical appliances, allowing your Raspberry Pi to control power flow without risking damage.
You’ll require a 433MHz transmitter/receiver pair for wireless communication with remote-controlled power sockets, expanding your system’s reach beyond hardwired connections.
Jumper cables connect your Raspberry Pi to relay modules without complex soldering, while a breadboard facilitates prototyping and circuit testing.
Don’t forget a reliable power supply to guarantee your Raspberry Pi operates consistently, maintaining uninterrupted energy management capabilities.
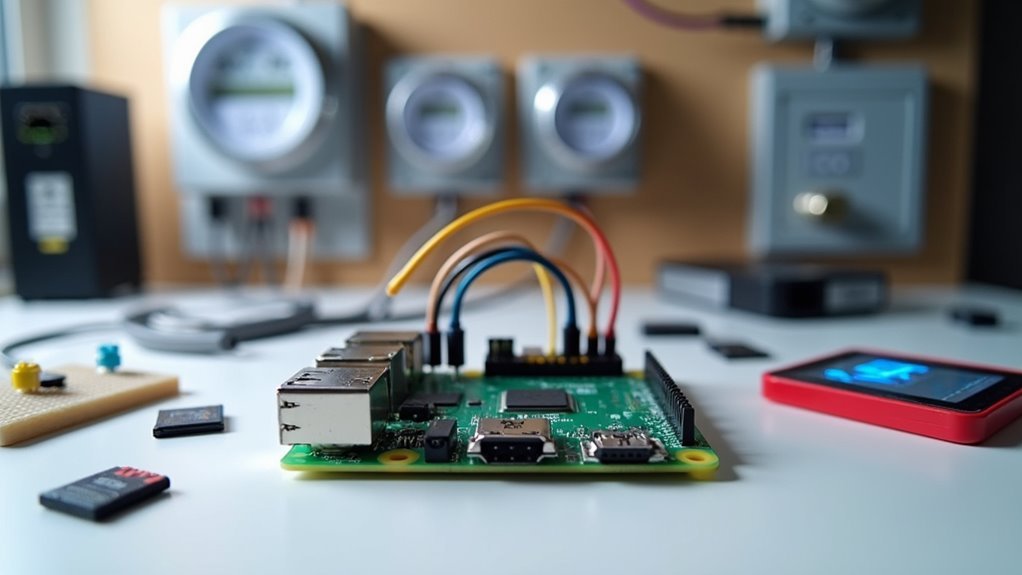
Setting Up Raspberry Pi Hardware and Operating System
You’ll need to select the right Raspberry Pi model and install the proper operating system to create an effective energy monitoring hub.
Start by choosing a Raspberry Pi 4 for ideal performance, then write the latest Home Assistant image to a high-quality 32GB SD card using Raspberry Pi Imager.
Once you’ve prepared the software, connect your Pi to a wired Ethernet connection and power it up to begin the initial configuration process.
Choose Right Pi Model
Three key hardware decisions will determine your home energy control system’s reliability and performance. Your Pi model choice directly impacts how effectively you’ll manage Home Energy monitoring and control tasks.
The Raspberry Pi 4 stands out as the recommended option for peak performance in home automation projects. Its improved processing power and memory capabilities surpass earlier models, ensuring smooth operation when handling multiple energy devices simultaneously.
You’ll want to pair your Pi 4 with a fast SD card of 32GB or more for efficient setup and operation. Write the latest stable Home Assistant image using Raspberry Pi Imager for streamlined installation.
Install Operating System Image
Once you’ve secured your Raspberry Pi 4 and fast SD card, installing the operating system becomes straightforward with the right tools.
Download the Raspberry Pi Imager and install the operating system image by selecting Home Assistant OS specifically designed for Pi 4/400 models. This specialized OS enhances energy efficiency while providing thorough smart home control capabilities.
Write the image onto a 32GB or larger SD card for peak performance.
Insert the prepared card into your Raspberry Pi and connect it to a wired network for stable initial setup. Power on the device and wait several minutes for the boot process to complete.
Access Home Assistant by guiding to http://homeassistant:8123 in your browser.
Complete the setup wizard by providing your name, username, password, and accurate location for proper energy efficiency scheduling.
Connect Essential Components
With your operating system now running, connecting the essential hardware components transforms your Raspberry Pi into a functional energy monitoring hub.
You’ll need to establish a stable wired Ethernet connection to guarantee reliable communication with smart devices throughout your home. This connection enables your Raspberry Pi to effectively monitor electricity consumption from various appliances and systems.
Power on your device and wait approximately five minutes for the system to fully initialize.
Once ready, navigate to http://homeassistant:8123 in your web browser to access the Home Assistant interface. During initial setup, you’ll provide essential details including your username, password, and accurate server location.
This location data guarantees proper sun-up and sun-down timing calculations for automated energy management schedules and peak electricity consumption monitoring across your connected devices.
Installing Required Software and Dependencies
Before you can begin monitoring and controlling your home’s energy consumption, you’ll need to install the essential software and dependencies on your Raspberry Pi.
Start by installing Raspbian as your operating system, which includes Python for scripting capabilities essential to your energy control project.
Once your operating system is running, open the command line and install necessary libraries. Execute `sudo apt-get install python3-rpi.gpio python3-pygame` to add GPIO pin control and graphical interface capabilities.
For remote access, install SSH and SFTP clients like PuTTY and FileZilla on your computer.
Ensure your Raspberry Pi connects to the internet via Ethernet or Wi-Fi for downloading updates.
Consider using Raspberry Pi Imager to write specialized home automation images directly onto your SD card for peak performance.
Connecting Current Transformers and Voltage Sensors
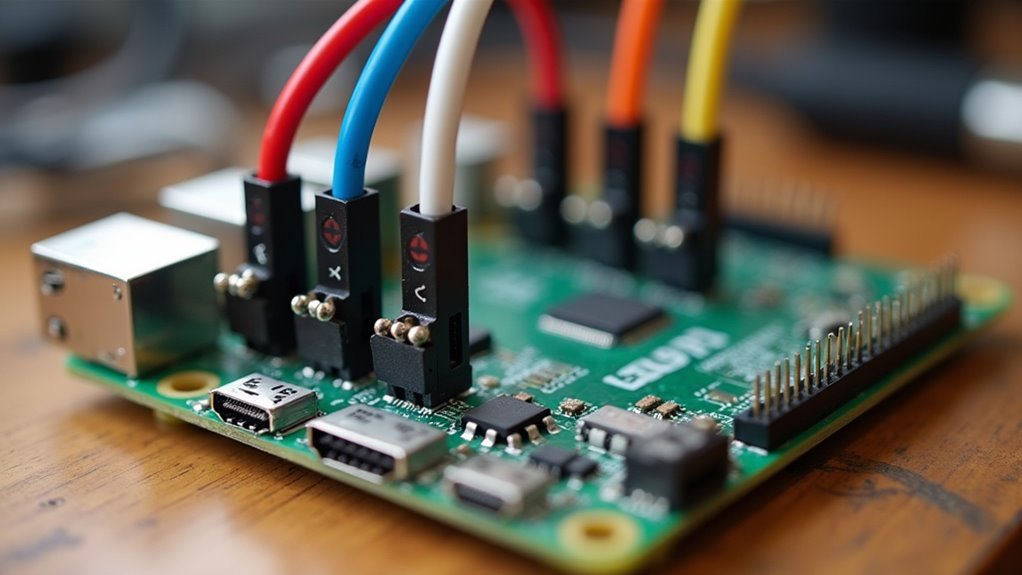
You’ll need to wire your CT clamps correctly to avoid damaging your Raspberry Pi’s sensitive GPIO pins.
Start by connecting the CT’s output through a burden resistor and voltage divider circuit before feeding the signal to an ADC module.
Once you’ve established the physical connections, you’ll calibrate your voltage sensors against known reference values to guarantee accurate power measurements.
Wiring CT Clamps
Two essential sensors form the backbone of your Raspberry Pi energy monitoring system: current transformers (CTs) that measure electrical current flow and voltage sensors that track line voltage levels.
When wiring CT clamps to your Raspberry Pi, you’ll need an analog-to-digital converter since the Pi lacks built-in analog inputs. Connect your CT clamps through jumper cables to the ADC, ensuring proper signal conversion.
Follow these critical wiring guidelines:
- Install an appropriately rated burden resistor to convert current signals into readable voltage.
- Shield all CT wiring to prevent electromagnetic interference from distorting readings.
- Verify voltage sensor outputs don’t exceed the Pi’s 3.3V maximum input threshold.
- Adhere to manufacturer specifications for safe wiring configurations.
- Double-check all connections before powering up your monitoring system.
Voltage Sensor Calibration
Once your CT clamps and voltage sensors are wired to the ADC, calibrating these components becomes essential for obtaining reliable energy measurements.
You’ll need to apply a known reference voltage to calculate the proper scaling factor for your voltage divider circuit. Start by measuring your home’s actual voltage using a quality multimeter, then compare this reading to your sensor’s raw output values.
Adjust your software calculations to match the reference measurement precisely. The voltage divider resistor values determine your sensor’s range, so make certain they’re properly configured before calibration begins.
Document your scaling factors and implement regular recalibration schedules to account for component drift over time. This systematic calibration approach guarantees accurate voltage readings essential for effective energy monitoring throughout your home automation system.
Configuring GPIO Pins for Energy Measurement
When setting up your Raspberry Pi for energy measurement, you’ll need to properly configure the GPIO pins to interface with various sensors and monitoring devices.
Your Raspberry Pi 3 or 4 provides 40 GPIO pins that you can utilize for thorough energy monitoring systems.
With 40 GPIO pins available on your Raspberry Pi 3 or 4, you have extensive connectivity options for comprehensive energy monitoring applications.
Here’s what you need to take into account for proper GPIO configuration:
- Install the RPi.GPIO Python library to control pin states as input or output
- Connect sensor data pins to appropriate GPIO pins with secure power and ground connections
- Implement voltage divider circuits when measuring high voltages to protect against damage beyond 3.3V
- Use `GPIO.input(pin_number)` function in Python scripts to read sensor states
- Wire energy measurement devices correctly to guarantee accurate data collection
This setup enables effective energy consumption monitoring throughout your home.
Calibrating Sensors for Accurate Power Readings
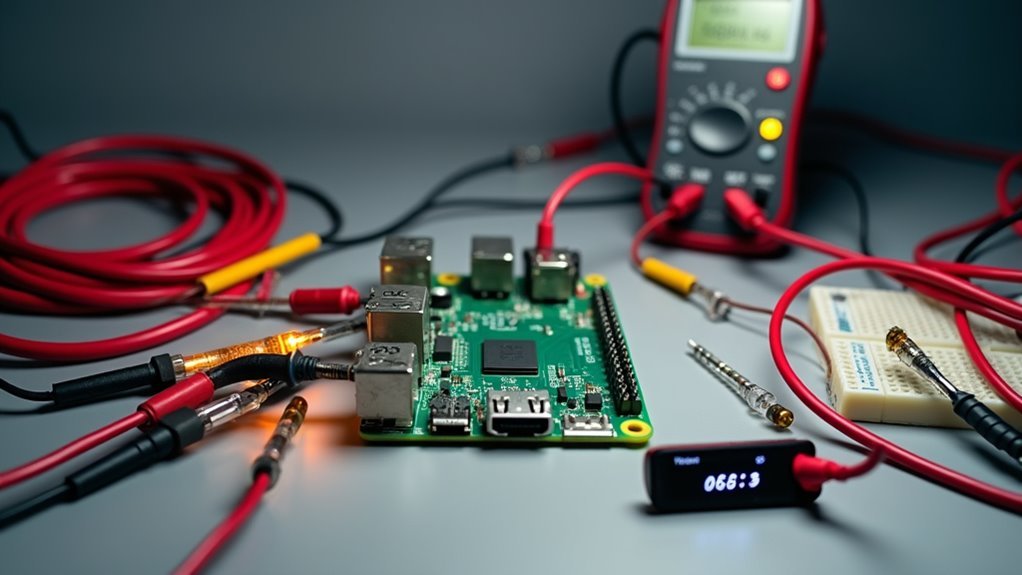
After properly wiring your GPIO pins to energy measurement devices, you’ll need to calibrate these sensors to obtain accurate power readings from your monitoring system. Calibrating sensors involves comparing their outputs to known reference values and making necessary adjustments to correct any measurement discrepancies.
Perform calibration under stable environmental conditions to minimize temperature fluctuation impacts. Use test loads with predetermined power consumption to verify your current sensors are functioning correctly.
| Calibration Step | Equipment Needed | Expected Result |
|---|---|---|
| Reference comparison | Known load device | Baseline measurement |
| Adjustment phase | Calibration software | Corrected readings |
| Verification test | Documentation tools | Confirmed accuracy |
Document all calibration procedures and results to maintain ongoing accuracy and reliability in your power monitoring system for future reference.
Creating Real-Time Energy Monitoring Dashboard
With your sensors now properly calibrated, you can build a thorough real-time energy monitoring dashboard that transforms raw power data into actionable insights.
Your Raspberry Pi becomes the central hub for displaying current electricity consumption with minimal lag, integrating data from smart meters and third-party APIs like n3rgy.
The dashboard features include:
- Capacitive touch display for intuitive navigation through energy statistics
- Half-hourly usage data visualization with detailed appliance breakdowns
- Black background interface design reducing glare while maintaining clarity
- Weather forecast integration to correlate energy patterns with environmental conditions
- HomeAnalytics software providing local access without cloud dependencies
You’ll access extensive energy usage patterns that enhance efficiency awareness.
The user-friendly interface maintains low information density, ensuring you can quickly identify consumption trends and optimize your home’s energy performance effectively.
Programming Automated Energy Control Functions
Since your dashboard now displays real-time energy data, you’ll want to implement automated control functions that respond intelligently to consumption patterns. You’ll create Python scripts that interface with relay modules through GPIO pins to control energy-consuming devices like lamps and appliances automatically.
| Function | GPIO Pin | Device Type | Schedule | Power Savings |
|---|---|---|---|---|
| lamp_control() | GPIO 18 | LED Lighting | 7:00 PM – 11:00 PM | 40% |
| appliance_scheduler() | GPIO 23 | Coffee Maker | 6:30 AM Daily | 25% |
| hvac_automation() | GPIO 24 | Smart Thermostat | Temperature-based | 35% |
| standby_eliminator() | GPIO 25 | Entertainment Center | Idle Detection | 15% |
| peak_hour_manager() | GPIO 12 | High-draw Appliances | Off-peak Hours | 50% |
Use time.sleep() strategically in your Python script for timing accuracy, and implement crontab scheduling for automated execution at designated times.
Implementing Smart Scheduling for Energy Optimization
You can program your Raspberry Pi to automatically shift energy-intensive tasks away from peak demand hours, reducing both costs and grid strain.
Weather-based load balancing takes this further by adjusting your home’s energy consumption based on forecasted conditions—running your dishwasher before a storm hits or delaying the dryer when solar generation will be low.
These smart scheduling strategies transform your Pi into an intelligent energy manager that responds to both time-of-use rates and environmental factors.
Automated Peak Hour Avoidance
Although electricity rates fluctuate throughout the day, you can leverage your Raspberry Pi to automatically shift energy-consuming tasks away from expensive peak hours.
Implementing automated peak hour avoidance transforms your home into an intelligent energy management system that operates seamlessly without constant manual intervention.
Your Raspberry Pi can execute sophisticated scheduling strategies through:
- Crontab scheduling – Program scripts to automatically control appliances during low-cost energy periods
- Home Assistant integration – Track real-time energy consumption and adjust schedules based on actual usage data
- Alert notifications – Receive warnings when peak hours approach, prompting you to delay high-energy tasks
- Smart plug connectivity – Enable remote device control for ideal timing coordination
- Dynamic rate monitoring – Continuously analyze energy costs to maximize savings opportunities
This automated approach eliminates guesswork while consistently reducing electricity expenses.
Weather-Based Load Balancing
When weather conditions shift throughout the day, your Raspberry Pi can intelligently reschedule energy-intensive tasks to capitalize on perfect renewable energy generation periods.
Weather-based load balancing enhances your energy consumption by automatically scheduling high-energy appliances during favorable conditions, like sunny afternoons when solar panels generate peak electricity.
Your Raspberry Pi interfaces with weather APIs to retrieve real-time forecasts and predict energy availability.
You’ll program it to delay running dishwashers, charging electric vehicles, or operating heating systems until prime weather windows occur.
This smart scheduling reduces grid electricity reliance during expensive peak hours.
Setting Up Remote Access and Mobile Control
Why settle for monitoring your home energy system only when you’re physically present?
Remote access and mobile control transform your Raspberry Pi into a powerful gateway for managing energy consumption from anywhere. You’ll gain complete oversight of your home’s power usage whether you’re at work or traveling abroad.
Setting up thorough remote access requires multiple security layers:
- Enable SSH and configure router port forwarding to access your Pi remotely
- Install dynamic DNS service for consistent domain naming despite changing IP addresses
- Deploy VPN server on your Raspberry Pi for encrypted network connections
- Implement mobile applications like Home Assistant for smartphone-based device control
- Add two-factor authentication to protect against unauthorized system access
These configurations guarantee secure, reliable mobile control while maintaining robust protection for your energy management infrastructure.
Data Logging and Historical Energy Analysis
Once you’ve established remote access to your Raspberry Pi energy monitoring system, collecting and analyzing historical consumption data becomes your next critical objective. Data logging captures electricity usage at regular intervals, storing information in CSV files for easy analysis. You’ll identify peak usage times, seasonal trends, and cost-saving opportunities through historical energy analysis.
| Data Source | Log Interval | File Format |
|---|---|---|
| Smart Meter | 15 minutes | CSV |
| Solar PV | 5 minutes | CSV |
| Smart Appliances | 1 minute | JSON |
Your Raspberry Pi can integrate multiple sources, including solar systems and smart appliances, creating detailed consumption reports. Visualizing this logged data through graphs helps you quickly understand usage behaviors and optimize energy management for maximum efficiency and savings.
Integrating With Smart Home Devices and Protocols
While data logging provides valuable insights into your energy consumption patterns, connecting your Raspberry Pi to smart home devices amplifies its control capabilities exponentially.
Connecting your Raspberry Pi to smart devices transforms passive energy monitoring into active, intelligent power management throughout your entire home.
You’ll transform raw energy data into actionable automation that actively manages your home’s power consumption.
Home Assistant on your Raspberry Pi automatically discovers and configures supported devices, eliminating complex programming requirements.
You’ll gain centralized control over your entire smart ecosystem through these integration capabilities:
- MQTT, Zigbee, and Z-Wave protocols for seamless device communication
- 433MHz transmitter/receiver pairs for controlling traditional appliances
- Cloud service connections enabling remote mobile access
- Community-driven integrations supporting lights, security systems, and thermostats
- Automatic device discovery reducing manual configuration time
You’ll control everything from smart thermostats to traditional lamps, creating thorough energy management systems that respond intelligently to your consumption patterns.
Troubleshooting Common Setup and Performance Issues
Even the most carefully planned Raspberry Pi energy control systems can encounter frustrating obstacles that prevent proper operation.
Start by checking all wiring connections, ensuring they’re secure and properly configured to prevent power issues or miscommunication with relay modules.
You’ll need to monitor the CPU load regularly, as high usage creates timing inaccuracies in code execution, particularly affecting time.sleep() functions during signal transmission.
If your Pi becomes unresponsive, check for overheating or insufficient power supply causing system instability.
Switch to the `gpiozero` library for simplified GPIO control with built-in error handling.
This helps you troubleshoot issues more effectively while managing GPIO pins easier.
Keep your operating system and libraries updated, as newer versions often resolve performance bugs and compatibility problems.
Frequently Asked Questions
What Is the Total Cost to Build a Raspberry Pi Energy Monitoring System?
You’ll spend approximately $150-300 total building an energy monitoring system. Costs include the main board ($35-75), current transformers ($20-60), voltage sensors ($10-30), enclosure ($15-40), and miscellaneous components ($70-95).
How Much Electricity Does the Raspberry Pi Energy Controller Consume Daily?
You’ll find the energy controller consumes approximately 3-8 watts daily, depending on your Pi model and attached sensors. That translates to roughly 0.07-0.19 kWh per day, costing about $0.01-0.03 in electricity.
Can This System Work With Solar Panels and Battery Storage Systems?
You can integrate solar panels and battery storage with energy management systems. They’ll monitor solar production, battery charge levels, and automatically switch between grid power, solar energy, and stored battery power based on availability.
Is Special Electrical Certification Required Before Installing Current Transformers?
You’ll need electrical certification in most jurisdictions before installing current transformers. They’re connected to your main electrical panel, requiring licensed electrician work to guarantee safety and code compliance.
How Does This Compare to Commercial Energy Monitoring Solutions Like Sense?
You’ll find DIY current transformer setups cost considerably less than Sense’s $300+ price tag, but you’ll sacrifice plug-and-play convenience for manual installation and programming requirements.


Leave a Reply