
You’ll transform your Raspberry Pi into a smart occupancy sensor that can monitor room presence, trigger automated responses, and integrate with your home automation system. While the basic concept involves connecting a PIR motion sensor to GPIO pins and writing detection code, there’s more to creating a reliable system than simply detecting movement. The real challenge lies in distinguishing between actual occupancy and false triggers, which requires careful calibration and potentially advanced detection methods.
Understanding PIR Motion Sensors for Occupancy Detection
When building an occupancy sensor with your Raspberry Pi, you’ll need to understand how PIR (Passive Infrared) motion sensors work as the foundation of your project. Your PIR sensor detects motion by sensing changes in infrared radiation from warm objects like humans and animals within its range.
The sensor typically covers three to seven meters and offers adjustable sensitivity and delay settings, with delays ranging from five seconds to five minutes.
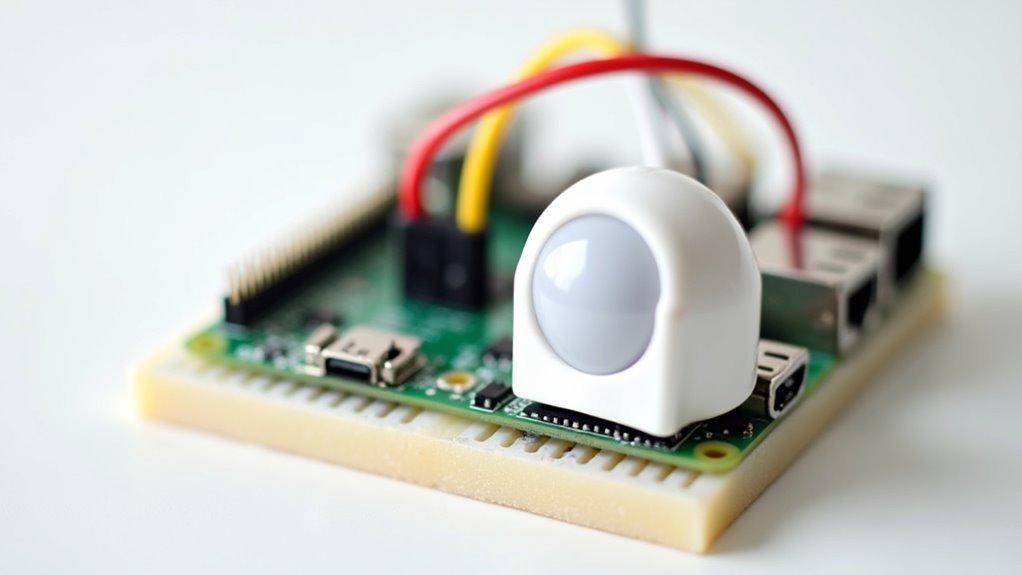
Your PIR sensor features three simple pins: Vcc connects to 5V power, Gnd connects to ground, and Out connects to your Raspberry Pi’s GPIO pin. When motion’s detected, the sensor outputs a high signal that can trigger notifications or activate lights.
These sensors are perfect for home automation and security systems because they’re cost-effective and consume minimal power.
Required Hardware Components and Tools
You’ll need specific electronic components to build your thermal-based occupancy sensor that goes beyond basic PIR motion detection.
The core hardware includes a Raspberry Pi ($35), an MLX90640 thermal camera breakout ($55), and a Breakout Garden connector ($10-14) for seamless integration.
You’ll also require basic assembly tools and need to take into account power supply requirements to guarantee your sensor operates reliably.
Essential Electronic Components
Building a reliable occupancy sensor starts with gathering the right electronic components and tools for your project.
You’ll need several key elements to create an effective detection system that responds accurately to human presence.
Your core components include:
- Raspberry Pi – Your system’s brain, delivering the processing power you need
- HC-SR501 PIR motion sensor – The vigilant eye that detects movement within 3-7 meters
- Teltonika TRM240 LTE modem – Your instant communication lifeline for SMS alerts
- LED indicators (red/green) – Visual feedback that keeps you informed at a glance
Don’t forget supporting components like a DC to DC converter and 1K resistor.
These guarantee proper voltage regulation and current flow throughout your circuit, preventing component damage and maintaining system stability.
Power Supply Requirements
Your carefully selected components won’t function without proper power management to keep everything running smoothly. Understanding the power supply requirements for your Raspberry Pi occupancy sensor guarantees reliable operation and prevents system failures.
Your Raspberry Pi needs a stable 5V power supply through its micro USB or USB-C connector, depending on your model. The HC-SR501 PIR motion sensor also operates at 5V and should connect directly to your Pi for best compatibility. For additional components like LEDs, you’ll need proper voltage regulation using an LM2596 converter.
| Component | Voltage | Current | Connection |
|---|---|---|---|
| Raspberry Pi | 5V | 2.5-3A | USB-C/Micro USB |
| PIR Motion Sensor | 5V | 50mA | GPIO Pins |
| LTE Modem | 5V | 2A | USB Port |
| LED Indicators | 3.3V | 20mA | GPIO/Converter |
| LM2596 Converter | 5V Input | Variable | Power Rail |
Make sure all connections remain secure for consistent functionality.
Assembly Tools Needed
Before tackling this project, gather the essential hardware components and tools that’ll make your assembly process smooth and efficient.
Your Raspberry Pi occupancy sensor relies on precise connections between the PIR motion sensor and GPIO pins to detect motion through infrared radiation detection.
Essential components you’ll need:
- HC-SR501 PIR motion sensor – The perfect solution for reliable motion detection with two potentiometers for sensitivity adjustment.
- Female-to-female Dupont wires – Makes it easy to connect each pin on the Raspberry Pi GPIO without soldering.
- LM2596 DC converter and 1K resistor – Guarantees stable power delivery to motion sensors.
- Electrical tools – Wire strippers and multimeter help you find proper connections.
Make certain your gpiozero import library supports distance sensor integration when motion is detected at each ground pin connection point.
Setting Up the Raspberry Pi Environment
Once you’ve assembled your hardware components, establishing the proper software foundation becomes essential for your occupancy sensor to function reliably.
Start by installing the necessary software using the terminal command `sudo apt install python3 python3-gpiozero python-serial -y`. You’ll need your Raspberry Pi connected to an Ethernet network to enable software updates and communication with the LTE modem.
Ensure your Raspberry Pi has network connectivity before running the software installation command to avoid dependency errors.
Next, verify your LTE modem connection by running `ls /dev/ttyUSB*` to check connected devices.
Connect your HC-SR501 PIR motion sensor to the GPIO pins: Vcc to a 5V pin, Gnd to any ground pin, and Out to your chosen GPIO pin.
Finally, create a Python script using the `gpiozero` library to handle GPIO inputs and implement motion detection logic.
Wiring the PIR Sensor to GPIO Pins
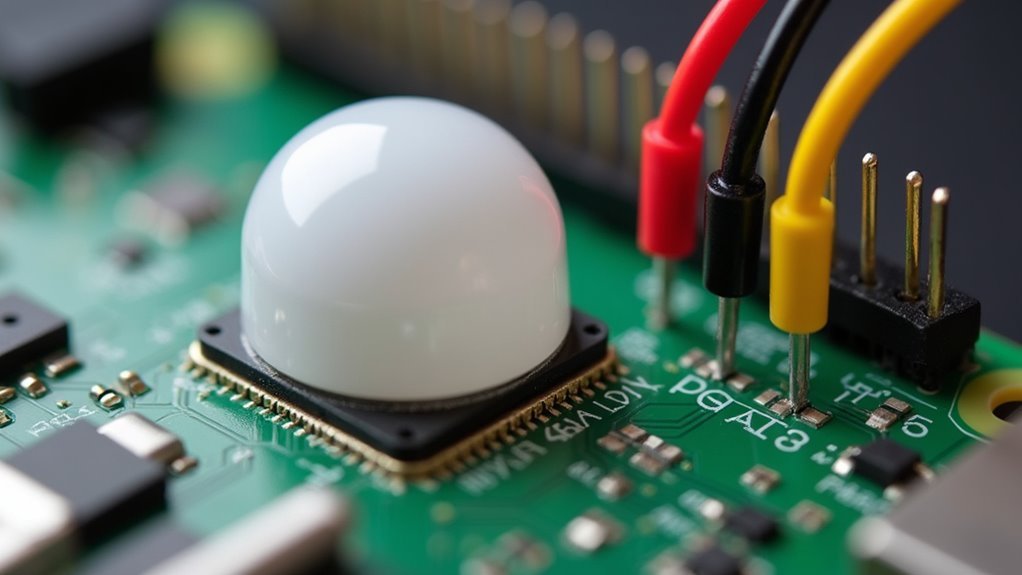
Three essential connections link your PIR sensor to the Raspberry Pi’s GPIO interface.
Before making any connections, you’ll need to identify the three pins on your PIR sensor, which might be obscured by the Fresnel lens.
Here’s how to wire your PIR sensor correctly:
- Connect Vcc to 5V – This provides the power your PIR sensor needs to detect motion and send signals.
- Connect Gnd to Ground – This completes the electrical circuit and guarantees proper operation.
- Connect Out to GPIO 4 – This carries the motion detection signal from your sensor to the Pi.
- Double-check pin labels – Verify each connection since incorrect wiring can damage your components.
These three simple connections transform your Raspberry Pi into a motion-detecting powerhouse.
Installing Essential Python Libraries
Now that your PIR sensor connects properly to the GPIO pins, you’ll need the right Python libraries to make everything work together. Open your terminal and execute this command: `sudo apt install python3 python3-gpiozero python-serial -y`. This installs all necessary packages in one go.
The `gpiozero` library handles GPIO pin control, letting you interact with your PIR motion sensor and any LEDs you’ve connected. Meanwhile, `python-serial` enables serial communication with your LTE modem for sending SMS alerts when motion’s detected.
Make sure your Raspberry Pi’s connected to the internet during installation so it can download packages from the repository.
Once installation completes, verify everything works by importing these libraries in a Python script—you shouldn’t encounter any errors.
Configuring Sensor Sensitivity and Timing
Now that you’ve installed the necessary libraries, you’ll need to fine-tune your PIR sensor’s hardware settings for ideal performance.
The HC-SR501 features two potentiometers that control sensitivity and timing – the right one adjusts detection range from 3 to 7 meters, while the left one sets the delay time from 5 seconds to 5 minutes.
Proper calibration of these settings, along with timeout duration adjustments, will guarantee your occupancy sensor responds accurately to movement without triggering false positives.
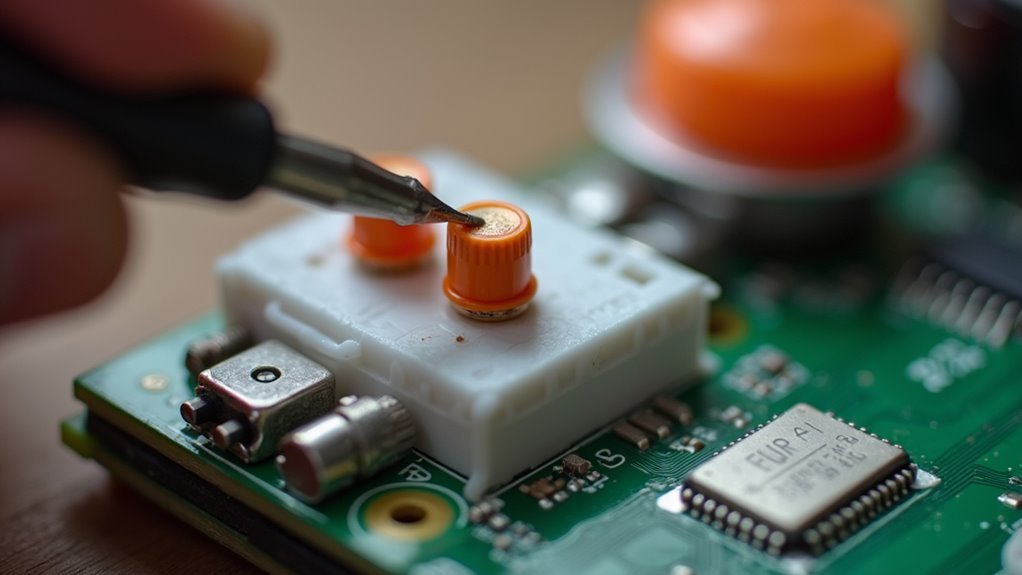
PIR Potentiometer Adjustments
Most PIR motion sensors feature two small potentiometers that you’ll need to adjust for ideal performance in your specific environment.
The right potentiometer controls sensitivity, affecting detection range from three to seven meters. Higher sensitivity catches smaller movements but may trigger false alarms from pets or wind.
The left potentiometer manages timeout duration, determining how long the sensor stays active after detecting motion—ranging from five seconds to five minutes.
Here’s what proper adjustment accomplishes:
- Eliminates frustrating false alarms that wake you at night
- Saves precious battery life through optimized timing
- Prevents missing important movements with correct sensitivity
- Reduces annoying pet-triggered alerts ruining your peace
You’ll need to experiment with both settings to find the perfect balance for your occupancy detection needs.
Timeout Duration Settings
After you’ve adjusted the sensitivity potentiometer, you’ll need to configure the timeout duration to match your specific occupancy monitoring requirements.
The left potentiometer controls how long the sensor remains active after detecting motion, with a range from approximately 2.5 seconds to 250 seconds. For occupancy sensing, you’ll want to find the sweet spot that balances responsiveness with stability.
Turn the timeout potentiometer clockwise to increase duration or counterclockwise to decrease it. Shorter timeouts work well for quick motion detection in high-traffic areas, while longer timeouts suit rooms where you want sustained monitoring without frequent resets.
Test different settings by walking through the detection zone and timing how long the output signal stays active. This guarantees your Raspberry Pi receives consistent occupancy data.
Detection Range Calibration
While timeout duration controls how long your sensor stays active, detection range calibration determines where and how far your PIR sensor can actually detect movement.
Your HC-SR501 sensor features two potentiometers that’ll transform your project’s effectiveness.
The right potentiometer adjusts sensitivity, controlling detection from 3 to 7 meters. Turn it clockwise to increase range, but don’t overdo it—you’ll get false positives from pets or swaying plants.
The left potentiometer sets delay time between 5 seconds and 5 minutes.
Here’s your calibration checklist:
- Start with minimum sensitivity and gradually increase until you achieve reliable human detection
- Set delay time based on room usage patterns—shorter for hallways, longer for offices
- Test extensively in different lighting conditions and temperatures
- Document your final settings for future reference
Regular testing guarantees peak performance.
Writing the Basic Motion Detection Script
Creating a basic motion detection script requires importing the `gpiozero` library, which provides the `MotionSensor` class for interfacing with your PIR sensor through a designated GPIO pin.
Initialize the motion sensor with your chosen GPIO pin, such as pin 4. Include a continuous loop that waits for motion detection and triggers specific actions like printing “You moved” when movement occurs.
Use the `when_motion` attribute to define callback functions that execute tasks such as activating LEDs or sending SMS notifications through your LTE modem. Set appropriate delay periods to prevent repeated triggers during continuous motion—your PIR sensor’s potentiometers help adjust sensitivity and timeout duration.
Install necessary libraries like `python3-gpiozero` and `python3-serial`, then run your script using `python3 motion_sensor.py`.
Adding LED Indicators for Visual Feedback
Now you’ll enhance your occupancy sensor with LED indicators that provide instant visual feedback about the system’s status.
You’ll need to wire a red LED for motion detection and a green LED for idle states, connecting each through a 330-ohm resistor to prevent damage.
Let’s start with the LED wiring configuration and then program the status light behaviors to respond to your motion sensor events.
LED Wiring Configuration
Adding visual feedback to your Raspberry Pi occupancy sensor transforms a basic detection system into an intuitive monitoring device that provides instant status updates.
Proper LED wiring guarantees reliable visual indicators that’ll enhance your project’s functionality:
- Connect LED polarity correctly – Attach the longer leg (anode) to your chosen GPIO pin and the shorter leg (cathode) to ground.
- Install current-limiting resistors – Use 220Ω to 1kΩ resistors in series with each LED to prevent damage from excessive current.
- Assign unique GPIO pins – Connect each LED to different pins for independent control of various status indicators.
- Plan your color scheme – Wire red LEDs for motion detection and green for idle states to create clear visual communication.
This configuration provides immediate feedback when your PIR sensor detects occupancy changes.
Status Light Programming
With your LEDs properly wired, you’ll need to program the status light functionality to create a responsive visual feedback system.
Start by importing the `gpiozero` library in your Python script to control the LED indicators. Configure the GPIO pins connected to your red and green LEDs as output pins within your code.
Set up the logic so the red LED illuminates when the PIR sensor detects motion, while the green LED activates during periods of no motion detected. This creates an intuitive visual status indicator where red means occupied and green means unoccupied.
Remember to adjust your PIR sensor’s delay settings to optimize the LED response time, ensuring the indicators react appropriately to motion events without excessive flickering or delayed responses.
Implementing SMS Notifications With LTE Modem
Once you’ve set up your PIR motion sensor, you’ll want to receive instant alerts when motion is detected, even when you’re away from home.
Adding SMS notifications through an LTE modem transforms your occupancy sensor into a powerful security system that keeps you connected wherever you are.
Here’s what you’ll need to configure:
- Connect your LTE modem via USB and verify it’s recognized using `ls /dev/ttyUSB*`
- Install python-serial library to establish communication between your Raspberry Pi and the modem
- Insert an active SIM card with SMS capability into your LTE modem
- Program AT commands using `AT+CMGS` to send messages when your PIR sensor triggers
Configure your callback function to execute the SMS routine whenever motion occurs, ensuring you’re instantly notified of any activity.
Enhancing Detection With Thermal Camera Integration
While PIR sensors provide reliable motion detection, thermal cameras like the MLX90640 elevate your occupancy sensor to a new level of precision by detecting the heat signatures that human bodies naturally emit. You’ll achieve approximately 99% accuracy with proper training, making this upgrade worthwhile for critical applications.
Unlike optical sensors, thermal cameras work effectively in any lighting condition, detecting presence without being influenced by visual characteristics. You’ll interface the MLX90640 with your Raspberry Pi using I2C, requiring specific libraries and drivers for functionality.
For best results, capture diverse training images with people in various positions, balancing presence and absence scenarios. Integrate Python dependencies like OpenCV to enhance predictive capabilities, enabling responsive automation based on real-time occupancy status.
Training Machine Learning Models for Presence Recognition
Although thermal cameras provide excellent heat signature detection, you’ll need to train a machine learning model to accurately interpret the data and distinguish between human presence and absence.
You’ll capture fewer than 1,000 diverse images showing various positions and activities to achieve over 99% accuracy. Convert these images to grayscale for enhanced neural network efficiency during training.
Your training workflow follows these essential steps:
- Capture diverse training images – Document different positions, movements, and scenarios
- Label your dataset – Use label.py scripts to categorize images as presence or absence
- Train the model – Execute train.ipynb in Jupyter notebook to generate your TensorFlow model
- Deploy to Raspberry Pi – Transfer the trained ir.pb model file for real-time predictions
This supervised learning approach guarantees accurate occupancy detection.
Mounting Components in Protective Housing
After training your machine learning model, you’ll need to protect your Raspberry Pi and components from environmental factors while maintaining proper functionality. Choose a 2-gang electrical box to house everything securely while keeping USB and ethernet ports accessible.
Start by drilling mounting holes for your Raspberry Pi and DC to DC converter to prevent movement and guarantee stability. Use plastic straw sections as spacers when mounting the Raspberry Pi—this maintains secure positioning while allowing necessary airflow around components.
Create an appropriate knock-out for the PIR motion sensor, positioning it correctly to detect motion without obstruction.
Finally, solder wires directly onto the DC barrel connector for reliable power connections to your DC to DC converter. This guarantees stable operation throughout your entire occupancy detection system.
Testing and Calibrating Your Occupancy Sensor
You’ll need to fine-tune your occupancy sensor’s performance by adjusting its detection range and verifying its accuracy in real-world conditions.
Start by monitoring the PIR sensor’s output signal while moving through its detection zone. Then use the sensitivity potentiometer to set a preferable range between three to seven meters for your specific environment.
Test the sensor at different times and lighting conditions to guarantee it consistently detects motion without triggering false positives from minor movements or environmental changes.
Sensor Range Adjustment
Once your HC-SR501 PIR motion sensor is connected to the Raspberry Pi, you’ll need to fine-tune its detection capabilities using the two built-in potentiometers.
The sensitivity potentiometer controls your sensor’s range from 3 to 7 meters. Higher settings detect movement from greater distances, while lower settings reduce sensitivity for smaller spaces.
The delay time potentiometer determines how long the sensor stays active after detecting motion, ranging from 5 seconds to 5 minutes.
Follow these essential steps for peak performance:
- Test the sensor in your actual installation environment
- Adjust sensitivity based on your room size and detection needs
- Set delay time to prevent false triggers from minor movements
- Recalibrate regularly when your environment changes
This careful tuning guarantees accurate occupancy detection without unnecessary alerts.
Detection Accuracy Verification
Before deploying your occupancy sensor in its final location, you must verify its detection accuracy through systematic testing. Conduct tests in various lighting conditions and distances to determine how well your PIR sensor detects motion at different sensitivity and timeout settings.
Record successful detections versus missed detections over multiple trials to calculate your sensor’s accuracy percentage. Adjust the sensitivity potentiometer on your PIR sensor and retest to find the best setting that reduces false positives while maintaining reliable detection.
Use a timer to monitor the delay time, ensuring it aligns with your expected output signal duration. Test different motion types—walking, running, or stationary presence—to validate your sensor reliably detects varying activity levels before final deployment.
Troubleshooting Common Setup Issues
Several issues can arise during the initial setup of your Raspberry Pi occupancy sensor, but most problems stem from incorrect wiring or configuration settings.
Here are the most critical troubleshooting steps you’ll need:
- Check your PIR sensor power connections – Connect Vcc to 5V and Gnd to ground properly, as incorrect wiring prevents sensor functionality entirely.
- Adjust sensitivity settings – Fine-tune the PIR’s sensitivity and delay potentiometers to avoid missed detections or false triggers that’ll frustrate you.
- Verify LTE modem recognition – Run `ls /dev/ttyUSB*` to confirm your modem appears; check USB connections and power if it doesn’t.
- Validate SIM card status – Ascertain your SIM is active and properly installed, then verify AT commands are correct for SMS functionality.
Frequently Asked Questions
Can Raspberry Pi Be Used as a Sensor?
You can’t use a Raspberry Pi as a sensor itself, but you’ll connect external sensors like PIR motion detectors or ultrasonic sensors to its GPIO pins for detecting presence, motion, or measuring distances effectively.
How Do I Set up Motion Detection on My Raspberry Pi?
You’ll install python3-gpiozero, connect an HC-SR501 PIR sensor to GPIO 4, then use Python’s MotionSensor class to detect movement. Adjust the sensor’s potentiometers for sensitivity and timing to optimize performance.
What Are the Disadvantages of PIR Motion Sensor?
You’ll face limited detection range, false triggers from temperature changes, inability to count occupants, fixed delay times, and poor performance through glass barriers with PIR sensors.
Which Type of Circuit Is Commonly Used to Interface a PIR Sensor With a Raspberry Pi?
You’ll use a simple three-wire circuit connecting the PIR’s Vcc to 5V, ground to ground, and output to a GPIO pin, often including a 1K resistor for signal integrity.


Leave a Reply