You’re tired of fumbling for remote controls every time you want to change your music or adjust the volume. A Raspberry Pi voice-controlled media system transforms your entertainment setup into a hands-free experience that responds to your spoken commands. While the concept sounds complex, you’ll discover that building this smart media hub requires only basic hardware and straightforward software configuration. The real challenge isn’t the setup—it’s deciding which advanced features you’ll want to implement first.
Essential Hardware Components for Voice Media Control
Success in building a voice-controlled media system depends on selecting the right hardware components for your Raspberry Pi setup.
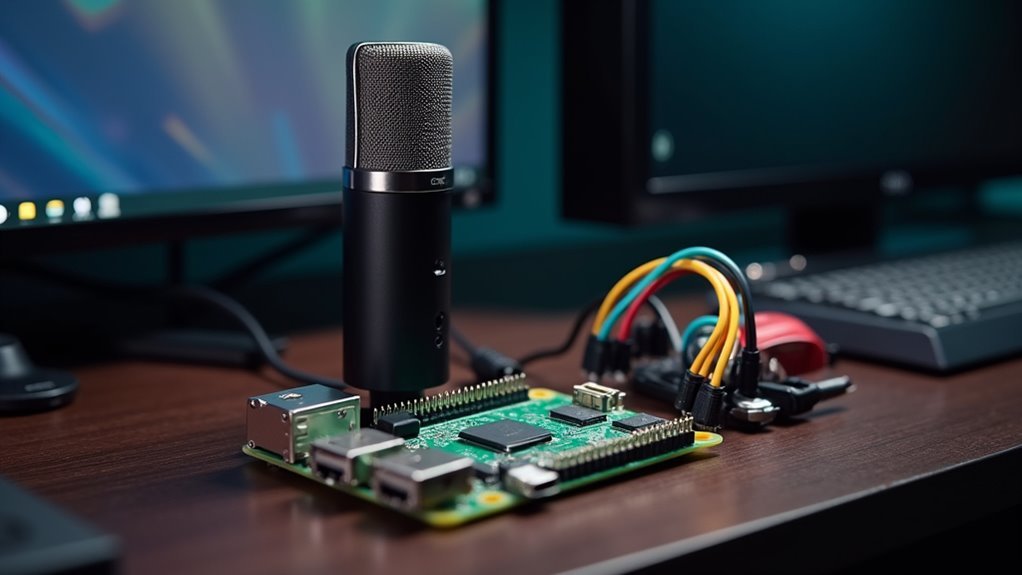
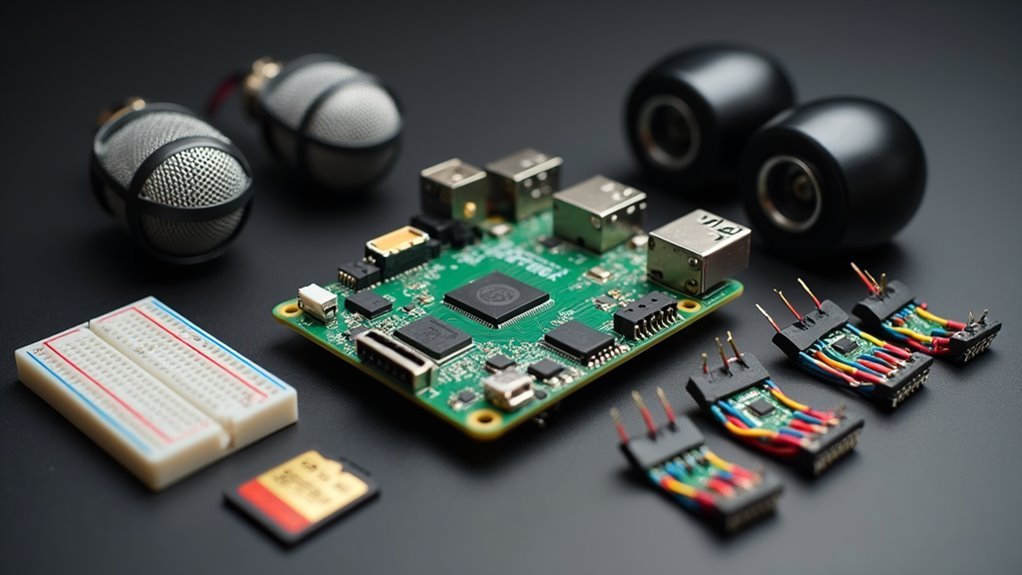
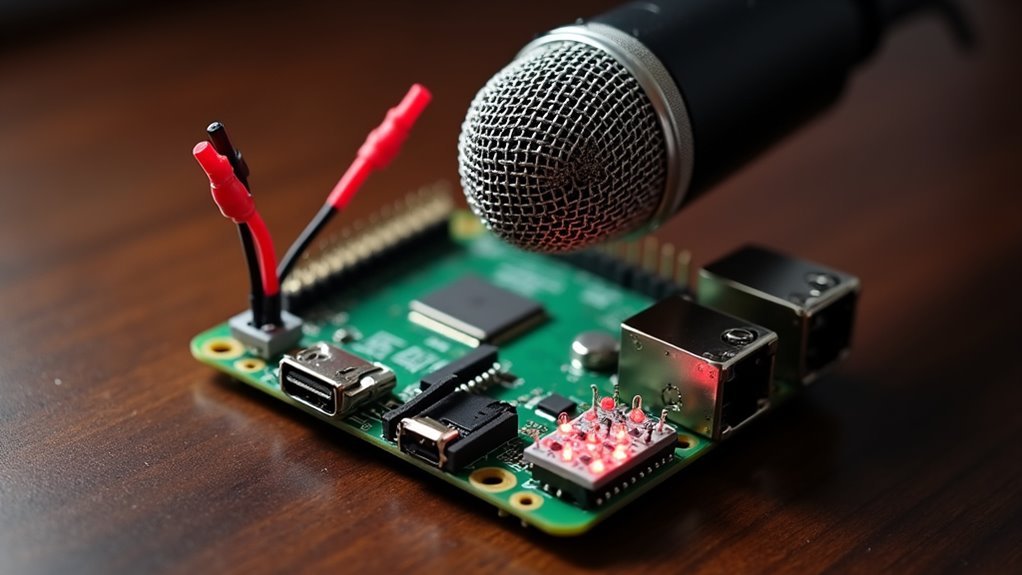
You’ll need a Raspberry Pi 3 or 4 for optimal performance when handling voice commands. A USB microphone or Pi-compatible ReSpeaker microphone is essential for capturing clear voice input that your voice assistant can process effectively.
Don’t forget speakers or headphones for audio feedback and media playback. A reliable Wi-Fi connection is vital since you’ll be downloading software, receiving updates, and accessing cloud-based voice recognition services.
Consider installing additional software components like PlayVideo and downloader applications to enhance your Pi’s media control capabilities. These components work together to create a responsive voice assistant that seamlessly controls your entertainment experience through simple spoken commands.
Setting Up Your Raspberry Pi Audio Configuration
You’ll need to configure your Raspberry Pi’s audio system to recognize your USB microphone and optimize its performance for voice commands.
Start by detecting your microphone device, then adjust the audio volume levels to guarantee clear input capture.
Finally, you’ll test the recording quality to confirm your setup works properly before implementing voice control features.
Microphone Device Detection
Before diving into voice recognition software, you’ll need to verify that your Raspberry Pi can properly detect and communicate with your microphone.
Start by connecting your USB microphone and running `lsusb` to verify it appears in the list of connected devices. Next, use `arecord -l` to check if your microphone shows up as an available recording device.
Test the microphone’s functionality by recording a short audio sample with `arecord -D plughw:1,0 test.wav`. Speak into the microphone for a few seconds, then stop the recording.
Play back your test file using `aplay test.wav` to verify audio capture works correctly.
If you encounter issues, use `alsamixer` to adjust recording levels and make sure your microphone is selected as the active input source.
Audio Volume Adjustment
Once your microphone is detected and functioning, you’ll need to configure the audio levels to guarantee optimal voice recognition performance.
Start your audio volume adjustment by opening `alsamixer` in the terminal, which provides a graphical interface for controlling sound levels. Press ‘F6’ to select your USB mic from the available devices list. Use the arrow keys to navigate and adjust volume levels appropriately.
Test your microphone configuration with `arecord -l` to verify proper recognition. Record a sample using `arecord –format=S16_LE –rate=44100 -d 5 test.wav` and play it back with `aplay test.wav` to check audio quality.
Once you’ve achieved optimal levels, run `sudo alsactl store` to save your settings permanently, ensuring they persist after rebooting your Raspberry Pi.
Recording Quality Testing
After storing your audio settings, recording quality testing becomes essential to verify your voice commands will be accurately recognized by your media control system.
You’ll test microphone functionality by recording a short audio clip using `arecord –format=S16_LE –rate=44100 -d 5 test.wav` and checking playback with `aplay test.wav` to evaluate clarity and volume levels.
For ideal voice recognition performance, you must minimize background noise during recordings by isolating your microphone from noisy environments and turning off other electronic devices.
If you’re experiencing poor recording quality testing results, verify your microphone’s USB connection with `lsusb` to confirm proper device recognition.
Consider using a powered USB hub if connectivity issues persist, as insufficient power can greatly impact audio input quality and voice recognition accuracy.
Installing Voice Recognition Software and Dependencies
You’ll need to choose the right voice recognition software for your Raspberry Pi media control project.
Several options exist, from Python-based libraries like SpeechRecognition to specialized packages like Steven Hickson’s PiAUISuite.
Let’s walk through the installation process to get your system ready for voice commands.
Software Options Overview
Before diving into the installation process, you’ll need to choose the right voice recognition software for your Raspberry Pi media control project. While several options exist, Steven Hickson’s Voice Control software stands out as the most recommended solution for its precision and user-friendly interface.
| Software Feature | Voice Control | Alternative Options |
|---|---|---|
| Setup Complexity | Moderate | Varies |
| Speech Recognition Accuracy | High | Mixed |
| Media Control Integration | Excellent | Limited |
Voice Control offers robust speech recognition capabilities specifically designed for Raspberry Pi environments. It includes pre-configured media control commands and supports keyword activation with customizable listening duration. The software’s installation script automates dependency management, making it accessible for users with varying technical expertise while maintaining professional-grade voice recognition performance.
Installation Setup Process
Five essential steps will transform your Raspberry Pi into a voice-controlled media hub.
Begin the installation setup process by updating your system with `sudo apt update` and `sudo apt upgrade` to guarantee current packages.
Download the required software using `wget` and extract files with `tar -xvzf PiAUISuite.tar.gz`, then navigate to the installation directory.
Execute `sudo ./InstallAUISuite.sh` and respond to prompts by selecting ‘y’ for installing dependencies and configuring the Google Speech API.
Set up your microphone by verifying connections with `arecord -l` and adjusting audio settings using `alsamixer` for best recording quality.
Test voice-to-text functionality by running `./speech-recog.sh`, then activate continuous voice control with `sudo voicecommand -c` using “Pi” as your default activation keyword.
Configuring Microphone Input and Audio Testing
| Command | Purpose | Example Usage |
|---|---|---|
| `lsusb` | List USB devices | Check microphone connection |
| `arecord -l` | List recording devices | Verify audio input detection |
| `alsamixer` | Adjust volume levels | Configure microphone sensitivity |
Test functionality by recording a sample with `arecord -D plughw:1,0 test.wav`, then play it back using `aplay test.wav`. If you’re experiencing issues, adjust settings in `alsamixer` or consider using a powered USB hub.
Programming Basic Voice Command Recognition
Since your microphone is properly configured and tested, you can now implement voice command recognition using Python and the Google Speech Recognition API.
Start by installing the speech_recognition library and creating the `listen_for_command()` function to continuously capture audio input. This function processes real-time audio for specific phrases you’ll define.
Set up your commands in a configuration file, linking phrases like “YouTube [title]” or “Play [filename]” to corresponding actions. The Google speech recognition API converts captured audio into text with enhanced accuracy and reliability.
Implement the `process_command(command)` function to interpret recognized commands and execute relevant bash commands based on user input.
Improve recognition accuracy by adjusting microphone sensitivity and maintaining a noise-free environment during operation.
Creating Custom Media Control Commands
You’ll start by programming basic media commands like “play,” “pause,” and “stop” that link directly to your media player’s control functions.
Next, you can expand into advanced command syntax that recognizes natural phrases such as “turn up the volume to fifty percent” or “skip to the next track.”
Finally, you’ll configure these commands in dedicated configuration files where you can map specific voice triggers to their corresponding bash scripts and customize responses for each media action.
Basic Media Commands
Five essential voice commands form the foundation of your Raspberry Pi media control system.
You’ll start with “Play music” and “Pause” as your core basic commands, linking them directly to bash scripts that control your media player. Google’s Speech-to-Text processes these voice inputs accurately, ensuring reliable command recognition.
Add “Stop,” “Next,” and “Previous” to complete your fundamental command set. Each command connects to specific bash scripts that interact with your chosen media player, whether it’s VLC, MPV, or another application.
Configure these basic commands in your voice recognition software’s configuration file by mapping the spoken phrases to their corresponding system commands.
This creates a responsive foundation that you’ll build upon with more advanced features like volume control and playlist management.
Advanced Command Syntax
Beyond basic play and pause functionality, custom media control commands open sophisticated interaction patterns that transform your Raspberry Pi into an intelligent entertainment hub. You’ll edit the configuration file to define specific phrases linking to bash commands, enabling complex operations like “Play [filename]” or “Pause video.” The `process_command(command)` function interprets these voice inputs, integrating seamlessly with Google voice recognition capabilities.
| Command Type | Voice Phrase | Bash Action |
|---|---|---|
| File Control | “Play movie.mp4” | `vlc /path/movie.mp4` |
| Volume Control | “Volume fifty percent” | `amixer set PCM 50%` |
| Playlist Control | “Next track” | `playerctl next` |
| System Control | “Stop all media” | `pkill vlc mpv` |
Implement text-to-speech feedback responses to confirm command execution, then test effectiveness through continuous listening loops for immediate response.
Command Configuration Files
Four essential steps transform your Raspberry Pi into a responsive voice-controlled media center through strategic configuration file management.
First, locate and edit Steven Hickson’s voice control software configuration file, where you’ll define your custom media commands.
Second, implement the `”
Third, keep your commands concise and recognizable—this improves accuracy when using voice commands for media control.
Fourth, test each newly configured command by activating the software and speaking your defined phrases to verify proper execution.
Remember to regularly update your command configuration files as your media system evolves, adding new functionalities that match your changing preferences and usage patterns.
Integrating Music Streaming Services
While local media files provide a solid foundation for your voice-controlled Raspberry Pi setup, integrating popular streaming services transforms your device into a complete entertainment hub.
Mopidy serves as your gateway to platforms like Spotify and SoundCloud through a unified interface.
Installing the Mopidy-Spotify extension connects your Raspberry Pi directly to your Spotify account, enabling seamless voice control over playback and track searches.
Transform your Raspberry Pi into a voice-controlled Spotify player with direct account integration for effortless music management.
You’ll configure custom voice commands to trigger specific playlists or songs instantly.
Key integration steps include:
- Setting up Mopidy with streaming service extensions
- Configuring voice recognition software for playlist commands
- Implementing Google Text-to-Speech for track announcements
Ensure your Raspberry Pi maintains a stable internet connection and complies with streaming platform API requirements for peak performance.
Voice-Activated Video Playback Controls
You’ll need to configure specific media commands that let your Raspberry Pi recognize voice instructions for video playback through Steve Hickson’s Pi AUI Toolkit.
Once you’ve set up basic commands like “YouTube [title]” and “Play [filename],” you can expand your control actions to include pause, skip, and volume adjustments.
If your Pi isn’t responding correctly to voice commands, you’ll want to troubleshoot recognition issues by checking your microphone settings and testing the Google voice API connection.
Setup Media Commands
Setting up voice-activated video playback controls transforms your Raspberry Pi into a hands-free media center that responds to natural spoken commands.
You’ll start by installing the PlayVideo software, which enables commands like “YouTube [title]” to stream videos directly through your browser.
Configure your system by editing the configuration file to establish specific voice commands.
Here’s your essential setup process:
- Install PlayVideo software for YouTube integration and browser-based playback
- Edit configuration files to define commands like “Play [filename]” for local media files
- Enable continuous listening using `sudo voicecommand -c` with “Pi” as your activation keyword
Implement Google Voice API for superior recognition accuracy, especially in noisy environments.
Test thoroughly using commands like “Play music” to verify your Raspberry setup responds correctly to voice inputs.
Control Playback Actions
Once your voice command system recognizes your wake word, you can control playback actions through intuitive spoken instructions that eliminate the need for keyboards or remote controls.
Commands like “Pause,” “Stop,” “Next track,” and “Previous track” provide seamless media management without physical interaction. Your Raspberry Pi processes these voice inputs through Google Speech recognition, translating spoken words into executable functions that control your media player.
The system responds immediately to playback commands, allowing you to adjust volume, skip content, or halt playback mid-stream.
You’ll receive audio confirmation through Google Text-to-Speech, which announces actions like “Paused” or “Skipping to next track.” This real-time feedback guarantees you know your commands were successfully executed, creating a smooth, hands-free entertainment experience that responds naturally to your voice.
Troubleshoot Recognition Issues
Voice recognition problems can frustrate your hands-free media experience, but systematic troubleshooting will identify and resolve most issues quickly.
First, verify your microphone’s connectivity using `arecord -l` to list available audio devices. If your microphone isn’t detected, check physical connections and restart your Raspberry Pi.
Next, optimize audio capture settings:
- Adjust recording volume with `alsamixer` to minimize background noise interference
- Test voice clarity by recording samples with `arecord` and playing them back using `aplay`
- Position your Raspberry Pi away from noisy appliances in a quiet environment
When you troubleshoot recognition accuracy, implement error handling in your command processing function. This allows graceful management of unrecognized commands through repeat attempts or feedback prompts, improving your overall voice-control experience.
Volume and Audio Settings Management
Proper audio configuration forms the foundation of any successful voice-controlled media system, and you’ll need to fine-tune several settings to achieve peak performance.
Access your Raspberry Pi’s volume and audio settings by opening the terminal and typing `alsamixer`. This command-line tool gives you complete control over microphone gain and speaker levels.
Press F6 to select your USB microphone or connected soundcard as the active audio device. Adjust the microphone gain carefully – too high creates distortion, while too low reduces recognition accuracy.
Test your configuration by recording a sample with `arecord –format=S16_LE –rate=44100 -d 5 test.wav`, then play it back using `aplay test.wav`. Position your microphone closer to minimize background noise and guarantee consistent voice recognition performance.
Smart Home Media Device Integration
After establishing your audio foundation, you’ll expand your Raspberry Pi’s capabilities by connecting it to various smart home media devices throughout your living space.
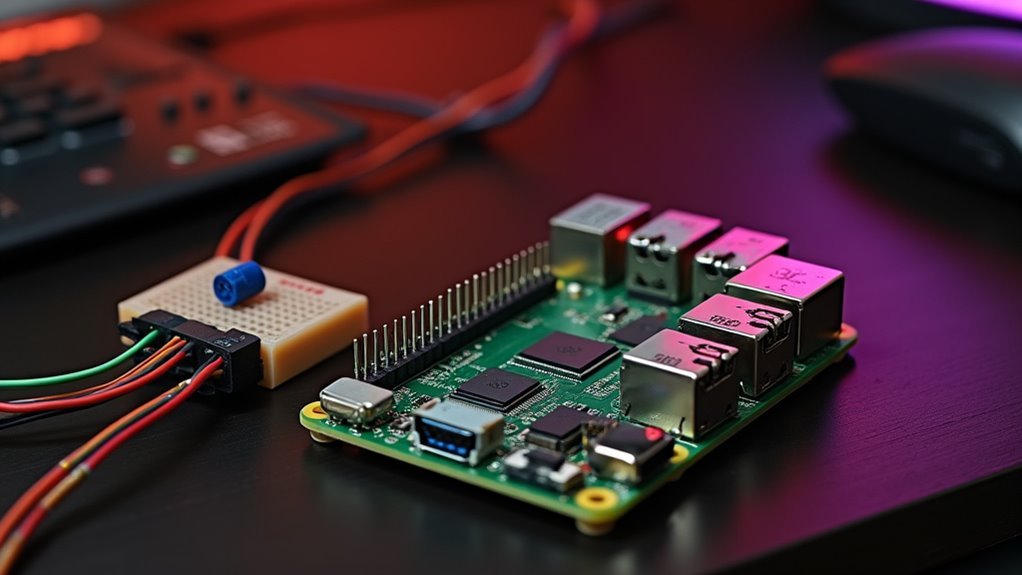
By linking voice commands to GPIO pins on your Raspberry Pi, you can control physical devices like lights and speakers seamlessly. This integration transforms your voice recognition system into a thorough smart home media hub.
Your expanded capabilities include:
- Device Control – Turn lights on/off, adjust speaker volumes, and manage entertainment systems
- Media Synchronization – Coordinate multiple devices simultaneously through single voice commands
- Custom Automation – Create personalized routines that trigger multiple actions across your smart home setup
You’ll configure additional commands in your software’s configuration file, enabling broader voice-activated functions.
This approach creates an interconnected ecosystem where your Raspberry Pi serves as the central command center for all media-related smart home operations.
Troubleshooting Voice Recognition Issues
When your Raspberry Pi voice recognition system doesn’t respond as expected, methodical troubleshooting will help you identify and resolve the underlying issues. Start by verifying your microphone connection using `lsusb` to list devices and `arecord -l` to confirm audio input functionality. Test recording with `arecord` and playback using `aplay` to guarantee proper operation.
| Issue | Solution |
|---|---|
| Poor voice commands accuracy | Reduce ambient noise, speak clearly near microphone |
| No audio input detected | Check connections, verify with `lsusb` and `arecord -l` |
| Low recording quality | Adjust volume settings using `alsamixer` |
| Unrecognized commands crash system | Implement error handling for better user feedback |
You’ll need to fine-tune recording volume settings through `alsamixer` to minimize background noise while maintaining clarity for voice commands processing.
Optimizing Command Response Times
Beyond resolving basic functionality problems, you’ll want to focus on making your voice-controlled media system respond faster to commands. Optimizing your Raspberry Pi’s command technology requires several strategic adjustments to minimize delays between voice input and system response.
Key optimization strategies include:
- System maintenance: Keep your operating system current with `sudo apt update` and `sudo apt upgrade` to guarantee peak performance.
- Audio configuration: Use `alsamixer` to fine-tune microphone sensitivity and reduce background noise interference.
- Command structure: Simplify your configuration file by linking fewer complex commands, reducing processing overhead.
Implement continuous listening mode with appropriate timeout settings to balance responsiveness and power consumption.
Regularly test your setup using `./speech-recog.sh` to assess accuracy and identify latency issues that prevent your system from efficiently executing the command sequences.
Advanced Voice Control Features and Customization
Once you’ve optimized your system’s response times, you’ll discover that advanced voice control features release powerful customization options that transform your Raspberry Pi into a truly personalized media assistant.
Advanced voice control features unlock powerful customization options that transform your Raspberry Pi into a truly personalized media assistant.
You can customize commands by linking phrases like “Play [filename]” to specific media files, streamlining your playbook experience. Use `voicecommand -e` to edit the configuration file, changing activation keywords and defining new commands that match your preferences.
Integration with Google Voice and Speech APIs delivers high accuracy for complex tasks like launching applications or web searches.
Set up continuous listening to improve accessibility without manual activation. Customizable text-to-speech responses provide conversational feedback, making interactions feel natural while enhancing your overall user experience through advanced voice control customization.
Security Considerations for Voice-Activated Systems
Security vulnerabilities pose significant risks to voice-activated Raspberry Pi systems, making robust protection measures crucial for safeguarding your media setup.
You’ll need to implement multiple layers of defense to prevent unauthorized access and protect your personal data.
Start by configuring a unique wake word or passphrase that prevents accidental activations. This guarantees your system only responds to intended commands rather than background conversations or television audio.
Essential security practices include:
- Regular software updates – Keep your voice recognition software current to patch security vulnerabilities and improve performance
- Network security – Use secure protocols and restrict external access to your Raspberry Pi
- Data encryption – Protect sensitive information like personal commands and user preferences
Monitor system logs continuously and establish alerts for unusual activity to detect potential threats early.
Frequently Asked Questions
Can Raspberry Pi Do Voice Recognition?
You can implement voice recognition on Raspberry Pi using software like Steven Hickson’s voice control program, which leverages Google voice APIs for accurate speech-to-text conversion and command execution.
How Do I Control My Screen With Voice?
You’ll install Steven Hickson’s Voice Control software on your Raspberry Pi, configure voice commands in a file, test your microphone setup, then run continuous listening mode to execute screen controls.
What Is the Best TTS for Raspberry Pi?
You’ll find Google Text-to-Speech offers the most realistic voices for Raspberry Pi, though it needs internet. For offline use, try Pico TTS for lightweight performance or eSpeak for flexibility.
Can Chatgpt Run on a Raspberry Pi?
You can’t run ChatGPT directly on a Raspberry Pi due to limited processing power. You’ll experience slow performance and constraints. Instead, use cloud-based APIs or lighter language models optimized for edge devices.


Leave a Reply