You’ll discover that creating an RFID pet feeder isn’t as complicated as it might seem, but there’s a critical detail most pet owners overlook that can make or break the entire system. While gathering components like RFID readers and microcontrollers seems straightforward, the real challenge lies in programming the recognition protocols and calibrating the dispensing mechanism to work flawlessly with your specific pets’ feeding habits and schedules.
Understanding RFID Technology for Pet Feeders
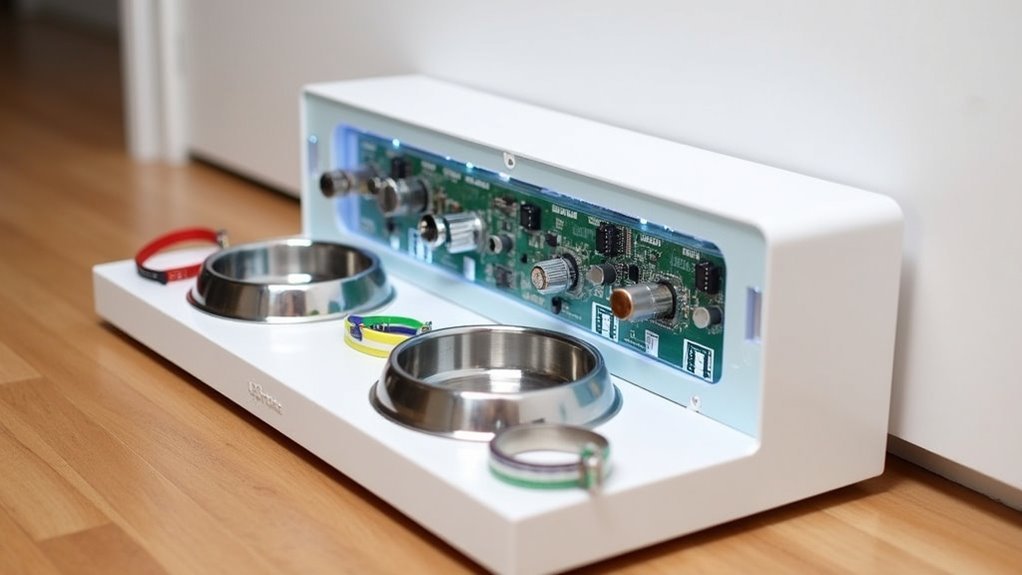
When you’re building an RFID pet feeder, you’ll harness electromagnetic fields to automatically identify and track tags attached to your pets. This RFID technology operates through Low Frequency (125KHz) readers that detect tags within 10-30 cm, perfect for controlling feeder access. Your passive RFID tag draws power directly from the reader’s RF energy, so there’s no battery maintenance required.
The effectiveness of your RFID system depends heavily on antenna design and positioning. Environmental factors can impact signal strength, so you’ll need to evaluate placement carefully.
Success requires precise programming of access permissions for each pet’s tag, ensuring only designated animals can access their specific food bowls. This targeted approach prevents food stealing and maintains proper dietary control for multiple pets.
Gathering Essential Components and Materials
Before starting construction, you’ll need to source specific components that form the backbone of your RFID pet feeder system. These specialized parts work together to create a reliable access control mechanism for your pet’s feeding station.
| Component | Specification |
|---|---|
| Access Control Kit | KL042 Proximity Card Access Control Kit |
| Key Fobs | SK02 – 125 kHz Proximity Key Fobs (minimum 10 pack) |
| Power Supply | Radio Shack 500mA AC to 12VDC Adapter |
| Project Box | Minimum dimensions: 13cm x 7cm |
| Additional Parts | Buzzers, mounting wire/L-bracket |
The KL042 kit provides essential RFID functionality, while multiple key fobs guarantee each pet gets individual access. You’ll mount everything securely to your pet feeder using appropriate hardware, creating a stable, functional system.
Selecting the Right Tools for Assembly

You’ll need specific tools to properly assemble your RFID pet feeder and guarantee all components work together seamlessly.
Essential cutting tools like a Dremel will help you modify circuit boards and create precise openings in your project box.
Soldering equipment becomes vital when you’re connecting wires and building reliable electrical connections for your RFID system.
Essential Cutting Tools
The right cutting tools can make or break your RFID pet feeder project, transforming what could be a frustrating assembly process into a smooth, professional build. Your Dremel tool serves as the workhorse for resizing circuit boards and making precise cuts in various materials throughout assembly.
You’ll need different Dremel bits for specific tasks like drilling holes or shaping components to fit perfectly within your project box. Your drill creates essential holes for sound output and the adaptaplug, ensuring proper functionality and system accessibility.
Meanwhile, your soldering gun becomes vital when working with unassembled kits, allowing you to create reliable electrical connections between wires and components. These cutting tools work together to help you achieve professional results in your DIY pet feeder construction.
Soldering Equipment Basics
Quality soldering equipment forms the foundation of reliable electrical connections in your RFID pet feeder build.
You’ll need specific tools to create clean, durable joints between components and circuit boards. A fine-tip soldering gun provides the precision required for delicate electronics work. Choose 0.6mm solder wire for ideal balance between workability and connection strength.
Don’t overlook flux – it cleans metal surfaces and improves solder flow for superior electrical connections.
Essential accessories include:
- Soldering iron stand – safely holds your hot iron when not in use, preventing burns and surface damage
- Helping hands – stabilizes components during assembly for more accurate soldering
- Flux applicator – guarantees clean metal surfaces and smooth solder application
These tools assure professional-quality connections throughout your pet feeder’s electronic assembly.
Programming Your Microcontroller
Programming transforms your assembled hardware into an intelligent pet feeder that recognizes specific RFID tags and responds accordingly.
Start by installing the necessary libraries for RFID communication, ensuring compatibility with your specific module. Programming your microcontroller requires writing a program that initializes the RFID reader and continuously checks for card scans using Arduino’s `loop()` function.
Implement conditional statements distinguishing between authorized and unauthorized tags, triggering specific feeder actions. Your experience with RFID technology will determine how smoothly this process goes.
Use the `Servo` library to control the motor opening and closing the feeder lid, defining correct angles for both positions.
Test your Automated Cat feeder by simulating RFID scans with different tags, using serial print statements for debugging to verify appropriate responses.
Setting Up the RFID Reader System
You’ll need to connect your KL042 Proximity Card Access Control Kit to a 12VDC power adapter and program the RFID key fobs using the kit’s DIP switches.
Position the reader so your pet’s tag stays within the 10-30 cm detection range for reliable reads.
Test the setup by verifying that authorized tags trigger the buzzer while unauthorized attempts activate the alarm system.
RFID Hardware Components
The foundation of your automated pet feeder starts with the KL042 Proximity Card Access Control Kit, which contains all the essential components needed to read RFID tags and control access to your pet’s food bowl.
This thorough kit provides the RFID reader hardware that’ll interface with your Raspberry Pi controller.
You’ll need these specific components for your project:
- SK02 – 125 kHz Proximity Key Fobs (sold in 10-packs) – attach these lightweight tags to your pet’s collar for identification
- Radio Shack 500mA AC to 12VDC Adapter – powers your entire RFID system with the correct adaptaplug tip for compatibility
- Wiring components and buzzer – follow the kit’s diagram carefully during assembly to guarantee proper connectivity
Program each key fob using DIP switches before final assembly.
Programming Reader Functions
Once you’ve assembled your hardware components, configuring the DIP switches becomes your next critical step to establish unique identification codes for each pet’s RFID key fob.
Set each switch combination to correspond with your pets’ specific tags, ensuring individual access control to designated feeding stations.
Connect your 12VDC power adapter properly to maintain consistent reader operation.
Your RFID system’s configuration interface is best viewed with JavaScript enabled browsers for peak functionality.
Test each programmed tag by passing it over the reader within the 10-30 cm range, confirming the system correctly identifies authorized pets and triggers feeder mechanisms.
Install a buzzer to provide audio feedback when unauthorized pets attempt access.
This feature alerts you to system activity and reinforces proper training protocols for your pets.
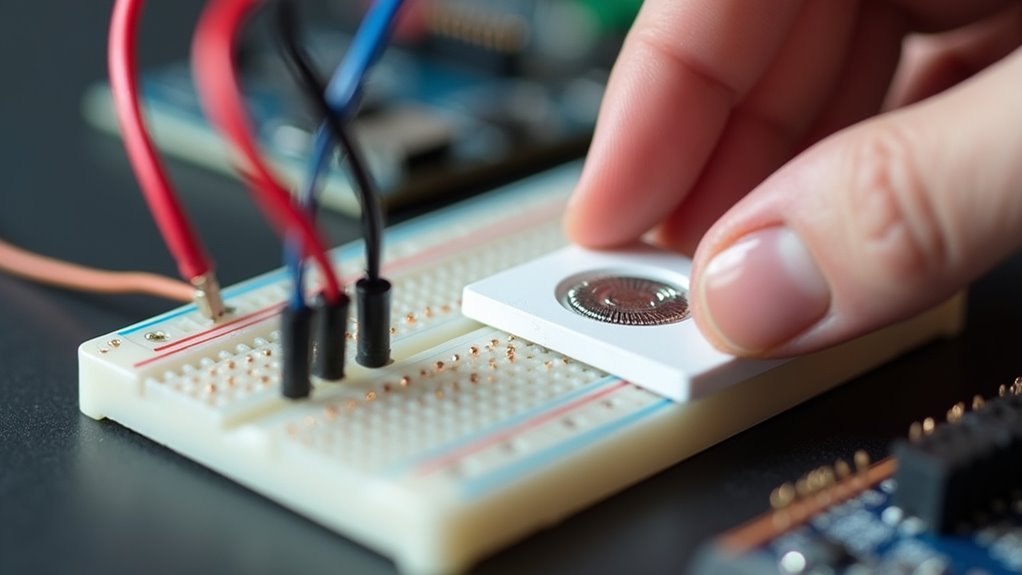
Configuring Pet Tags and Access Control
After assembling your RFID feeder’s hardware components, configuring the pet tags becomes your next critical step in establishing proper access control.
You’ll need SK02 – 125 kHz Proximity Key Fobs, which come in convenient ten-packs for individual pet identification.
Here’s how to configure your system:
- Program each fob using DIP switches – Assign specific fobs to corresponding pets that need access to their designated food bowls.
- Set up unauthorized fob detection – Include unauthorized fobs in programming to trigger buzzers when pets without access attempt to reach food.
- Position the RFID reader correctly – Guarantee fobs must be within 10-30 cm for successful identification.
Test your system multiple times with each pet to confirm only designated fobs open the feeder, preventing cross-feeding issues.
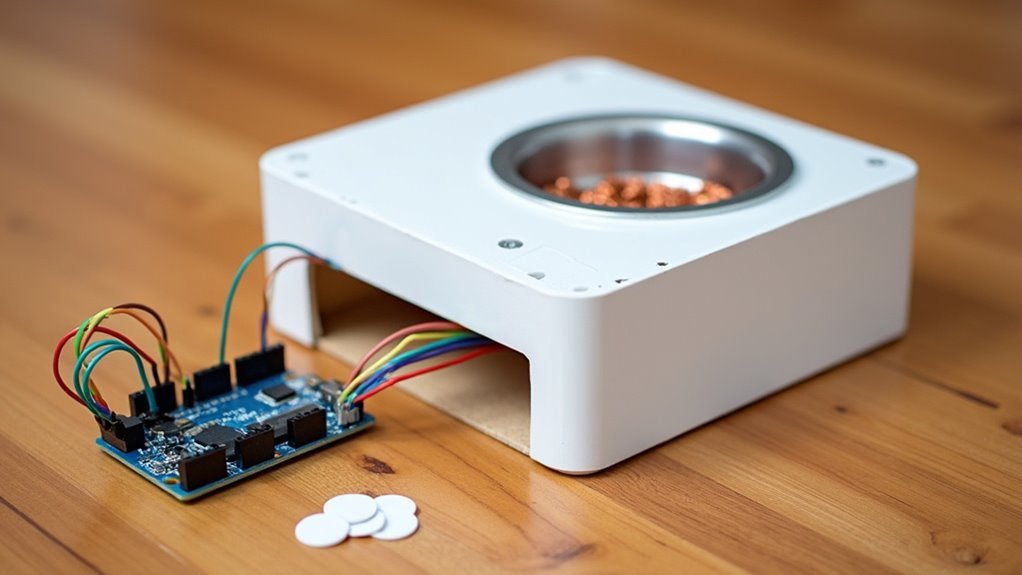
Building the Feeding Mechanism
With your RFID tags properly configured, you’ll now construct the feeding mechanism that controls access to your pet’s food bowl.
Mount a servo motor to operate the feeder lid, ensuring it opens and closes smoothly based on RFID recognition.
Install a force-sensitive resistor (FSR) beneath the feeding platform to detect your pet’s presence before activating the lid mechanism.
Design an adjustable pivot point for the FSR to fine-tune sensitivity for different pet weights.
Position your RFID reader within 25mm of where your pet’s collar tag will be during feeding for ideal detection.
Add a manual override switch to bypass the RFID system when you need to perform maintenance or troubleshooting on the feeder.
Wiring and Electronic Connections
Before you can test your automated feeding system, you’ll need to establish reliable electrical connections between all components. Start by connecting your KL042 Proximity Card Access Control Kit’s power supply to the Radio Shack 500mA AC to 12VDC Adapter for proper voltage delivery.
Proper electrical connections form the foundation of any reliable automated system—start with securing your power supply connections for consistent voltage delivery.
Use your soldering gun and solder to secure any unassembled kit components, carefully following the wiring diagram for accurate placement.
- Connect the buzzer to the designated output pin on your control board to alert when unauthorized pets approach the food bowl.
- Wire the RFID reader to the control board ensuring it receives power and can communicate with programmed key fobs.
- Verify all connections are secure and properly insulated to prevent short circuits before closing your project box.
Creating the Feeder Housing
Protection forms the cornerstone of any successful electronics project, and your RFID pet feeder requires a sturdy enclosure that shields delicate components from pet hair, moisture, and curious paws. Select a project box measuring at least 13cm x 7cm to house your RFID components comfortably.
| Component | Requirement |
|---|---|
| Housing Size | 13cm x 7cm minimum |
| Attachment Method | L-bracket or wire |
| Access Points | Programming switches, RFID reader |
You’ll need a Dremel tool to create custom openings for the power cord and sound buzzer. Secure the housing to your pet’s food bowl using an L-bracket or wire to prevent movement during feeding. Position everything so the RFID key fob hovers directly over the reader, ensuring ideal read efficiency and reliable operation.
Testing RFID Tag Recognition
Successful RFID tag recognition depends on achieving the perfect balance between power, proximity, and positioning.
You’ll need to verify your reader receives adequate power first, as insufficient voltage creates unreliable readings. Most 125 kHz readers require tags within 10-30 cm for proper recognition.
Follow these testing steps:
- Conduct multiple read tests – Test each tag repeatedly to confirm consistent recognition and identify electronic interference from nearby devices.
- Monitor signal strength – Track read distance and signal quality to determine best reader placement for reliable operation.
- Document performance data – Record successful read rates under various conditions, including different distances, angles, and environmental factors.
This documentation helps fine-tune your pet feeder system and guarantees consistent performance when your pets approach for feeding.
Calibrating Food Dispensing Functions
Now you’ll need to calibrate your feeder’s dispensing system to guarantee accurate food delivery for each pet.
Start by setting up your weight sensor to measure precise portion sizes.
Then program the system to dispense the correct amounts based on each pet’s dietary requirements.
Finally, you’ll adjust the timing mechanism to control feeding intervals and prevent overfeeding throughout the day.
Weight Sensor Calibration
One critical step in building your RFID pet feeder involves calibrating the weight sensor to guarantee accurate food dispensing.
You’ll need to establish baseline readings using known quantities of food to verify your system works reliably.
Here’s how to calibrate your weight sensor effectively:
- Position the FSR correctly – Place the force-sensitive resistor under the food bowl, making certain it detects food weight without interference from the bowl itself.
- Set threshold values – Use your Arduino Uno to read FSR values and establish weight thresholds that trigger food dispensing at appropriate portion sizes.
- Test and document – Regularly add or remove food while monitoring FSR readings, then refine your calibration based on your pets’ eating habits for ideal accuracy.
Portion Size Programming
After establishing accurate weight readings from your sensor, you’ll need to program precise portion control to guarantee each pet receives the correct amount of food.
Start by measuring each pet’s desired portion using a kitchen scale, then translate these weights into servo motor timing sequences. Program your Arduino to open the feeder lid for specific durations that correspond to measured portions.
Install a force-sensitive resistor in the food bowl to provide real-time feedback during dispensing. This allows your system to adjust timing based on actual food levels rather than relying solely on predetermined durations.
Create a user interface that lets you easily modify portion sizes for different pets’ dietary requirements.
Test your dispensing mechanism repeatedly, observing actual output and fine-tuning your code until you achieve consistent, accurate portions for each registered pet.
Timing Mechanism Adjustment
Once your portion control system dispenses the correct amounts, you’ll need to fine-tune the timing mechanism to confirm smooth, reliable operation. Proper calibration confirms your servo motor controls the feeder lid precisely while preventing overfeeding or unauthorized access.
Here’s how to calibrate your timing mechanism:
- Servo Motor Timing – Test the lid’s opening and closing speed, aiming for 1-3 seconds depending on your food type and dispenser design. Use the `millis()` function for non-blocking timing control.
- FSR Weight Detection – Adjust your force-sensitive resistor’s sensitivity to detect proper food weight, confirming dispensing only occurs when correct portions are detected.
- Auto-Close Timer – Program a 10-second automatic lid closure to prevent other pets from accessing the food after dispensing completes.
Mounting and Positioning Your Feeder
While technology handles the smart functionality of your RFID pet feeder, proper mounting and positioning determine whether the system works reliably in daily use.
Use a modified L-bracket to securely attach the RFID access control box to your pet’s food bowl, ensuring it won’t shift during feeding sessions. Cut a slit in the feeding mat to run the power cord underneath, creating a clean setup while reducing tripping hazards.
Position the RFID reader box so your pet’s key fob hovers directly over the reader during feeding. This placement enhances successful access recognition.
Set the box at a height that’s accessible for your target pet while preventing other animals from reaching it. Fine-tune the positioning based on your pet’s feeding behavior and personal preferences to optimize the system’s functionality.
Troubleshooting Common Issues
Even well-built RFID pet feeders can develop issues that prevent reliable operation. When your system isn’t working properly, start by checking these common culprits that cause most problems.
1. Tag Programming and Reader Configuration – Verify that your RFID tags are programmed correctly and your reader recognizes only designated tags for authorized access. Incorrectly configured systems won’t grant proper access to your pets.
2. Power Supply and Positioning – Check your power supply for adequate voltage, as insufficient power causes inconsistent performance.
Confirm tags are positioned within ideal range (typically under 25mm) for reliable detection.
3. Wiring and Antenna Setup – Inspect all connections for loose or faulty wiring that creates intermittent functionality.
Adjust your antenna positioning to improve read range and overall system reliability.
Optimizing Performance and Reliability
You’ll need to fine-tune your RFID pet feeder’s performance to guarantee consistent operation when your pets approach for feeding.
Focus on enhancing the RFID reading range through proper antenna positioning and design modifications that account for your pet’s size and movement patterns.
Address any signal interference issues by adjusting the system’s power settings and implementing shielding techniques that prevent false readings or missed detections.
RFID Range Enhancement
Most RFID pet feeders struggle with inconsistent tag detection, but several proven techniques can dramatically improve your system’s range and reliability.
Key Enhancement Strategies:
- Switch to low-frequency readers (125 kHz) – These achieve 10-30 cm range, perfect for pet identification applications where animals approach feeding stations naturally.
- Boost power output by 4-6 dB – This effectively doubles your reading distance, though you’ll need to verify your power source can handle increased demands and maintain safety standards.
- Refine antenna orientation and size – Larger antennas reduce polarization issues and accommodate pets that don’t position themselves directly in front of readers.
Regular testing and real-world adjustments guarantee peak performance.
Custom antenna designs can further enhance range, making your feeder more responsive to smaller pets or varying approach angles.
Antenna Design Optimization
When your RFID pet feeder’s antenna design isn’t optimized, you’ll experience frustrating missed reads and inconsistent performance. Focus on three critical factors: polarization, size, and shape. These elements directly impact your system’s read range and signal strength.
Proper antenna placement relative to your RFID reader is essential—misalignment kills performance and creates unreliable readings. You’ll want to experiment with loop or dipole configurations to find what works best for your specific setup.
Use materials with low dielectric loss for antenna construction. This enhances signal transmission and reception, boosting overall system reliability.
A well-designed antenna can improve your effective reading distance by 30-40%, making passive RFID tag detection considerably more reliable in your DIY pet feeder application.
Signal Interference Solutions
Even the most perfectly designed antenna won’t deliver reliable performance if signal interference disrupts your RFID pet feeder’s operation.
You’ll need to address several interference sources that can compromise your system’s effectiveness.
Here’s how to minimize signal interference:
- Use shielded cables for all connections between your RFID reader and power supply to prevent electromagnetic interference from nearby electronic devices like microwaves or wireless routers.
- Remove physical obstructions between the reader and tags, particularly metal objects or dense materials that can block or reflect RFID signals, reducing your effective read range.
- Test in multiple environments to identify interference from Wi-Fi networks or other RF devices operating in the same frequency range, then adjust your system’s positioning accordingly for peak performance.
Frequently Asked Questions
Are Pet Tags RFID?
Yes, you’ll find many pet tags use RFID technology, operating at 125 kHz or 13.56 MHz frequencies. They don’t need batteries since they’re powered by the reader’s electromagnetic field for identification.
How Many Portions to Feed a Cat Automatic Feeder?
You should program your automatic feeder to dispense 1/4 to 1/2 cup portions per meal, typically feeding your cat 2-3 times daily based on their weight and activity level.
How Do RFID Cat Feeders Work?
Your cat’s RFID tag triggers the feeder’s reader when detected within range. The system recognizes your pet’s unique signal, activating a motor that opens the food bowl while keeping other pets out.
Are Automatic Cat Feeders Worth It?
You’ll find automatic cat feeders worthwhile if you’re dealing with portion control issues or irregular schedules. They’ll help prevent overeating, maintain consistent feeding times, and give you peace of mind when away.


Leave a Reply