
You’re spending too much time juggling separate apps just to control your smart lights, check security cameras, and adjust your thermostat. A custom home dashboard hub eliminates this frustration by bringing everything into one centralized interface that you control completely. Unlike pre-built solutions that lock you into specific ecosystems, building your own dashboard means you’ll choose exactly which devices connect, how they’re arranged, and what automations run behind the scenes.
Understanding Smart Home Dashboard Fundamentals
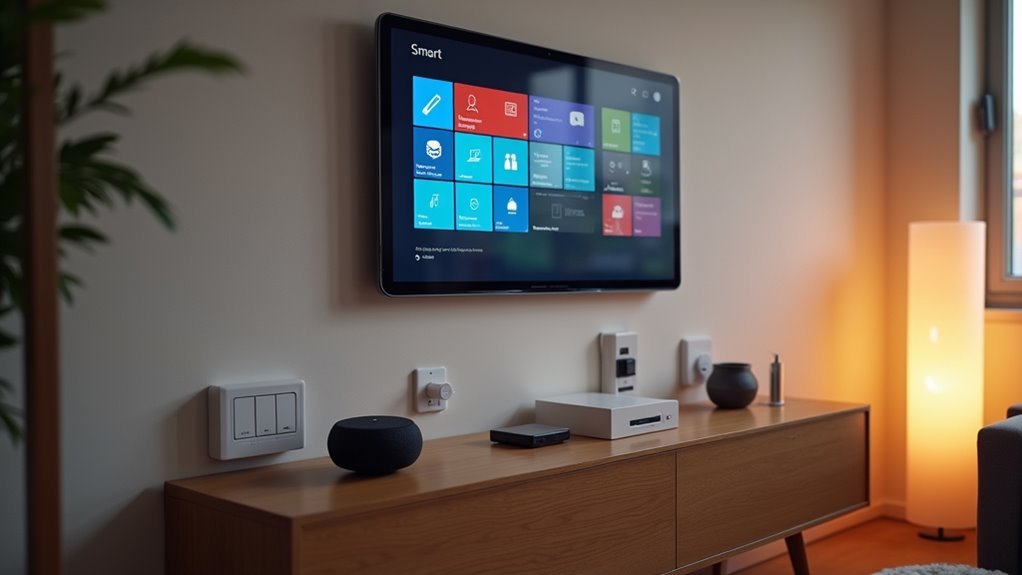
When you’re managing multiple smart devices across your home, a smart home dashboard becomes your central command center that consolidates all controls into one intuitive interface.
This powerful tool eliminates the need to juggle multiple apps by bringing everything together on screens filled with customizable widgets.
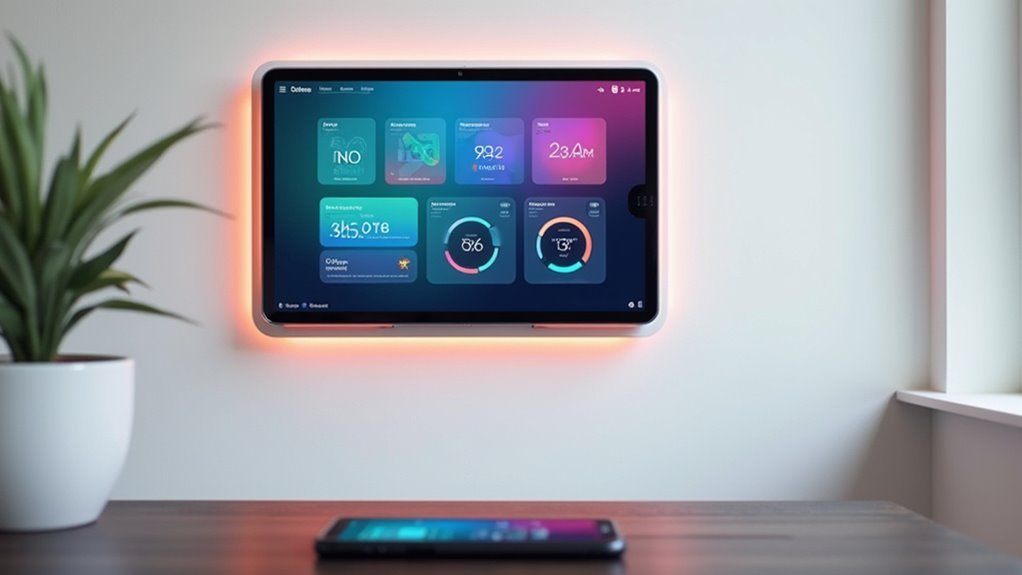
Your dashboard use extends beyond simple device control. You’ll access weather updates, calendar information, and other essential data alongside your smart device controls.
Each widget serves a specific purpose, whether it’s adjusting lighting, managing automation flows, or setting mood preferences.
The beauty lies in customization – you can rearrange widgets to match your daily routines and priorities.
This personalized approach guarantees your smart home responds exactly how you want it to, making home management effortless and efficient.
Choosing the Right Dashboard Platform for Your Needs
Now that you understand how dashboards streamline your smart home experience, selecting the perfect platform becomes your next priority.
Start by checking compatibility with your existing smart home devices and ecosystems like SmartThings or Home Assistant to guarantee seamless integration.
Verify your smart devices work with major ecosystems before committing to any dashboard platform for optimal performance.
Examine customization options carefully, as platforms like ActionTiles and SharpTools offer extensive tile and layout flexibility while others provide limited choices.
Consider the user interface’s intuitiveness—a well-designed dashboard platform encourages regular engagement with your controls.
Research community support availability, particularly for platforms like Home Assistant that feature active user communities providing valuable insights and solutions.
Finally, evaluate costs including one-time purchases, subscriptions, and additional feature fees to match your budget requirements.
Setting Up Your Home Assistant Environment
Before you can enjoy Home Assistant’s powerful dashboard capabilities, you’ll need to establish a solid foundation by installing the platform on a compatible device. A Raspberry Pi or virtual machine on your computer works perfectly for this setup.
Ensure your device meets the minimum requirements: at least 2 GB of RAM and a stable internet connection. After installation, you’ll access Home Assistant through your browser at http://homeassistant.local:8123.
Here’s what makes this exciting:
- Connect everything – Configure integrations to bring all your smart devices together
- Make it yours – Customize your dashboard with cards that match your lifestyle
- Control everything – Manage your entire home from one beautiful interface
The user-friendly integration page supports countless products, making setup straightforward.
Configuring Essential Hardware Requirements
With your Home Assistant software ready to go, you’ll need the right hardware foundation to build a robust dashboard hub that actually works when you need it.
Start with a reliable smart home hub like the Homey Pro, which guarantees seamless device integration and control. You’ll want a dedicated tablet or smartphone running the latest Homey app for peak dashboard management.
Establish a stable Wi-Fi connection since your system depends on cloud services for real-time updates. Choose smart lights, motion sensors, and compatible devices based on your specific needs.
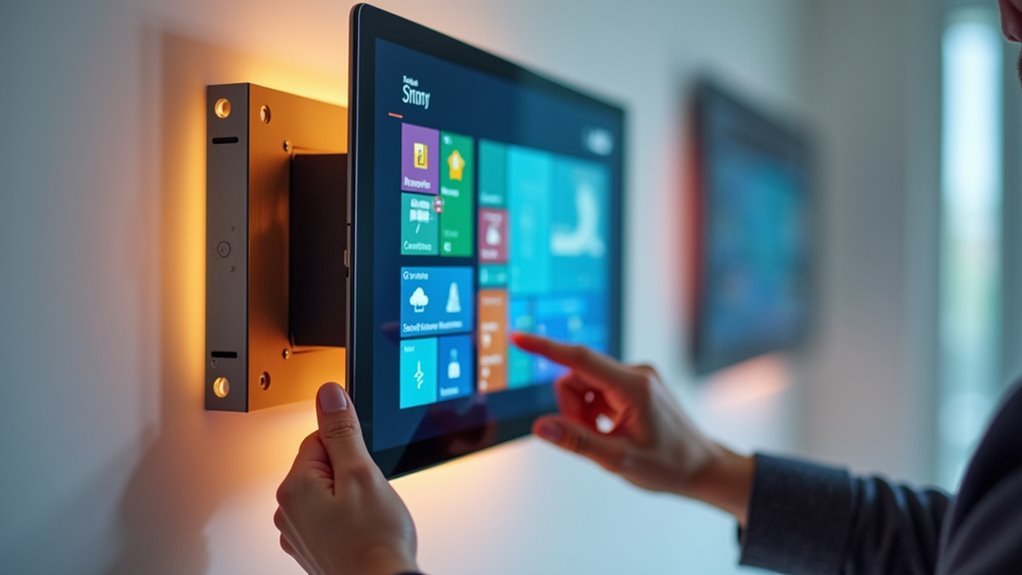
Motion sensors serve as an additional filter for automation triggers, making your dashboard more responsive. Consider mounting a tablet as a permanent display for constant access to controls throughout your home.
Installing and Customizing Dashboard Applications
You’ll need to select the right dashboard platform that’s compatible with your smart home ecosystem and meets your specific interface needs.
Once you’ve chosen your platform, you can configure widget settings to display the information that matters most to you, from device controls to weather updates.
Finally, you’ll personalize the user interface by arranging tiles, adjusting layouts, and customizing themes to create a dashboard that fits your workflow and aesthetic preferences.
Choose Dashboard Platform
How do you select the ideal dashboard platform that balances ease of use with customization flexibility?
You’ll want to explore different types of platforms available, from plug-and-play solutions like ActionTiles to locally hosted options requiring technical setup.
Consider these emotional benefits when choosing your platform:
- Freedom – Create a new dashboard that perfectly matches your lifestyle and preferences
- Control – Manage every aspect of your smart home from one centralized location
- Pride – Show off your personalized creation to family and friends
ActionTiles and SharpTools offer user-friendly interfaces for beginners, while Raspberry Pi solutions like HousePanel provide advanced customization.
Custom dashboards can utilize Azure’s Tile Gallery for extensive personalization.
Community resources offer free alternatives, letting you explore various features before committing to a platform.
Configure Widget Settings
The installation process for dashboard applications starts with creating an account on your chosen platform’s website and accessing the application through your web browser.
Once you’ve completed the setup, you’ll enter edit mode to customize your dashboard by adding device, flow, mood, and speaker widgets from the Homey app.
Select widgets that align with your smart home needs and use role-based access to control who can modify settings.
Rearrange, replace, or remove widgets using the editing options to prioritize frequently used controls.
Enhance functionality with custom widgets like sticky notes and clocks.
Regularly check the app store for new features and updates to keep your dashboard current and functional.
Personalize User Interface
Why settle for a generic interface when you can create a dashboard that reflects your unique smart home preferences?
Transform your control center by selecting applications like ActionTiles or SharpTools, which deliver exceptional customization capabilities for your connected devices.
Your personalization journey involves these essential steps:
- Choose your foundation – ActionTiles offers reliable functionality for $28.99 after a 14-day trial, while SharpTools provides unique customization features.
- Explore community creations – Access free alternatives and varied functionalities that expand your dashboard possibilities.
- Master widget diversity – Understand device, flow, mood, and speaker widgets to optimize your smart home interactions.
Stay connected with community forums to discover fresh customization techniques and layout optimizations that’ll make your dashboard truly yours.
Creating Your First Custom Dashboard Layout
You’ll want to start by planning your dashboard structure before jumping into widget selection, as this foundation determines how effectively you’ll navigate your smart home controls.
Once you’ve mapped out your layout, you can select essential widgets like device controls, flow triggers, and system insights that match your daily routines and priorities.
Finally, you’ll arrange these visual elements strategically, placing your most-used controls in prominent positions while grouping related functions together for intuitive access.
Planning Your Dashboard Structure
Before diving into widget placement and screen layouts, successful dashboard creation requires thoughtful planning of your overall structure. Start by identifying your primary functions—whether you’re controlling smart devices, monitoring security, or tracking energy usage. This foundation determines everything else.
Your dashboard layout should group related controls logically while keeping frequently used features prominent. Mix various widget types like device controls, flows, and speakers to address different needs effectively.
Consider these essential planning steps:
- Map your daily routines to understand which controls you’ll access most often.
- Visualize emergency scenarios where you’ll need instant access to critical functions.
- Anticipate future expansions as your smart home grows.
Regularly gather user feedback and adjust accordingly—your dashboard should evolve with your changing needs.
Selecting Essential Widgets
Which widgets deserve prime real estate on your dashboard? Start with device widgets for your most-used smart home devices—lights, thermostats, and security systems. Flow widgets enable quick automation triggers, while mood widgets let you adjust lighting scenes instantly.
| Widget Type | Primary Function |
|---|---|
| Device Widgets | Control smart home devices directly |
| Flow Widgets | Trigger automation sequences |
| Mood Widgets | Adjust lighting and ambiance settings |
The Enhanced Device Widget app expands your dashboard capabilities, displaying CPU usage and enabling device reboots. Don’t overlook utility widgets like sticky notes for reminders or clocks for time management. Prioritize widgets you’ll interact with daily—frequent automation controls should occupy top positions, while monitoring widgets can fill secondary spaces. Your dashboard should reflect your routine, not showcase every available option.
Arranging Visual Elements
With your widget selection complete, creating an effective dashboard layout begins in your platform’s main menu where you’ll find the dashboard creation interface.
The Tile Gallery becomes your creative workspace for arranging visual elements that’ll transform your custom dashboard into an intuitive control center.
When positioning your tiles, follow these essential principles:
- Place critical controls front and center – Your most-used functions deserve prime real estate where they’ll catch your eye instantly.
- Group related elements together – Clustering similar functions creates logical zones that feel natural to navigate.
- Leave breathing room between sections – Cramped layouts overwhelm users and reduce functionality.
Drag tiles to resize and reposition them while using the preview function to visualize changes.
Save your progress frequently to preserve your carefully crafted arrangement.
Adding and Organizing Device Control Widgets
Once you’ve set up your Homey dashboard, you’ll want to populate it with device control widgets that give you quick access to your most-used smart home functions.
Start by exploring the app’s pre-built options or selecting custom components that suit your needs. You can personalize your setup by adding flow widgets to trigger automation sequences, mood widgets for lighting adjustments, and Enhanced Device Widget options that display detailed information like IP addresses and memory usage.
Customize your dashboard with pre-built widgets or create personalized components for automation flows, lighting moods, and detailed device monitoring.
Don’t forget you can rearrange, replace, or remove widgets anytime to match your daily routines.
Since each phone can have its unique dashboard configuration, you’ll be able to tailor the experience specifically for managing your smart home devices efficiently.
Integrating Weather and Calendar Information
Beyond controlling devices, you’ll find that adding weather and calendar widgets transforms your Homey dashboard into a thorough daily command center.
The weather integration delivers real-time conditions and forecasts directly to your interface, while calendar widgets keep your schedule visible at all times.
Google Calendar integration guarantees seamless synchronization across all your devices, making appointment management effortless. You can access these widgets from your smartphone or tablet through the Homey app, maintaining consistency wherever you are.
Customization options let you:
- Never miss important moments by selecting specific weather locations that matter to your family
- Feel organized and in control with personalized calendar display formats
- Experience peace of mind knowing your daily essentials are always accessible
Implementing Security and Monitoring Features
Security features elevate your Homey dashboard from a convenient control center to an all-inclusive home protection system. You’ll transform your interface into a thorough monitoring hub by integrating smart cameras, motion sensors, and door/window detectors that deliver real-time alerts for unauthorized access.
| Device Type | Dashboard Feature | Automation Action |
|---|---|---|
| Smart Cameras | Live feed widgets | Record on motion |
| Motion Sensors | Alert notifications | Trigger lighting |
| Door/Window Sensors | Status indicators | Send alerts |
| Security Panel | Armed/disarmed display | Schedule activation |
Customizable widgets display your security status at a glance, while flow automation triggers specific responses like activating lights when motion’s detected. The Enhanced Device Widget app monitors component performance and battery life, ensuring peak functionality. Regular dashboard reviews allow quick adjustments based on changing security needs.
Designing Multi-Room Control Interfaces
You’ll need to organize your smart home devices into logical zones that mirror your physical room layout, making it easier to control multiple devices within each area.
Cross-platform widget synchronization guarantees that changes you make on one device instantly reflect across all your interfaces, whether you’re using a tablet, smartphone, or wall-mounted display.
This approach eliminates the frustration of maneuvering separate apps or dealing with delayed updates when managing your multi-room setup.
Zone-Based Device Grouping
When managing a smart home with devices scattered across multiple rooms, zone-based device grouping transforms chaos into organized control.
You’ll organize devices by location—living rooms, bedrooms, kitchens—creating logical clusters that respond to single commands. Instead of manually adjusting individual devices, you can trigger room-wide actions like dimming all bedroom lights or adjusting your kitchen’s temperature settings.
This approach revolutionizes your smart home management through:
- Effortless whole-room control that saves precious time during busy mornings
- Simplified automation flows that adapt to your family’s unique daily routines
- Enhanced user engagement through intuitive, location-based interactions
Your dashboard’s customizable widgets provide instant access to zone controls, creating tailored experiences that match your lifestyle.
This strategic grouping enables sophisticated automation schedules across multiple devices simultaneously.
Cross-Platform Widget Synchronization
While zone-based grouping organizes your devices by location, cross-platform widget synchronization takes control a step further by ensuring your dashboard remains consistent across every device you own.
You’ll create customizable widgets that automatically sync appearance and functionality whether you’re using your smartphone, tablet, or computer. This cross-platform approach connects seamlessly with smart home ecosystems like Homey and SmartThings, letting you control smart devices from any interface.
Your synchronized widgets can include device management controls, automation flows, and real-time monitoring displays. When you modify a widget on one device, synchronization updates it everywhere instantly.
Regular community contributions expand available widget options, so you’ll customize dashboards for specific needs while maintaining perfect consistency across all your devices and platforms.
Setting Up Automation and Flow Triggers
Setting up automation and flow triggers transforms your Home Dashboard Hub from a simple control interface into an intelligent system that responds automatically to your daily routines and environmental changes.
Transform your basic smart home controls into an intelligent ecosystem that anticipates and responds to your lifestyle automatically.
Access the Homey app and navigate to the “Flows” section to create powerful automation rules that’ll revolutionize your smart home experience.
Your flows consist of triggers, optional conditions, and actions that work together seamlessly. Here’s what you can create:
- Morning routines that gradually brighten lights and start coffee when motion’s detected
- Security automation that locks doors and activates cameras when everyone leaves
- Energy-saving flows that adjust thermostats based on occupancy patterns
Use the Flow Checker Utility to monitor your automation and troubleshoot any issues.
Consider integrating third-party apps for expanded triggers and enhanced functionality.
Optimizing Dashboard Performance and Responsiveness
Three key factors determine your Home Dashboard Hub’s performance: the number of active elements, refresh frequency, and data processing load.
To optimize your dashboard’s performance, regularly remove unused tiles and widgets that clutter your interface and slow loading times. You’ll want to configure auto-refresh settings carefully—update data without overwhelming your system with constant requests that degrade responsiveness.
Implement strategic filters to narrow displayed data, reducing processing demands while enhancing responsiveness.
Customize tile sizes and arrangements to create a streamlined layout that puts essential information at your fingertips. Consider lightweight custom cards from community resources instead of resource-heavy alternatives.
These performance tweaks guarantee your dashboard remains agile and responsive, delivering the smooth user experience you need for effective home management.
Managing User Access and Sharing Permissions
You’ll need to establish proper access controls when managing your dashboard hub to guarantee the right users can view or modify specific dashboards.
Setting these permissions starts with Azure’s role-based access control system, which lets you define who can access your dashboards and what actions they’re allowed to perform.
Publishing shared resources requires you to explicitly move dashboards from private status to shared status, then configure visibility settings that match your team’s collaboration needs.
Setting Access Controls
When managing your Azure dashboard environment, controlling who can access and modify your dashboards becomes critical for maintaining data security and operational integrity.
You’ll need to leverage Azure’s role-based access control to establish proper user access boundaries and sharing protocols.
Setting effective access controls requires strategic planning:
- Review permissions meticulously – Your sensitive data deserves protection from unauthorized viewers who shouldn’t see confidential metrics.
- Configure sharing settings carefully – One wrong permission setting could expose critical business intelligence to competitors or unauthorized personnel.
- Monitor dashboard limits proactively – With 100 private dashboards allowed, you must strategically decide which ones warrant sharing without counting against your quota.
Publishing Shared Resources
Once you’ve established your access control framework, you’re ready to publish dashboards and manage how shared resources reach your intended audience.
Publishing transforms your private dashboard into a shareable resource, but you’ll need to configure sharing permissions through Azure’s role-based access control system.
To share your dashboard, click the arrow beside the dashboard name and select your sharing options. You can choose specific users or groups who’ll receive access based on your predefined access controls.
Remember that dashboards remain private by default until you actively publish them.
You can adjust sharing settings anytime to modify who sees your shared dashboards. If something goes wrong, don’t worry—deleted dashboards can be recovered within 14 days, protecting your shared resources from accidental removal.
Maintaining and Updating Your Dashboard System
While setting up your home dashboard hub represents just the beginning of your smart home journey, maintaining and updating the system guarantees it continues delivering top performance and functionality.
Regular maintenance guarantees your dashboard operates smoothly and securely. Check for software updates frequently to receive the latest features and security patches that enhance your user experience. Monitor system performance metrics like CPU load and memory usage to identify potential issues before they impact responsiveness.
To keep your system running efficiently:
- Schedule routine checks – Verify all widgets and integrations function properly to prevent frustrating disruptions.
- Back up configurations regularly – Protect against devastating data loss and enable quick recovery.
- Gather user feedback – Implement improvements that truly matter to your household’s daily routines.
Proactive maintenance transforms your dashboard from a simple display into a reliable smart home command center.
Frequently Asked Questions
How Do I Create a Custom Home Assistant Dashboard?
Navigate to Home Assistant’s “Dashboards” section and create a new dashboard. You’ll add various cards like sensors and weather forecasts, then customize the layout by dragging, resizing, and applying themes for personalization.
Can I Create My Own Dashboard?
Yes, you can create your own dashboard using platforms like Azure, SmartThings, or Homey. Each offers unique customization options, with Azure allowing 100 private dashboards and community alternatives providing free building solutions.
Which Is the Best Platform to Create a Dashboard?
You’ll find ActionTiles offers the best balance of usability and features for most users. If you’re technical, HousePanel provides maximum flexibility. SharpTools excels for advanced customization needs.
Can Chatgpt Create an Excel Dashboard?
You can’t directly have ChatGPT create an Excel dashboard, but it’ll provide detailed step-by-step instructions, recommend visualization tools, suggest formatting options, and guide you through building interactive dashboards yourself.


Leave a Reply