You’re probably paying more for water than you need to, and your current sprinkler timer isn’t helping. Installing a modern irrigation controller can cut your water bills by up to 30% while keeping your lawn healthier than ever. The process seems intimidating at first glance, but it’s actually straightforward once you understand the basics. Before you call an expensive contractor, there’s something you should know about what’s really involved.
Choosing the Right Controller for Your Zone Requirements
How do you determine which watering controller will best serve your irrigation system’s needs? Start by counting your existing zones and select an irrigation controller that matches or exceeds that number.
You’ll typically find options for 4, 6, 8, and 12 zones. Don’t worry about having unused zones – it’s perfectly acceptable to choose a controller with more capacity than you currently need.
Prioritize models with rain sensor compatibility to maximize water efficiency and prevent overwatering during natural rainfall. The Hunter X-Core stands out as a reliable choice for most residential applications, replacing the discontinued XC model with nearly identical functionality.
Before finalizing your selection, verify wire compatibility and color coding, as these can vary between different installations and controller models.
Essential Tools and Safety Equipment Needed
You’ll need several basic wire tools to properly install your watering controller system, starting with a quality screwdriver for removing and inserting wires into terminals.
Don’t overlook electrical safety precautions – always wear protective gloves and safety goggles to shield yourself from accidental electrical contact and flying debris.
A digital multimeter becomes invaluable for checking voltage levels and confirming your system’s powered correctly before you handle any wiring.
Basic Wire Tools
Success in watering controller installation depends heavily on having the right tools and safety equipment before you begin. Your basic wire tools arsenal should include a screwdriver for removing existing wires and wire strippers for preparing clean connections.
You’ll also need a multimeter to check voltage and continuity in your irrigation systems. Don’t forget electrical tape or wire nuts to secure and insulate exposed connections after installation.
Confirm you have safety equipment like insulated gloves and safety glasses to protect against accidental shocks. A smartphone or camera proves invaluable for photographing existing wiring setups before removal.
Most importantly, always unplug the power supply before starting any wiring work to prevent electrocution and confirm your safety throughout the installation process.
Electrical Safety Precautions
Beyond gathering the right tools, your safety must take priority throughout every step of the installation process.
Always unplug power to your sprinkler controller before starting any wiring work to prevent electrocution, even though today works with low voltage systems operating at 24 volts. Use insulated screwdrivers when removing and connecting wires to reduce short circuit risks.
Wear safety glasses to protect your eyes from debris or wire snaps during installation. Make certain your workspace stays completely dry and water-free to minimize electrical shock while handling components.
Keep a first aid kit nearby for minor injuries. These precautions protect you while installing your irrigation whole system, making sure both your safety and successful controller installation throughout the entire project.
Understanding Your Current Wiring Configuration
Before you disconnect a single wire from your existing controller, you’ll need to identify the different wire types and understand how they’re currently connected.
Turn off power to the system at the breaker and take detailed photos of your wiring configuration from multiple angles.
Label each wire with tape or tags, noting which terminals they connect to, so you can accurately recreate the setup with your new controller.
Identifying Wire Types
One of the most critical steps you’ll take involves documenting your existing wiring setup before disconnecting anything from your current controller.
Take a clear photograph of the wiring configuration and label each wire to prevent confusion during installation. You’ll typically find two distinct sets of wires entering the controller—keep these separate to maintain proper system function.
Look for the common wire, which usually appears white or green, as it’s essential for completing your irrigation circuit.
Each zone wire connects to numbered terminals, while the P terminal controls a master valve if your system uses one.
Don’t worry about unused wires in your setup—simply leave them disconnected as long as your new controller matches or exceeds your existing zone count.
Safety Before Disconnection
Although your watering controller operates on a relatively safe 24-volt system, you’ll want to disconnect the power supply completely before touching any wires. This precaution prevents any risk of electrocution and guarantees you’re working safely throughout the replacement process.
Before disconnecting anything, take these essential preparation steps:
- Take a photograph of your existing wiring configuration
- Label each wire to track connections during replacement
- Identify the two sets of wires running into your controller
- Locate power wires connected to the transformer
- Note any unused wires that may be present
Your setup might include various components like rain sensors or master valves, creating different wire configurations.
Some wires may remain unused depending on your specific installation features. Organizing and clearly identifying these connections now will save you considerable time and frustration later.
Documentation and Labeling
Taking detailed documentation of your current wiring setup forms the foundation for a successful controller replacement. Before disconnecting anything, snap a clear photograph of the existing wiring configuration. This visual reference will prove invaluable during reinstallation.
Next, label each wire according to its specific function. Mark power, common, and zone wires clearly, as you’ll need to identify them correctly on your new controller.
Don’t assume wire colors follow standard conventions—common wires might be white or green depending on your installation.
Document any unused wires you discover, as these could be installation-specific and unnecessary for your new system.
Pay special attention to the P terminal connection for master valves, which isn’t utilized in every sprinkler system.
Photographing and Labeling Existing Wire Connections
Before you disconnect a single wire from your old sprinkler controller, grab your phone or camera to capture clear photographs of the entire wiring setup.
Take multiple shots from different angles to guarantee you’ve documented every connection clearly. These photos will serve as your roadmap when installing the new controller.
Next, create labels for each wire according to its corresponding terminal. Use masking tape or wire labels to mark each connection point.
Pay special attention to documenting:
- Wire colors and their specific terminal assignments
- Common wire identification (typically white or green)
- Any unused wires and their positions
- Multiple wires connected to single terminals
- Special connections or jumpers between terminals
Double-check your labels against your photographs before proceeding with disconnection.
Safely Disconnecting Power and Removing Old Controller
Power safety stands as your top priority when removing the old controller. Before touching any components, completely unplug the power to your sprinkler controller to eliminate electrocution risks.
Always disconnect power completely before touching any sprinkler controller components to prevent dangerous electrical shock.
You’ll typically encounter two sets of low voltage wires running at 24 volts into the controller.
Using your screwdriver, carefully remove each wire from the old controller’s terminals. Don’t rush this process—mixing up connections will cause headaches later. Some wires in your installation might be unused, so verify which specific connections your system actually requires before proceeding.
Once you’ve disconnected all wires from the old controller, you can safely remove the unit. Follow the same meticulous labeling and organization method you used during photography when connecting wires to your new controller.
Identifying Common Wire Types and Their Functions
Understanding your sprinkler system’s wiring becomes straightforward once you recognize the standard wire types and their specific roles.
Before you begin connecting wires to your new controller, take time to identify each wire’s function in your existing system.
Here are the essential wire types you’ll encounter:
- Power wires – Connect to the transformer, supplying 24 volts to operate your controller
- Zone wires – Control individual sprinkler zones throughout your property
- Common wires – Complete the circuit, typically white or green colored
- Master valve wire – Connects to P terminal when present (not always used)
- Rain sensor wire – Enables automated rainfall adjustments on compatible models
Always photograph and label your existing wiring before disconnection.
This documentation guarantees you’ll reconnect everything correctly to your new controller.
Understanding Master Valve and Rain Sensor Connections
You’ll need to understand how master valve and rain sensor connections work to complete your irrigation controller installation properly.
The master valve connects to the “P” terminal on your controller and controls the main water supply, while rain sensors prevent unnecessary watering by detecting moisture and skipping scheduled cycles.
You’ll also notice that common wire colors can vary between installations, typically appearing as white or green wires that connect all zones back to the controller.
Master Valve P Terminal
When installing your watering controller system, you’ll encounter the Master Valve P terminal, which serves a crucial role in controlling water flow throughout your entire irrigation network. This terminal controls the master valve that regulates water to your complete irrigation system, ensuring efficient operation while preventing costly leaks.
The P terminal’s functionality includes:
- Controlling the main water supply valve for your entire system
- Preventing water flow when zones aren’t actively running
- Protecting against leaks by shutting off water supply automatically
- Enhancing system efficiency through centralized flow management
- Reducing water waste during system downtime
Remember that not all irrigation systems require a master valve connection. You can leave the P terminal unused if your particular installation doesn’t need this feature, depending on your system’s specific design requirements.
Rain Sensor Functionality
After connecting your master valve to the P terminal, you’ll want to integrate rain sensor functionality to create a thorough water management system. Rain sensors prevent unnecessary watering during rainfall, conserving water and reducing utility costs considerably.
Connect your rain sensor to the “SEN” terminal on Hunter XC and X-Core models. Position the sensor in an unobstructed area for accurate precipitation detection.
| Component | Terminal | Function | Required | Notes |
|---|---|---|---|---|
| Master Valve | P | Controls water flow | Optional | System-dependent |
| Rain Sensor | SEN | Detects rainfall | Recommended | Saves water/money |
| Zone Wires | 1-8 | Individual zones | Yes | Based on layout |
| Common Wire | C | Return path | Yes | White wire typically |
| Unused Wires | Any | Not connected | N/A | Won’t affect operation |
Unused connections won’t interfere with rain sensor operation.
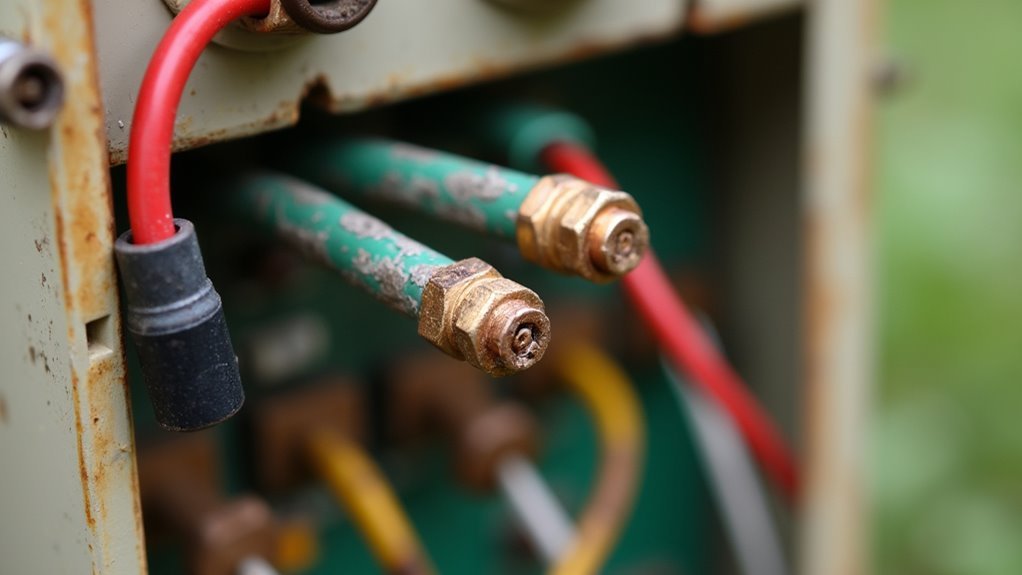
Common Wire Color Variations
Wire colors in sprinkler systems don’t follow universal standards, creating confusion during installations and repairs.
You’ll find that common wires are typically white or green, but installation practices can vary considerably between manufacturers and installers.
Understanding these variations is essential for proper connections:
- Master valve wires (P terminal) are often red or yellow, though not all systems use them
- Rain sensor connections feature distinct colors or labels to differentiate from zone wires
- Common wires may appear as white, green, or other colors depending on the installer
- Zone wires can vary widely in color coding between different manufacturers
- Wire labeling systems aren’t standardized across brands
Before disconnecting any wires, photograph and label each connection.
This prevents confusion when reconnecting your new controller, especially given these color variations.
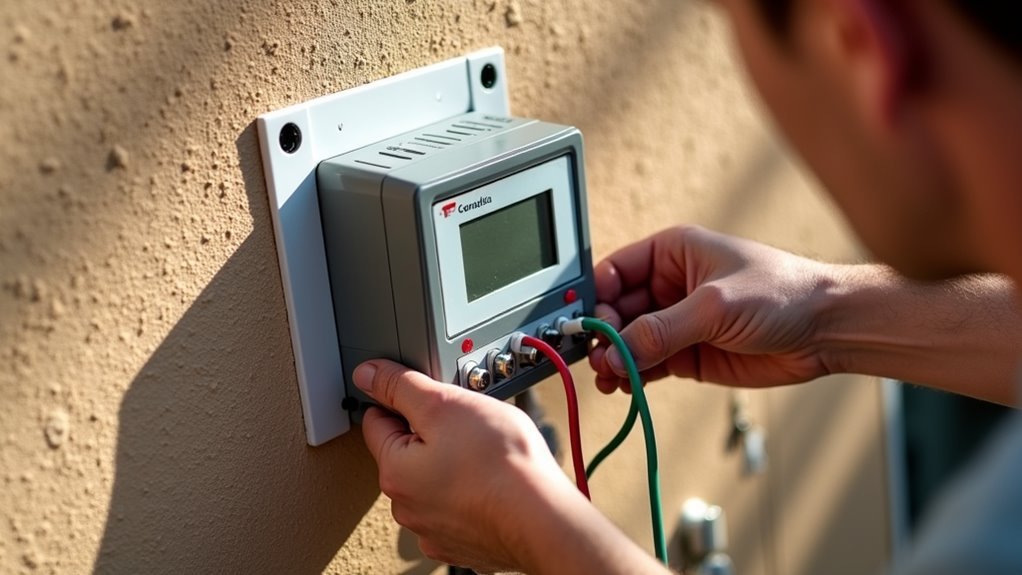
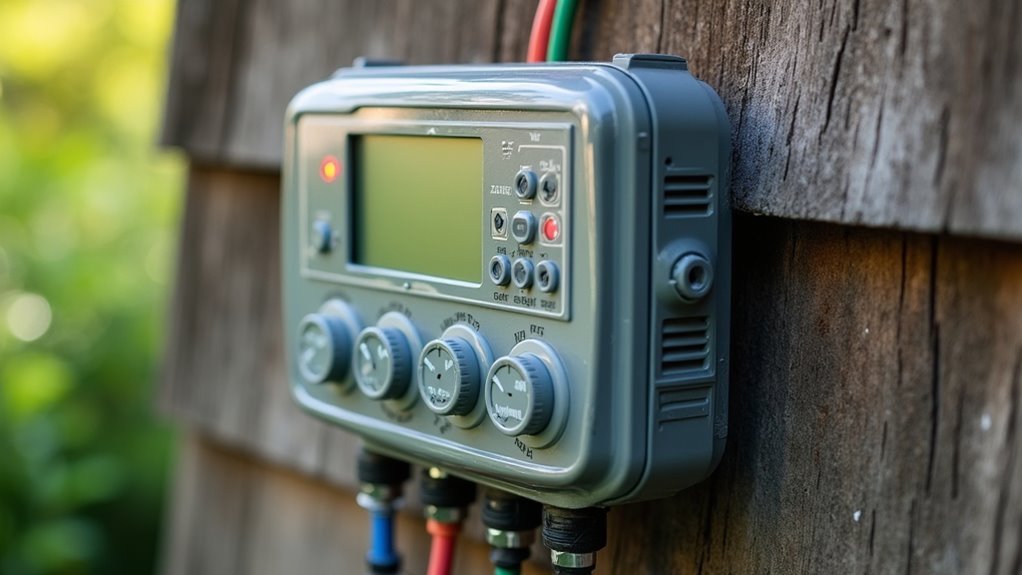
Mounting Your New Hunter X-Core Controller
Before connecting any wires, you’ll need to properly mount your Hunter X-Core controller in an ideal location. Start by selecting a wall spot that’s sheltered from direct sunlight and moisture, as these elements can damage the controller’s performance over time.
Once you’ve chosen the location, use a level to guarantee your mounting marks are perfectly straight. Mark the drilling points and create holes for the mounting hardware.
Secure the controller firmly to the wall using appropriate screws or anchors that match your wall type. The controller must be mounted solidly to prevent vibration or movement that could loosen wire connections later.
Double-check that the unit sits flush against the wall and remains level before proceeding to the wiring phase.
Connecting Power Wires to the Transformer
With your controller securely mounted, you can now focus on establishing the electrical connections that’ll power your system.
Before beginning any electrical work, unplug the power to eliminate electrocution risks during installation.
Always disconnect power before starting electrical work to prevent shock hazards during your irrigation controller installation.
Follow these essential steps for safe power connection:
- Photograph and label existing wiring before removal for accurate reconnection
- Identify power wire color coding to guarantee correct transformer connections
- Use only a screwdriver for the simple 24-volt wire connections
- Connect wires according to manufacturer specifications
- Test controller functionality before finalizing setup
The Hunter X-Core operates on 24 volts, making wire connections straightforward and manageable.
Once you’ve connected the power wires to the transformer following proper color coding, verify your installation works correctly by testing the controller’s basic functions.
Wiring Individual Zone Controls Properly
Each zone control wire connects to a specific terminal on your controller, and proper identification prevents costly mistakes during installation.
Before disconnecting any wires, photograph and label your existing wiring configuration to eliminate confusion during reinstallation. Turn off power to your sprinkler system completely before handling any wires to prevent electrocution risks.
Connect each zone wire to its corresponding terminal in the new controller, keeping your wiring organized to avoid mix-ups.
Pay close attention to the common wire’s color coding, which typically appears white or green, and make sure it’s properly connected for system functionality.
If you’re installing a master valve or rain sensor, connect those specific terminals according to your system’s requirements for peak performance.
Setting Up Rain Sensor Integration
Although rain sensors aren’t mandatory for every irrigation system, they’ll considerably improve your watering efficiency and help you comply with local water conservation regulations.
First, verify your controller supports rain sensor integration, as not all systems are compatible. Connect the sensor to the designated terminals, typically labeled “SEN” or “RAIN,” following your manufacturer’s wiring diagram precisely.
When positioning your rain sensor, follow these critical guidelines:
- Install in an open area without obstructions from trees or buildings
- Guarantee direct exposure to rainfall for accurate moisture detection
- Mount securely to prevent movement during weather events
- Keep accessible for regular maintenance and cleaning
- Position away from sprinkler spray zones
Once activated, the sensor automatically prevents scheduled watering during rainy conditions, saving water and money.
Programming Your Watering Schedule and Zones
After completing your rain sensor setup, you’re ready to program your watering schedule and zones through the controller’s interface. Access the programming menu and set your desired start times for each zone, selecting specific days of the week based on your watering frequency needs.
Modern controllers like the Hunter X-Core let you customize individual run times for each zone, accommodating different plant requirements across your landscape.
Double-check that each programmed zone corresponds to the correct garden or lawn area to guarantee efficient water distribution. Your rain sensor will automatically adjust or suspend watering when recent rainfall is detected, preventing overwatering and conserving water.
After programming, monitor your system’s performance regularly and adjust run times or schedules seasonally to account for changing weather conditions and plant growth patterns.
Testing Each Zone for Proper Operation
After completing your programming setup, you’ll need to test each zone to verify everything’s working correctly.
Start by manually activating each zone through your controller and watch for proper water flow and coverage patterns.
If you notice zones that won’t activate, have weak water pressure, or show irregular spray patterns, you’ll need to troubleshoot wiring connections and check for flow restrictions.
Manual Zone Activation Steps
Once you’ve completed the initial installation of your watering controller system, you’ll need to manually test each zone to confirm proper operation before relying on automatic scheduling.
Start by verifying that power’s connected and your controller’s programmed correctly. Then switch to manual operation mode and select each zone individually.
Follow these steps for effective zone testing:
- Activate each zone for a short duration to observe water flow
- Check for proper coverage across the entire irrigation area
- Look for clogs, leaks, or malfunctioning sprinkler heads
- Note any zones with inadequate pressure or uneven distribution
- Document problems for future troubleshooting reference
After completing your manual tests, return the controller to automatic mode to resume scheduled watering cycles.
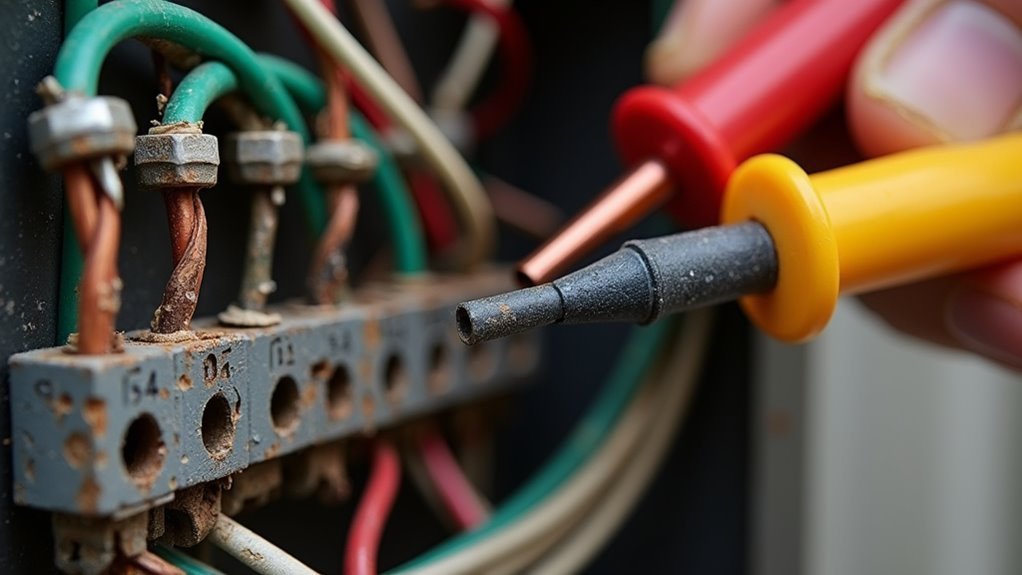
Identifying Faulty Zone Wiring
During manual testing, you might discover zones that don’t respond or operate inconsistently, signaling potential wiring problems that require immediate attention.
Start by inspecting all wiring connections at your controller, ensuring they’re secure and properly labeled for each zone. Use a multimeter to test voltage at each zone’s terminal—you should read approximately 24 volts for proper power supply.
Activate each zone manually from the controller to verify operation. Check the entire wiring path for visible damage or corrosion that could interrupt the circuit.
If you find consistently non-functional zones despite proper voltage readings, the issue likely stems from faulty solenoids or valves requiring replacement rather than wiring problems.
Troubleshooting Water Flow Issues
Even when electrical connections test properly, water flow problems can still plague individual zones and prevent effective irrigation coverage.
You’ll need to systematically diagnose each zone to pinpoint the exact issue.
Start your troubleshooting process with these essential steps:
- Manually activate each zone on the controller to check for water flow
- Inspect all wiring connections for loose or damaged wires, focusing on common and zone-specific connections
- Verify that zone valves aren’t stuck or blocked by physical obstructions
- Use a multimeter to measure 24-volt readings at valve connections
- Confirm the main water supply is turned on without leaks
If you’re getting proper voltage but no water flow, the valve itself likely needs cleaning or replacement.
Always check your main water line first before diving into individual zone diagnostics.
Troubleshooting Common Wiring Issues
While watering controller installation typically proceeds smoothly, wiring problems can quickly derail your project if you’re not prepared to identify and resolve them.
Always photograph and label your existing wiring before disconnecting anything to guarantee correct reconnection. Verify unused wires are properly capped off to prevent short circuits or interference with your new controller.
Document your current setup with photos and labels before removal to ensure proper reconnection and prevent costly wiring mistakes.
Double-check that common wire connections are securely attached and color-coding remains consistent, as they may vary between white or green.
If you’re experiencing issues post-installation, verify your power supply’s functioning and confirm all wires connect firmly to their designated terminals.
Consult your controller’s manual for troubleshooting specific wiring issues, since different models feature unique requirements that need addressing.
Frequently Asked Questions
Can I Install My Own Irrigation System?
Yes, you can install your own irrigation system by following straightforward wiring processes with low voltage connections. You’ll need to photograph existing wiring, choose appropriate zone configurations, and always unplug power before starting installation.
Can You Replace a Sprinkler Controller Yourself?
Yes, you can replace a sprinkler controller yourself by following straightforward wiring steps. Always unplug power first for safety, photograph existing wires, and verify your new controller matches your system’s zone requirements.
How Much Does It Cost to Install Your Own Irrigation System?
You’ll spend $1,000 to $3,000 installing your own irrigation system, depending on area size and complexity. Materials cost $0.50 to $1.00 per square foot, while controllers range from $50 to $300.
Is a DIY Sprinkler System Worth It?
You’ll save 30% on water bills and recover costs within years. It’s straightforward with low-voltage wiring, requires minimal experience, and modern features like rain sensors make it worthwhile for water conservation.


Leave a Reply