To build a voice-activated smart mirror, you’ll need a two-way mirror, LED display, Raspberry Pi, microphone, and speakers. Start by designing your frame to house all components, ensuring proper ventilation. Assemble the hardware, install Magic Mirror software on your Pi, and add voice control modules. Customize with widgets for weather, news, and calendar functions. Position your microphone strategically for ideal voice recognition. The complete guide below walks you through each step of creating your personalized interactive mirror.
Materials and Components: What You’ll Need to Get Started
The foundation of any smart mirror project begins with careful component selection.
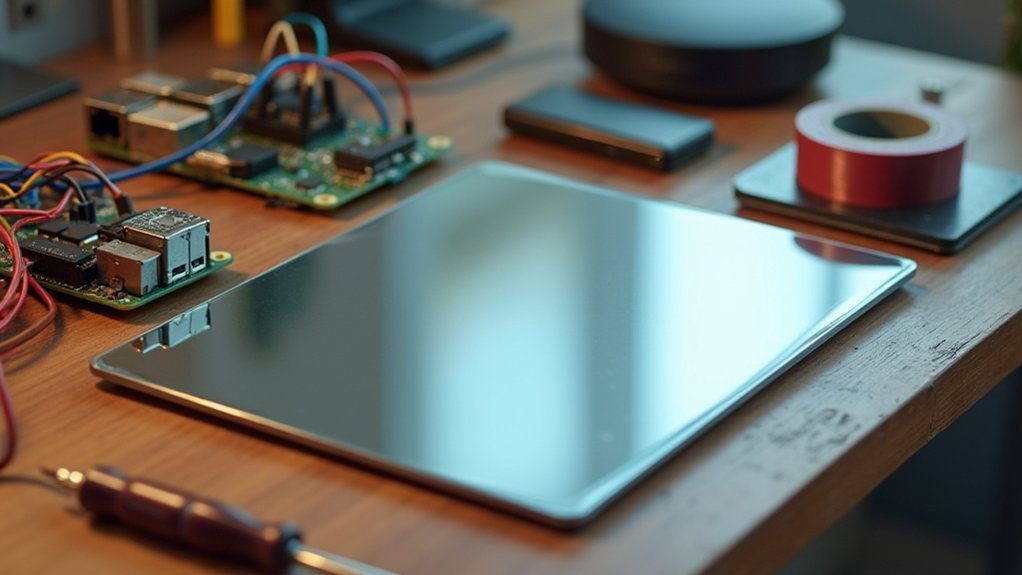
You’ll need a two-way mirror surface—either glass with specialized coating or lighter acrylic alternatives that reflect while allowing display visibility. Dielectric mirrors offering 70% reflection and 30% transmission provide an ideal balance.
For the display, choose a flat LED monitor (15-24 inches) with at least 1080p resolution.
The brain of your system will be a Raspberry Pi 3 or 4, along with its power supply, HDMI cable, and microSD card for the MagicMirror² software.
Don’t forget audio components: a USB microphone for voice commands and speakers for responses.
Finally, gather mounting hardware, frame materials (typically wood), and optional LED lighting strips for enhanced aesthetics and functionality. Many suppliers like big box stores can cut wood pieces to your exact specifications, saving time during the frame assembly process.
Planning Your Design: Size, Layout, and Functionality
When planning your smart mirror design, you’ll need to choose an appropriate size like A3 for a sleek appearance while ensuring your display fits perfectly behind the mirror.
Position your Raspberry Pi, speakers, and sensors strategically to maintain a clean aesthetic and enable ideal voice command recognition.
Prioritize which features matter most to you—whether that’s voice control, cloud integration, or multifactor authentication—to create a personalized smart mirror that enhances your daily routine.
Consider using nylon hardware for assembly to avoid electrical conductivity issues and ensure safe mounting of all components.
Mirror Size Considerations
Selecting the appropriate dimensions for your smart mirror project represents one of the most essential initial decisions you’ll make. Most DIY builders opt for display sizes between 24-27 inches diagonally, but your mirror pane should extend beyond the screen to conceal hardware and prevent backlight bleedthrough.
Consider your installation location carefully – bathroom mirrors typically range from 60-200cm wide by 60-100cm tall, while other spaces may accommodate custom dimensions. Many users report positive experiences with Vizio 32 HD TVs for their smart mirror projects.
Your frame needs sufficient depth (at least 2.25″) to house your display and computer components.
For ideal integration, match your mirror’s size to available wall space and interior décor. Remember that commercial smart mirrors commonly use 21.5-inch displays within larger mirror panes, providing a proven blueprint for your project’s proportions.
Component Placement Strategy
Strategic component placement forms the backbone of any successful smart mirror build, transforming a basic reflective surface into an interactive information hub. Your design decisions will determine both functionality and aesthetics. When planning your layout, consider how the IR touch frame might affect the visual appearance of your completed mirror.
| Component | Ideal Placement |
|---|---|
| Monitor | Directly behind mirror, ports accessible |
| Raspberry Pi | Adjacent to monitor to minimize cables |
| Microphones | Top edge, unobstructed by frame |
| Sensors | Where they can detect input without blocking |
Position your display flush against the two-way mirror, using spacers to prevent pressure damage. Create ventilation channels to prevent overheating of electronics. Secure everything with proper mounting holes and bolts to maintain alignment, and use metal tabs on the frame to hold components firmly. For maintenance access, design your wiring to follow organized channels that allow for future troubleshooting or upgrades.
Feature Priority Planning
Before diving into construction, thoughtful feature prioritization will determine the success of your smart mirror project. Start with essential core functions: time, date, weather, and news headlines that provide daily value at a glance.
Implement voice activation for hands-free control, especially useful in bathroom environments where touch isn’t ideal.
Add presence detection through motion sensors to conserve energy by activating the display only when someone’s nearby.
Consider your personal needs when selecting customizable modules like calendar appointments, traffic updates, or music streaming.
Design your interface with high-contrast elements and clear fonts that remain readable through the semi-transparent mirror surface.
For ideal user experience, organize information in distinct zones on the mirror and guarantee all content is visible with minimal interaction required. The MagicMirror2 open-source software allows extensive customization to achieve your desired layout and functionality.
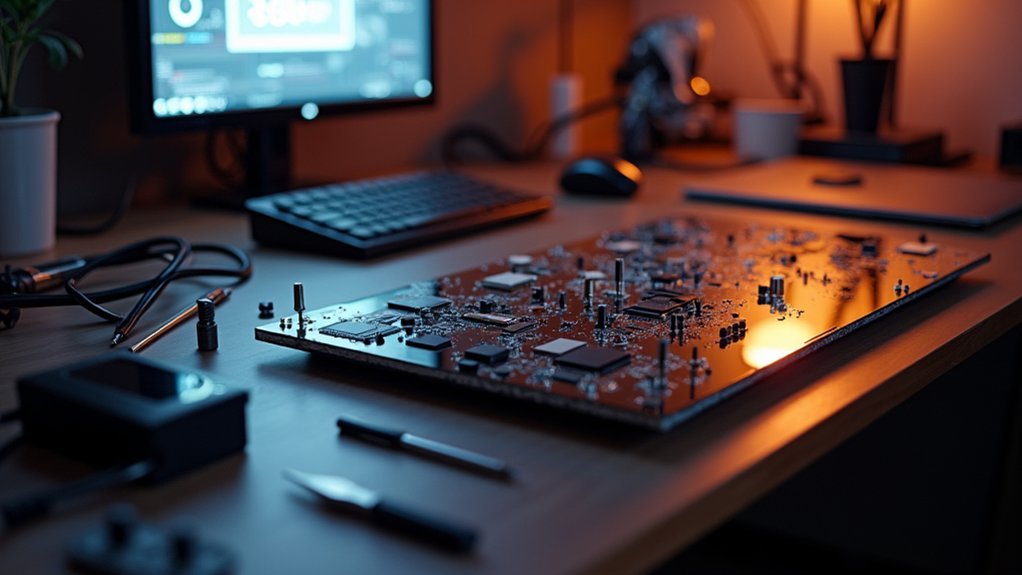
Assembling the Hardware Framework
Once you’ve gathered all your components, the assembly phase brings your smart mirror concept to physical reality.
Start by selecting either glass (more scratch-resistant) or acrylic (lighter) for your two-way mirror material, then pair it with a stripped-down monitor that has minimal bezel depth.
Construct a frame sized to house both the mirror and display, leaving space for other components. Wood or metal frames work well—choose based on your bathroom’s aesthetic. Consider using 4 x ½ inch boards with corner brackets for a sturdy, reliable frame structure.
Secure the mirror-display stack using brackets or adhesives.
Don’t forget ventilation! Include small slots in your frame design to prevent overheating.
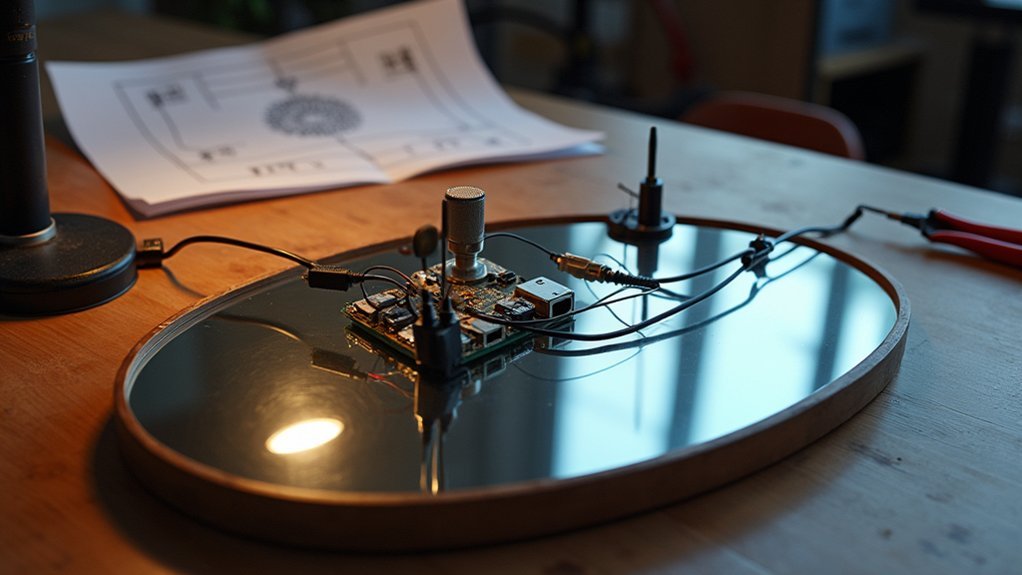
Position your USB microphone strategically to minimize echo, and organize cables with Velcro straps or clips for a clean look.
Finally, install proper mounting hardware sized for the combined weight of glass and electronics.
Setting Up the Raspberry Pi and Display

The heart of your smart mirror’s functionality lies in properly setting up the Raspberry Pi and display connection. Connect your Pi to the display using a mini HDMI cable, ensuring all power cables are secure.
Before installation, test the display to confirm compatibility and set brightness to maximum.
Install Raspberry Pi OS on your microSD card and configure the correct time zone with `sudo dpkg-reconfigure tzdata`. Connect to Wi-Fi and enable SSH for remote management. Install the necessary MagicMirror platform from Michael Teeuw’s GitHub repository for your smart mirror’s interface.
Set up automatic boot to Magic Mirror in kiosk mode for seamless startup.
When installing, remove any protective tapes and unnecessary components from the display. Mount it behind the two-way mirror using nuts, bolts, and spacers.
Route cables neatly behind the frame and secure them to maintain a clean appearance.
Installing and Configuring Magic Mirror Software
After preparing your hardware setup, installing the Magic Mirror software transforms your mirror from a simple display into an interactive smart device.
You’ll need Node.js and Git to begin the process.
First, clone the MagicMirror repository with `git clone https://github.com/MagicMirrorOrg/MagicMirror`, then navigate to the directory and run `npm run install-mm`.
Be patient—this step takes 10-25 minutes, especially on Raspberry Pi.
Next, create your configuration by copying the sample file: `cp config/config.js.sample config/config.js`.
Edit this file to customize modules and settings.
To launch the application, run `npm run start` for the full interface or `npm run server` for headless operation. If you’re using a Windows system, you’ll need to use the `npm run start:windows` command for Windows instead.
You’ll see default modules like date, weather, and news appear when properly configured.
Implementing Voice Control Capabilities
With your Magic Mirror software running, you’re ready to add voice control – the feature that truly makes your mirror “smart.” Voice interaction transforms how you’ll use your mirror, allowing hands-free operation while getting dressed or performing other tasks.
Choose your hardware carefully – dedicated voice kits like Google’s AIY offer better compatibility than generic USB microphones. Position your microphone strategically within the mirror enclosure for ideal voice capture. Popular wake words for activating your smart mirror include MMM Google Assistant which supports default phrases like “hey google,” “ok google,” and “jarvis.”
| Voice Assistant | Best Use Case |
|---|---|
| Amazon Alexa | Smart home integration |
| Google Assistant | Search functionality |
| Custom Solution | Privacy-focused setup |
| Wake Word Detection | Always-on convenience |
| Voice Authentication | Personalized content |
For implementation, you’ll need to integrate speech-to-text APIs and configure wake word detection. Consider adding voice authentication if you’ll display personal information on your mirror.
Customizing Your Smart Mirror With Additional Features
Once your mirror has basic voice control capabilities, you’ll want to explore the vast customization options that transform it from a novelty into an indispensable part of your daily routine.
Tailor your display with widgets for weather, news, and traffic updates while personalizing the interface with your preferred colors and fonts.
Integrate health tracking by connecting fitness apps to monitor workouts and sleep patterns. You can receive real-time feedback during interactive exercise sessions right in front of your mirror.
Enhance your daily routines by programming morning settings with bright lighting and daily schedules, then switching to soothing evening modes with ambient sounds and dimmed lights. Implementing voice recognition technology ensures that your mirror displays only the information relevant to your personal profile.
For expanded functionality, add third-party modules displaying stock prices or transportation schedules, and connect to your smart home system for centralized control of all devices.
Frequently Asked Questions
How Long Does the Mirror’s Display Last Before Needing Replacement?
Your smart mirror’s display typically lasts 10-15 years before replacement. With good maintenance and controlled conditions, you’ll get maximum lifespan. Quality models with LED technology and proper care can extend this timeframe further.
Can the Smart Mirror Function Without Constant Internet Connection?
Yes, your smart mirror can function without constant internet. You’ll enjoy offline voice recognition, local data processing, and basic commands through Raspberry Pi integration. However, advanced features like Alexa skills require connectivity.
How Much Power Does a Smart Mirror Typically Consume?
Your smart mirror typically consumes 15-50 watts for basic LED models and 100-200 watts for advanced versions with heating elements and displays. You’ll use about 0.09 kWh daily when running a 30-watt mirror for 3 hours.
Is It Possible to Add Touchscreen Functionality?
Yes, you can add touchscreen functionality to your smart mirror. It’s completely feasible using capacitive touch overlays that connect via USB. You’ll maintain mirror functionality while gaining touch controls alongside voice commands.
How Do You Protect the Mirror From Bathroom Humidity?
Install a dehumidifier nearby, use exhaust fans for 15 minutes after showering, apply anti-fog sprays, or consider heated demister pads. Regular cleaning with shaving cream can also create a temporary barrier against fogging.
In Summary
You’ve now built your own voice-activated smart mirror from scratch! While the project required patience and troubleshooting, you’ve created something truly unique. Don’t stop here—keep exploring new modules and voice commands to make your mirror even smarter. As technology evolves, you’ll find endless ways to upgrade your creation. Enjoy your personal smart mirror that reflects both your image and your technical achievement.


Leave a Reply