You’ll transform an ordinary mirror into an intelligent weather station that delivers real-time forecasts while you get ready each morning. This project combines a Raspberry Pi’s computing power with specialized mirror glass and display technology to create a seamless information hub. The process requires careful component selection, precise software configuration, and strategic assembly techniques. However, one critical mistake during the initial setup phase can render your entire display useless, making proper preparation absolutely essential.
Gathering Essential Components and Tools
Before diving into the construction process, you’ll need to gather the right components and tools to guarantee your weather-ready mirror display functions properly.
Proper preparation with the right components and tools is essential for building a functional weather-ready smart mirror display.
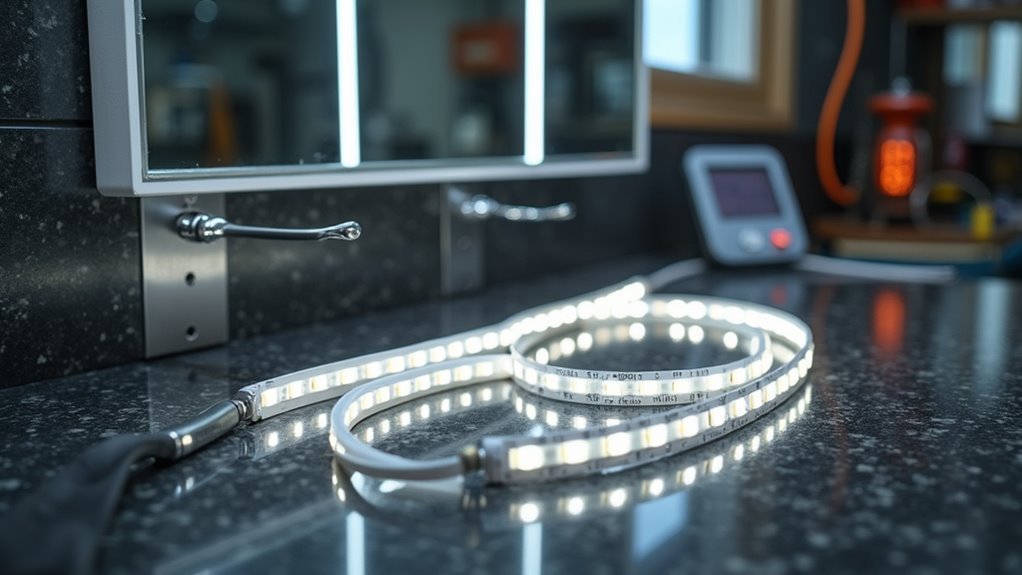
Start with a Raspberry Pi 3 Model B+ or 4 as your computing core, paired with a 15.6-inch HDMI monitor for ideal display size. Choose between a professional two-way mirror or budget-friendly acrylic mirror for the reflective surface.
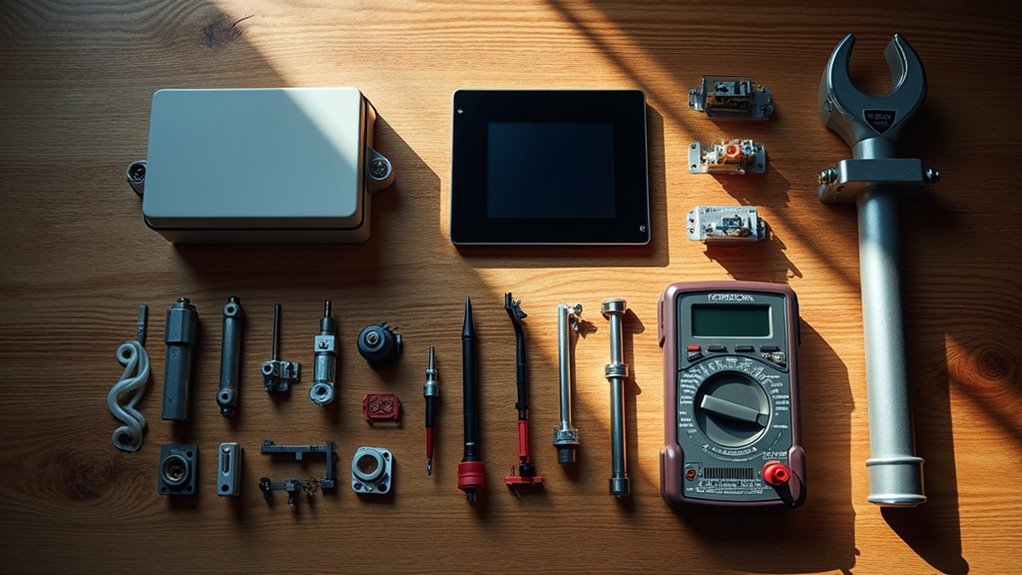
Essential electronics include a minimum 8GB microSD card, appropriate power supply, and HDMI cable for connectivity.
You’ll need specific tools like a drill with proper bits, craft knife for precision cutting, and screwdriver for assembly.
Additional supplies include M3 nylon bolts, double-sided foam tape for secure mounting, and black card or paint to enhance aesthetics and prevent light leakage through your chosen frame.
Selecting the Right Two-Way Mirror for Weather Display
You’ll need to choose between glass and acrylic materials for your two-way mirror, each offering distinct advantages for your weather display project.
Glass mirrors provide superior image quality and durability, while acrylic options offer a more budget-friendly alternative with slightly reduced clarity.
The key lies in finding the right balance between transparency and reflection ratios to guarantee your weather data remains clearly visible without compromising the mirror’s reflective properties.
Glass Vs Acrylic Options
When choosing between glass and acrylic for your two-way mirror, you’re weighing superior clarity against practical considerations like cost and durability.
Glass offers exceptional reflection quality and visibility, making it ideal when display readability is essential. You’ll get crisp, clear reflections that won’t compromise your weather display’s performance.
However, acrylic presents compelling advantages as a budget-friendly alternative that’s lighter and shatter-resistant.
While acrylic mirrors may sacrifice some reflection quality compared to glass, they’re more forgiving in handling and installation.
For weather displays where clarity is vital, glass typically delivers better results.
Consider your specific needs: if you prioritize maximum visibility and have the budget, choose glass. If you need cost-effectiveness and ease of installation, acrylic might suit your project better.
Transparency and Reflection Ratios
Beyond material selection, the transparency and reflection ratios of your two-way mirror determine how effectively your weather display functions. You’ll want to aim for a 70% reflective and 30% transparent ratio to achieve ideal balance between mirror visibility and display clarity.
| Mirror Ratio | Reflection Quality | Display Visibility | Best Use Case |
|---|---|---|---|
| 80/20 | Excellent | Poor | Decorative only |
| 70/30 | Very Good | Good | Weather displays |
| 60/40 | Good | Very Good | Bright displays |
| 50/50 | Fair | Excellent | Dark environments |
The reflection ratio directly impacts how well you’ll see both your reflection and the weather information behind it. Consider mirror thickness too—thicker options provide better durability and enhanced light transmission performance, ensuring your two-way mirror delivers consistent results for your weather-ready display setup.
Choosing Your Display Monitor and Frame Setup

You’ll need to carefully select your display monitor size to guarantee it fits snugly within your chosen frame while leaving adequate space for the mirror glass.
Your frame must have sufficient depth to accommodate both the monitor thickness and the 1/8 to 1/4 inch mirror glass, requiring at least 2.5 inches of width for proper housing.
Consider using a TV instead of a computer monitor since TVs often provide remote control capabilities and better functionality for your weather display project.
Monitor Size Selection Tips
Three key factors determine the success of your smart mirror project: monitor size, frame dimensions, and display specifications. Start with a 15.6-inch HDMI monitor for ideal balance between functionality and design. Your frame width must be at least 2.5 inches to accommodate both the monitor and two-way mirror properly.
| Monitor Size | Frame Width Required | Frame Depth Needed |
|---|---|---|
| 15.6-inch | 2.5+ inches | 2.5-3 inches |
| 21-inch | 3+ inches | 3-4 inches |
| 24-inch | 3.5+ inches | 4-5 inches |
Consider the thickness of the frame carefully—you’ll need 2.5 to 5 inches depth for proper assembly. Your two-way mirror should provide 70% light reflection and 30% transparency for clear weather display visibility while maintaining reflective properties.
Frame Depth Requirements
Although monitor thickness varies between manufacturers, most displays measure 1/8 to 1/4 inches thick and require careful consideration when planning your frame depth.
You’ll need a frame depth between 2.5 to 5 inches to properly accommodate both your monitor and two-way mirror while maintaining stability and aesthetic appeal.
Choose frames with removable inserts whenever possible. This design feature allows you to easily replace components during maintenance or upgrades without rebuilding the entire assembly.
Proper alignment within your frame prevents light leakage and guarantees ideal functionality of your weather display.
Avoid using thin acrylic mirrors if you’re planning to incorporate IR touch overlay technology, as the material’s flexibility can interfere with touch responsiveness and compromise your display’s overall performance quality.
TV Vs Monitor Benefits
With your frame specifications determined, selecting between a TV and monitor becomes your next decision point. TVs offer superior functionality for smart mirror projects, providing built-in remote control capabilities that simplify power management without exposed buttons. This creates a cleaner aesthetic when integrated into your frame design.
| Feature | TV | Monitor |
|---|---|---|
| Power Control | Remote capability | Complex setup required |
| Design Integration | Sleeker profile | Less aesthetic appeal |
| Screen Options | Larger sizes available | Limited size range |
Your display choice directly impacts the effectiveness of two-way mirrors, which require ideal reflectivity ratios. TVs typically deliver better visibility for weather information and calendar updates. When paired with proper two-way mirrors achieving 70% reflectivity and 30% transparency, TVs enhance your smart mirror’s overall functionality and user experience.
Preparing the Raspberry Pi for Weather Integration

Before you can display real-time weather information on your mirror, you’ll need to properly configure your Raspberry Pi as the foundation for this smart home project.
Start by installing Raspberry Pi OS (32-bit), which provides ideal compatibility for weather integration packages. Next, install Node.js and NPM, as they’re essential for running the Magic Mirror software and managing module dependencies.
Connect your Raspberry Pi to the internet via Wi-Fi or Ethernet to enable real-time weather data fetching.
Download the Magic Mirror software repository from GitHub, which includes built-in weather modules. The vital step involves modifying the config.js file to include your weather module configuration.
You’ll need to obtain an API key from OpenWeatherMap and enter it into the configuration file.
Installing the MagicMirror Software Platform
Three simple commands will get your MagicMirror software up and running on your Raspberry Pi. First, clone the repository from GitHub using the one-line Bash command in your terminal. Navigate to the MagicMirror directory with `cd MagicMirror/` and install dependencies using `npm install`. Finally, execute `npm start` to launch your mirror interface.
| Step | Command |
|---|---|
| 1 | Clone repository from GitHub |
| 2 | `cd MagicMirror/` |
| 3 | `npm install` |
| 4 | `npm start` |
| 5 | Customize config.js file |
Your operating system should now display the MagicMirror interface. You’ll customize your setup by editing the `config.js` file in `/home/pi/MagicMirror/config` directory. This configuration file lets you add various modules like weather displays, making your mirror truly weather-ready for real-time information.
Configuring Weather API and Data Sources
Now that you’ve got MagicMirror installed, you’ll need to connect it to a weather data source to display real-time information.
You’ll start by setting up a weather API like OpenWeatherMap or WeatherAPI, then integrate that data source into your mirror’s configuration.
Finally, you’ll customize the display options to show exactly the weather details you want on your smart mirror.
Weather API Setup
While your smart mirror’s hardware provides the foundation, you’ll need to connect it to live weather data sources to make it truly functional.
Setting up your weather API begins with obtaining an API key from reliable services like OpenWeatherMap or WeatherAPI, which offer free tiers for basic functionality.
Once you’ve secured your API key, you’ll integrate it into your Magic Mirror configuration:
- Use JavaScript’s fetch function to call the weather API and retrieve current weather data in JSON format
- Modify the config.js file to include weather modules with your API key and necessary settings
- Test the integration by running Magic Mirror and verifying weather information displays correctly
Reference the API documentation to understand required endpoints and parameters for fetching forecasts and other relevant information.
Data Source Integration
After securing your API key, you’ll configure the Magic Mirror’s weather module to pull data from your chosen weather service.
Navigate to the configuration file (config.js) and locate the weather module section. Here, you’ll input your API key and specify your desired location for accurate weather data retrieval.
Configure additional settings within the weather module to customize your display. Select temperature units between Celsius or Fahrenheit, set update intervals for fresh data, and choose display preferences for current conditions and forecasts.
These configuration options guarantee the weather module meets your specific needs.
Complete the integration by restarting your Magic Mirror application. This allows the system to load your new settings and begin fetching weather data from the API, displaying real-time information on your smart mirror.
Display Configuration Options
Once your weather data integration is complete, you’ll need to fine-tune the display configuration to optimize how weather information appears on your smart mirror.
Start by modifying the `config.js` file to include your weather module settings and API key from your chosen service like OpenWeatherMap.
Key configuration steps include:
- Set the update interval to refresh weather data automatically, typically every 10 minutes
- Customize display parameters to show current temperature, forecasts, and weather icons
- Configure location settings to guarantee accurate local weather information
You can further customize the weather module by adjusting which data elements appear on screen.
Consider adding supplementary information like air quality or pollen counts by integrating additional APIs into your configuration file for a thorough weather display.
Customizing Weather Module Settings and Layout
Before your weather-ready mirror can display accurate local conditions, you’ll need to configure the weather module’s core settings and position it strategically on your display.
Start customizing by steering to the config.js file in `/home/pi/MagicMirror/config` directory. Here, you’ll modify essential parameters including location, temperature units, and update intervals. For thorough weather data, integrate OpenWeatherMap API by inputting your unique API key within config.js.
Control your weather module layout using the grid positioning system. Set properties like `position: “top_left”` or `position: “bottom_right”` to place the module exactly where you want it.
Enhance visual appeal through CSS styling in the weather.css file, adjusting font sizes, colors, and backgrounds. Consider adding CSS animations or JavaScript changes for dynamic weather updates.
Building the Back Frame Structure
Now that you’ve configured your weather display settings, you’ll need to construct a sturdy back frame to house all the electronic components.
Start by cutting your plywood strips to the specified dimensions, then apply black acrylic paint to match your front frame’s aesthetic.
Once the paint’s dry, you can assemble everything using pocket screws for a secure, professional finish.
Cutting Wood Strips
Gather your materials and prepare to cut the wood strips that’ll form the backbone of your smart mirror’s frame structure.
You’ll need 3/4-inch plywood for cutting wood strips in specific dimensions to create your back frame.
Cut the following pieces precisely:
- Four strips at 1.75 inches wide: two measuring 25.75 inches long and two measuring 18.25 inches long
- Two strips at 1.5 inches wide, each measuring at least 25 inches long to hold the monitor securely
Sand all cut edges smooth to guarantee clean joints.
Once you’ve finished cutting, apply black acrylic paint to all strips before assembly. This coating will match your picture frame and create a professional appearance.
After the paint dries completely, you’ll use pocket screws to assemble the frame together.
Painting Frame Components
Since you’ve cut and sanded all your wood strips, you’re ready to apply the black acrylic paint that’ll give your smart mirror’s back frame a professional, uniform appearance.
When painting frame components, use even brush strokes to prevent drips and maintain consistent coverage across all surfaces. Apply your first coat systematically, ensuring complete coverage on each piece.
Allow adequate drying time between applications—typically 2-3 hours depending on humidity and temperature. For best results, you’ll likely need multiple layers to achieve rich opacity and depth.
The second coat will enhance the smooth finish and eliminate any thin spots from the initial application.
Once all pieces are completely dry, you’ll have professionally painted components ready for assembly without risk of smudging during construction.
Assembly With Screws
With your painted frame components fully cured, you’ll start building the structural backbone that’ll support your mirror’s electronic components.
The assembly with screws process creates a robust back frame using your pre-cut plywood strips and pocket holes. Join the strips methodically, inserting pocket screws through the pre-drilled holes.
Keep checking for squareness as you work—this guarantees your sturdy structure will properly align with the picture frame later.
Key assembly steps include:
- Position strips vertically to prevent pocket holes from showing at the front
- Tighten screws gradually to avoid wood splitting while maintaining alignment
- Test-fit components before final assembly to confirm proper dimensions
Once your back frame is complete, you’ll secure the monitor housing and attach it to your picture frame using wood screws and glue for maximum stability.
Assembling the Monitor and Mirror Components
After you’ve gathered all your materials and prepared your workspace, carefully disassemble your monitor by removing the stand and any external screws that hold the casing together.
Use a prying tool to access the display panel without damaging internal components. Check that your monitor’s dimensions match your picture frame and two-way mirror for proper fit.
Secure the monitor to the back frame using hot glue or wooden strips, preventing light leakage and ensuring stability.
Position your two-way mirror carefully, aligning it with the monitor so the display shines through while maintaining reflective properties.
Route all cables from the monitor and Raspberry Pi neatly behind the frame. Use hot glue and cable ties to secure cables, maintaining a clean appearance and preventing tangling during operation.
Mounting the Raspberry Pi and Electronics
Now that your monitor and mirror are properly positioned within the frame, you’ll need to secure the Raspberry Pi and remaining electronics to complete the display’s core assembly.
Mount your Raspberry Pi to the monitor’s back using nylon bolts, nuts, and hexagon standoff pillars for maximum stability. Connect the HDMI cable between your Raspberry Pi and monitor, routing it neatly to avoid component obstruction.
- Use hot glue to attach electronic components like the display control board to the back panel.
- Verify all power cables connect properly to both the Raspberry Pi and monitor.
- Test the complete setup by powering on devices to confirm display functionality.
Check for loose connections that could disrupt operation before proceeding with further assembly steps.
Programming Weather Display Features
Once you’ve secured all hardware components, you’ll transform your smart mirror into a functional weather station by installing the Magic Mirror software framework. This robust platform simplifies programming your weather display with built-in modules like `MMM-Weather`.
You’ll need to obtain a free API key from OpenWeatherMap to access real-time weather data.
Next, modify the `config.js` file by adding your API key and setting location parameters, units, and update intervals. You can customize the display’s appearance by adjusting CSS styles in the module folder, changing fonts, colors, and layouts to match your design preferences.
Explore additional weather modules like `MMM-WeatherForecast` for extended forecasts or `MMM-WeatherAlerts` for severe weather notifications, expanding your mirror’s functionality beyond basic conditions.
Testing Weather Data Accuracy and Display
Testing your weather display requires systematic verification to confirm the data appears correctly and matches real-world conditions.
You’ll need to validate your Magic Mirror’s weather data through multiple checkpoints to ascertain reliability. Start by confirming your API source connection to OpenWeatherMap is functioning properly. Cross-reference the displayed information with trusted weather apps or websites to verify accuracy for your specific location.
Here’s your testing checklist:
- Monitor your internet connection stability to prevent data retrieval delays or failures
- Verify the GPS-based location service correctly identifies your geographical position
- Check Magic Mirror module updates regularly to maintain API compatibility
Test your display under various network conditions and at different times throughout the day.
This thorough approach guarantees your weather information remains accurate and your mirror delivers dependable forecasts consistently.
Final Assembly and Cable Management
With your weather display tested and verified, you’ll tackle the final assembly by organizing the cables and securing all components within your mirror frame.
Start your cable management by routing all wires neatly along the frame’s back using hot glue and Velcro ties or zip-ties for a clean appearance.
Create airflow vents in the back frame around your Raspberry Pi and monitor to prevent overheating during operation. Cut a small notch at the bottom for easy passage of power and HDMI cables, eliminating visible wire clutter.
Secure all connections firmly to prevent disconnections.
Apply Black Rustoleum paint to the mirror’s back, enhancing reflective properties while concealing your final assembly work.
Optimizing Performance and Troubleshooting
After completing your mirror assembly, you’ll need to fine-tune the system’s performance and prepare for potential issues that may arise during regular use.
Start by regularly checking for software updates to guarantee your Magic Mirror application runs smoothly and accesses the latest features. Monitor your Raspberry Pi’s temperature closely, as overheating can severely impact performance during extended operation.
Important enhancement steps include:
- Install PM2 tool to automatically restart your application after crashes, guaranteeing continuous operation
- Secure all cable connections to prevent signal interference and unexpected disconnections
- Test each added module individually to identify compatibility issues before full deployment
When troubleshooting problems, focus on isolating specific modules that might cause conflicts.
Temperature monitoring becomes vital during summer months, so consider adding heat sinks or cooling fans to maintain peak system performance throughout various weather conditions.
Frequently Asked Questions
How to Make an AI Mirror?
You’ll need a two-way mirror, display screen, and Raspberry Pi with Magic Mirror software. Add a microphone for voice recognition, install weather modules, and integrate Google Assistant for AI functionality and real-time information.
How to Make a Monitor Mirror?
You’ll need a monitor with HDMI input and a two-way mirror. Remove the monitor’s housing, mount it behind the mirror, connect a Raspberry Pi, install Magic Mirror software, and customize with desired modules.
How to Make a DIY Mirror?
You’ll need a two-way mirror, monitor, and Raspberry Pi. Build a black plywood frame, install the monitor behind the mirror, download Magic Mirror software, and route cables neatly with proper ventilation.
What Raspberry Pi Do I Need for a Magic Mirror?
You’ll need a Raspberry Pi 3 Model B+ or Raspberry Pi 4 for your magic mirror project. Both provide sufficient processing power and built-in Wi-Fi for easy setup and smooth operation.


Leave a Reply