
You’ve been putting off upgrading your home’s electrical system because you don’t want the hassle and expense of hiring an electrician. What if there’s a simpler way to transform your regular outlets into smart ones that you can control from your phone? The reality is that most homeowners can achieve this upgrade in minutes without touching a single wire, but there’s one essential detail that determines whether this approach will work for your specific situation.
Understanding Smart Outlet Options and Technologies

How do you choose the right smart outlet when faced with countless options flooding the market?
You’ll encounter two main types: smart outlets that replace existing wall outlets and smart plugs that simply plug into standard outlets. Both options offer multiple connectivity protocols including Wi-Fi, Bluetooth, Zigbee, and Z-Wave, ensuring seamless integration into your existing smart home ecosystem.
Power handling capabilities vary greatly between models. Some smart outlets support high-wattage appliances like space heaters, while others work best with low-power devices like lamps. You must review specifications carefully before purchasing.
Voice assistant compatibility with Amazon Alexa, Google Assistant, and Apple Siri adds convenience through hands-free control. Many models include companion apps for scheduling and energy monitoring features.
Choosing Between Plug-In and Hardwired Smart Solutions
You’ll face two main choices when upgrading to smart outlets: plug-in adapters that insert into existing outlets or hardwired replacements that swap out your current wall outlets entirely.
The installation complexity differs dramatically between these options, with plug-ins requiring zero electrical work while hardwired solutions demand basic wiring skills or professional installation.
Your decision hinges on power requirements, since hardwired outlets handle high-wattage appliances that plug-in versions can’t support safely.
Plug-In Vs Hardwired
When deciding between plug-in and hardwired smart outlets, you’ll need to weigh convenience against permanence. A plug-in smart outlet offers ultimate flexibility – simply plug it into any standard wall outlet and you’re ready to go. This makes them perfect for renters or temporary setups since no electrical work is required.
Hardwired smart outlets replace your existing wall outlets permanently, requiring proper installation and a neutral wire. However, they provide cleaner aesthetics and higher power handling capabilities.
| Feature | Plug-in Smart Outlet | Hardwired Smart Outlets |
|---|---|---|
| Installation | Plug and play | Requires wiring work |
| Power Capacity | Lower wattage devices | Higher wattage appliances |
| Setup Flexibility | Move anywhere easily | Permanent wall placement |
Consider your long-term needs and existing wiring compatibility when choosing.
Installation Complexity Comparison
Installation complexity varies dramatically between plug-in and hardwired smart outlets, with each option presenting distinct challenges and requirements.
You’ll find plug-in models incredibly straightforward—simply plug them into existing outlets without any tools or electrical knowledge. They’re perfect if you’re renting or want temporary solutions.
Hardwired options demand considerably more effort and expertise. You’ll need to turn off power at the breaker box, remove existing outlets, and connect wires properly. This requires basic electrical skills and safety awareness.
While you can handle this DIY project yourself, you must understand wiring fundamentals and follow safety protocols.
The trade-off is clear: plug-in smart outlets offer convenience and simplicity, while hardwired installations provide permanent solutions with enhanced capabilities at the cost of increased complexity.
Power Handling Capabilities
Beyond installation considerations, power handling capabilities represent a fundamental difference that directly impacts which devices you can control. When selecting a smart outlet, you’ll need to match its wattage capacity to your intended devices. Plug-in models typically handle lower-power electronics, while hardwired options support high-demand appliances.
| Device Category | Power Requirements | Recommended Smart Outlet Type |
|---|---|---|
| LED lights, fans, lamps | Under 300W | Plug-in (Wi-Fi) |
| Coffee makers, microwaves | 800-1500W | Hardwired 15A |
| Air conditioners, heaters | 1500W+ | Hardwired 20A |
| Refrigerators, washers | 1200-1800W | Hardwired 20A |
| Phone chargers, routers | Under 100W | Plug-in (any protocol) |
Always check manufacturer specifications before connecting devices. Exceeding power handling capabilities creates safety hazards and equipment damage.
Essential Safety Steps Before Starting Installation
Before you touch a single wire or remove an outlet cover, you must prioritize electrical safety to protect yourself from potentially fatal shocks. Smart wall outlets require the same safety precautions as any electrical work.
Follow these essential safety steps:
- Turn off power at the breaker box – Locate and switch off the correct breaker controlling your target outlet.
- Test with a voltage tester – Confirm power is completely off before handling any wires.
- Label your breakers – Mark unclear breakers for future reference and safety.
- Prepare your workspace – Keep the area dry and clutter-free to prevent accidents.
Remember the standard wiring color codes: black for hot, white for neutral, and green or bare copper for ground connections.
Installing Plug-In Smart Outlets for Instant Upgrades

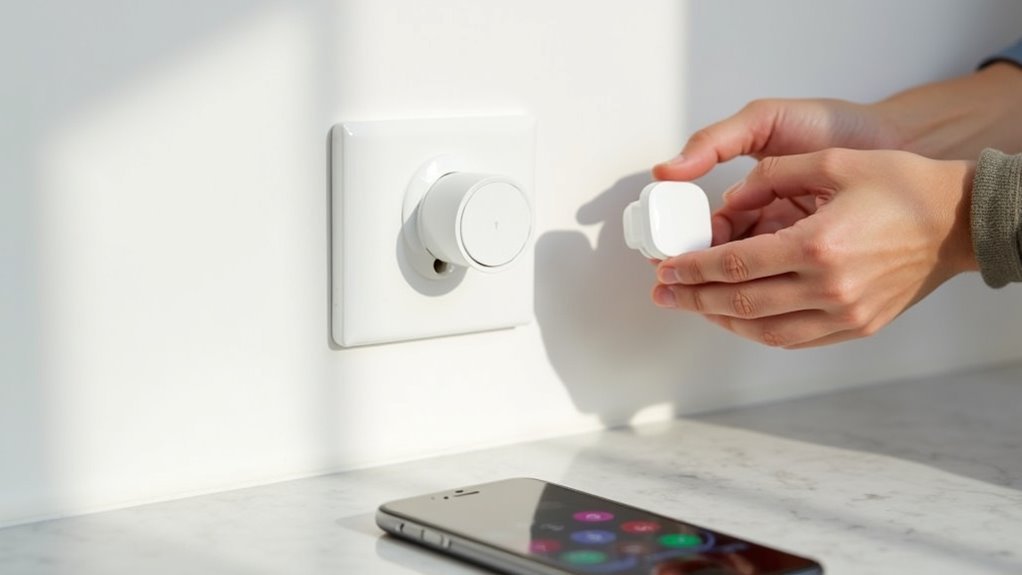
You’ll appreciate how plug-in smart outlets require zero electrical work—simply unplug your existing device and plug it into the smart outlet, then plug that into your wall socket.
This instant transformation lets you control any connected appliance through your smartphone app within minutes of setup.
You can también integrate these outlets with Alexa, Google Assistant, or other voice assistants to control your devices hands-free using simple voice commands.
Simple Plug-and-Play Setup
When you’re ready to upgrade your home without calling an electrician, plug-in smart outlets offer the perfect solution.
These devices transform any standard outlet into a smart control hub instantly. You’ll simply plug the smart outlet into your existing wall outlet, then connect your device to it.
The setup process couldn’t be easier:
- Download the manufacturer’s app on your smartphone
- Connect the plug-in smart outlets to your Wi-Fi network through the app
- Pair with voice assistants like Alexa or Google Assistant for hands-free control
- Configure scheduling and automation features to optimize energy usage
You’ll gain remote control capabilities, scheduling options, and safety protections without any rewiring.
Most smart outlet models support multiple connectivity protocols, ensuring compatibility with your existing smart home ecosystem.
Voice Assistant Integration
Once your plug-in smart outlet connects to your home network, voice assistant integration transforms how you interact with your devices. You’ll enjoy seamless compatibility with Amazon Alexa, Google Assistant, and Apple Siri, enabling hands-free control throughout your home.
Setting up voice commands is straightforward through your manufacturer’s app. Simply link your smart outlet to your preferred assistant and create custom device names for easy recognition.
| Voice Assistant | Wake Word | Example Command |
|---|---|---|
| Amazon Alexa | “Alexa” | “Alexa, turn on living room lamp” |
| Google Assistant | “Hey Google” | “Hey Google, turn off coffee maker” |
| Apple Siri | “Hey Siri” | “Hey Siri, switch on bedroom fan” |
| Amazon Alexa | “Alexa” | “Alexa, turn off kitchen radio” |
| Google Assistant | “Hey Google” | “Hey Google, power on desk lamp” |
Voice commands eliminate the need for manual switches, enhancing accessibility and convenience for all users.
Wiring Smart Outlets to Replace Existing Wall Receptacles
Although smart outlets offer advanced functionality, installing them requires careful attention to electrical safety and proper wiring techniques.
Before replacing your wall outlet, you’ll need to verify compatibility and follow proper procedures.
Here’s your installation process:
- Power safety first – Turn off power at the breaker box and use a voltage tester to confirm it’s completely off before touching any wires.
- Check for neutral wire – Your smart outlet requires a neutral wire in the existing outlet box for proper operation.
- Connect wires correctly – Attach black wires to brass terminals, white wires to silver terminals, and ground wires to green terminals.
- Follow manufacturer guidelines – Confirm your smart outlet supports your preferred connectivity like Wi-Fi or Zigbee.
Setting Up Your Smart Outlet Mobile Application
After completing the physical installation, you’ll need to configure your smart outlet through its dedicated mobile application.
Download the specific app for your smart outlet brand from the App Store or Google Play Store. Create an account by providing your email address and password for secure access.
Follow the on-screen instructions to add your device, which typically involves scanning a QR code or pressing a pairing button.
Once connected, customize your smart outlet settings within the app. You can set schedules, routines, and automation preferences for seamless control.
Don’t forget to name your smart outlet for easy identification when using voice assistants or mobile commands, making control more intuitive and efficient.
Connecting Smart Outlets to Home Wi-Fi Networks
Now you’ll connect your smart outlet to your home Wi-Fi network through the manufacturer’s app.
The initial setup process typically involves selecting your network, entering your password, and following the app’s pairing instructions.
When connection problems arise, you’ll need to troubleshoot issues like weak signal strength, incompatible frequency bands, or incorrect network credentials.
Initial Wi-Fi Setup Process
Before you can enjoy the convenience of remotely controlling your electrical devices, you’ll need to connect your smart outlets to your home Wi-Fi network. The initial wi-fi setup process for smart outlets requires careful preparation and proper execution to guarantee seamless connectivity.
Follow these essential steps to complete your setup:
- Verify your Wi-Fi connection – Confirm your network is functioning properly and have your SSID and password ready.
- Download the manufacturer’s app – Install the specific application designed for your smart outlets on your smartphone.
- Initiate pairing mode – Follow app instructions to press the outlet button or scan the QR code.
- Position within range – Make certain your outlets are close enough to receive a strong Wi-Fi signal.
After connection, customize settings and routines through the app.
Troubleshooting Connection Issues
When your smart outlet refuses to connect despite following the setup steps, several common culprits could be disrupting the process.
First, verify you’re within range of your Wi-Fi router, as weak signals prevent successful connections. Check that you’re using a 2.4 GHz network rather than 5 GHz, since most smart outlets don’t support the latter frequency.
Double-check your network name and password for accuracy—typos are surprisingly common during troubleshooting.
If problems persist, restart both your router and smart outlet to reset the connection. Update your smart outlet’s firmware through the mobile app, as outdated software often causes connectivity issues.
When these steps don’t resolve the problem, consult your manufacturer’s troubleshooting guide or contact customer support for model-specific solutions.
Integrating Voice Assistant Controls With Smart Outlets
Three major voice assistants—Alexa, Google Assistant, and Siri—seamlessly integrate with smart outlets, transforming how you control your home’s electrical devices.
You’ll enjoy hands-free operation through simple voice commands that eliminate the need to manually operate switches or apps.
Setting up voice assistant integration follows these essential steps:
- Enable the corresponding skill or action within your voice assistant’s app
- Link your smart outlet account to the voice assistant platform
- Configure device names for easy voice recognition
- Test basic commands like “turn on living room lamp”
Once connected, you can create schedules, establish routines, and control multiple devices simultaneously.
This integration enhances energy efficiency by letting you easily turn off forgotten devices, reducing unnecessary power consumption while creating a unified smart home experience.
Managing Switched Outlets With Smart Technology
You can overcome switched outlet limitations by bypassing complicated switch wiring altogether and opting for smart plug solutions instead.
Smart plugs offer a plug-and-play approach that doesn’t require rewiring your electrical system or dealing with neutral wire compatibility issues.
This method transforms any switched outlet into a controllable smart device through your smartphone app or voice commands.
Bypass Switch Wiring
Since many homes feature switched outlets that control table and floor lamps, you’ll often find that smart plugs can’t function properly when the wall switch cuts power to the entire outlet.
Bypass switch wiring solves this problem by connecting line and load wires together, making your outlet constantly powered for smart plug compatibility.
This straightforward modification follows these steps:
- Turn off power at the circuit breaker and verify it’s off
- Remove the switch and connect the line wire directly to the load wire
- Cap the connection with a wire nut and restore the switch plate
- Test the outlet to guarantee it’s always hot
You’ll maintain manual control through lamp switches while gaining remote access through your smart home hub, creating the perfect balance between traditional and smart functionality.
Smart Plug Solutions
Why rewire switches when smart plugs can instantly transform any outlet into a controllable power source?
You’ll simply plug these devices into existing outlets without complex wiring or professional installation. Smart plugs enable remote control via smartphone apps, letting you manage multiple outlets through one interface.
Voice assistant compatibility means you can control via simple commands to Alexa or Google Assistant. Just say “turn off living room lamp” and it’s done.
Scheduling features automate your lighting routines—lamps turn on at sunset and off at bedtime automatically.
Wi-Fi or Bluetooth connectivity makes smart plugs versatile for various home automation setups.
You’ll enhance convenience and energy efficiency while seamlessly controlling switched outlets and improving your home’s lighting functionality.
Using Z-Wave Devices for Advanced Home Automation
When it comes to creating a sophisticated smart home ecosystem, Z-Wave devices stand out as the backbone that connects your smart outlets to a thorough automation network.
These devices enable seamless communication between outlets and your central hub, letting you control plugged devices remotely through smartphone apps or voice commands.
Z-Wave technology transforms your home automation capabilities in four key ways:
Z-Wave technology revolutionizes home automation by enabling seamless device integration, enhanced security features, centralized control, and flexible electrical configurations.
- Enhanced Security – Set automated schedules for lamps to turn on at sunset and off at bedtime, deterring potential intruders.
- Central Scene Control – Trigger multiple smart devices simultaneously using controllers like the ZEN32 Scene Controller.
- Heavy-Duty Applications – Install 15A-rated switches like the ZEN75 for switched receptacles.
- Flexible Rewiring – Convert receptacles to always-hot configurations for smart plug compatibility.
Troubleshooting Common Smart Outlet Connection Issues
Even with proper Z-Wave setup and network configuration, you’ll occasionally encounter smart outlet connection problems that can disrupt your home automation flow.
First, verify your smart outlet’s compatibility with your Wi-Fi network by checking specifications for connectivity options like Wi-Fi, Bluetooth, Zigbee, or Z-Wave. If the outlet isn’t responding, confirm power is on and use a voltage tester to verify it’s receiving electricity.
Double-check app configuration by confirming the smart outlet is added correctly—remove and re-add the device if necessary to refresh the connection. For voice assistant integration, enable the corresponding skill and confirm proper device discovery.
When experiencing persistent connectivity issues, reset the smart outlet following manufacturer instructions, typically holding a button for a specific duration.
Creating Automated Schedules and Lighting Rules
Once you’ve established a stable connection with your smart outlets, you can maximize their potential by setting up automated schedules that control your lighting and devices without manual intervention.
Your smart outlet apps offer powerful scheduling capabilities that enhance convenience while reducing energy consumption.
Here’s how to create effective automated schedules:
- Set time-based routines – Program devices to turn on/off at specific times daily or weekly
- Configure voice assistant integration – Connect with Alexa or Google Assistant for voice-activated lighting schedules
- Customize lighting rules – Adjust brightness and color based on time of day for ideal ambiance
- Enable geofencing – Automatically trigger devices when you enter or leave home
Regular firmware updates will enhance these scheduling features and maintain compatibility with evolving smart home technologies.
Maximizing Energy Efficiency Through Smart Controls
While automated schedules provide convenience, smart outlets truly shine when you harness their energy-saving capabilities to cut utility costs and reduce your environmental footprint. You’ll save up to 15% on electricity bills by programming devices to turn off automatically, eliminating phantom loads that drain power unnecessarily.
| Feature | Energy Efficiency Benefit |
|---|---|
| Power metering | Track real-time consumption patterns |
| Automatic shutoff | Eliminate standby power waste |
| Peak-time scheduling | Run appliances during off-peak hours |
| Usage monitoring | Identify energy-hungry devices |
| Smart integration | Optimize whole-home energy management |
Every smart outlet becomes an energy watchdog, providing insights into usage patterns and helping you make informed decisions. You’ll transform wasteful habits into sustainable practices while your utility bills shrink month after month.
Expanding Your Smart Home System Room by Room
Building your smart home ecosystem doesn’t require a complete overhaul overnight—you can strategically expand room by room to spread costs while maximizing functionality.
Smart home transformation happens gradually—strategic room-by-room expansion controls costs while building a comprehensive, functional automation ecosystem.
Smart outlets serve as the foundation for each room’s transformation, offering easy installation without professional help.
When you expand your smart home systematically, follow this approach:
- Start with high-traffic areas like living rooms and kitchens where you’ll use automation most frequently.
- Choose Z-Wave or Zigbee devices to create a reliable mesh network that strengthens as you add more rooms.
- Integrate with voice assistants like Alexa or Google Assistant for seamless hands-free control throughout your home.
- Plan automation schedules for each room’s appliances and lighting to maximize energy efficiency and security.
This gradual expansion guarantees compatibility while maintaining budget control.
Frequently Asked Questions
Do You Need an Electrician to Install Smart Switches?
You don’t need an electrician for most smart switch installations if you’ve got basic electrical knowledge. However, you should consult one for complex wiring situations or three-way switches.
Can You Install an Outlet Without an Electrician?
You can install basic outlets yourself by following safety protocols like turning off power and using proper tools. However, you’ll need permits and code compliance, so checking local regulations first is essential.
Do You Need an Electrician to Install Smart Lights?
You don’t need an electrician for most smart lights. You can install smart bulbs in existing fixtures or use smart plugs easily. However, smart switches requiring neutral wires might need professional installation.
How Much Does an Electrician Charge to Install a Smart Switch?
You’ll pay between $100 to $200 for an electrician to install a smart switch. Hourly rates range from $50 to $100, with potential travel fees adding $20 to $50 more.


Leave a Reply