You’ll transform your watering routine once you discover how soaker hose systems eliminate the guesswork from garden irrigation. These porous tubes deliver moisture directly where it’s needed most—at the root zone—while smart timers handle the scheduling automatically. You won’t waste water through evaporation or runoff, and your plants receive consistent hydration without your constant attention. But there’s a specific setup process that determines whether your system becomes a gardening game-changer or an expensive disappointment.
Understanding Soaker Hose Technology and Benefits
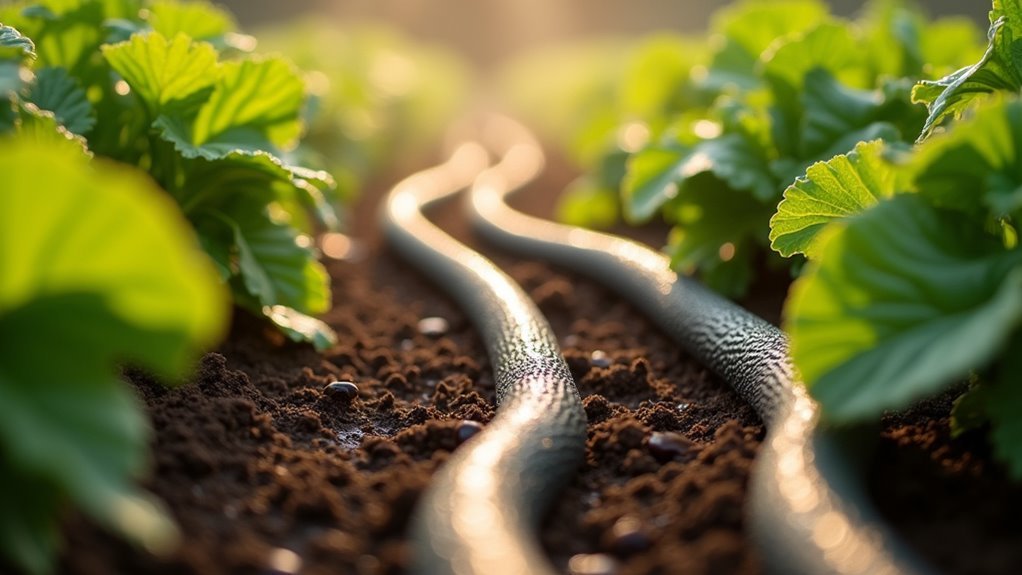
When you’re looking to maximize water efficiency in your garden, soaker hoses deliver a smart irrigation solution through their innovative porous design.
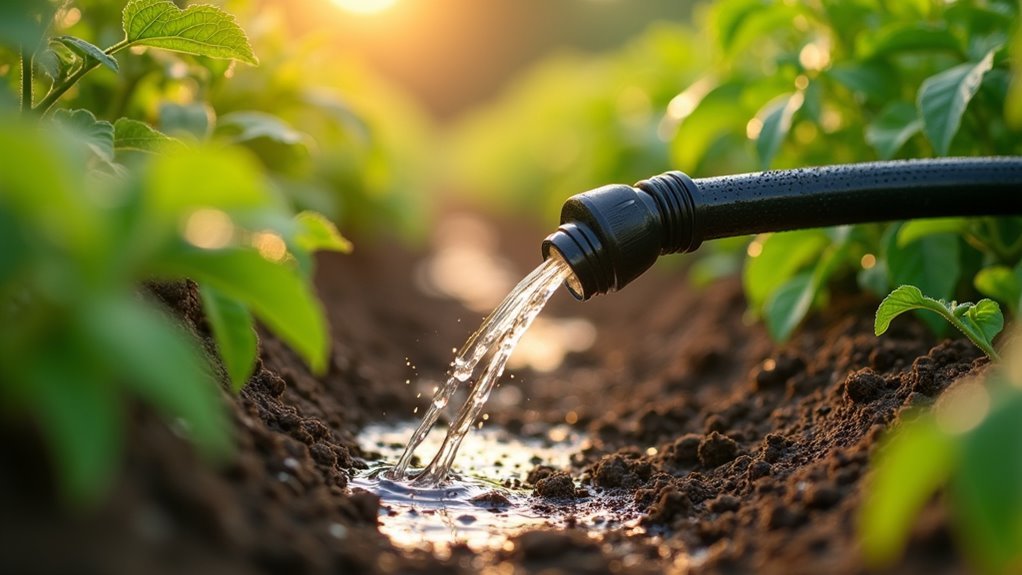
These specialized hoses feature strategically placed tiny holes that allow water flows to seep directly into the soil, reaching plant roots where it’s needed most while minimizing evaporation losses.
You’ll appreciate the eco-friendly construction using 100% recycled vinyl materials that pass rigorous safety tests like CA74, making them perfect for edible plants.
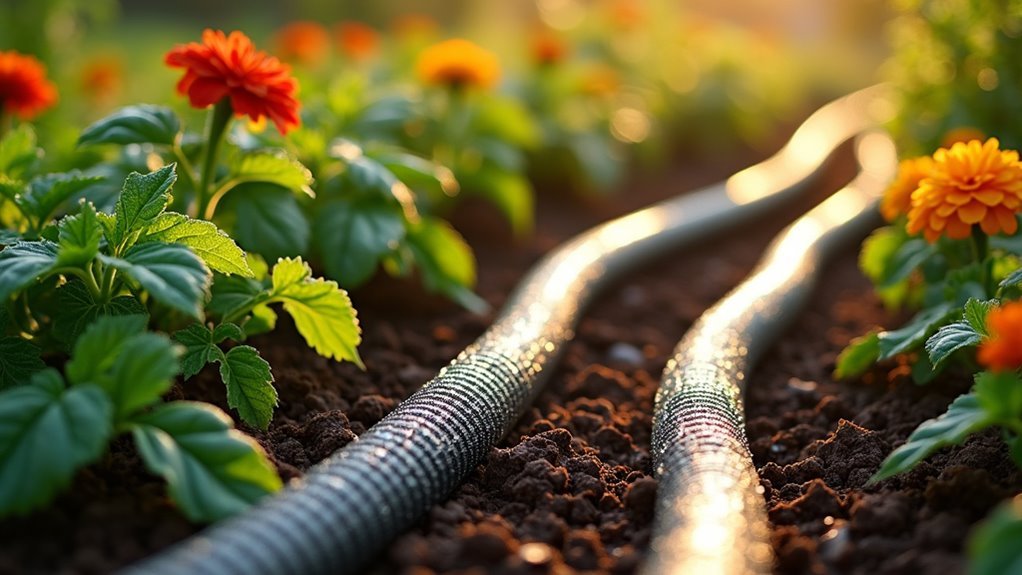
The linkable design lets you customize your irrigation system by connecting multiple hoses to match your garden’s unique layout.
Create a tailored watering network that adapts perfectly to your garden’s specific shape and plant arrangement needs.
Operating efficiently at 25-40 psi, your soaker hose targets root zones of closely spaced plants, ensuring consistent moisture delivery while reducing waste from overspray.
Essential Components for Smart Soaker Hose Systems
You’ll need specific components to transform your basic soaker hose into an efficient smart irrigation system.
Smart timers automate your watering schedule and optimize water usage, while pressure control devices prevent hose damage and guarantee consistent water flow.
These essential elements work together to create a reliable, hands-off watering solution that protects both your plants and equipment.
Smart Timer Integration Benefits
Since smart timers transform basic soaker hose systems into precision irrigation tools, you’ll gain unprecedented control over your garden’s watering schedule.
These devices automate your irrigation by delivering consistent moisture directly to plant roots, dramatically improving plant health while reducing water waste. You’ll control watering duration and frequency through smartphone apps or voice commands, making garden management effortless.
Smart timers enhance soaker hoses’ natural efficiency by minimizing evaporation and runoff.
Weather sensing capabilities automatically adjust watering based on rainfall and temperature, conserving even more water. You can create customizable programs tailored to specific plant needs and soil conditions, ensuring ideal growth.
This integration eliminates guesswork from irrigation, giving you professional-grade watering precision that adapts to changing environmental conditions automatically.
Pressure Control Components
Proper pressure regulation forms the backbone of any efficient smart soaker hose system, determining whether your irrigation delivers consistent, gentle watering or creates uneven distribution that wastes water.
You’ll need essential pressure control components to maintain ideal performance. Install a pressure reducer to keep water pressure around 25 psi – this prevents your soaker hose from bursting while guaranteeing even water flow along its entire length.
Don’t forget the backflow prevention device, which protects your home’s plumbing from contaminated water return.
Regular maintenance of these pressure control components is vital. Check connections monthly for leaks, inspect for clogs that restrict flow, and verify all fittings remain secure.
These simple steps extend your system’s lifespan considerably.
Choosing the Right Soaker Hose for Your Garden
When you’re selecting a soaker hose, you’ll need to focus on two critical factors that directly impact your irrigation system’s effectiveness.
The material and construction determine how long your hose will last and whether it can withstand your garden’s conditions without kinking or deteriorating.
You’ll also want to carefully consider the length and coverage capabilities to guarantee your hose can reach all areas of your garden while providing consistent water distribution.
Material and Durability Factors
Three key material factors determine whether your soaker hose will survive multiple growing seasons or require frequent replacement.
First, prioritize durable materials like double-layer PVC and extra-strength fabric construction. These materials enhance longevity and withstand harsh outdoor elements better than single-layer alternatives.
Second, select weather-resistant hoses that won’t crack under UV exposure or extreme temperatures. This feature guarantees consistent performance regardless of seasonal conditions.
Third, choose kink-resistant designs that maintain steady water flow even when bent or twisted during installation. Look for hoses that pass rigorous durability tests like the CA74 standard, which validates safety and performance quality.
Consider eco-friendly options made from 100% recycled vinyl for sustainable gardening while guaranteeing edible plant safety.
Length and Coverage Options
Four essential length considerations will determine your soaker hose’s effectiveness in delivering targeted irrigation throughout your garden space.
The Garden Flat Soaker Hose’s 100-foot option provides extensive coverage for larger areas and multiple plant rows. You’ll appreciate how its linkable design lets you connect multiple hoses end to end, customizing your drip irrigation system for any garden size.
Consider these spacing guidelines:
- Position hoses 12-24 inches apart based on soil type
- Space closer for new plants requiring more frequent watering
- Adjust positioning for different plant varieties’ specific needs
- Guarantee the entire length maintains consistent water pressure
- Account for weight distribution – the lightweight 1.51 kg design simplifies installation
The durable double-layer PVC construction will allow water to seep evenly while withstanding seasonal use, making length adjustments practical for evolving garden layouts.
Setting Up Backflow Prevention and Pressure Control
Before connecting your soaker hose to the outdoor faucet, you’ll need to install two critical components that protect both your home’s water supply and your irrigation equipment.
First, attach a backflow prevention device between your faucet and garden hose. This inexpensive safety measure prevents contaminated water from flowing back into your plumbing system. The device easily connects to standard garden hose threads, making installation straightforward.
Next, install a pressure reducer to maintain proper water flow through your soaker hose. Set the pressure control to around 25 psi for ideal performance and to prevent hose damage. This pressure control guarantees efficient water distribution and extends your equipment’s lifespan.
Check both devices regularly for wear or malfunction to maintain continuous, safe operation of your irrigation system.
Proper Installation Techniques for Maximum Efficiency
You’ll achieve maximum efficiency from your soaker hose system by following proper installation techniques that start with essential safety measures.
Your hose positioning and spacing will directly impact water distribution across your garden beds.
Let’s examine the pre-installation safety requirements, strategic hose placement methods, and soil-specific spacing guidelines that’ll optimize your irrigation system’s performance.
Pre-Installation Safety Setup
Setting up your soaker hose system correctly from the start prevents costly mistakes and guarantees ideal water delivery throughout your garden.
Before installing your irrigation system, you’ll need to address several vital safety components that make certain your plants receive top-notch hydration while protecting your home’s water supply.
Essential pre-installation safety steps include:
- Connect a backflow prevention device to your faucet to prevent contaminated water from entering your indoor plumbing system.
- Install a pressure reducer to maintain the recommended 25 psi operating pressure for maximum efficiency.
- Unwind your soaker hose in warm sunlight for thirty minutes to improve flexibility.
- Purchase these less expensive components at your local hardware store before beginning installation.
- Plan for level hose placement to guarantee even water distribution throughout your garden beds.
Hose Positioning Guidelines
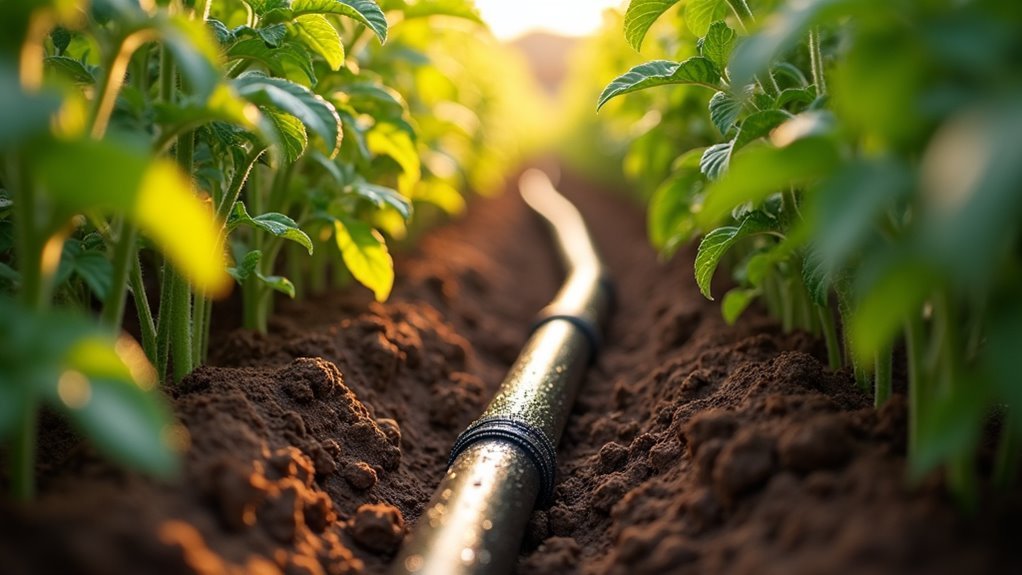
After completing your safety preparations, proper hose placement becomes the foundation of an efficient soaker irrigation system. You’ll need to position your soaker hoses level and straight to guarantee even water distribution across the entire length, preventing pooling or uneven watering patterns.
Before installation, unwind and stretch your hose in warm sunshine for approximately 30 minutes. This enhances flexibility and makes maneuvering around plants considerably easier.
Space your hoses according to soil type: 12 to 18 inches apart for sandy soil, and 18 to 24 inches for clay or loam soil to maximize water absorption.
Once positioned, lay mulch over the soaker hose to retain moisture, promote consistent soil hydration, and protect against UV exposure. Regularly check for kinks and clogs to maintain ideal water flow.
Soil-Specific Spacing Methods
Since soil composition directly affects water infiltration rates, spacing your soaker hoses correctly prevents both water waste and plant stress.
Different soil types require specific approaches to achieve ideal water distribution.
Here’s how you’ll adjust spacing based on your soil type:
- Sandy soil: Space hoses 12-18 inches apart for faster absorption and reduced runoff
- Clay or loam soil: Maintain 18-24 inches between hoses to prevent waterlogging
- New plantings: Keep hoses within 12 inches for shallow root systems
- Absorption monitoring: Check soil moisture regularly and adjust spacing accordingly
- Split watering sessions: Water twice daily (morning and evening) to accommodate varying absorption rates
You’ll need to observe how your specific soil responds and make adjustments throughout the growing season for maximum efficiency.
Soil Type Considerations and Spacing Guidelines
Understanding your soil type determines how you’ll space your soaker hoses and schedule watering sessions for excellent plant health.
Sandy soil drains quickly, requiring closer hose spacing of 12 to 18 inches apart and more frequent watering split into two intervals. Clay and loam soils retain moisture longer, so you’ll space hoses 18 to 24 inches apart to prevent oversaturation while guaranteeing effective hydration.
For new plantings with developing root systems, place hoses closer together—typically under 12 inches apart—regardless of soil type. This promotes healthy root establishment and consistent moisture access.
You’ll need to regularly monitor how your soil absorbs water and adjust both watering duration and hose placement accordingly.
This ongoing observation guarantees ideal moisture retention and supports overall plant health.
Integrating Timer Controls for Automated Watering
You’ll find that adding a timer to your soaker hose system transforms your watering routine from a daily chore into an effortless, automated process.
Setting up these timers requires basic programming of start times, duration, and frequency to match your garden’s specific moisture needs.
The automated scheduling benefits extend beyond convenience, delivering consistent hydration while reducing water waste through precise timing and rainfall adjustments.
Timer Setup Basics
When you’re ready to automate your soaker hose system, connecting a smart hose timer like the Rachio to your outdoor faucet transforms manual watering into a precise, hands-off operation.
Before installation, verify your timer’s compatibility with standard garden hose threads for seamless integration.
Follow these essential setup steps:
- Connect the timer between your outdoor faucet and soaker hose
- Configure watering schedules based on your plants’ specific needs
- Enable weather intelligence features to prevent overwatering during rain
- Set seasonal adjustments for changing water requirements
- Test initial settings and monitor water distribution patterns
Once configured, you’ll need to fine-tune duration and frequency settings.
Most vegetables require 1-2 inches weekly, while established perennials need less frequent watering.
Regular monitoring guarantees peak performance and prevents costly water waste or plant damage.
Automated Scheduling Benefits
Automated scheduling transforms your soaker hose system from a basic watering tool into a sophisticated irrigation network that works independently around your schedule.
You’ll deliver precise moisture directly to plant roots without daily manual intervention, ensuring consistent hydration regardless of your availability.
Programming watering during ideal times like early morning or late afternoon reduces evaporation and promotes healthier plant growth.
You can customize frequency and duration settings based on specific plant requirements and seasonal changes, maximizing efficiency while conserving water.
This automated approach eliminates guesswork and waste associated with traditional overhead irrigation methods.
You’ll save significant time on garden maintenance while gaining peace of mind knowing your plants receive exactly what they need when they need it.
Connecting Multiple Hoses for Larger Garden Areas
As your garden expands beyond what a single soaker hose can cover, connecting multiple hoses becomes essential for maintaining consistent irrigation across larger areas.
Expanding gardens require multiple connected soaker hoses to ensure consistent irrigation coverage across larger growing areas.
You’ll find that standard garden hose threads make this expansion straightforward and customizable.
To successfully connect multiple soaker hoses:
- Link hoses end-to-end using standard garden hose connections
- Maintain water pressure between 40-94 psi for peak performance
- Space hoses 12-24 inches apart based on your soil type
- Check all connections regularly to prevent water-wasting leaks
- Customize your system’s length and coverage as needed
This modular approach guarantees even moisture delivery throughout your expanded garden space.
You’ll achieve uniform watering while maintaining the efficiency that makes soaker hose irrigation so effective for larger cultivation areas.
Water Pressure Requirements and Flow Management
Proper water pressure forms the backbone of any successful soaker hose system, whether you’re running a single line or multiple connected hoses throughout your garden.
You’ll need to maintain pressure between 40-94 psi for efficient water distribution, but operating around 25 psi delivers ideal results without overwhelming your hose structure. Installing a pressure reducer is crucial—it prevents damage from excessive pressure while maintaining consistent flow.
Monitor your soil’s absorption rate carefully. Sandy soils drain quickly and require longer watering sessions, while clay holds water longer.
Adjust your pressure and timing accordingly. Regular maintenance keeps everything running smoothly—check for kinks, clogs, and damaged sections that reduce flow.
This proactive approach guarantees your system delivers water efficiently while minimizing waste.
Mulching Strategies to Enhance Soaker Hose Performance
When you combine mulch with your soaker hose system, you’ll create a powerful moisture-retention partnership that dramatically improves watering efficiency.
Mulch acts as a protective barrier that reduces evaporation rates while ensuring water penetrates soil more effectively around plant roots.
Mulch creates a moisture-saving shield that cuts evaporation while boosting water absorption at the root zone.
To maximize your soaker hose performance with mulch:
- Apply wood chips or compost directly over your soaker hose
- Maintain a 2 to 4-inch thick mulch layer for ideal results
- Monitor mulch condition regularly and replenish as needed
- Adjust mulch based on seasonal changes and plant growth
- Use mulch to regulate soil temperature and moisture levels
This strategic combination lets you reduce watering frequency while providing consistent moisture to your plants.
You’ll find that mulched soaker hose systems deliver superior hydration with less effort and water waste.
Maintenance Practices for Long-Term Reliability
While soaker hoses offer excellent irrigation benefits, they’ll only deliver consistent performance when you maintain them properly throughout their lifespan.
Start by regularly checking for clogs or kinks that can disrupt water flow and create uneven irrigation patterns. When you discover blockages, clear them immediately to restore ideal distribution.
Monitor soil absorption patterns around your plants to determine if adjustments are needed. Different growth stages and seasonal conditions require modified watering practices for effective moisture delivery to root systems.
Conduct routine maintenance by unwinding your hose and stretching it in warm sunshine. This simple practice enhances flexibility and makes maneuvering around plants much easier during installation.
Additionally, make sure your hose stays in straight lines to prevent water pooling and maintain consistent distribution along its entire length.
Troubleshooting Common Soaker Hose Issues
Even with consistent maintenance, you’ll occasionally encounter problems that require specific solutions to restore your soaker hose system’s effectiveness.
Regular maintenance prevents most issues, but targeted troubleshooting ensures your soaker hose system operates at peak efficiency when problems arise.
When troubleshooting issues, focus on these common problems and their solutions:
- Uneven water distribution – Verify your hose is level and check for kinks or clogs that restrict water flow.
- Leaks or bursts – Reduce water pressure to 25-40 psi, as excessive pressure damages the hose material.
- Dry spots in garden beds – Adjust spacing based on soil type: 12-18 inches for sandy soil, 18-24 inches for clay or loam.
- Poor water soaking performance – Unwind the hose and place it in warm sunshine to restore flexibility.
- Blockages affecting flow – Remove debris and flush the system to clear accumulated sediment.
Seasonal Adjustments and Weather Considerations
Although proper maintenance keeps your soaker hose system functioning well, you’ll need to adjust your watering schedule throughout the year to match changing seasonal conditions and weather patterns.
During hot summer months, increase watering frequency to prevent soil from drying out completely. In cooler months, reduce watering since plants require less moisture. Monitor weather conditions closely—unexpected rainfall can eliminate the need for additional watering, helping you conserve water resources.
Sandy soils drain quickly and need more frequent watering, especially during dry spells. You’ll want to shorten watering intervals for this soil type.
Using a soaker hose with a timer helps automate your watering schedule and adjust for seasonal variations, ensuring your plants receive consistent moisture without requiring manual intervention.
Cost-Effective Smart Irrigation Upgrade Options
When you’re ready to modernize your soaker hose system, smart irrigation upgrades offer an excellent balance of functionality and affordability.
The Rachio Smart Hose Timer Kit transforms your existing setup into an automated watering solution that enhances efficiency and simplifies maintenance.
Smart irrigation benefits include:
- Automated scheduling – Set precise watering frequency and duration for ideal plant health
- Water conservation – Reduce waste through targeted root-zone delivery and smart controls
- Cost savings – Enjoy 10% discounts when pairing Rachio timers with quality soaker hoses
- Environmental impact – Support sustainability through efficient water management
- Simplified maintenance – Control your entire system remotely without manual adjustments
This upgrade delivers immediate improvements in garden care while aligning with conservation goals, making smart irrigation an investment that pays dividends.
Frequently Asked Questions
How Long Should You Water With a Soaker Hose?
You should water with a soaker hose for 30 minutes to 2 hours, depending on your soil type. Sandy soils need shorter sessions, while clay soils require longer periods for proper absorption.
What Is the Disadvantage of Soaker Hose?
You’ll face uneven water distribution, potential durability issues with leaks, frequent maintenance needs, reduced effectiveness in clay soils, and lack of targeted watering for plants with different moisture requirements.
Do You Need the Restrictor in Soaker Hose?
You’ll need a restrictor to control water pressure and guarantee even distribution along your soaker hose. Without one, you’ll face uneven watering, potential hose damage, and water waste from excessive flow rates.
How Can I Make My Soaker Hose Work Better?
You’ll improve your soaker hose by warming it in sunshine first, laying mulch over it, using a pressure reducer, checking for clogs regularly, and adjusting watering times based on your soil type.


Leave a Reply